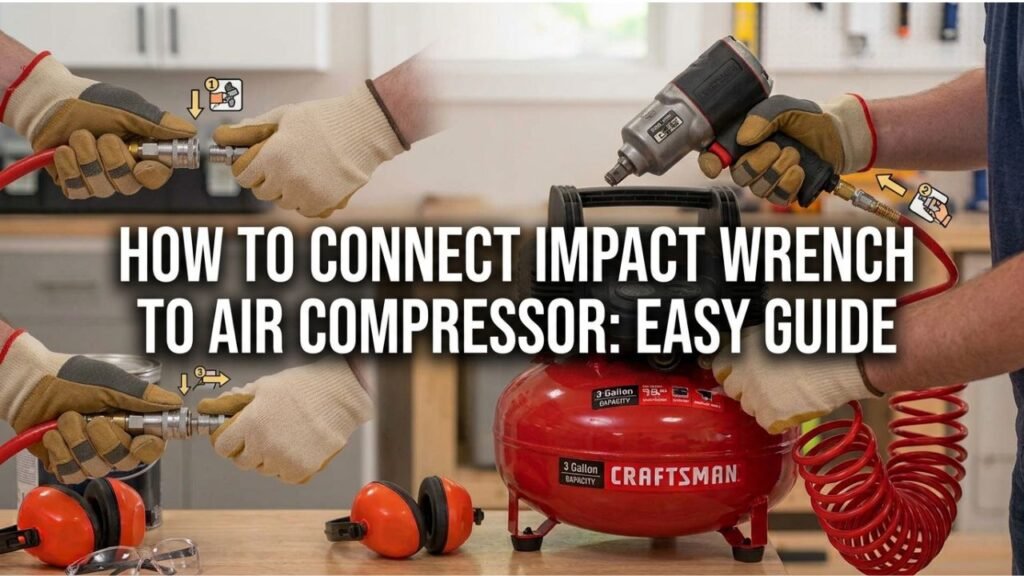
How to Connect Impact Wrench to Air Compressor: Easy Guide
How to connect impact wrench to air compressor is straightforward: install the correct air fitting on the wrench, connect a properly sized air hose to the compressor, attach the hose to the wrench with compatible quick-connect couplers, set the regulator to the tool’s specified working pressure—commonly around 90 PSI—and then test the wrench before putting it under load. The important part is not simply making the physical connection. Your compressor, hose, fittings, pressure setting, and airflow must all be suitable for the particular impact wrench.
A pneumatic impact wrench can demand a substantial amount of compressed air while it is running. A connection that looks correct can still leave the wrench weak if the hose is too restrictive, the fittings are undersized, the regulator is set incorrectly, or the compressor cannot supply enough CFM.
You also need to consider lubrication, moisture in the air supply, socket selection, and basic compressed-air safety. Excessive pressure is not a good way to compensate for insufficient airflow and can create a dangerous condition.
In this guide, I’ll explain how to connect an impact wrench to an air compressor step by step, how to use an air compressor with an impact wrench correctly, what fittings and hose you need, how to set PSI, how to check CFM, and what to do if the wrench does not deliver enough power.
What You Need to Connect an Impact Wrench to an Air Compressor
You do not need a complicated setup for a typical home garage, but all components in the air path need to work together.
For a basic setup, you will normally need:
- An air compressor capable of supplying the wrench
- A pneumatic impact wrench
- A suitable compressed-air hose
- A male air plug for the impact wrench
- Compatible quick-connect couplers
- Thread sealant approved for pneumatic fittings
- Pneumatic tool oil if your wrench requires manual lubrication
- The correct impact-rated socket
- Eye and hearing protection
The compressor and impact wrench are only two parts of the system. The hose and fittings can determine whether enough airflow actually reaches the tool.
Understand the Air Connection on the Impact Wrench
Most portable pneumatic impact wrenches have a threaded air inlet at the bottom of the handle.
A common inlet on many 3/8-inch and 1/2-inch impact wrenches is 1/4-inch NPT, although this is not universal. Larger professional impact wrenches may use 3/8-inch or 1/2-inch air inlets and require much larger hoses.
Do not assume the wrench’s drive size tells you its air inlet size.
For example:
- A 1/2-inch drive wrench may have a 1/4-inch NPT air inlet.
- A larger 3/4-inch drive wrench may use a 3/8-inch inlet.
- A heavy-duty 1-inch impact wrench may use a 1/2-inch inlet.
The square drive at the front holds the socket. The threaded port in the handle connects the air supply.
Check the wrench’s manual or specification label before purchasing fittings.
Understand the Compressor Connection
Most portable shop compressors have an outlet regulator followed by a female quick coupler. The air hose connects to this coupler using a matching male plug.
At the other end of the hose, there is normally another female quick coupler. A male plug installed in the impact wrench snaps into that coupler.
A typical connection therefore looks like this:
Compressor → Regulator → Quick Coupler → Air Hose → Quick Coupler → Impact Wrench
Some shop systems also include a moisture separator, filter, lubricator, or larger hard-piped air distribution system.
How to Connect Impact Wrench to Air Compressor Step by Step
Before making connections, switch off the compressor or make sure the outlet pressure is controlled and the tool trigger cannot be accidentally activated. Wear eye protection, and keep the air hose under control when connecting or disconnecting it.
1. Check the Impact Wrench Air Requirements
Start with the wrench specifications rather than the compressor tank size.
Look for:
- Required or recommended CFM
- Working pressure
- Maximum permitted pressure
- Air inlet thread size
- Recommended minimum hose size
- Lubrication instructions
Many pneumatic impact wrenches are designed around approximately 90 PSI, but you should use the specification for your exact model rather than treating 90 PSI as a universal rule.
CFM requirements vary much more widely.
A compact impact wrench may consume relatively little air, while a large 3/4-inch or 1-inch industrial wrench can require several times as much airflow.
2. Verify That the Compressor Can Supply Enough CFM
The compressor must be able to maintain enough airflow while the tool is operating.
The important specification is generally the compressor’s SCFM or CFM rating at the pressure you intend to use, commonly stated at 90 PSI.
If an impact wrench requires 5 CFM at 90 PSI, for example, I would prefer a compressor that can produce somewhat more than 5 CFM at 90 PSI rather than one that barely matches the number.
That extra capacity helps compensate for pressure losses through hoses, fittings, regulators, and normal compressor cycling.
Tank gallons affect how much compressed air is stored, but tank size does not replace adequate compressor CFM.
A large tank connected to a low-output pump may run an impact wrench briefly and then require a long recovery period.
3. Choose the Correct Air Hose
Hose diameter matters because an impact wrench can demand high airflow in short bursts.
For many typical 1/2-inch pneumatic impact wrenches, a 3/8-inch inside-diameter air hose is a practical choice. Some smaller tools can operate with a smaller hose, while large 3/4-inch and 1-inch impact wrenches may require 1/2-inch, 3/4-inch, or another manufacturer-specified hose size.
Here is a general guide:
| Impact Wrench Type | Common Hose Range | What to Do |
| Small 1/4-inch or 3/8-inch wrench | 5/16 to 3/8 inch | Follow tool specification |
| Typical 1/2-inch impact wrench | Around 3/8 inch | Good general garage choice |
| Heavy-duty 3/4-inch wrench | Often 1/2 inch | Verify required minimum size |
| Industrial 1-inch wrench | Often 1/2 to 3/4 inch | Use manufacturer requirement |
These are general ranges, not universal specifications.
A long, narrow hose creates more restriction than a short, adequately sized hose. If your wrench seems weak even though the compressor is adequate, hose diameter and length should be among the first things you inspect.
4. Install the Air Plug in the Impact Wrench
If the wrench does not already have a plug installed, choose a male pneumatic plug with:
- The correct pipe-thread size for the tool
- A quick-connect profile that matches your hose coupler
- Sufficient flow capacity for the wrench
Apply a small amount of suitable pneumatic thread sealant to the male pipe threads according to the sealant manufacturer’s directions.
Thread the fitting into the air inlet and tighten it appropriately.
Do not allow excess sealant or tape to enter the air passage. Loose sealing material can restrict airflow or contaminate the tool.
Also avoid overtightening the fitting. The wrench housing or inlet can be damaged if excessive force is applied.
5. Connect the Hose to the Compressor
Push the hose’s male plug into the compressor’s female quick coupler until it locks securely.
Depending on the coupler design, you may need to pull back the coupler sleeve before inserting the plug and then release it to lock the connection.
Give the connection a gentle check to make sure it is fully seated.
6. Connect the Impact Wrench to the Air Hose
Hold the hose securely.
Pull back the sleeve on the hose’s female coupler if required, insert the male plug attached to the impact wrench, and release the sleeve.
Make sure the coupling locks completely.
Compressed-air hoses can move suddenly if a pressurized connection comes loose, so never treat the hose casually during connection or disconnection.
7. Start the Compressor and Let the Tank Fill
Turn on the compressor and allow it to build pressure until it reaches its normal cut-out pressure.
The pressure shown on the tank gauge is not necessarily the pressure reaching the impact wrench.
Most compressors have two relevant readings:
- Tank pressure
- Regulated outlet pressure
The outlet pressure is the number you need to adjust for the tool.
8. Set the Correct Regulated Air Pressure
Set the compressor’s outlet regulator according to the impact wrench manufacturer’s specification.
For many common pneumatic impact wrenches, this is approximately 90 PSI.
However, the most useful measurement is pressure available while air is actually flowing. A regulator may show the desired pressure with the wrench stopped but drop substantially as soon as you pull the trigger.
If your compressor shows 90 PSI while idle but drops to 65 PSI during operation, the wrench may not produce its expected performance.
Do not solve this problem by blindly turning the regulator above the wrench’s maximum permitted pressure.
Instead, check:
- Compressor CFM
- Hose diameter
- Hose length
- Quick-connect fitting size
- Regulator capacity
- Filter restrictions
- Air leaks
9. Lubricate the Wrench If Required
Many pneumatic impact wrenches require air-tool oil.
If your model uses manual lubrication, its instructions may call for a few drops of appropriate pneumatic tool oil at the air inlet before operation.
Some permanent shop air systems use an inline lubricator instead.
Do not guess about lubricant type or quantity. Follow your wrench manufacturer’s maintenance instructions because lubrication systems differ among models.
Never substitute random automotive oil, penetrating oil, or another lubricant simply because it is available.
10. Install an Impact-Rated Socket
Disconnect the air supply before changing sockets if the manufacturer’s safety instructions require it—which is the safest general practice.
Use a socket specifically rated for impact tools.
An impact socket is designed for the repeated shock loads produced by an impact mechanism. Ordinary chrome hand-tool sockets are not the right choice for repeated impact-wrench use because they can crack or fail.
Match the socket to the wrench’s square drive and the fastener.
11. Select Forward or Reverse
Use the wrench’s direction selector:
- Forward tightens most standard right-hand threaded fasteners.
- Reverse loosens them.
Many pneumatic impact wrenches also have an adjustable power or speed control.
Start at an appropriate setting instead of automatically using maximum power.
12. Test the Wrench
Hold the wrench securely and briefly operate it without loading a fastener.
Listen and feel for normal operation.
Check for:
- Air leaks
- Loose fittings
- Abnormally weak speed
- Excessive vibration
- Unexpected sounds
- A hose connection that does not remain secure
Once everything operates correctly, the wrench is ready for use.
Key Takeaways:
- Match the compressor’s airflow, hose, fittings, and pressure to the wrench specifications.
- Many common impact wrenches operate near 90 PSI, but the manufacturer’s rating takes priority.
- A 3/8-inch hose is a common choice for many 1/2-inch impact wrenches, but larger tools may need considerably larger hoses.
- Secure couplers, proper lubrication, and impact-rated sockets are essential parts of the setup.
How to Use Air Compressor With Impact Wrench Correctly
Connecting the components is only the beginning. Proper operation helps the wrench produce its intended power without abusing the tool or fastener.
Let the Compressor Reach Operating Pressure
Do not start demanding full tool performance while the compressor tank is still building pressure.
Let the compressor finish its normal fill cycle first.
When you begin using the wrench, the tank acts as an air reserve while the compressor pump replenishes the air being consumed.
Use Short, Controlled Trigger Bursts
Impact wrenches are particularly well suited to intermittent operation.
When removing a stubborn fastener, firmly seat the socket over the fastener and apply controlled trigger bursts.
Do not let the tool hammer indefinitely against a fastener that will not move.
Continued hammering creates heat and stress and may indicate that the tool, air supply, socket, fastener condition, or removal method needs attention.
Watch the Pressure While the Wrench Runs
If possible, observe outlet pressure while operating the wrench.
A major pressure drop can indicate that the system cannot deliver enough airflow.
This is particularly important when troubleshooting a wrench that sounds normal at first but quickly loses strength.
Allow a Small Compressor to Recover
A small compressor may successfully operate an impact wrench for occasional lug-nut removal even if it cannot support continuous use.
You may notice:
- The wrench initially feels strong.
- Tank pressure starts falling.
- The compressor motor starts.
- Wrench performance gradually decreases.
- You must stop and allow pressure to rebuild.
That can be acceptable for light, intermittent DIY work, provided the compressor and tool are being operated within their ratings.
For frequent automotive work, I recommend enough compressor output that you are not constantly stopping for the tank to recover.
Do Not Use the Impact Wrench as a Final Torque Tool
An impact wrench can install a fastener quickly, but its power setting is not a reliable substitute for final torque verification.
Actual fastener torque can vary with:
- Air pressure
- Available airflow
- Tool setting
- Impact duration
- Lubrication
- Fastener condition
- Thread condition
- Wrench design
- Battery or pneumatic tool performance
For critical fasteners such as wheel lug nuts, use the correct tightening procedure and finish with an appropriate calibrated torque wrench according to the vehicle manufacturer’s specification.
Pro Tip: When installing lug nuts, use the impact wrench carefully to run them down without excessive tightening. Then complete final tightening in the specified sequence with a torque wrench.
PSI vs CFM: Which Matters More for an Impact Wrench?
Both matter, but they describe different things.
PSI is pressure.
CFM is airflow volume.
An impact wrench requires suitable pressure and enough flow at that pressure.
Think of PSI as the force available to push air through the system and CFM as the quantity of air the system can continually supply.
A compressor showing a high tank pressure is not automatically capable of running an air-hungry impact wrench.
Why 90 PSI Does Not Tell the Whole Story
Suppose two compressors can both regulate their outputs to 90 PSI.
One delivers 2.5 CFM at 90 PSI.
The other delivers 7 CFM at 90 PSI.
A wrench needing about 5 CFM may work only briefly or poorly on the first compressor, while the second has a much better chance of keeping up with normal intermittent use.
That is why compressor selection should never be based only on maximum PSI.
Average CFM Can Be Misleading
Impact-tool specifications sometimes distinguish between average air consumption and higher airflow during actual loaded operation.
The average number can assume intermittent trigger use.
For compressor sizing, it is wise to understand exactly how the tool manufacturer defines its airflow figure.
If the wrench specification provides an air-consumption-at-load number, that can provide a more demanding and useful picture of the tool’s airflow requirements.
Give Yourself Some CFM Headroom
If the compressor exactly matches the tool’s listed air requirement, real-world restrictions may still cause performance problems.
I prefer some extra compressor capacity where practical.
A system with reasonable airflow headroom handles:
- Hose losses
- Coupler restrictions
- Filters
- Pressure regulator losses
- Longer work cycles
- Normal compressor aging
better than a system operating right at its limit.
Key Takeaways:
- PSI and CFM are different; an impact wrench needs enough of both.
- High tank PSI cannot compensate for inadequate compressor airflow.
- Compare the tool’s air requirement with compressor output at the relevant PSI.
- Some extra CFM capacity generally provides more consistent tool performance.
What PSI Should You Set for an Air Impact Wrench?
For many common pneumatic impact wrenches, 90 PSI is a typical rated working or maximum inlet pressure, but you should always confirm the value specified for your exact tool.
Do not assume more pressure automatically means better performance.
Excess pressure can:
- Overspeed the tool
- Increase wear
- Create excessive stress
- Affect output unpredictably
- Exceed the tool’s safe pressure rating
If your wrench is weak at its specified pressure, correct the airflow problem instead of raising pressure beyond the allowed limit.
Static Pressure vs Dynamic Pressure
Static pressure is measured when no air is flowing.
Dynamic pressure is the pressure available while the tool is consuming air.
The difference matters.
Imagine your regulator reads 90 PSI when the wrench is sitting idle. When you hold the trigger, the reading falls dramatically.
The compressor may have enough static pressure but insufficient flow capacity—or the hose, regulator, filter, or fittings may be restricting that flow.
For diagnosing tool performance, pressure under operating conditions is often much more informative than the idle reading alone.
What Size Air Hose Should You Use for an Impact Wrench?
For a typical 1/2-inch garage impact wrench, 3/8-inch ID hose is a strong general-purpose choice.
But the wrench manufacturer’s minimum hose specification should ultimately decide.
Hose requirements tend to increase as the tool becomes larger and consumes more air.
Why a Small Hose Can Reduce Impact Power
A narrow hose creates resistance to airflow.
The problem becomes worse when the hose is:
- Very long
- Coiled or kinked
- Connected through restrictive fittings
- Supplying a high-CFM wrench
- Used alongside other air tools
Your compressor might be perfectly capable of supplying the wrench, yet the wrench can still feel underpowered because enough of that air never reaches it.
Hose Length Matters Too
If you can choose between an unnecessarily long hose and a shorter hose of the same diameter, the shorter hose generally creates less pressure loss.
That does not mean you should always use the shortest possible hose. You need enough length to work safely and conveniently.
The goal is to avoid unnecessary restriction.
What Size Fittings Do You Need?
The threaded fitting installed in the impact wrench must match the tool’s air inlet.
For many common 1/2-inch impact wrenches, you may encounter a 1/4-inch NPT inlet, but always verify the actual specification.
The quick-connect portion must also match the couplers used throughout your air system.
Quick-Connect Styles Must Be Compatible
Not every pneumatic plug fits every coupler correctly.
Several quick-connect profiles are used in U.S. air systems. Even fittings that appear similar may not seal or latch properly together.
The easiest approach is to standardize your garage around one compatible fitting system with adequate flow capacity.
Bigger Tools Need Bigger Air Paths
A tiny quick-connect fitting can act as a bottleneck even if you have a large hose.
This is especially important with high-air-consumption 3/4-inch and 1-inch impact wrenches.
When an industrial impact wrench specifies a large hose and inlet, do not reduce the entire system to small consumer-grade fittings and expect full performance.
Key Takeaways:
- A 3/8-inch ID hose works well with many ordinary 1/2-inch impact wrenches.
- Follow the wrench’s specified minimum hose size rather than assuming one size fits every tool.
- Long or undersized hoses and restrictive couplers can significantly reduce available airflow.
- The smallest passage in the system can become an airflow bottleneck.
How to Lubricate an Air Impact Wrench
Compressed air powers the wrench, but many pneumatic impact wrenches also depend on lubrication.
There can be more than one lubrication requirement because the air motor and impact mechanism may be serviced differently.
Air-Motor Lubrication
Some tools call for pneumatic tool oil through the air inlet.
If your wrench uses this arrangement, disconnect the air supply and follow the manufacturer-specified oil type and quantity.
After reconnecting, you may be instructed to run the tool briefly to distribute the oil internally.
Impact Mechanism Lubrication
Depending on the design, the hammer mechanism may use grease or another specified lubricant and may have a separate service procedure.
Do not assume that putting air-tool oil into the inlet services every internal component.
Follow the maintenance schedule for the particular wrench.
What Happens If You Do Not Lubricate It?
Insufficient lubrication can contribute to:
- Accelerated internal wear
- Poor performance
- Corrosion
- Rough operation
- Shorter tool life
Overlubricating can also create mess and unnecessary oil discharge.
Use the type and amount specified by the manufacturer.
Do You Need a Water Separator or Air Filter?
Compressed air can contain moisture and contamination.
As air is compressed and then cools, water can condense in the compressor tank and downstream air lines.
A moisture separator or filter can help protect pneumatic tools, especially in humid environments or systems that see frequent use.
You should also drain the compressor tank according to the compressor manufacturer’s instructions.
Moisture left in a compressed-air system can contribute to corrosion and contaminate tools.
For occasional home use, you may not need an elaborate industrial air-treatment system, but clean, reasonably dry air is still desirable.
Air Compressor and Impact Wrench Safety
Compressed air stores considerable energy, and an impact wrench produces high torque and repeated shock loads.
Basic precautions matter.
Never Exceed the Tool’s Maximum Air Pressure
Check the manufacturer’s rating.
Excessive inlet pressure can create hazardous operating conditions and may damage the wrench.
Wear Eye Protection
Fasteners, corrosion, debris, or damaged sockets can release material during operation.
Proper eye protection is essential.
Protect Your Hearing
Pneumatic impact wrenches and compressors can both be loud.
Use suitable hearing protection, particularly during repeated or prolonged operation.
Use Only Impact-Rated Sockets
Avoid ordinary chrome sockets on impact tools.
Impact sockets are designed for impact loading.
Disconnect the Air Before Changing Accessories
Separating the wrench from its air supply prevents accidental operation while you install or remove a socket or perform maintenance.
Keep the Hose Under Control
When connecting or disconnecting pressurized air lines, hold the hose securely.
Never point compressed air at yourself or another person.
Inspect the Equipment
Before use, check the:
- Hose for cuts, cracking, bubbles, or severe abrasion
- Fittings for damage
- Couplers for secure engagement
- Tool body for damage
- Socket for cracks or excessive wear
Replace damaged components instead of trying to improvise a repair.
Important Tip: Never increase pressure beyond the tool’s rating to make up for a weak compressor. Insufficient airflow should be corrected by addressing compressor capacity, hose size, regulator flow, fittings, leaks, or other restrictions.
Why Is My Impact Wrench Weak After Connecting It to the Compressor?
An underpowered impact wrench is one of the most common problems with pneumatic setups.
If the wrench runs but does not produce expected torque, work through the system methodically.
Compressor CFM Is Too Low
This is a major possibility.
A small compressor may build plenty of pressure while sitting idle but fail to replace air as quickly as the impact wrench consumes it.
The result is strong performance for the first few seconds followed by declining power.
Air Hose Is Too Small
An undersized hose restricts flow.
Switching to the manufacturer-recommended hose diameter can noticeably improve performance when the original hose is the bottleneck.
Hose Is Too Long
A very long hose introduces additional pressure loss, particularly when it is small in diameter.
Use only as much hose length as the job reasonably requires or increase hose diameter where appropriate.
Quick Couplers Are Restrictive
Small-flow couplers can choke an otherwise adequate air system.
This problem becomes increasingly important as wrench airflow requirements rise.
Regulator Cannot Flow Enough Air
A small or restrictive regulator may display adequate static pressure but cause substantial pressure drop under load.
The same is true of undersized filters and moisture separators.
Air Pressure Is Set Too Low
Check the regulated outlet pressure against the wrench specification.
Remember to observe what happens while air is flowing, not only when the wrench is idle.
There Is an Air Leak
Listen around:
- Couplers
- Threaded fittings
- Hose ends
- Regulator
- Tool inlet
A small leak wastes compressor capacity continuously.
The Wrench Needs Lubrication
A poorly lubricated pneumatic motor may not operate as intended.
Follow the maintenance instructions before assuming the wrench has failed.
The Socket or Extension Is Affecting Performance
Very long extensions, adapters, and inappropriate accessories can reduce how effectively impact energy reaches the fastener.
Use the correct impact-rated socket with the simplest practical connection.
The Fastener Is Beyond the Tool’s Capability
A severely rusted, seized, cross-threaded, or excessively tightened fastener may require more breakaway torque than the wrench can deliver.
Do not keep hammering indefinitely.
A higher-capacity tool, penetrant where appropriate, heat when professionally appropriate and safe, or another removal method may be necessary.
Key Takeaways:
- Weak impact-wrench performance is often caused by airflow restriction rather than insufficient tank PSI.
- Check CFM, hose diameter, couplers, regulator capacity, pressure under load, and leaks.
- Increasing PSI beyond the manufacturer’s limit is not a safe troubleshooting method.
- A properly supplied wrench can still struggle with a fastener that exceeds its practical breakaway capability.
Can You Connect an Impact Wrench Directly to an Air Compressor?
Yes. For a basic home-garage system, the impact wrench can usually be connected through an appropriate air hose to the compressor’s regulated outlet.
However, “directly” should not mean bypassing the regulator or ignoring air treatment and pressure limits.
The correct basic path is:
Compressor tank → outlet regulator → hose → impact wrench
Quick couplers are normally used between these components.
A more developed shop setup might add:
Compressor → filter/moisture separator → regulator → lubricator where appropriate → hose → impact wrench
The exact layout depends on the compressor, tool, and how frequently the system is used.
Can a Small Air Compressor Run an Impact Wrench?
Sometimes.
A small compressor can operate an impact wrench if it provides the required pressure and enough stored air for brief operation.
The main limitation is usually duty cycle and compressor recovery.
A small tank may empty quickly, forcing frequent pauses.
For example, a compact compressor can sometimes remove several lug nuts before pressure drops significantly, but that does not mean it is suitable for continuous professional use.
When deciding whether your compressor is adequate, compare:
- The impact wrench’s CFM requirement
- The compressor’s CFM output at the relevant PSI
- The expected duration and frequency of use
- Tank capacity
- Hose and fitting restrictions
For occasional tire changes, a marginal system can sometimes be workable.
For repeated automotive repair, suspension work, or commercial use, I recommend a compressor that comfortably meets the wrench’s airflow demand.
Does Air Compressor Tank Size Matter for an Impact Wrench?
Yes, but not as much as many beginners assume.
Tank size determines how much compressed air is stored before the pump needs to replenish it.
A larger tank can give you longer bursts of impact-wrench operation before pressure falls significantly.
However, once the stored air is depleted, pump output becomes critical.
A 20-gallon compressor with insufficient CFM can eventually fall behind just as a smaller compressor can.
A larger tank mainly provides a bigger buffer.
For frequent impact-wrench use, I would prioritize:
Adequate CFM first, practical tank capacity second.
How to Disconnect the Impact Wrench After Use
A proper shutdown routine helps protect both the tool and the air system.
- Release the impact-wrench trigger completely.
- Turn off the compressor when the job is finished.
- Follow the compressor manufacturer’s procedure for relieving or managing pressure.
- Hold the hose securely when disconnecting the wrench.
- Disconnect the quick coupler.
- Lubricate the tool after use if its manufacturer specifies this procedure.
- Drain accumulated moisture from the compressor tank according to the compressor instructions.
- Store the wrench and hose in a clean, dry place.
Do not pull a hose by the coupler or leave damaged hoses connected for future use.
Common Mistakes to Avoid
A correctly connected impact wrench can still perform poorly if the setup is wrong.
Choosing a Compressor Based Only on PSI
Most compressors can achieve relatively high pressure.
That tells you little about how much air they can continuously deliver.
Compare CFM at the wrench’s operating pressure.
Using a 1/4-Inch Hose for an Air-Hungry Wrench
A small hose may work physically but restrict performance.
Use the recommended minimum hose diameter.
Mixing Incompatible Quick Couplers
Similar-looking fittings are not necessarily interchangeable.
Use one compatible coupler system throughout your setup.
Running Extremely Long Hose Without Accounting for Pressure Drop
Long runs create additional restriction.
Increase hose size where needed and avoid unnecessary length.
Turning Up PSI to Fix Low CFM
Pressure and flow are related but not interchangeable specifications.
Never exceed the wrench’s maximum rating.
Using Standard Hand Sockets
Use impact-rated sockets.
Tightening Lug Nuts Entirely With the Impact Wrench
This can result in excessive or inconsistent fastener torque.
Finish critical fasteners with the correct torque wrench and manufacturer-specified torque procedure.
Ignoring Compressor Tank Moisture
Regular draining helps reduce internal tank corrosion and keeps excessive moisture out of the air system.
Ignoring Tool Lubrication
Pneumatic tools often need routine lubrication.
Check the manual rather than waiting for performance to deteriorate.
FAQs about How to Connect Impact Wrench to Air Compressor
How do I connect an impact wrench to an air compressor?
Install the correct quick-connect air plug in the wrench’s threaded inlet, connect an appropriately sized hose to the regulated compressor outlet, attach the wrench to the hose coupler, set the manufacturer’s specified working pressure, and test the tool.
Verify CFM, hose size, fittings, and lubrication requirements before using the wrench under load.
How do I use an air compressor with an impact wrench?
Let the compressor fill, set the regulated outlet to the impact wrench’s specified pressure, connect the air hose and wrench, install an impact-rated socket, choose forward or reverse, and operate the trigger in controlled bursts.
Monitor compressor recovery and pressure while using the wrench.
What PSI should my compressor be set at for an impact wrench?
Many pneumatic impact wrenches are rated around 90 PSI, but there is no universal setting for every model.
Use the pressure specified by the wrench manufacturer and never exceed the maximum permitted inlet pressure.
How much CFM does an impact wrench need?
It depends on the wrench.
Smaller impact tools can have comparatively modest air requirements, while large professional 3/4-inch and 1-inch wrenches can consume dramatically more air.
Check the manufacturer’s CFM or air-consumption specification for the exact model and compare it with compressor output at the required PSI.
Can I use a 1/4-inch air hose for an impact wrench?
It may operate some small or low-consumption impact wrenches, but it can restrict airflow to larger tools.
For many standard 1/2-inch garage impact wrenches, a 3/8-inch ID hose is a better general choice.
Use the tool manufacturer’s specified minimum hose size whenever available.
Do I need a regulator for an impact wrench?
Yes, pressure control is important.
A regulator lets you supply the wrench at its specified operating pressure rather than exposing it directly to whatever pressure is stored in the tank.
Do I need an oiler between the compressor and impact wrench?
Not necessarily.
Some systems use an inline lubricator, while many home users manually add pneumatic tool oil according to the impact wrench manufacturer’s instructions.
Follow the maintenance instructions for your particular tool.
Do I need a moisture separator?
A moisture separator is useful because compressed air can contain condensed water.
It becomes especially valuable with frequent use, humid conditions, and permanent shop air systems.
You should also drain the compressor tank according to its maintenance instructions.
Why does my impact wrench lose power after a few seconds?
The compressor may not be supplying air as quickly as the tool consumes it.
Other possibilities include a small hose, restrictive couplers, an undersized regulator, air leaks, low operating pressure, or poor tool lubrication.
Watch pressure while the wrench is running to help identify the problem.
Why does my compressor show 90 PSI but the wrench is still weak?
The gauge may be showing static pressure.
Once the wrench starts consuming air, pressure at the tool can drop because of low compressor CFM or restrictions in the hose, regulator, filter, or fittings.
Dynamic pressure under airflow is what matters during operation.
Should I use Teflon tape on the impact wrench air fitting?
A suitable thread sealant is normally used on threaded pneumatic connections, and PTFE tape is sometimes used where appropriate.
If you use tape, keep it away from the first threads and prevent fragments from entering the tool.
A pneumatic-rated liquid or paste thread sealant can also be used when appropriate.
Follow the fitting and tool manufacturer’s guidance.
Can I connect a 1/2-inch impact wrench to any compressor?
You can physically connect it to many compressors with the appropriate fittings, but physical compatibility does not guarantee adequate performance.
The compressor still needs sufficient PSI and CFM, and the hose and fittings need enough flow capacity.
Does a bigger air hose make an impact wrench stronger?
A larger hose can improve performance if the original hose was restricting airflow.
Once the hose is adequately sized for the tool, increasing diameter further does not magically increase the wrench’s rated torque.
Compressor capacity and the rest of the air path still matter.
Can an impact wrench damage lug nuts?
Yes. Excessive impact time or uncontrolled tightening can overtorque fasteners, damage threads, deform components, or make future removal difficult.
Use the impact wrench for efficient installation and removal, but finish critical wheel-fastener tightening with the specified torque procedure and a torque wrench.
Should I leave the impact wrench connected to the compressor?
For occasional garage use, I recommend disconnecting it when the job is complete.
This makes storage easier, prevents accidental operation, and gives you an opportunity to perform the tool’s prescribed lubrication and inspection routine.
Conclusion
Learning how to connect impact wrench to air compressor involves more than snapping an air hose onto the tool. Start by checking the wrench’s required PSI, CFM, air-inlet size, minimum hose diameter, and lubrication instructions. Install compatible fittings, use an adequately sized hose, connect it to the compressor’s regulated outlet, and set the pressure according to the tool manufacturer’s specification.
For many common 1/2-inch pneumatic impact wrenches, approximately 90 PSI and a 3/8-inch air hose are common starting points, but these are not universal specifications. Large impact wrenches can require substantially greater airflow and much larger air lines.
If the wrench feels weak, I would check airflow before increasing pressure. Compressor CFM, hose diameter, hose length, regulator capacity, quick couplers, leaks, and pressure drop under load are usually more useful troubleshooting points than simply turning the regulator higher.
For safe, dependable operation, use impact-rated sockets, keep the wrench properly lubricated, control moisture in the air system, stay within the manufacturer’s maximum pressure rating, and use a torque wrench for the final tightening of critical fasteners. With the compressor and air system properly matched, an air impact wrench can deliver the fast, repeatable performance that makes pneumatic tools so useful in a home garage or professional shop.