How to Use Air Compressor Accessories and Attachments Correctly
Most compressor add-ons connect through the same basic path: compressor outlet, regulator, coupler, hose, and then the tool or attachment. Match the fittings, set outlet pressure for the accessory, inspect the hose and connections, and release line pressure before removing threaded parts or disconnecting a hose that could whip.
A basic compressor kit may include a blow gun, safety nozzle, tapered inflation tip, tire chuck, pressure gauge, inflation needles, plugs, couplers, and an air hose. Campbell Hausfeld currently sells accessory kits containing many of these same components for inflation and general compressor work.
The regulator is one of the most useful controls in the system. DEWALT states that the regulator controls pressure coming from the receiver and warns that outlet pressure must not exceed the maximum rating of the attached tool or accessory.
Compressed-air cleaning also has a specific U.S. workplace safety limit. OSHA requires compressed air used for cleaning to be reduced to less than 30 PSI under the conditions of 29 CFR 1910.242(b), along with chip guarding and personal protective equipment. Compressed air should never be directed at a person’s body or clothing.
The basic rule for how to use air compressor accessories is to match four things before opening the air supply: fitting style, pressure rating, airflow requirement, and intended job.
The phrase how to use air compressor attachments covers everything from connecting a tire inflator to setting up an impact wrench. The attachment changes, but the safe connection and pressure-setting process stays similar.
How Air Compressor Accessories Connect Together
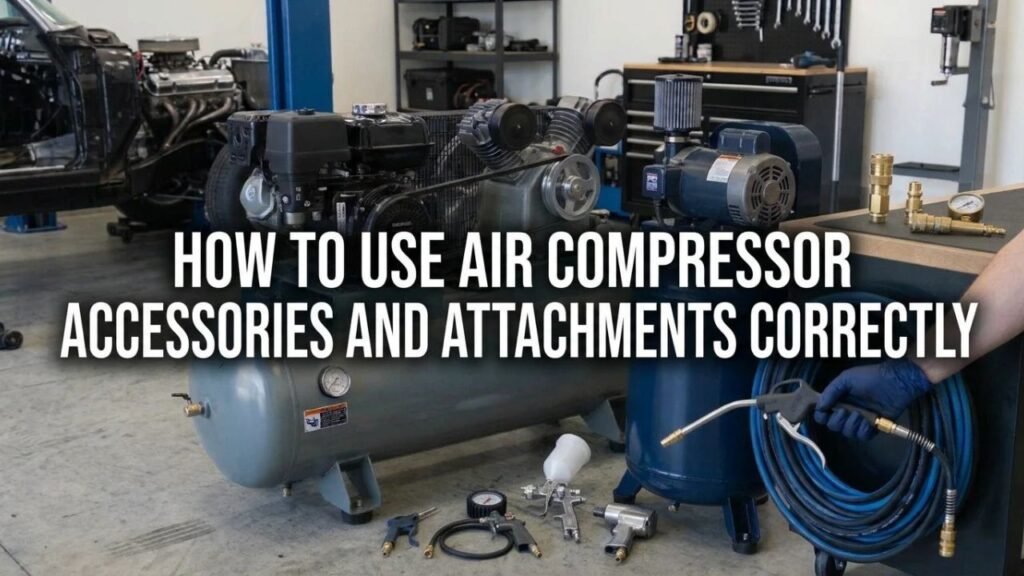
Most small shop compressor setups follow a simple air path.
Compressor Outlet and Regulator
Compressed air is stored in the receiver tank at tank pressure.
The regulator reduces that pressure to the level needed at the outlet.
For example, your receiver may contain air at 150 PSI while a pneumatic tool requires approximately 90 PSI.
The pressure shown on the regulated outlet gauge is the number that matters for the connected accessory.
DEWALT instructs users to turn the regulator clockwise to raise outlet pressure and counterclockwise to lower it. It also warns users to check the pressure rating of tools and accessories before use.
Never assume maximum tank PSI is the correct tool pressure.
Quick Coupler and Plug
A quick-connect system normally uses:
- Female coupler on the supply side
- Male plug on the hose or tool
- Matching plug and coupler profile
A common home-garage setup uses 1/4-inch NPT fittings with an industrial-style quick-connect profile.
Milton’s M-Style system, for example, uses 1/4-inch NPT connections and is rated for up to 40 SCFM in the cited coupler kits.
The thread size and the quick-connect profile are different specifications.
Two fittings may both have 1/4-inch NPT threads yet use incompatible plug profiles.
Air Hose
The hose carries air between the compressor and accessory.
Check its:
- Inside diameter
- Length
- Maximum pressure rating
- End fittings
- Condition
A long, narrow hose can restrict airflow to high-CFM tools.
The pressure gauge may still read normally when the tool is stopped, then drop once the tool starts consuming air.
Ingersoll Rand points out that air pressure should be checked at the tool while it is running for demanding pneumatic equipment because static pressure alone does not prove that enough airflow reaches the tool.
Filter, Regulator, and Lubricator
Some pneumatic setups include an FRL assembly:
Filter → Regulator → Lubricator
The filter removes water and debris.
The regulator controls downstream pressure.
The lubricator meters oil into the air stream for tools that require airline lubrication.
Ingersoll Rand identifies filters, regulators, and lubricators as standard air-preparation components and offers regulators designed to control outlet pressure for pneumatic equipment.
Do not put an airline lubricator ahead of paint spray equipment or other applications that require oil-free air unless the system is designed with separate branches.
Key Takeaway: The usual flow is compressor, regulator, coupler, hose, and accessory. High-use pneumatic systems may add filters and lubricators, but every component must match the pressure and airflow required by the job.
How to Use Air Compressor Accessories Step by Step
Use this sequence as a general setup method.
1. Turn the Compressor Off
Set the compressor switch to OFF before assembling unfamiliar fittings or making threaded changes.
If you are replacing permanent fittings, release stored pressure according to the compressor manual.
Do not unscrew a pressurized fitting.
2. Identify the Accessory
Check what you are connecting.
Common options include:
- Blow gun
- Tire chuck
- Tire inflator
- Tire-pressure gauge
- Inflation needle
- Tapered nozzle
- Pneumatic nailer
- Impact wrench
- Ratchet
- Air hammer
- Sander
- Spray gun
Find its maximum pressure and normal operating pressure.
3. Install the Correct Plug
Many air tools use a threaded air inlet.
Thread the matching male quick-connect plug into that inlet if one is not already installed.
Use the thread sealant method specified by the fitting or tool maker.
Campbell Hausfeld’s accessory instructions call for thread tape on threaded compressor connections to reduce air leaks.
Keep sealant debris out of the internal air passage.
4. Connect the Air Hose
Insert the hose plug into the compressor coupler.
Make sure it seats fully.
A safety coupler may use a different connection or release sequence than a conventional sliding-sleeve coupler.
Milton’s push-button safety coupler vents trapped pressure with the first push and releases the plug with the second, reducing hose-whip risk during disconnection.
5. Attach the Accessory to the Hose
Connect the accessory or air tool to the outlet end of the hose.
Keep a firm grip on the hose when connecting or disconnecting it.
DEWALT specifically warns users to hold the hose firmly to reduce hose-whip risk.
6. Start the Compressor
Turn the compressor on and let it build receiver pressure.
Wait until it reaches normal cut-out pressure if the job requires a full tank.
7. Set the Regulated Pressure
Start low.
Increase the regulator until the outlet reaches the pressure required by the accessory.
For a pneumatic tool, check the pressure specification in its manual.
For a tire inflator, use pressure based on the vehicle or equipment manufacturer’s inflation specification rather than the compressor’s maximum PSI.
8. Test the Connection
Listen for air leaks around:
- Couplers
- Plugs
- Threaded fittings
- Hose ends
- Accessory connections
A hissing threaded joint may need depressurizing and resealing.
Never tighten a pressurized threaded connection.
9. Use the Accessory
Operate the attachment according to its instructions.
Monitor regulated pressure during high-airflow jobs because outlet pressure can fall while the tool is running.
10. Disconnect Safely
Switch off the tool or accessory.
Close or turn off the compressor when the job is finished.
Release downstream pressure as required.
Hold the hose before operating the coupler.
Store attachments clean and dry.
Key Takeaway: Identify the accessory, install compatible fittings, connect the hose, build tank pressure, set the regulator for the job, test for leaks, then depressurize the connection before service or threaded disassembly.
How to Use Air Compressor Attachments for Common Jobs
Different attachments perform very different tasks even though they connect to the same air supply.
How to Use a Blow Gun
A blow gun directs a controlled air stream through a nozzle.
Common uses include:
- Clearing chips from equipment
- Blowing dust from suitable work surfaces
- Drying selected parts
- Cleaning hard-to-reach areas
Connect the blow gun to the hose and install the correct nozzle.
Use a safety nozzle when the job calls for compressed-air cleaning.
OSHA’s general-industry rule states that compressed air used for cleaning must be reduced to less than 30 PSI when dead-ended and used with guarding and PPE. It should never be used to clean a person’s body or clothing.
A standard unrestricted nozzle attached to a high-pressure supply should not be treated as a personal cleaning tool.
How to Use a Tire Inflator
A tire inflator usually combines:
- Trigger
- Air chuck
- Hose
- Pressure gauge
Connect the inflator to the air hose.
Remove the tire valve cap and seat the chuck firmly on the valve stem.
Add air in short bursts and watch the gauge.
Stop at the tire pressure specified for the vehicle or equipment.
For a passenger vehicle, use the placard pressure supplied by the vehicle manufacturer, not the maximum pressure molded into the tire sidewall.
Disconnect the chuck and replace the valve cap.
How to Use a Tire Chuck
A basic tire chuck has no trigger or gauge.
It opens the tire valve when pressed or locked onto the valve stem.
The setup is:
compressor → regulator → hose → tire chuck
Use a separate tire-pressure gauge to confirm pressure.
Do not estimate tire pressure from how firm the tire feels.
How to Use an Inflation Needle
An inflation needle is meant for items such as sports balls.
Thread or attach the needle to the blow gun or inflator fitting listed by the accessory maker.
Reduce outlet pressure before starting.
Moisten the needle tip with a suitable material if the ball maker recommends it, then insert it straight into the valve.
Inflate slowly and check the item’s specified pressure.
Thin inflation needles can bend or break if pushed sideways.
How to Use a Tapered Inflation Nozzle
A tapered nozzle fits larger valves or openings that do not accept a tire chuck.
Common applications may include:
- Pool toys
- Air mattresses
- Inflatable equipment
Press the nozzle into the valve opening and use low regulated pressure.
These items often require very little pressure even though they may need considerable air volume.
High compressor pressure can rupture a low-pressure inflatable.
How to Use an Air Tool
Pneumatic tools need more than the correct PSI.
They also need enough CFM.
Typical setup:
compressor → regulator → hose → coupler → pneumatic tool
Check:
- Required operating pressure
- Required CFM
- Minimum hose diameter
- Tool lubrication instructions
- Plug size
Ingersoll Rand’s current 2922 impact-wrench guidance, for example, specifies 90 PSI at the tool while operating and emphasizes that the air supply must maintain both pressure and airflow during use.
A compressor that reaches 150 PSI but produces too little CFM can still be too small for the tool.
How to Use a Spray Gun
A spray gun should be supplied with clean, dry air.
A typical arrangement may include:
compressor → moisture filter → regulator → hose → spray gun
Check the spray gun manual for pressure at the gun and required airflow.
Avoid sending lubricated air into paint equipment unless the equipment maker calls for it.
Oil contamination can create coating defects.
How to Use an Air Nailer or Stapler
Install the correct fitting in the tool inlet and connect the hose.
Start at the lower end of the pressure range stated by the nailer manufacturer.
Raise pressure only enough to drive the fastener correctly.
Use the tool’s depth adjustment when available instead of relying entirely on excessive air pressure.
OSHA requires certain pneumatically driven nailers and staplers operating above 100 PSI at the tool to have a muzzle safety device that prevents firing unless the muzzle contacts the work surface.
Key Takeaway: Inflation tools generally use controlled pressure and modest airflow, while pneumatic power tools may demand much more CFM. Blow guns require extra attention to nozzle design, pressure, chip guarding, and eye protection.
What Common Air Compressor Accessories Do
Regulator
Reduces outlet pressure to the level required by the attachment.
It does not raise pressure above tank pressure.
Pressure Gauge
Shows pressure.
A compressor may have separate gauges for:
- Tank pressure
- Regulated outlet pressure
A tire inflator may have its own gauge as well.
Quick Coupler
Lets the hose or tool connect and disconnect without unthreading fittings each time.
The plug profile must match.
Air Plug
Threads into a hose or tool and inserts into the coupler.
Common thread sizes do not guarantee that the quick-connect shape matches.
Air Hose
Carries compressed air.
Diameter and length affect flow.
Blow Gun
Creates a directed stream for approved cleaning or drying jobs.
Safety Nozzle
Designed to limit dead-end pressure or redirect air according to its construction.
Tire Chuck
Connects compressed air to a tire valve.
Inflator Gauge
Combines inflation control with pressure measurement.
Inflation Needle
Used for ball valves and similar small inflation ports.
Tapered Nozzle
Fits low-pressure inflatable items with larger openings.
Moisture Filter
Removes liquid water and some contamination from the air stream.
Lubricator
Introduces oil into the air stream for pneumatic tools that require it.
Not every tool should receive lubricated air.
How to Match Air Compressor Fittings
Fitting compatibility creates many beginner problems.
Match the Quick-Connect Profile
Common plug families include industrial/M-style and other profiles.
They may look similar while using different sealing dimensions.
Standardizing a shop around one profile avoids constant adapter changes.
Milton states that its M-Style fittings meeting the relevant dimensional standard interchange with compatible fittings from other manufacturers.
Match NPT Thread Size
Common small-compressor fittings use:
- 1/4-inch NPT
- 3/8-inch NPT
Larger high-flow tools may use bigger ports.
Do not confuse a 1/4-inch NPT thread with the inside diameter of a hose.
Check Flow Capacity
A tiny coupler can become a restriction on a high-CFM tool.
The impact wrench, grinder, sander, or spray gun may run poorly even though the regulator shows adequate static PSI.
For demanding tools, check the complete air path:
- Compressor CFM
- Regulator flow
- Coupler flow
- Hose diameter
- Hose length
- Tool inlet
Check Pressure Rating
OSHA states that manufacturer safe operating pressures for hoses, valves, filters, fittings, and related components must not be exceeded in covered construction applications.
The system is limited by its lowest-rated component.
Key Takeaway: Match quick-connect profile, NPT thread, pressure rating, and airflow. A fitting that screws into place is not automatically a good match for the pneumatic job.
How to Set the Compressor Regulator for Accessories
The tank-pressure gauge and outlet-pressure gauge serve different purposes.
Tank Pressure
This shows pressure stored in the receiver.
You normally do not adjust it for each accessory.
The compressor’s pressure switch controls cut-in and cut-out pressure.
Do not alter those settings unless the manufacturer provides a specific procedure.
Regulated Outlet Pressure
This is the pressure delivered downstream to the hose.
To set it:
- Connect the accessory.
- Start with the regulator low.
- Increase pressure toward the accessory specification.
- For high-flow air tools, verify pressure while the tool is running.
- Stay below the maximum rating of every downstream component.
DEWALT warns that excessive regulated pressure can create a bursting hazard and states that outlet pressure must stay below the maximum rating of the attached equipment.
PSI Does Not Replace CFM
Pressure and flow are different.
A tool requiring 6 CFM at 90 PSI needs a compressor capable of delivering that airflow.
A small compressor may reach 90 PSI yet lose pressure quickly once the tool starts running.
Key Takeaway: Set the regulator from the accessory’s pressure requirement, then confirm that the compressor and hose system can supply the required CFM during operation.
How to Connect and Disconnect Quick Couplers
Quick couplers are easy to use once their style is identified.
Connecting a Standard Coupler
A common procedure is:
- Hold the hose firmly.
- Pull back the coupler sleeve if required.
- Push the male plug fully into the coupler.
- Release the sleeve.
- Tug lightly to confirm the connection is locked.
Some push-to-connect couplers do not require manually retracting the sleeve during connection.
Disconnecting a Standard Coupler
Reduce downstream pressure first when practical.
Hold the hose.
Retract the coupler sleeve and remove the plug.
Be ready for trapped air to vent.
Disconnecting a Safety Coupler
Safety couplers may vent pressure before releasing the plug.
Milton’s cited push-button model uses two stages:
- First push vents pressure.
- Second push releases the plug.
That design reduces sudden hose movement during disconnection.
Do not assume every coupler works this way. Check its instructions.
Do Air Compressor Accessories Need Oil?
Some do, some do not.
Pneumatic Tools May Need Oil
Impact wrenches, air hammers, ratchets, and other pneumatic tools may require:
- Manual drops of air-tool oil
- Inline lubricator
- Internal grease service
- A combination of these
Follow the tool manual.
Ingersoll Rand manuals for some pneumatic tools call for airline lubrication and periodic oil added through the air inlet.
Inflation Accessories Usually Do Not Need Airline Oil
A tire chuck or blow gun generally does not need a lubricator feeding oil mist through it.
Paint Equipment Needs Clean Air
Spray guns normally need dry, contamination-free air.
Oil carried downstream from a lubricator can contaminate paintwork.
If a shop uses both lubricated pneumatic tools and paint equipment, separate air branches are often the cleaner setup.
Common Mistakes With Air Compressor Attachments
Setting Pressure From the Tank Gauge
Set accessory pressure from the regulated outlet side.
Assuming Every Quick Coupler Fits
Similar-looking fittings may use different plug profiles.
Using High PSI to Fix Low CFM
More pressure does not turn an undersized compressor into a higher-flow machine.
Using the Wrong Hose
A long, small-diameter hose can choke airflow to demanding tools.
Directing Compressed Air at Skin
Never clean your hands, clothing, hair, or body with compressed air.
OSHA prohibits using compressed air to clean employees and regulates compressed-air cleaning pressure and guarding.
Disconnecting a Pressurized Hose Carelessly
Hold the hose and release pressure before disconnecting when the setup permits it.
Putting Oil Into Every Air Line
Paint and some other air applications should not receive oil mist.
Exceeding the Accessory Rating
The compressor may store more pressure than the connected tool, hose, or fitting can safely handle.
The regulator exists to control downstream pressure.
Key Takeaway: Most accessory problems come from wrong fittings, excessive pressure, inadequate CFM, restrictive hoses, careless disconnection, or using compressed air for an unsafe cleaning job.
Conclusion
For how to use air compressor accessories, build the system in the correct order, match the fittings, connect a pressure-rated hose, and use the regulator to set pressure for the attachment rather than sending full tank pressure directly to every tool.
Common inflation attachments such as tire chucks, needles, tapered nozzles, and inflator gauges need controlled pressure. Pneumatic tools add another requirement: enough CFM at the required operating PSI.
For how to use air compressor attachments safely, check each component’s pressure rating and intended purpose before opening the air supply. Hold hoses during connection changes, control trapped pressure, and keep incompatible fitting styles out of the same setup.
Pay special attention to blow guns. OSHA’s compressed-air cleaning rules include a less-than-30-PSI dead-end pressure requirement, chip guarding, and PPE for covered workplace cleaning operations, and compressed air should never be used on a person’s body or clothing.
FAQs About Air Compressor Accessories and Attachments
What accessories do I need for an air compressor?
A basic setup usually needs an air hose, quick couplers, plugs, and a regulator. Job-specific items may include a tire chuck, inflator gauge, blow gun, inflation needle, tapered nozzle, moisture filter, or pneumatic tools. Campbell Hausfeld accessory kits include many of these common parts.
How do I connect an attachment to an air compressor?
Install compatible quick-connect fittings, connect the hose to the regulated compressor outlet, and attach the tool to the other end. Start the compressor, then adjust outlet pressure to the attachment’s specification. Check the fittings for leaks before starting work.
What PSI should I set for air compressor accessories?
Use the pressure listed by the accessory or tool manufacturer. Inflation pressure comes from the item being inflated, while pneumatic tools commonly specify an operating pressure. Never exceed the lowest maximum-pressure rating among the tool, hose, fittings, and other downstream parts.
Can I connect an air tool directly to the compressor?
You can connect through the compressor outlet when the setup includes a suitable regulator, hose, and compatible fittings. A short direct connection without enough hose can be awkward, and high-CFM tools may need larger hoses and couplers to maintain airflow.
What is the difference between an air coupler and an air plug?
The coupler is the female quick-connect body that accepts the plug. The plug is the male fitting inserted into it. Their profiles must match. Thread size, such as 1/4-inch NPT, does not by itself prove that two quick-connect parts are compatible.
Do I need a regulator for compressor attachments?
Yes for most jobs where the accessory must operate below full receiver pressure. The regulator sets downstream pressure. DEWALT warns that regulated outlet pressure should not exceed the maximum rating of connected tools and accessories.
Can I use a blow gun at full compressor pressure?
Do not assume full tank pressure is appropriate. In U.S. workplace cleaning applications covered by OSHA, compressed air used for cleaning must meet the less-than-30-PSI dead-end requirement along with chip guarding and PPE. Never use compressed air to clean your body or clothing.
Why does my air tool lose power after I connect it?
The compressor may not supply enough CFM, or airflow may be restricted by a narrow hose, long hose, small coupler, regulator, filter, or fitting. Check pressure at the tool while it is running rather than relying only on the static gauge reading.