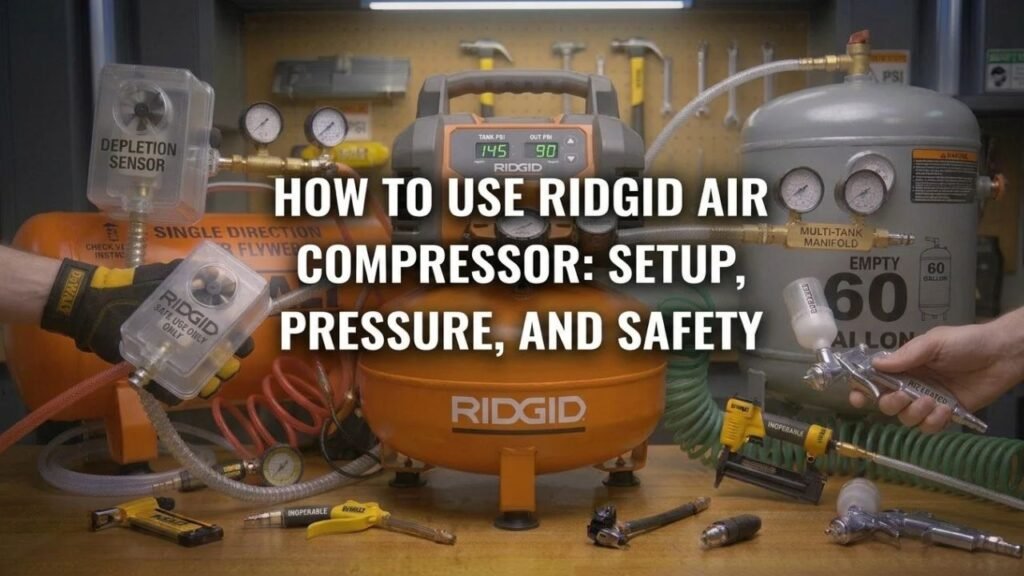
How to Use RIDGID Air Compressor: Setup, Pressure, and Safety
To operate a RIDGID compressor, close the tank drain, connect the air hose, plug the unit into the proper power supply, switch it on, let the tank reach cut-out pressure, then adjust the outlet regulator to the PSI required by your tool. After use, switch it off, unplug it, release pressure, and drain moisture from the tank.
The exact control layout changes between RIDGID models, so identify the tank gauge, outlet-pressure gauge, regulator, quick coupler, power switch, safety valve, and tank drain before starting. The common 6-gallon pancake models are straightforward once you understand what each control does.
RIDGID’s current U.S. 6-gallon electric pancake compressor is rated for 120 volts, 150 PSI maximum tank pressure, and 2.6 SCFM at 90 PSI. It also uses dual quick couplers, a locking regulator, and a quarter-turn tank drain.
For how to use RIDGID air compressor correctly, the most common mistake to avoid is setting the regulator to the compressor’s maximum tank pressure instead of the pressure required by the air tool. The tank and outlet pressures serve different purposes.
Compressed air also deserves care during cleaning jobs. OSHA’s workplace rule requires compressed air used for cleaning to be reduced to less than 30 PSI at the nozzle under specified conditions and used with chip guarding and personal protective equipment.
The process below applies mainly to portable RIDGID electric compressors, including pancake-style units. Gas-powered, oil-lubricated, wheelbarrow, and other RIDGID models can have extra startup steps, so the exact operator’s manual should take priority when your controls differ.
Know the RIDGID Air Compressor Controls Before Starting
Tank Pressure Gauge
The tank-pressure gauge shows how much compressed-air pressure is stored inside the receiver tank.
On a typical RIDGID pancake compressor, tank pressure rises automatically while the motor runs. Once the compressor reaches its factory-set cut-out pressure, the motor stops.
The motor starts again automatically after tank pressure falls to the cut-in point.
You normally do not adjust the compressor’s cut-in and cut-out settings.
Outlet Pressure Gauge
The outlet gauge shows the pressure being supplied to your hose and air tool.
This is the pressure you compare with the tool manufacturer’s PSI requirement.
If your nailer calls for 90 PSI, the outlet gauge is the one you use while adjusting the regulator.
Pressure Regulator
The regulator controls the pressure sent through the coupler.
On current RIDGID 6-gallon models, the regulator can be locked to reduce unwanted pressure changes.
Turning the regulator in the increase direction raises outlet pressure. Turning it in the opposite direction lowers pressure.
RIDGID’s current 6-gallon manual says that when reducing pressure, turn the regulator below the desired setting first, then increase it back to the target pressure.
Quick Coupler
The quick coupler is where the air hose attaches.
Current RIDGID 6-gallon pancake models have two universal push-to-connect couplers that accept common 1/4-inch automotive and industrial plugs.
Other models may use one coupler or another fitting arrangement.
Tank Drain Valve
The drain valve is located near the bottom of the air tank.
Its job is to remove water that condenses inside the tank during normal compressor operation.
Current RIDGID 6-gallon pancake models use a quarter-turn ball-style drain valve.
Safety Relief Valve
The safety valve is a pressure-protection device.
Do not use it as the normal way to empty the tank after every job unless the model’s instructions specifically direct you to do so.
Do not modify, plug, or replace it with an unapproved component.
Key Takeaway: The tank gauge shows stored pressure, the outlet gauge shows tool pressure, and the regulator controls only the air delivered to the hose.
How to Use RIDGID Air Compressor Step by Step
1. Put the Compressor on a Stable Surface
Place the unit on a firm, level surface with room around the pump and motor for cooling airflow.
Do not operate it where water can reach electrical parts.
Keep flammable liquids, fuel vapors, and combustible materials away from the compressor.
Position the unit so you can reach the switch, regulator, hose, and drain valve without moving it while pressurized.
2. Check the Tank Drain Valve
Make sure the drain valve is closed before starting.
If it is open, the compressor will release air instead of building tank pressure.
RIDGID’s current electric 6-gallon startup instructions begin by closing the drain valve before connecting power.
Do not overtighten a drain valve in an attempt to stop a damaged valve from leaking.
3. Inspect the Air Hose and Fittings
Check the hose for:
- Cuts
- Cracks
- Bulges
- Damaged couplers
- Loose fittings
Replace damaged air hose before use.
Make sure the plug on the hose matches the compressor coupler.
4. Connect the Air Hose
Push the hose plug fully into the compressor’s quick coupler.
Confirm that it locks in place.
If the other end of the hose is already attached to an air tool, make sure the tool trigger is released before pressurizing the system.
5. Turn the Regulator Down
Before startup, reduce the outlet setting or follow the startup position specified in your model’s manual.
This avoids immediately sending excessive pressure into a connected tool.
The final outlet setting will be adjusted after the tank fills.
6. Plug the Compressor Into the Correct Supply
For the current RIDGID 6-gallon pancake model, the listed supply is 120 volts, with a current rating of 12.5 amps.
Use the electrical supply and grounding arrangement stated in your own manual.
Avoid undersized extension cords because voltage drop can interfere with motor starting and increase heat.
7. Switch the Compressor On
Move the power switch to the ON position.
The motor should start filling the tank.
Stay near the compressor during startup and listen for unusual air leaks, grinding, rattling, or electrical buzzing.
8. Let the Tank Reach Cut-Out Pressure
Allow the compressor to run without using air.
The tank gauge should rise.
The motor should switch off automatically when cut-out pressure is reached.
On the current 6-gallon RIDGID pancake compressor, maximum tank pressure is listed at 150 PSI.
Do not confuse that 150 PSI maximum with the pressure your nailer or accessory should receive.
9. Set the Correct Outlet PSI
Check the air tool’s manual or label.
Turn the regulator until the outlet gauge shows the required working pressure.
If the tool calls for 90 PSI, set the outlet pressure around the manufacturer’s specified value rather than automatically using maximum pressure.
RIDGID warns not to exceed the operating-pressure rating of the attached tool or accessory.
10. Use the Tool
The compressor is now ready.
As air is consumed, tank pressure falls.
The motor may restart automatically to refill the tank. That cycling is normal.
If pressure continually falls and the tool becomes weak, the tool may require more SCFM than the compressor can supply.
Key Takeaway: Close the drain, connect the hose, power the compressor, let the tank fill, then set outlet PSI from the air tool’s specification before working.
How to Set the Pressure on a RIDGID Air Compressor
Do Not Set Pressure From the Tank Gauge
The tank gauge is not your tool-pressure setting.
For example, a tank may contain 130 PSI while the regulator supplies only 90 PSI to a nail gun.
That is normal.
The regulator reduces stored tank pressure to the level selected for the outlet.
Find the Tool’s Required PSI
Check the tool itself or its operator’s manual.
You may see a range such as:
70–120 PSI
Start near the lower end that operates the tool correctly, then increase as needed without exceeding its rating.
For a nail gun, use only enough pressure to drive the fastener to the required depth.
Adjust Pressure With Air Available
Let the compressor build tank pressure.
Turn the regulator while watching the outlet gauge.
If lowering the setting on a RIDGID model that follows the current 6-gallon manual, turn below the target first, then raise the setting back to the desired value.
Lock the Regulator if Your Model Supports It
Some RIDGID compressors use a locking regulator.
Once pressure is correct, engage the lock so vibration or accidental contact does not change the setting.
Key Takeaway: Tool PSI comes from the outlet gauge and regulator, not the tank-pressure gauge or the compressor’s maximum PSI rating.
How to Use a RIDGID Compressor With a Nail Gun
Confirm the Nailer Pressure Range
Check the nailer’s rated operating pressure.
Do not guess from the nail size.
Different framing, finish, brad, roofing, and pin nailers can use different pressures and amounts of air.
Connect the Hose Before Loading or Firing
Follow the nailer’s own connection and loading sequence.
Keep fingers away from the trigger and contact tip while connecting compressed air.
Set Pressure Low and Test
Start toward the lower part of the tool’s approved range.
Fire a test fastener into scrap material.
If the fastener sits too high, increase pressure gradually.
If it is driven too deeply, reduce pressure or use the nailer’s depth adjustment if equipped.
Watch Compressor Recovery
Current RIDGID 6-gallon pancake models provide 2.6 SCFM at 90 PSI and are marketed for trim and finish applications. RIDGID also states that the dual couplers can support two nailers within the compressor’s available air capacity.
Rapid framing or roofing work can consume air faster than light finish nailing.
If tool performance fades during fast firing, pause and let the tank recover.
Key Takeaway: Match outlet PSI to the nailer’s rating, test fastener depth on scrap, and watch for pressure loss during rapid firing.
How to Use a RIDGID Air Compressor for Tire Inflation
Attach an Inflation Chuck
Connect a tire inflator or air chuck to the hose.
A gauge-equipped inflator makes pressure control easier.
Check the Vehicle’s Tire Specification
For passenger vehicles, use the recommended cold tire pressure from the vehicle’s tire-information placard, commonly found around the driver’s door opening.
Do not inflate a normal passenger tire to the compressor’s maximum tank PSI.
Add Air in Short Intervals
Connect the chuck securely to the valve stem.
Add air, stop, and check pressure.
Repeat until the tire reaches its specified pressure.
The compressor may cycle during inflation.
Avoid Overinflation
A compressor capable of 150 PSI can exceed the pressure required by most passenger tires.
The compressor’s maximum pressure and the tire’s recommended inflation pressure are unrelated specifications.
How to Use a Blow Gun With a RIDGID Compressor
A blow gun can consume more air than a nailer because airflow continues as long as the trigger is held.
Set the outlet pressure for the job and accessory.
For workplace cleaning, OSHA’s general-industry standard requires compressed air to be reduced to less than 30 PSI under the specified dead-end condition and used with suitable guarding and PPE.
Do not direct compressed air at:
- Eyes
- Skin
- Other people
- Clothing being worn
- Open wounds
Wear eye protection because compressed air can launch chips and dust.
Can a RIDGID Air Compressor Run Any Air Tool?
No.
The deciding factor is mainly SCFM at the tool’s operating PSI.
A current 6-gallon RIDGID pancake compressor produces 2.6 SCFM at 90 PSI.
That makes it much better suited to intermittent tools than high-consumption tools.
Good Matches
Common light and intermittent uses include:
- Brad nailers
- Finish nailers
- Staplers
- Tire inflation
- Short blow-gun use
Tools That May Need More Air
High-air-demand tools can include:
- Pneumatic grinders
- Sanders
- Large impact wrenches
- Spray guns
- Sandblasters
- Air drills
If a tool needs 5 CFM at 90 PSI and the compressor produces 2.6 SCFM at 90 PSI, the tool may work briefly from stored tank air but the pump cannot sustain that demand.
The pressure will eventually fall.
Key Takeaway: Compare the tool’s SCFM requirement with the compressor’s SCFM output at the same pressure; maximum tank PSI does not show continuous tool capacity.
How to Shut Down a RIDGID Air Compressor
1. Switch the Compressor Off
Move the power switch to OFF.
Do not stop normal operation by pulling the plug while the motor is running.
2. Unplug the Power Cord
Disconnect the unit from the electrical source.
The current RIDGID 6-gallon manual lists switching off and unplugging as the first shutdown steps.
3. Relieve Pressure as Required
Release pressure according to your model’s shutdown and drain procedure.
Do not remove fittings or service components from a pressurized tank.
The current RIDGID 6-gallon manual warns users to relieve air pressure before service.
4. Drain Water From the Tank
Move or tilt the compressor only as directed by its manual so the drain sits at the low point.
Open the tank drain and let moisture escape into a suitable container.
RIDGID’s current 6-gallon manual warns not to open its drain valve while tank pressure exceeds 10 PSI and calls for eye protection because escaping moisture can propel debris.
Drain requirements differ on some other RIDGID models, so follow the pressure limit in your own manual.
5. Close the Drain After Emptying
Once the tank is empty and moisture has drained, close the valve.
Store the compressor in a dry location after it cools.
Key Takeaway: Shut off power, unplug the compressor, reduce pressure according to the manual, drain tank moisture, then close the valve before storage.
Why You Should Drain a RIDGID Compressor Tank
Compressed air contains moisture.
As air cools inside the receiver, water can condense and collect at the bottom of the tank.
Leaving water inside can promote internal corrosion.
Regular draining also reduces the amount of water carried downstream into hoses and tools.
RIDGID manuals for some compressor models specifically call for draining the air tank daily to reduce tank corrosion and moisture in the supplied air.
How often you find water depends on humidity, operating time, compressor temperature, and how much air you use.
Do not leave the drain permanently open during operation.
Common RIDGID Air Compressor Mistakes
Setting the Regulator to Maximum PSI
More pressure does not automatically make an air tool perform better.
It may damage the tool, hose, accessory, fastener work, or inflated item.
Use the tool’s rated operating pressure.
Forgetting to Close the Drain Valve
An open drain can make it seem as if the compressor will not build pressure.
Check the drain before suspecting the pump.
Forgetting to Drain the Tank
Water accumulation can contribute to corrosion.
Make draining part of shutdown.
Running a Tool That Needs Too Much SCFM
The compressor may run almost constantly while outlet pressure falls.
That points to an air-demand mismatch rather than a regulator problem.
Using a Damaged Extension Cord
Voltage drop can cause poor motor starting and excess heat.
Use the electrical setup stated by RIDGID for the exact model.
Leaving the Unit Powered While Servicing It
A compressor can restart automatically when tank pressure falls.
Switch it off, unplug it, and relieve pressure before service.
Key Takeaway: Most operating problems come from incorrect outlet pressure, an open drain, insufficient airflow capacity, skipped tank draining, or servicing a pressurized unit.
Why Is My RIDGID Air Compressor Not Building Pressure?
Check the Drain Valve
Make sure it is fully closed and not leaking.
Air escaping continuously at the drain will prevent normal pressure buildup.
Listen for Air Leaks
Check:
- Hose couplers
- Fittings
- Drain valve
- Connected tools
- Regulator area
A soap-and-water leak check can expose bubbling around threaded connections, but keep liquids away from electrical components.
Disconnect the Air Tool
Remove the tool and see if the tank fills normally.
A leaking or high-demand tool can make the compressor appear weak.
Check the Tank Gauge
If the tank gauge rises normally but outlet pressure does not, investigate the regulator or downstream connection.
If tank pressure itself never rises, the problem is elsewhere.
Let a Full Tank Cycle Normally
A compressor with a full tank may not start immediately after you switch it on.
The motor starts when pressure falls below the unit’s cut-in setting.
That behavior is normal.
Key Takeaway: An open drain, leaking connection, high air demand, regulator fault, or a tank already above cut-in pressure can explain why the compressor does not behave as expected.
Why Does My RIDGID Compressor Keep Turning On and Off?
Normal cycling is part of compressor operation.
The motor stops when tank pressure reaches cut-out pressure.
It starts again when pressure falls to cut-in pressure.
Frequent cycling can occur because:
- You are using air rapidly
- A fitting leaks
- The drain valve leaks
- The connected tool uses high CFM
- The tank is small relative to demand
If the motor cycles even when no air is being used, check for leaks.
If it runs continuously without reaching normal cut-out pressure, stop using it and diagnose the cause.
Conclusion
How to use RIDGID air compressor safely starts with identifying the controls, closing the tank drain, connecting a sound air hose, filling the tank, and setting outlet pressure to the air tool’s rating. The compressor handles tank cycling automatically during normal operation.
Pay more attention to outlet PSI and SCFM than maximum tank pressure. The regulator sets pressure for the tool, while the compressor’s SCFM rating determines how well it keeps up with continuous air demand.
After the job, switch the compressor off, unplug it, relieve pressure according to the model’s instructions, and drain condensed water from the tank. Check the operator’s manual for your exact RIDGID model if its controls or shutdown limits differ from the common 6-gallon pancake design.
FAQs About Using a RIDGID Air Compressor
How Do I Start a RIDGID Air Compressor?
Close the tank drain, connect the hose, reduce the regulator setting, plug the compressor into the specified power supply, and switch it on. Let the tank reach cut-out pressure before setting the outlet regulator for the connected air tool.
What PSI Should I Set My RIDGID Air Compressor To?
Set the outlet pressure according to the tool or accessory manufacturer’s rating. Do not automatically use the compressor’s maximum tank pressure. Nail guns, inflators, blow guns, and other tools can require different working pressures.
Why Does My RIDGID Air Compressor Stop Running?
It may have simply reached cut-out pressure. A compressor automatically stops its motor when the tank is full enough and restarts after pressure drops to the cut-in point. Check the tank gauge before treating the motor stopping as a fault.
Do I Need to Drain My RIDGID Air Compressor After Every Use?
Draining frequently is a good practice because compressed air creates condensation inside the tank. Some RIDGID manuals call for daily tank draining. Follow the shutdown and drain-pressure instructions for your exact model.
Can I Leave My RIDGID Air Compressor Pressurized?
For normal storage, follow RIDGID’s shutdown instructions for your model. Regular draining removes moisture from the receiver and reduces corrosion risk. Do not open or service pressurized components.
Why Does My RIDGID Air Compressor Keep Running?
The connected tool may be consuming air faster than the pump can replace it, the drain may be open, or the system may have a leak. If the compressor runs continuously with no air use and never reaches cut-out pressure, stop and inspect it.
Can a RIDGID 6-Gallon Compressor Run a Nail Gun?
Yes. RIDGID’s current 6-gallon pancake compressor is designed for trim and finish work and delivers 2.6 SCFM at 90 PSI. Match regulator pressure to the nailer’s rating and allow recovery time if rapid firing causes pressure to fall.
How Do I Adjust Pressure on a RIDGID Air Compressor?
Let the tank build pressure, then turn the regulator while watching the outlet-pressure gauge. Increase or decrease it until the gauge matches the air tool’s required working pressure. On models with a locking regulator, lock the setting after adjustment.