
How to Change Belt on Air Compressor: Replacement Steps & Tips
Changing an air compressor belt usually involves disconnecting power, draining tank pressure, removing the belt guard, loosening the motor mounting bolts, moving the motor toward the pump, removing the old belt, fitting the correct replacement, aligning the pulleys, and setting the belt tension to the compressor manufacturer’s specification.
A worn drive belt can make a belt-driven compressor squeal, run hot, build pressure slowly, or stop transferring motor power to the pump. Cracks, frayed edges, glazing, missing chunks, and black rubber dust around the pulleys are common replacement signs.
The job is straightforward on many stationary and portable belt-drive compressors, but tension settings are not universal. One compressor may specify about 1/2 inch of deflection under a stated force, while another may call for considerably less movement.
Before starting, identify the compressor model and replacement belt number. Using a belt that is too long, too short, too narrow, or built with the wrong V-profile can cause slipping, rapid wear, pulley damage, or bearing stress.
The basic process for how to change belt on air compressor is similar across many reciprocating units: create slack by moving the motor or pump, install the belt in both pulley grooves, tension it correctly, check pulley alignment, tighten the mounts, and reinstall the guard.
Do not run the compressor with the belt guard removed. Fingers, clothing, hair, and tools can be pulled between a moving belt and pulley in an instant. Hardwired compressors should be electrically isolated according to the manufacturer’s service procedure before the guard is opened.
How to Change Belt on Air Compressor Step by Step
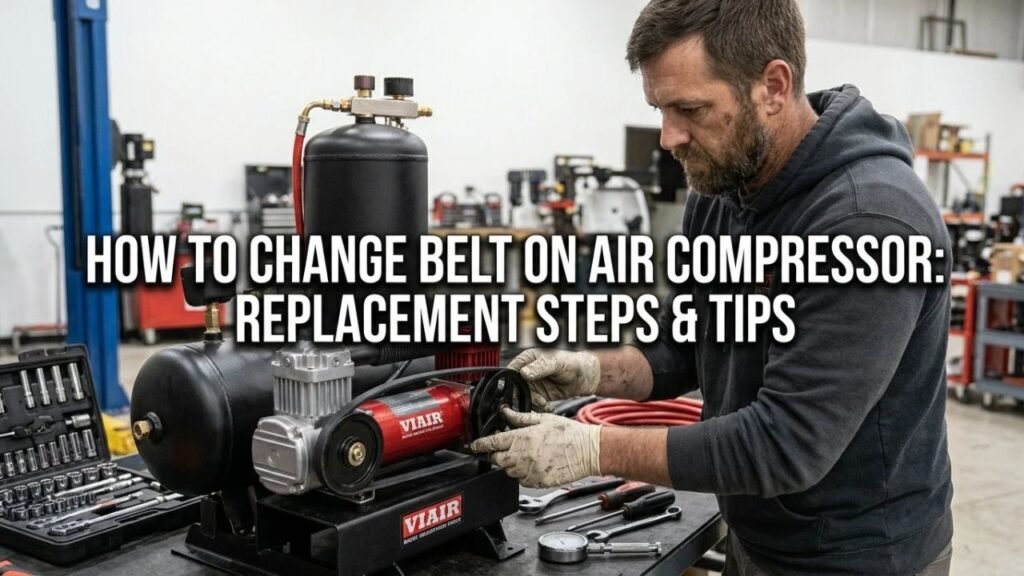
The following process applies to many common belt-driven piston compressors. Your owner’s manual takes priority if the mounting system or tension procedure differs.
1. Shut Off and Disconnect the Compressor
Move the compressor switch to OFF.
For a plug-in electric compressor:
- Unplug it from the outlet.
- Keep the plug where you can see it during service.
For a hardwired compressor:
- Switch off the correct disconnect or breaker.
- Use proper electrical isolation procedures if the unit could be energized by another person.
For an engine-driven compressor:
- Shut the engine off.
- Remove the key if equipped.
- Let hot components cool.
Do not rely only on the pressure switch to prevent startup. A pressure switch can command the motor to restart automatically when tank pressure drops.
2. Drain the Air Pressure
Open the tank drain or another approved valve and relieve stored air pressure.
Check the tank pressure gauge before working near moving or pressurized components.
The belt itself is not pressurized, but draining the compressor prevents an unexpected automatic cycle and makes service safer.
3. Remove the Belt Guard
Locate the guard around the motor pulley, compressor flywheel, and drive belt.
Remove the screws, bolts, clips, or other fasteners holding the guard.
Keep the hardware together so nothing is lost.
Once the guard is removed, inspect the area for:
- Rubber dust
- Oil contamination
- Loose pulley hardware
- Cracked pulley grooves
- Misalignment
- Frayed belt material
Do not rotate the pulleys with your fingers positioned where the belt enters a groove.
4. Check the Existing Belt Before Removing It
Look closely at the old belt.
Replacement is justified if you see:
- Cracks
- Fraying
- Glazing or a shiny surface
- Missing pieces
- Exposed cords
- Hardened rubber
- Oil saturation
- Uneven edge wear
- A belt sitting too deeply in the pulley groove
A belt that looks healthy but squeals may simply be loose, contaminated, or running on misaligned pulleys.
5. Loosen the Motor Mounting Bolts
Many belt-driven compressors tension the belt by moving the motor farther from or closer to the pump.
Loosen the motor mounting bolts enough to let the motor slide.
Do not remove the bolts unless the compressor design requires it.
Some units adjust the pump position instead of the motor. Check the mounting slots and service manual before forcing anything.
6. Move the Motor Toward the Pump
Slide the motor toward the compressor pump or flywheel.
This shortens the distance between the pulleys and creates slack in the belt.
If the motor is difficult to move, check for:
- Adjustment bolts
- Lock nuts
- Corrosion
- Mounting bolts that are still too tight
Do not pry aggressively against the motor shaft, pulley, or pump casting.
7. Remove the Old Belt
Once enough slack exists, lift the belt out of the smaller motor pulley and then off the larger compressor flywheel.
On some designs, it may be easier to remove the belt from the flywheel first.
Do not force a tight belt off with a screwdriver. Prying can damage the pulley groove or belt.
If the compressor uses multiple matched belts, replace the complete set rather than one belt at a time unless the manufacturer states otherwise.
8. Compare the New and Old Belts
Before installation, compare:
- Belt width
- V-profile
- Length
- Rib count, if applicable
- Manufacturer part number
A severely stretched old belt may appear longer than the replacement, so part-number verification is more dependable than simply laying the belts side by side.
9. Install the New Belt
Place the replacement belt into the pulley grooves.
Make sure it sits squarely and fully in each groove.
Do not twist the belt.
If there is not enough slack to install it without heavy force, move the motor farther toward the pump rather than prying the new belt over a pulley.
10. Set the Belt Tension
Move the motor away from the pump until the belt reaches the specified tension.
This is one of the most important parts of the job.
Too loose can cause:
- Slipping
- Squealing
- Slow pressure buildup
- Heat
- Glazing
- Rubber dust
Too tight can place excess load on:
- Motor bearings
- Pump bearings
- Shaft seals
- Pulley shafts
Do not guess at the tension if the manufacturer’s specification is available.
11. Check Pulley Alignment
Place a straightedge across the faces of the motor pulley and compressor flywheel if the design permits this method.
The pulley grooves should run in the same plane.
Look for:
- One pulley sitting farther inward
- One pulley sitting farther outward
- Angular misalignment
- Belt tracking toward one edge
Correct alignment before final tightening.
12. Tighten the Motor Mounts
Tighten the mounting bolts while holding the motor in its adjusted position.
After tightening, check belt tension again.
The motor can shift slightly as the bolts are tightened, changing the final setting.
13. Rotate the Drive by Hand
With power still disconnected, turn the compressor flywheel by hand if the manufacturer’s procedure permits it.
Watch the belt through several rotations.
It should:
- Stay centered in the grooves
- Move smoothly
- Remain aligned
- Avoid rubbing the guard or frame
Stop if the belt tries to walk off a pulley.
14. Reinstall the Belt Guard
Put the guard back in place and tighten all fasteners.
Do not operate the compressor without the guard installed.
15. Test the Compressor
Close the tank drain if it was opened.
Restore power and start the compressor.
Listen for:
- Squealing
- Slapping
- Clicking
- Rubbing
- Excessive vibration
Let the compressor build pressure and cycle normally.
Shut it down if the belt tracks incorrectly, produces smoke, creates a burning-rubber smell, or makes abnormal noise.
Key Takeaway: Disconnect power, drain pressure, loosen the motor, replace the belt without prying, set model-specific tension, align the pulleys, tighten the mounts, and reinstall the guard before startup.
How Tight Should an Air Compressor Belt Be?
The belt should be tight enough to transfer motor power without slipping but not so tight that it overloads the bearings.
There is no universal deflection number for every compressor.
Belt Tension Specifications Vary by Model
Some compressor manuals specify about 1/2 inch of belt deflection with 5 pounds of force applied halfway between the motor pulley and pump flywheel.
Other units specify around 3/16 inch with 5 pounds of force.
Another compressor may use a different force, span, or tension-gauge reading.
That range shows why using a generic finger-pressure rule can produce the wrong setting.
Measure at the Middle of the Belt Span
When a deflection method is specified, pressure is commonly applied midway between the motor pulley and compressor flywheel.
Measure how far the belt moves from its resting position under the specified force.
Use a ruler or belt tension gauge if the manual calls for one.
Do Not Overtighten to Stop Squealing
A squealing belt is not always loose.
It may be:
- Glazed
- Oil-contaminated
- Misaligned
- Riding in worn pulleys
- Incorrectly sized
Tightening a damaged belt until the noise stops can overload the motor and pump bearings.
Key Takeaway: Use the tension value listed for the exact compressor. Belt deflection settings differ enough between models that one universal measurement is not dependable.
How to Check Air Compressor Pulley Alignment
Correct alignment keeps the belt centered and reduces edge wear.
A new belt can fail quickly if the pulleys are not in the same plane.
Use a Straightedge
With power disconnected and the guard removed, place a straightedge along the pulley faces if the compressor design gives you a safe flat reference.
Compare the motor pulley with the compressor flywheel.
Both should line up without a large gap or offset.
Look for Parallel Misalignment
Parallel misalignment occurs when the pulleys are parallel but one sits farther in or out on its shaft.
The belt then runs diagonally between the pulleys.
This can wear one side of the belt rapidly.
Look for Angular Misalignment
Angular misalignment occurs when the pulleys are not parallel.
The belt may climb one side of the groove or repeatedly move toward the edge.
Check that the motor is sitting squarely on its mount before tightening the bolts.
Inspect Pulley Set Screws
If the motor pulley has shifted on its shaft, check the set screw and key.
Do not reposition a pulley without checking the model’s required shaft position and set-screw tightening procedure.
Key Takeaway: Keep the motor pulley and pump flywheel in the same plane. Misalignment causes edge wear, noise, heat, and shortened belt life.
Signs Your Air Compressor Belt Needs Replacement
You do not need to wait until the belt snaps.
Several symptoms appear before complete failure.
Cracks or Frayed Edges
Cracks show that the rubber is aging or has been exposed to excessive heat.
Fraying can point toward pulley misalignment, damaged grooves, or the belt rubbing against another component.
Replace a belt with visible cord damage.
Shiny or Glazed Belt Surface
A glazed belt looks smooth and shiny instead of having a normal rubber surface.
Glazing commonly develops from slipping and heat.
A glazed belt may continue squealing even after its tension is corrected.
Squealing During Startup
A brief squeal when the motor starts can come from a loose or worn belt.
Check:
- Belt condition
- Tension
- Pulley alignment
- Oil contamination
- Pump rotation
A motor struggling to start for electrical or mechanical reasons can also create unusual belt noise.
Compressor Builds Pressure Slowly
A slipping belt may let the motor spin without driving the pump at full speed.
The compressor then takes longer to reach cut-out pressure.
Before blaming the belt, also check:
- Air leaks
- Intake filter
- Valves
- Pump condition
- Head gasket
- Pressure settings
Black Rubber Dust
Fine black dust inside the belt guard is often material worn off the belt.
Some belt dust over long periods can occur, but heavy accumulation points toward:
- Slipping
- Misalignment
- Worn pulley grooves
- Excessive tension
- Belt deterioration
Burnt Rubber Smell
A slipping belt creates friction and heat.
Shut the compressor down if you smell burning rubber and inspect the drive before running it again.
Key Takeaway: Replace a belt that is cracked, frayed, glazed, damaged, or shedding material, and check tension and pulley alignment so the new belt does not suffer the same failure.
Why Does the New Air Compressor Belt Keep Coming Off?
A belt that repeatedly leaves the pulley usually indicates another problem.
Simply reinstalling it will not solve the cause.
Pulleys Are Misaligned
This is one of the first things to inspect.
If the motor pulley and pump flywheel are offset or angled, the belt may track sideways until it comes off.
Belt Is Too Loose
Insufficient tension can let the belt flap or climb out of the pulley groove during startup.
Set the tension to the model specification.
Wrong Belt Size
A belt that is too wide, narrow, long, or has the wrong V-angle may not sit correctly in the pulley.
Match the part number or belt specification.
Pulley Is Damaged
Inspect the grooves for:
- Chips
- Cracks
- Bent edges
- Severe wear
- Rust buildup
A damaged pulley may need replacement.
Motor or Pump Mount Is Loose
Loose mounting bolts can let alignment change while the compressor runs.
Check all mounting hardware after setting tension.
Key Takeaway: A replacement belt that keeps coming off usually points toward misalignment, poor tension, the wrong belt, damaged pulleys, or loose mounting hardware.
Can You Change an Air Compressor Belt Without Moving the Motor?
On many compressors, no.
The motor or pump needs to move so belt tension can be released.
Trying to stretch a V-belt over the flywheel under full tension can damage:
- Belt cords
- Pulley grooves
- Motor bearings
- Your fingers
Some compressor designs use a separate tensioner or another adjustment system. Follow that arrangement rather than assuming the motor always slides.
If the compressor has no obvious mounting slots or adjuster, check the manual before attempting removal.
Should You Replace Both Belts on a Twin-Belt Compressor?
If the compressor uses a matched pair of V-belts, replacing both at the same time is generally the better approach.
An old belt and a new belt may have different:
- Length
- Stretch
- Grip
- Wear
- Load distribution
The newer belt may end up carrying more of the load.
Use a matched replacement set specified for the compressor.
Also inspect all grooves because a worn sheave can damage the new belts.
How Long Does an Air Compressor Belt Last?
There is no fixed service life that applies to every belt-driven compressor.
Belt life changes with:
- Compressor hours
- Number of motor starts
- Heat
- Pulley alignment
- Belt tension
- Oil contamination
- Dust
- Pulley condition
- Pump load
A correctly aligned and tensioned belt can remain in service for years on a lightly used home compressor.
A compressor running for hours every day may need belts much sooner.
Inspect the belt during routine maintenance rather than replacing it solely by age.
What Causes Air Compressor Belts to Break?
A belt usually gives warning signs before it breaks.
Excessive Belt Tension
A belt that is too tight stays under high load.
This stresses the belt cords along with motor and pump bearings.
Loose Belt and Slipping
A loose belt slips against the pulley.
That creates heat, which can harden and glaze the rubber until the belt cracks.
Oil Contamination
Oil can soften or damage some belt materials and reduce grip.
If compressor oil is reaching the belt, find the leak rather than repeatedly replacing belts.
Possible leak points include pump seals, gaskets, and nearby components.
Pulley Misalignment
A misaligned belt rubs unevenly and places abnormal load on its edges.
This can cause fraying or separation.
Seized or Tight Pump
A belt may break because the pump is difficult to turn.
With the power isolated and the unit cooled, check for abnormal resistance using the manufacturer’s inspection procedure.
Do not install a new belt repeatedly if the pump or motor is binding.
Key Takeaway: Incorrect tension, slipping, oil, misalignment, worn pulleys, and mechanical binding are common causes of repeated belt damage.
What to Check After Changing the Belt
The first run should be treated as a final inspection.
Listen for Squealing
A new belt should not squeal continuously.
If it does, shut the unit off and recheck tension and alignment.
Watch Belt Tracking
If the guard includes a safe viewing opening, check that the belt runs consistently.
Never remove the guard while the compressor is running just to watch the belt.
Recheck Tension After Initial Use
New V-belts can settle into pulley grooves during early operation.
Some manufacturers call for a tension recheck after a short break-in period.
Follow the maintenance schedule for your model.
Check Pressure-Build Time
If belt slip was the reason for slow filling, pump-up time should return closer to normal after the repair.
If pressure buildup is still slow, the compressor may have a separate pump, valve, gasket, filter, or leakage problem.
Conclusion
The core process for how to change belt on air compressor is to disconnect the power source, relieve stored pressure, remove the belt guard, loosen the motor or pump mounts, create belt slack, install the correct replacement, and reset tension and alignment before running the compressor.
Do not force a new belt over the pulley under tension. Moving the motor or pump into the proper service position protects the belt, bearings, pulleys, and your hands.
Belt tension deserves special attention because specifications vary between compressor models. Use the deflection force and distance listed in the owner’s manual rather than tightening the belt by feel alone.
After installation, reinstall the guard, run the compressor, listen for abnormal noise, and recheck the belt according to the manufacturer’s break-in or maintenance guidance.
FAQs About Changing an Air Compressor Belt
How Do I Know What Belt My Air Compressor Needs?
Check the compressor owner’s manual, parts diagram, belt label, or model-specific parts listing.
Match the belt profile, width, length, and part number. Do not choose a replacement only because it looks close to the old belt.
How Tight Should My Air Compressor Belt Be?
Use the manufacturer’s specified deflection and force.
Some compressors call for roughly 1/2 inch of deflection under 5 pounds of pressure, while others specify much less. The exact model specification should always control the adjustment.
Can I Run an Air Compressor Without the Belt Guard?
No. The guard protects people from the moving belt, motor pulley, and pump flywheel.
Install the guard before restoring normal operation.
Why Does My Compressor Belt Squeal After Replacement?
Common causes include insufficient tension, pulley misalignment, oil contamination, an incorrect belt, worn pulley grooves, or a pump that is difficult to turn.
Shut the compressor off and inspect the drive rather than tightening the belt excessively.
Can I Replace an Air Compressor Belt Myself?
Many home and shop compressor belts can be replaced with basic hand tools if the motor or pump has an accessible tension adjustment.
Large industrial compressors, hardwired equipment, unusual belt systems, or units with unresolved mechanical problems may be better serviced by a qualified technician.
Should I Replace a Cracked Air Compressor Belt?
Yes. Cracks indicate deterioration of the belt material.
Replace it before it breaks, then check pulley alignment and tension for conditions that may have accelerated the wear.
Why Is My New Air Compressor Belt Getting Hot?
A new belt may overheat from excessive tension, slipping, pulley misalignment, incorrect belt size, worn grooves, or mechanical resistance in the pump.
Shut the compressor down and correct the cause before the belt becomes glazed or fails.