
How to Put Air Compressor in Car: Installation and Wiring Guide
A car air compressor can be installed permanently by mounting an automotive-rated 12V compressor in a dry, ventilated location, running properly sized fused power from the battery, grounding it correctly, and connecting the air line to a tire outlet or air tank. A portable tire inflator needs no permanent mounting or wiring.
The first decision is the type of compressor you want. A small portable unit can stay in the trunk and connect to a 12V accessory socket or directly to the battery when needed. An onboard system stays mounted to the vehicle and can supply tires, air suspension, air horns, lockers, or other pneumatic equipment.
Electrical demand varies widely. For example, VIAIR lists onboard 12V systems with maximum current ratings ranging from about 13 amps to more than 20 amps, so wire gauge, relay capacity, and fuse size need to match the exact compressor rather than a generic car-compressor diagram.
For how to put air compressor in car, an automotive 12V unit is normally the practical option. A household 120V shop compressor is not designed to be wired straight into a car’s electrical system and would require a correctly sized inverter plus safe mounting and power arrangements.
The compressor also needs protection from exhaust heat, road debris, water exposure beyond its environmental rating, and moving suspension or drivetrain parts. Installation instructions from Air Lift specifically call for routing wiring away from heat and abrasive edges, while its compressor guidance stresses a dry mounting area with an unobstructed air inlet.
A permanent setup may be compressor-only or include a tank, pressure switch, relay, safety valve, gauge, drain, and quick-connect outlet. Systems with tanks make stored air available immediately, while compressor-only setups take less space and work well for occasional tire inflation.
The steps below cover both approaches, including mounting location, battery wiring, fuse placement, grounding, air-line routing, tanks, portable alternatives, and the mistakes that can damage a compressor or vehicle electrical system.
What Type of Air Compressor Can You Put in a Car?
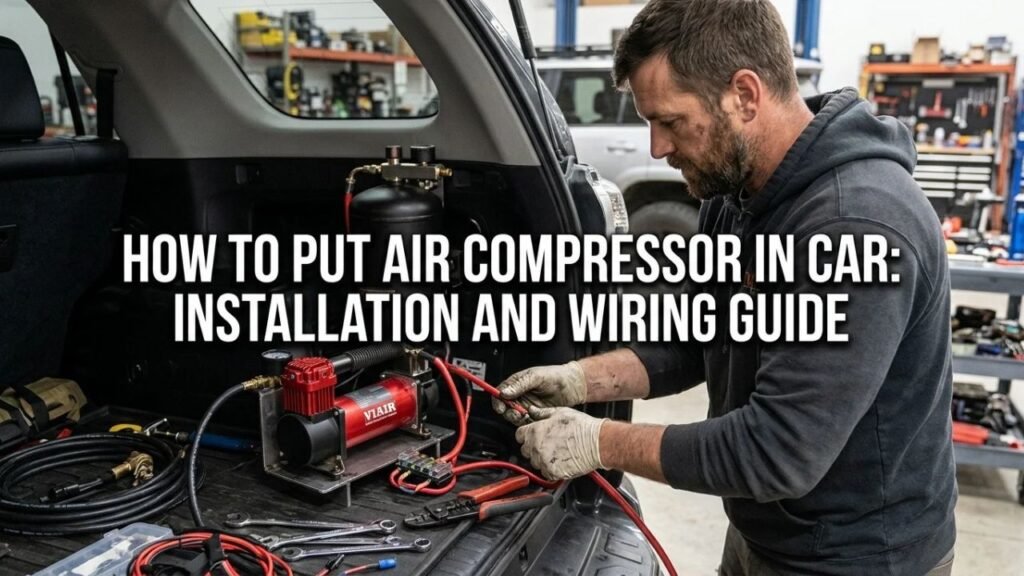
Not every air compressor is suited to vehicle installation.
For most cars, SUVs, and trucks, the practical options are a portable 12V tire compressor or a permanently installed 12V onboard compressor.
Portable 12V Compressor
A portable compressor requires almost no installation.
You store it in the trunk, cargo area, or tool compartment and connect it only when air is needed.
Small models may use a vehicle accessory socket. Higher-current portable units often connect directly to the battery with clamps because the accessory socket may not support their electrical load.
VIAIR, for example, warns owners to verify the amperage rating of the vehicle’s power port before using an accessory-socket compressor. Its portable models also show that startup current can be much higher than the normal running current.
A portable compressor is a good match if your main goal is emergency tire inflation.
Permanent Onboard Compressor
An onboard compressor is bolted to the vehicle and wired into the electrical system.
It may supply:
Tire inflation, air suspension, air lockers, air horns, small air tanks, or other vehicle-rated pneumatic accessories.
This setup takes more installation work but eliminates the need to unpack and connect a compressor every time you need air.
Compressor With an Air Tank
An onboard air tank stores compressed air after the compressor shuts off.
A complete tank-based system commonly includes a pressure switch that starts and stops the compressor automatically as tank pressure changes.
For example, VIAIR’s onboard systems combine a compressor, tank, pressure switch, relay, safety valve, drain, wiring, and air fittings as a complete vehicle system.
The tank adds weight and takes up more mounting space, but stored air can make repeated tire inflation and short bursts of pneumatic use faster.
Key Takeaway: Use an automotive-rated 12V compressor for permanent installation; choose a portable unit for occasional tire inflation or an onboard compressor and tank for frequent air use.
Tools and Parts Needed for an Onboard Installation
Exact parts vary by compressor kit, but a typical permanent installation may require:
- Automotive 12V air compressor
- Manufacturer-specified fuse or circuit breaker
- Correct-gauge automotive wire
- Relay when required
- Ring terminals and sealed connectors
- Mounting hardware
- Rubber isolators if supplied
- Air hose or DOT-rated pneumatic line approved by the kit maker
- Pressure switch for tank systems
- Air tank if desired
- Safety relief valve for a tank
- Drain valve
- Quick-connect fitting
- Wire loom and grommets
- Basic hand tools
- Wire crimper and stripper
- Multimeter
- Drill and suitable bits if new mounting holes are required
Do not select the wire or fuse solely from a generic chart without checking the compressor instructions. Current draw and wire length both affect the required conductor size.
How to Put Air Compressor in Car Step by Step
A permanent 12V onboard system is easiest to install when you plan the compressor, electrical route, and air plumbing before drilling or cutting anything.
1. Choose the Compressor Location
Find a solid mounting point with enough room around the compressor for cooling and service access.
Possible locations include the trunk, cargo compartment, under a seat when the manufacturer permits it, engine bay, frame area, or a protected underbody bracket.
The location must meet the compressor’s environmental rating.
An IP-rated underbody compressor may tolerate dust and water exposure better than an indoor-style compressor, but electrical relays and pressure switches may have lower protection ratings. VIAIR states that some of its pressure-switch and relay assemblies should be kept protected from the elements.
Keep the compressor away from exhaust manifolds, catalytic converters, mufflers, and other high-temperature parts.
Do not mount it where suspension movement, a driveshaft, steering parts, tires, or road debris can strike it.
2. Check the Compressor’s Amp Rating
Read the compressor label and installation manual.
Look for:
Voltage, maximum amp draw, recommended fuse, required relay, minimum wire gauge, duty cycle, and grounding instructions.
Current varies sharply between compressors. VIAIR lists one small onboard system at 13 amps, another at 18 amps, and larger systems above 20 amps.
That is why copying another vehicle’s fuse and wire setup can be unsafe.
3. Disconnect Battery Power
Follow the compressor manufacturer’s electrical procedure before working on the vehicle.
Air Lift installation instructions call for disconnecting battery ground before installing the wiring harness.
This reduces the chance of accidentally shorting a power wire to the body while routing or terminating cables.
If the vehicle has special battery-disconnection procedures, memory settings, hybrid equipment, or multiple batteries, check its service information first.
4. Mount the Compressor Securely
Position the compressor and mark the mounting points.
Before drilling, check both sides of the panel or floor.
You do not want to drill into a fuel tank, fuel line, brake line, wiring harness, battery cable, high-voltage cable, or structural component.
Use the mounting hardware and isolators specified by the compressor manufacturer.
The compressor should sit firmly without its housing touching nearby sheet metal that can amplify vibration.
Air Lift recommends placing the compressor where the intake filter remains dry, away from excessive heat, and free from airflow blockage.
5. Route the Main Power Wire
For a permanent high-current compressor, main power normally comes from the vehicle battery rather than a small accessory socket.
Route the positive cable from the battery toward the compressor using the wire gauge specified by the kit.
Protect it with loom where it passes through the engine compartment or underbody.
Avoid sharp edges, exhaust parts, steering shafts, suspension components, and places where cargo can crush the cable.
If the wire passes through sheet metal or the firewall, use a proper grommet.
ARB’s compressor installation guidance uses existing firewall grommets for cab wiring where suitable, which avoids running an unprotected wire through bare metal.
6. Install the Fuse Near the Battery
The main positive feed should have the fuse or circuit protection specified by the compressor manufacturer.
Place the fuse holder in the location stated by the kit instructions, normally near the power source so most of the cable is protected.
Do not increase fuse size simply because a smaller fuse blows.
A repeatedly blown fuse may point to:
A short circuit, incorrect wiring, seized compressor, undersized wiring, damaged relay, or wrong fuse selection.
Air Lift instructs installers to make the battery connection and install the fuse last during one of its compressor installations.
7. Install the Relay if Required
Many onboard compressors use a relay so the dashboard switch or pressure switch does not carry full motor current.
The high-current circuit powers the compressor through the relay contacts.
The low-current control circuit energizes the relay.
Some onboard systems combine the pressure switch and relay into a prewired assembly.
Follow the supplied diagram exactly. Relay pin assignments and harness designs are not universal.
8. Ground the Compressor Correctly
A poor ground can cause slow compressor operation, voltage drop, overheated wiring, or unreliable starting.
Use the manufacturer-specified ground wire size.
Some kits ground directly to the battery. Others permit a clean chassis connection.
Air Lift instructs installers in one system to make a sound frame ground and remove paint or corrosion if needed to obtain good electrical contact.
Protect the finished chassis connection against corrosion after making the electrical contact.
9. Install the Dashboard Switch
A dashboard switch is optional on some systems and required on others.
Choose a location that does not interfere with airbags, steering, pedals, knee panels, or factory controls.
If the system uses switched ignition power, identify the circuit with proper test equipment rather than guessing from wire color.
ARB’s installation guidance calls for an ignition or accessory circuit that is live only with the key in the required position for its compressor control harness.
The compressor motor itself should still receive power through the correct fused high-current circuit when the kit uses a relay.
10. Install the Air Tank if Your System Uses One
Mount the tank to a strong part of the vehicle using its rated mounting points.
Do not use a tank with unknown pressure condition or severe corrosion.
Install all required components specified for the system, including its safety valve and drain.
VIAIR onboard kits, for example, include rated safety valves and tank drains as part of their tank systems.
Position the drain so moisture can be removed during service.
11. Route the Air Line
Run the air line from the compressor to the tank or outlet.
Keep it away from:
Exhaust heat, sharp edges, suspension movement, steering components, tires, and driveshafts.
Leave enough slack where body or frame movement requires it, but do not leave loops that can catch road debris.
Make clean, square cuts when using push-to-connect pneumatic tubing.
A poorly cut or partially seated line can leak.
12. Install the Tire Inflation Outlet
A quick-connect fitting can be mounted in the engine bay, bumper area, trunk, cargo space, or another protected point.
Pick a location that is easy to reach without placing the fitting where dirt and water can pack into it.
Make sure the air hose can reach every tire.
Some drivers install outlets at both the front and rear of larger vehicles.
13. Recheck the Wiring Before Adding the Fuse
Before restoring power, compare every connection with the wiring diagram.
Check:
Battery polarity, relay terminals, ground, switch wiring, pressure-switch wiring, fuse rating, connector insulation, and cable routing.
Verify that no wire can rub against metal or lie on a hot exhaust component.
14. Power the System and Test It
Reconnect the battery according to the vehicle procedure and install the compressor fuse last if the kit directs you to do so.
Turn the system on and listen for abnormal noise.
For tank-based systems, watch the pressure rise and confirm that the pressure switch shuts the compressor off at the specified pressure.
Check every fitting for air leakage using the inspection method approved by the equipment maker.
Confirm that wiring and terminals do not become unusually hot.
Key Takeaway: Mount the compressor securely, size wiring and fuse protection from the actual compressor specification, use a sound ground, protect wiring from heat and abrasion, then test both electrical and air connections before regular use.
Can You Put a Portable Air Compressor in the Car Without Installing It?
Yes.
If tire inflation is your only goal, a portable compressor is often the simpler setup.
Store it in its case in the trunk or cargo area so it cannot move around during hard braking.
When you need it, park safely and follow the compressor’s power instructions.
Accessory-Socket Compressors
Low-current models may plug into a 12V accessory outlet.
Check the fuse and amperage rating of that outlet before buying the compressor.
A compressor rated above the outlet capacity can blow the vehicle fuse or overheat the connection.
Battery-Clamp Compressors
Larger portable compressors often use clamps that connect directly to the 12V battery.
This bypasses the small accessory-socket circuit and gives the compressor a higher-current connection designed by its manufacturer.
VIAIR’s 88P is one example of a portable compressor supplied with direct battery clamps.
Connect positive and negative clamps only as stated in the compressor manual and keep the cable away from fans, belts, and hot parts.
Can You Put a 120V Air Compressor in a Car?
A household 120V compressor cannot be connected directly to a car’s 12V electrical system.
A power inverter would be required to convert 12V DC battery power to 120V AC.
The challenge is current.
A 120V compressor that consumes 1,200 watts may require well over 100 amps from the 12V side of an inverter once conversion losses and operating conditions are considered.
Motor startup can demand far more for a short period.
That can require a large inverter, heavy battery cables, strong electrical connections, and enough alternator and battery capacity.
For ordinary tire inflation, a dedicated 12V automotive compressor is usually far simpler than trying to operate a shop compressor through an inverter.
Where Is the Best Place to Mount an Air Compressor in a Car?
The best mounting area provides airflow, protection, wiring access, and a strong mounting surface.
Trunk or Cargo Area
An interior location protects the compressor from rain, road salt, and debris.
The drawbacks are noise, vibration, heat, and the need to route a heavy power cable into the cabin.
The compressor still needs airflow for cooling.
Do not seal it inside a small unventilated box unless the equipment maker approves that setup.
Engine Bay
The engine bay can make battery wiring short and simple.
Heat is the main problem.
Keep the compressor far enough from exhaust parts and engine heat sources to remain inside its temperature rating.
Underbody or Frame
An underbody location saves interior space.
The compressor needs suitable water and dust protection, plus shielding from road debris.
Any separate relay or pressure-switch assembly with a lower environmental rating may need a protected mounting point.
Key Takeaway: Pick a location that combines solid mounting, cooling airflow, environmental protection, and safe access for wiring and air lines.
Common Air Compressor Installation Mistakes
A neat-looking installation can still have electrical or thermal problems.
One common mistake is using wire that is too small for the compressor current and cable length. Voltage drop at the motor can slow startup and increase heat.
Another is placing the fuse far from the battery. The unprotected section of cable between the battery and fuse can short to the vehicle body if its insulation is damaged.
Poor grounding can create similar trouble. Paint, rust, or a loose fastener can increase resistance at a chassis ground.
Heat is another frequent problem. Keep wiring, air tubing, compressors, and tanks away from exhaust components.
Do not install a compressor in a sealed compartment with no cooling airflow unless the manufacturer specifically allows it.
Lastly, do not use a fuse larger than the recommended value to stop nuisance blowing. Find the electrical or mechanical fault instead.
Do You Need an Air Tank With a Car Compressor?
No.
A compressor used only for occasional tire inflation can work without a tank.
Air travels directly from the compressor to the tire.
A tank becomes more useful when you want stored compressed air for repeated short demands.
Examples include air suspension controls, pneumatic lockers, air horns, or quicker access to an initial burst of air.
A tank system also needs extra plumbing and safety components, so it creates more installation work.
For a basic emergency tire setup, compressor-only is usually enough.
What Size Fuse Should a Car Air Compressor Use?
Use the fuse size stated by the compressor or wiring-kit manufacturer.
Do not choose it from tank size, maximum PSI, or compressor appearance.
Different 12V systems have very different loads. Current VIAIR examples range from roughly 13 amps for a small onboard system to 23 amps for a constant-duty unit, while some dual-compressor systems draw still more.
The fuse protects the wiring as well as the equipment.
Wire size, circuit length, relay design, and manufacturer instructions all need to agree with the fuse selection.
Conclusion
For how to put air compressor in car, a dedicated 12V automotive compressor is the simplest permanent setup. Mount it to a strong, cool location, run the specified fused battery feed, provide a clean ground, protect the wiring from heat and abrasion, and route the air line where moving vehicle parts cannot damage it.
A tank is optional for tire inflation but useful for applications that need stored compressed air. If you add one, use a pressure-rated automotive air tank with the required pressure switch, safety valve, drain, and approved fittings.
A portable compressor is the easier answer if you only need emergency tire air. It can remain secured in the trunk and connect to the accessory socket or battery according to its instructions.
I would not guess at wire gauge, fuse size, or relay capacity. Use the values for the exact compressor model, since 12V compressors can differ greatly in current draw and startup demand.
FAQs About Putting an Air Compressor in a Car
Can I permanently install an air compressor in my car?
Yes. Automotive 12V compressors are available for permanent onboard installation. The compressor needs a secure mounting location, properly sized fused battery wiring, correct grounding, and suitable air plumbing. Follow the wiring diagram supplied with the exact compressor.
Can I wire an air compressor directly to the car battery?
Many high-current 12V compressors receive their main power from the battery, but the circuit still needs the manufacturer’s fuse, wire gauge, relay, and switching arrangement. Do not run an unfused positive cable directly from the battery to the motor.
Can I plug a car air compressor into the cigarette lighter?
Some small compressors can use a 12V accessory socket. Check both the compressor’s maximum current draw and the outlet’s amperage rating. Higher-current units may require direct battery clamps or permanent battery wiring.
Does an onboard air compressor need a relay?
Many higher-current systems use a relay so a small dashboard or pressure switch does not carry full compressor-motor current. Some compressors or harnesses use different control arrangements. Follow the manufacturer’s diagram rather than adding or deleting a relay from a generic plan.
Do I need to leave the car running while using an air compressor?
Follow the compressor manual. A 12V compressor can discharge the battery when used with the engine off, especially during long inflation sessions. Some manufacturers instruct users to operate with the engine running for adequate system voltage. If the engine is running, keep the vehicle outdoors and away from enclosed spaces because exhaust contains carbon monoxide.
Where should I put the fuse for an onboard compressor?
Place the main circuit protection according to the kit instructions, typically near the battery or power source. This keeps most of the positive cable protected if its insulation is cut or rubbed through.
Can I mount an air compressor under my car?
Yes, if the compressor is rated for that environment and mounted where road debris, water, exhaust heat, suspension travel, or drivetrain parts cannot damage it. Components that are not weather-sealed may need a separate protected location.
Is an air tank necessary for inflating car tires?
No. A compressor can inflate tires directly without a storage tank. A tank provides stored air and is more useful for repeated short air demands, air suspension, pneumatic lockers, air horns, or systems that need pressure available before the compressor starts.