How to Test Air Compressor on Truck: Air Brake System Checks
To test a truck air compressor, watch how quickly the air-brake system builds pressure, verify the governor’s cut-in and cut-out points, check system leakage, and inspect the compressor discharge circuit. Slow pressure recovery does not automatically mean the compressor is bad because leaks, the governor, air dryer, or discharge line can create similar symptoms.
This procedure applies to the engine-driven compressor used in heavy-truck air-brake systems. It does not cover an automotive A/C compressor or a portable compressor carried in a pickup bed.
A truck’s compressor supplies compressed air to reservoirs used by the service brakes, parking-brake system, and other pneumatic equipment. The governor determines when the compressor loads and unloads as reservoir pressure changes.
For how to test air compressor on truck, one of the most useful checks is pressure build-up time. Current U.S. CDL guidance commonly uses a benchmark of building a dual air system from 85 to 100 psi within 45 seconds at operating RPM, while also stating that manufacturer specifications take priority and larger reservoir systems may take longer.
You should also test for air leakage before blaming the compressor. A strong compressor cannot maintain normal pressure if the truck has a major leak elsewhere in the brake system.
Bendix also recommends checking the discharge line between the compressor and air dryer when pressure builds slowly. Carbon restriction or small holes in that line can cause a slow- or no-build condition even when the compressor itself is still working.
The tests below help separate a weak compressor from governor, leakage, air-dryer, discharge-line, and control-system problems.
What Does the Air Compressor on a Truck Do?
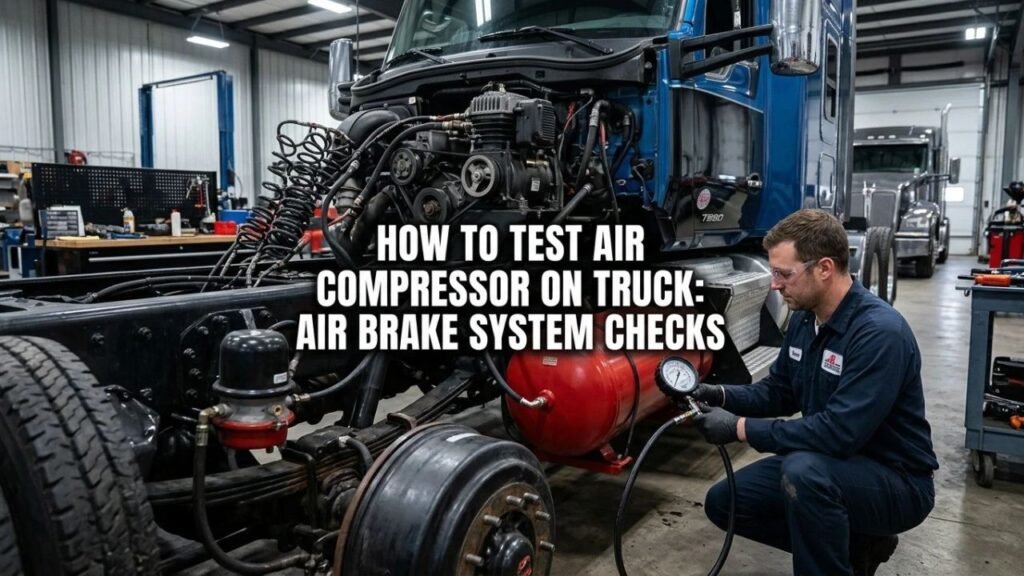
A heavy-truck air compressor produces the compressed air stored in the vehicle’s air reservoirs.
How the Compressor Is Driven
Truck air compressors are commonly driven by the engine through:
- Gears
- Belt drive on some systems
- Another engine-mounted drive arrangement
Oregon’s current CDL guidance notes that an air compressor may be connected to the engine through gears or a V-belt. It may also have its own oil supply or share engine lubrication, depending on design.
What the Governor Does
The compressor does not need to pump at full capacity every second the engine is running.
The governor controls the loading cycle.
When reservoir pressure falls to the cut-in pressure, the compressor begins supplying air.
When pressure reaches the cut-out pressure, the compressor unloads and stops adding air to the reservoirs.
Common CDL reference values are around:
- Cut-in: approximately 100 psi
- Cut-out: approximately 120–140 psi
The exact truck manufacturer’s specification is the number that matters.
Why Compressor Testing Is a System Test
Air flows through several components after leaving the compressor.
A simplified route is:
Compressor → discharge line → air dryer → reservoirs → brake valves and circuits
A fault anywhere along that route can make the truck appear to have a weak compressor.
Key Takeaway: The truck compressor creates air pressure, while the governor controls when it loads and unloads; slow pressure build can originate elsewhere in the air system.**
How to Test Air Compressor on Truck Step by Step
A basic functional test can be performed using the truck’s air-pressure gauges and a timer.
Park in a safe area before beginning.
Step 1: Secure the Truck
Park on firm, level ground.
Put the transmission in neutral or park as appropriate.
Use wheel chocks before releasing parking brakes during air-system tests.
Keep people clear of the vehicle.
Air-brake testing involves intentionally lowering system pressure and releasing brakes at certain stages, so preventing vehicle movement is essential.
Step 2: Inspect the Compressor Area
Before starting the engine, inspect what you can safely see.
Look for:
- Loose or damaged compressor drive components
- Oil leaks
- Coolant leaks on water-cooled compressors
- Damaged air lines
- Loose fittings
- Cracked hoses
- Damaged compressor mounting
- Heavy contamination around connections
If the compressor uses its own oil supply, check its oil level according to the manufacturer’s procedure.
Do not place your hands near belts, pulleys, fans, or other moving engine components once the engine is running.
Step 3: Check the Air Gauges
Start the engine and verify that the primary and secondary air-pressure gauges respond normally.
Most modern heavy trucks have dual air systems.
Pressure should begin rising as the compressor charges the reservoirs.
If neither gauge rises, do not immediately condemn the compressor. The fault could involve the governor, discharge line, dryer, major system leak, or compressor drive.
Step 4: Lower Pressure Below Compressor Cut-In
If the system is already fully charged, reduce pressure in a controlled manner by applying and releasing the service brake while the truck is secured.
Watch the air gauges.
The compressor should load when pressure reaches the manufacturer’s cut-in setting.
Many CDL references use approximately 100 psi as a typical cut-in point.
Once the compressor cuts in, the gauge needles should begin climbing again.
Step 5: Test Air-Pressure Build-Up Time
This is one of the most useful screening tests.
With the compressor loaded and engine operating at the required RPM, time the pressure increase.
A common U.S. CDL benchmark for a dual air system is:
85 psi to 100 psi within 45 seconds
Manufacturer specifications come first. Vehicles with greater-than-minimum reservoir capacity can have different build-up requirements.
If your truck takes far longer than its specified time, the air charging system needs diagnosis.
Step 6: Verify Governor Cut-Out
Continue allowing the compressor to charge the reservoirs.
Watch the gauge until pressure stops climbing and the compressor unloads.
Many current CDL test procedures place typical governor cut-out around 120–140 psi, or at the level specified by the vehicle manufacturer.
Some systems also produce a noticeable air-dryer purge when cut-out occurs.
Record the actual pressure.
Step 7: Verify Governor Cut-In
With the engine running, safely reduce reservoir pressure again using brake applications.
Watch for the point where the compressor starts charging.
Pressure should begin increasing again at the specified cut-in pressure.
A typical reference is around 100 psi, but different governors and vehicles can use different settings.
If cut-in or cut-out is incorrect, investigate the governor and control circuit before replacing the compressor.
Step 8: Repeat the Build-Up Test if Needed
If the first result is questionable, repeat the test under the same conditions.
Use the same:
- Starting pressure
- Ending pressure
- Engine RPM
- Accessory configuration
Consistent testing makes comparison easier.
Key Takeaway: A basic truck-compressor test checks that pressure rises at the correct rate and that the governor loads and unloads the compressor at the specified pressures.**
What Is a Normal Truck Air-Compressor Build-Up Time?
There is no one time specification for every truck.
Reservoir capacity, engine RPM, compressor displacement, and installed pneumatic equipment all affect charging time.
Common Dual-System Reference
For many dual air-brake systems, CDL guidance uses:
85 to 100 psi within 45 seconds at operating RPM
A slower result deserves investigation.
Older Single Air Systems
Older pre-1975 single air systems have traditionally used a different reference: approximately 50 to 90 psi within three minutes at 600–900 RPM.
This specification is mainly relevant to older equipment.
Large Reservoir Systems May Differ
A truck fitted with larger air reservoirs or extensive pneumatic accessories can take longer to charge.
That does not automatically prove compressor failure.
Use the truck maker’s service specification when it differs from a general CDL reference.
Key Takeaway: The commonly cited dual-system test is 85–100 psi within 45 seconds, but reservoir size and OEM specifications can change the acceptable result.**
How to Test the Truck Air Compressor Governor
A compressor that appears faulty may actually have a governor problem.
The governor controls when the compressor pumps and when it unloads.
Test Cut-Out Pressure
Start the engine and allow air pressure to rise.
Watch the gauges until pressure stops increasing.
Current CDL procedures commonly expect governor cut-out around 120–140 psi, subject to manufacturer specifications.
If pressure keeps climbing beyond the specified range, shut the test down and investigate the control system.
The safety valve is not intended to act as normal pressure control.
Test Cut-In Pressure
After reaching cut-out, reduce pressure with controlled brake applications.
Watch for the compressor to begin charging again.
A typical cut-in point is around 100 psi.
If pressure drops well below the specified cut-in point before charging resumes, the governor or its control circuit may be faulty.
Do Not Adjust the Governor Randomly
Bendix lists different D-2 governor versions with different operating pressure ranges, including ranges such as 100–120, 105–125, 110–130, and others.
That means one universal adjustment value cannot be applied to every truck.
Identify the installed governor and use its service data.
Key Takeaway: Verify cut-in and cut-out against the truck’s specification before blaming the compressor; different governor models are designed for different pressure ranges.**
Test the Air System for Leaks Before Condemning the Compressor
Air leakage can make a healthy compressor run constantly or build pressure too slowly.
Static Leakage Test
With the air system fully charged, shut off the engine and secure the truck.
After releasing the parking brakes as required by the test procedure and allowing the gauges to stabilize, observe pressure loss for one minute.
Common CDL limits are:
- Single vehicle: less than 2 psi per minute
- Combination vehicle: less than 3 psi per minute
Applied-Brake Leakage Test
With the engine off, parking brakes released, and system stabilized, fully apply the service brake.
Common CDL reference limits after stabilization are:
- Single vehicle: no more than 3 psi in one minute
- Combination vehicle: no more than 4 psi in one minute
State testing procedures and vehicle configurations can differ, so use the applicable specification for the truck.
Find External Leaks
Listen for escaping air.
A soap-and-water solution can help locate leaks at accessible fittings and connections if the equipment maker permits that method.
Check likely areas such as:
- Reservoir drain valves
- Air lines
- Fittings
- Brake chambers
- Air dryer
- Governor connections
- Trailer connections
- Accessory air circuits
Repair excessive leakage before evaluating compressor output again.
Key Takeaway: A compressor cannot build or hold pressure normally if the air system is leaking, so leakage testing should come before compressor replacement.**
What to Check if the Truck Builds Air Too Slowly
Slow build-up does not automatically mean worn compressor rings or valves.
Start with simpler external causes.
Inspect the Compressor Discharge Line
The discharge line carries hot compressed air from the compressor toward the air dryer.
Bendix states that this line can develop carbon buildup or pinholes, producing slow or no air-pressure build even when the compressor itself is not the source of the failure.
Inspect for:
- Kinks
- Crushed sections
- Carbon restriction
- Heat damage
- Loose fittings
- Leakage
- Incorrect routing
A discharge-line leak may be difficult to hear because it occurs while the engine is running.
Inspect the Air Dryer
A malfunctioning dryer, purge valve, or associated check valve can lose compressed air.
Listen for air continuously escaping from the dryer when it should not be purging.
The air dryer sits between the compressor and reservoirs and removes moisture and contaminants before they reach the brake system.
Check the Compressor Intake
A severely restricted compressor inlet can reduce the amount of air available to compress.
Inspect:
- Intake hose
- Intake filter
- Connections
- Restrictions
Follow the truck or engine manufacturer’s compressor-intake procedure.
Check the Governor and Unloader Circuit
If the compressor remains unloaded when reservoir pressure is low, the pump may be mechanically capable of producing air but never receive the command to load.
Governor lines, unloaders, and compressor controls need to be checked using the service procedure for the installed system.
Check for High Air Demand
Air suspension, automated transmissions, lift axles, central tire inflation, and other pneumatic equipment can increase air demand.
Bendix notes that high-air-use vehicles can make the compressor operate at a higher duty cycle.
Temporarily diagnosing accessory circuits may require model-specific service information.
Key Takeaway: Before replacing a slow-building compressor, check the discharge line, dryer, intake, governor/unloader controls, system leaks, and abnormal accessory air demand.**
How to Tell if the Truck Air Compressor Itself Is Bad
Once external faults have been ruled out, several findings can point more directly toward the compressor.
It Cannot Meet the OEM Build-Up Specification
If the system has no major leaks, the discharge path is clear, the governor is loading correctly, and the compressor still cannot build pressure within specification, internal compressor wear becomes more likely.
Possible internal faults include:
- Worn piston rings
- Damaged valves
- Cylinder wear
- Head-gasket problems
- Unloader faults
- Damaged internal components
The exact design varies by compressor.
Excessive Oil Reaches the Air System
A small amount of oil in an air system does not automatically condemn the compressor.
Bendix notes that compressor oil passing is influenced by compressor design, inlet conditions, duty cycle, and air demand. High duty cycle caused by leaks can increase oil passing.
Heavy oil accumulation in the reservoirs or discharge circuit deserves diagnosis.
Bendix recommends inspecting the discharge line for heavy carbon fouling or oil when excessive oil is found downstream.
Compressor Makes Abnormal Mechanical Noise
Knocking, grinding, or other new mechanical noise from the compressor area can indicate internal wear or drive damage.
Do not attempt to locate a noise by putting hands or tools near moving engine components.
Compressor Has Coolant or Lubrication Problems
Some truck compressors are cooled by engine coolant and lubricated by engine oil.
Leaks, restricted coolant flow, or lubrication problems can damage the compressor.
Use engine and compressor service information before disconnecting coolant or oil lines.
Key Takeaway: Compressor failure becomes a stronger diagnosis when build-up remains poor after leaks, controls, intake, discharge line, dryer, and abnormal air demand have been ruled out.**
Can You Test a Truck Air Compressor With a Pressure Gauge?
The truck’s primary and secondary reservoir gauges are usually enough for basic operational checks.
More detailed workshop diagnosis may require calibrated external gauges.
Dashboard Gauges Work for Functional Checks
They allow you to measure:
- Build-up rate
- Cut-in pressure
- Cut-out pressure
- Static pressure loss
- Applied-brake pressure loss
If the dashboard gauges disagree strongly or behave erratically, verify gauge accuracy before relying on the readings.
Direct Compressor Output Testing Is More Specialized
Testing compressor output directly can require service tools, specific test ports, and compressor-manufacturer procedures.
Do not disconnect a pressurized discharge line simply to see how much air comes out.
The discharge line can be extremely hot, and compressed-air components can move violently when loosened under pressure.
A technician diagnosing output at the compressor should use the specific Bendix, WABCO, Cummins, Detroit, Volvo, Mack, or other applicable service procedure for that compressor and engine.
Truck Air Compressor Test Results and Likely Causes
| Test Result | Possible Cause |
| No pressure build | Compressor drive, governor/unloader, major leak, blocked discharge line, compressor failure |
| Pressure builds too slowly | Air leak, discharge restriction, dryer fault, weak compressor, restricted intake |
| Builds normally but loses pressure quickly | System leak rather than low compressor output |
| Cut-in occurs too late | Governor/control problem |
| Cut-out pressure too high or low | Governor/control problem |
| Compressor runs nearly constantly | Air leak, high demand, governor issue, low compressor output |
| Excessive oil in tanks | Compressor oil passing, excessive duty cycle, air-dryer/service issue |
| Dryer leaks continuously | Dryer purge/control/check-valve problem |
| Good build-up after leak repair | Compressor likely was not the original problem |
This table provides diagnostic direction rather than a final diagnosis.
Several faults can occur at the same time.
Safety Precautions When Testing a Truck Air Compressor
Air brakes are safety-critical equipment.
Chock the Wheels
Pressure tests may require releasing the parking brakes.
Secure the vehicle before beginning.
Keep Clear of Moving Engine Parts
Truck compressors are mounted close to belts, gears, fans, and hot engine components.
Do not reach into the engine compartment while components are moving.
Treat Air Lines as Pressurized
Never loosen a fitting or line until the applicable circuit has been safely depressurized.
Compressed air stores energy.
Watch Hot Components
Compressor cylinder heads and discharge lines can reach high temperatures.
Allow the system to cool before physical inspection.
Do Not Drive With Slow Air Build-Up
FMCSA CDL guidance states that a vehicle that cannot build air pressure fast enough should not be driven until the problem is repaired because pressure can fall too low during operation.
Commercial brake inspection and repair may also be subject to technician qualification requirements. FMCSA requires personnel performing certain CMV brake inspections and maintenance to meet applicable training or experience qualifications.
Conclusion
For how to test air compressor on truck, begin by securing the vehicle and checking how quickly the air-brake system builds pressure. A common dual-system reference is 85 to 100 psi within 45 seconds at operating RPM, but the truck manufacturer’s specification should be used when available.
Next, verify governor operation. The compressor should load near the specified cut-in pressure and unload at cut-out. Typical CDL references are around 100 psi cut-in and roughly 120–140 psi cut-out, but different trucks and governors use different settings.
Do not replace the compressor solely because the truck builds pressure slowly. Air leaks, a restricted discharge line, dryer faults, governor or unloader problems, restricted intake air, and excessive accessory demand can produce the same complaint.
If pressure build remains below specification after those causes are eliminated, the compressor itself deserves closer mechanical testing or professional service.
FAQs About Testing a Truck Air Compressor
How Do You Know if a Truck Air Compressor Is Bad?
A weak compressor may build air too slowly, fail to reach normal pressure, run nearly continuously, or pass excessive oil.
Confirm system leaks, the governor, air dryer, intake, and discharge line are working correctly before diagnosing internal compressor failure.
How Fast Should a Truck Build Air Pressure?
A common CDL reference for dual air systems is 85 to 100 psi within 45 seconds at operating RPM.
Trucks with different reservoir capacity or air-system designs may have a different manufacturer specification.
What PSI Should a Truck Air Compressor Cut In?
About 100 psi is a common reference point.
The exact pressure depends on the governor and vehicle specification. Some systems use a different pressure range.
What PSI Should a Truck Air Compressor Cut Out?
Many current CDL procedures use approximately 120–140 psi, or the manufacturer’s specified cut-out pressure.
Once cut-out occurs, system pressure should stop rising under normal conditions.
Why Is My Truck Air Compressor Slow to Build Pressure?
Possible causes include air leaks, a restricted compressor intake, carbon buildup or leakage in the discharge line, air-dryer faults, governor or unloader problems, high accessory air demand, or internal compressor wear.
Bendix specifically recommends inspecting the compressor-to-dryer discharge line before assuming a slow-build problem requires compressor replacement.
Can an Air Leak Make the Compressor Look Bad?
Yes.
A major leak can release air almost as fast as the compressor produces it. The compressor may run continuously and pressure may rise very slowly even though the compressor itself is functional.
Why Does My Truck Compressor Keep Running?
Frequent or continuous compressor loading can result from air leaks, high pneumatic demand, incorrect governor operation, or insufficient compressor output.
Bendix notes that increased air demand and multiple leaks raise compressor duty cycle.
Can I Drive a Truck if the Air Compressor Builds Pressure Slowly?
Do not drive if the air system cannot meet its required pressure build-up rate or maintain safe operating pressure.
FMCSA guidance warns that insufficient build-up can allow air pressure to fall too low during driving and states that the problem should be repaired before the vehicle is driven.