
How to Use a Biscuit Joiner : Step by Step Guide
Here is how to use a biscuit joiner: mark matching slot locations on two boards, choose the right biscuit size, and set the tool’s cutting depth and fence height. Clamp each board, cut a slot at every mark, then test the fit. Add wood glue, insert the biscuits, and clamp the joint until the glue cures.
A biscuit joiner, also called a plate joiner, cuts shallow, oval slots in wood. Thin, oval wood biscuits fit into those slots and help hold parts in line while glue dries. It is a handy tool for joining boards into a wide tabletop or lining up the parts of a simple cabinet.
The blade is hidden inside the tool until you push forward to make a cut. That makes the process look easy, but a fence set a little too high can leave one board standing above the other. A test cut catches that problem before it reaches your project.
This guide is for first-time users working with common shop boards. You’ll learn what to set, how to make matching cuts, how to handle glue-up, and what to do when a joint doesn’t fit.
Quick Answer
- Lay out both boards and mark matching biscuit centers.
- Set biscuit depth, fence angle, and fence height.
- Clamp the wood and plunge-cut each matching slot.
- Dry-fit, glue the edges and slots, insert biscuits, and clamp.
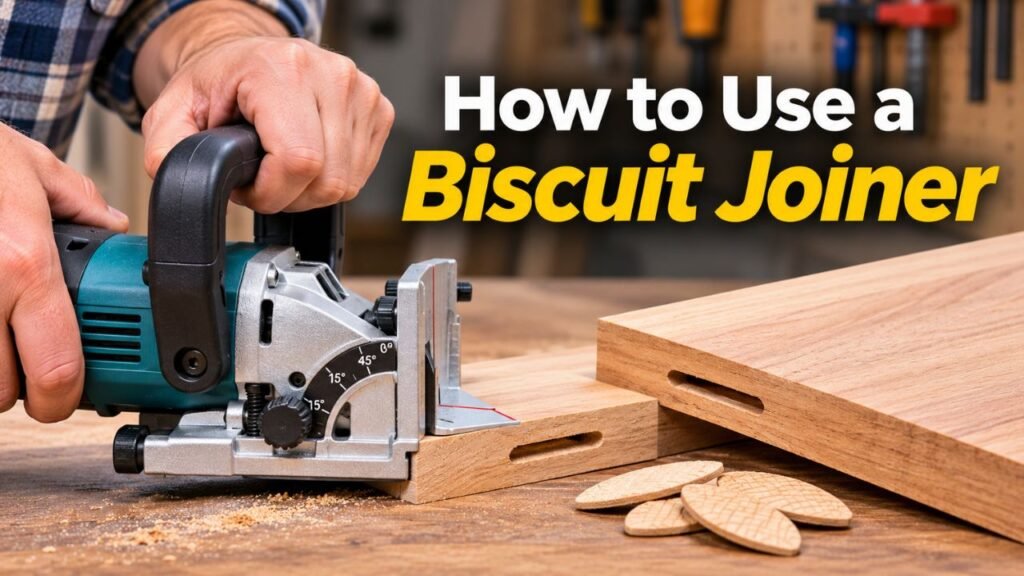
What Does a Biscuit Joiner Actually Do?
A biscuit joiner cuts a shallow, curved slot in each piece of wood so an oval wooden biscuit can sit between them. The biscuit helps keep the parts lined up during assembly, while wood glue bonds the mating surfaces and the biscuit to the slot walls.
The blade moves forward in a plunge cut, then retracts inside its housing. The fence rests against the board, the depth stop limits the cut, and a centerline mark helps position each slot.
For a simple edge-to-edge panel, the biggest benefit is keeping the board faces flush while you clamp. Biscuits are useful alignment aids, but they don’t replace proper structural joints or fasteners where a project needs them.
What Should You Have Ready Before You Start?
Get two straight, dry boards, matching wood biscuits, wood glue, clamps, a pencil, and scrap wood for practice. Check that the joiner has a sound blade and working guard, and set up a firm bench before you plug it in or install a charged battery.
Keep these items within reach:
- The joiner, its manual, and dust collection.
- Wood biscuits in the size you plan to use.
- A square, tape measure, and pencil.
- Work clamps, glue-up clamps, and protective pads.
- Suitable wood glue and a damp rag.
- Safety glasses and suitable hearing and dust protection.
Check the edges first. Biscuits won’t close bowed edges. If the wood doesn’t meet cleanly without force, straighten the edges or choose better stock before cutting slots.
Also check for hidden nails, screws, and staples in used wood. A biscuit joiner is meant to cut wood, not metal.
Which Biscuit Size and Depth Setting Should You Use?
Choose a biscuit that fits inside the boards without breaking through a face or end. The common sizes are #0, #10, and #20; these numbers identify biscuit sizes, not inches, and most standard joiners have matching depth stops marked on the tool.
| Biscuit size | Typical choice | What to check |
|---|---|---|
| #0 | Small frames and narrow parts | Enough wood remains around the slot. |
| #10 | Medium-width pieces and some thinner stock | The slot stays clear of faces and ends. |
| #20 | Wider boards, often including 3/4-inch panel stock | Both pieces have room for the full slot. |
Bigger isn’t always better. For a small frame part, a #20 slot may come out through the edge. A #0 may fit better.
Turn the depth knob to the number that matches the biscuit, with the power disconnected. Settings vary by model. For reference, Makita’s plate joiner instructions describe depth settings and making trial cuts.
What Safety Rules Matter Before Cutting?
Secure the work to a stable bench, keep both hands on the tool’s intended grips, and never put fingers in line with the blade’s cutting path. Wear eye and hearing protection, control wood dust, and disconnect the power before changing settings, clearing a jam, or servicing the blade.
Safety Note: Don’t wear gloves while operating a biscuit joiner. A rotating blade can catch loose material. Tie back long hair, remove hanging jewelry, and keep the power cord away from the slot area.
Wear ANSI Z87.1-rated eye protection and use a dust bag or extractor. Wood dust can irritate your eyes and airways; use suitable respiratory protection. Ask a medical professional about personal breathing or hearing concerns.
Inspect the cord or battery, switch, blade guard, and blade before starting. The OSHA power tool safety guidance also advises disconnecting tools before servicing and keeping cords away from sharp edges. Never operate a damaged tool.
How to Use a Biscuit Joiner Step by Step
Start with a practice edge-to-edge joint between two flat boards. This setup teaches you the same marking, fence, plunge, and glue-up skills used for many other joints, without the extra angle settings that come with miters or cabinet corners on your first attempt.
Step 01: Arrange the Boards and Choose a Reference Face
Place both boards on the bench in the position you want for the finished panel. Arrange the grain, then check for gaps along the meeting edges.
Pick the surface that should end up smooth and level. Mark that as the reference face, meaning the face you’ll measure from every time. Keep that face oriented the same way for both pieces. This helps prevent an uneven seam.
Step 02: Mark Matching Biscuit Locations
Push the board edges together and draw one short pencil line across each joint location. Those shared lines give you matching centers.
As a starting layout, keep slot centers about 2 inches from board ends, with roughly 4 to 6 inches between slots, provided your joiner’s instructions and the part dimensions allow it. Check the full slot length so the blade doesn’t break through an end.
Step 03: Select the Biscuit and Set Cutting Depth
Unplug the cord or remove the battery. Pick a biscuit size that fits the thickness and width of both boards, then rotate the depth selector to the matching #0, #10, or #20 stop.
The depth stop limits how far the blade travels into the wood. An over-deep slot can leave a loose biscuit or weaken thin wood. If your machine has fine depth adjustment, use the manual and test cuts before changing it.
Step 04: Set the Fence Angle and Height
For this edge-to-edge practice joint, set the fence square to the cutting direction, using the model’s setting for a straight slot. Tighten the angle lock so the fence can’t move during a plunge.
Adjust fence height so the slot sits near the middle of the board thickness. Centering works for equal-thickness boards. Otherwise, measure from the same reference face on both boards. This keeps the visible faces level.
Step 05: Clamp the First Board and Connect Dust Collection
Clamp the first board firmly to the bench with its marked edge easy to reach. Check that the clamp isn’t in the tool’s path and that the board can’t rock or slide. Never cut wood held in your hand.
Connect the dust bag or a compatible extractor. Make sure its hose, along with the power cord if fitted, can move without tugging the tool sideways. Clear offcuts from the floor.
Step 06: Make a Test Slot in Scrap Wood
Before cutting the project, use two scraps with the same thickness as your boards. Mark a shared centerline, clamp each scrap, and plunge-cut matching slots.
Switch off, wait for the blade to stop, and disconnect power before testing a biscuit in both slots. The biscuit should fit without hammering and leave the faces level. If not, correct the setup and make another test cut.
Step 07: Cut the Slots in the First Board
Set the joiner’s fence firmly against the chosen reference face and align the centerline indicator with the first pencil mark. Keep the tool flat so it won’t tilt sideways.
Start the motor and let it reach operating speed. Push forward smoothly until the depth stop is reached, then allow the blade to retract fully before moving to the next mark. Don’t twist the joiner. Repeat using the same setting and reference face.
Step 08: Cut the Matching Slots in the Second Board
Switch off and wait for the blade to stop before repositioning the work. Clamp the second board securely, then line the joiner up with the matching pencil marks you made across the two edges.
Use the same reference face and fence height as before. Reposition the board for solid fence support without switching reference faces. Plunge and retract at each mark. Disconnect power before inspecting the slots.
Step 09: Dry-Fit the Boards Before Adding Glue
Insert the biscuits into the slots without glue, then bring the boards together. Check that the top faces are level, the ends line up, and the joint closes with firm hand pressure or light clamp pressure.
The biscuit shouldn’t need pounding. If a slot is clogged with chips, clear it with the tool disconnected. If the joint won’t close, check depth, marks, and edge straightness.
Step 10: Apply Glue, Assemble, and Clamp
Take the joint apart. Spread an even film of wood glue along the mating edges and inside the slots, then coat the biscuits lightly as the glue maker directs. Fit the biscuits into one board and bring the second board over them while the glue is still workable.
Clamp gradually, checking the faces with a straightedge. Close the seam without bowing the boards. Wipe away fresh squeeze-out, then leave the assembly clamped for the time stated on the glue label. Full cure may take longer than the initial clamp time.
Pro Tip: If a wide panel starts to shift during clamping, place flat, padded boards across its top and bottom as temporary alignment aids. They help keep faces level.
How Do You Use the Same Tool for Corners and Miter Joints?
The cutting method stays the same, but the reference surface changes for corner, T-shaped, and miter joints. A corner uses a board edge, while a T-joint may cut into a broad face, so support each part as your tool’s manual shows and test the setup on scrap.
- Right-angle corner joint: Mark matching biscuit centers on a cabinet side and top. Clamp each piece as the manual shows and avoid cutting through the outside face.
- T-joint: Lay the upright divider across the shelf and mark its position. A slot in the shelf face may use the tool’s base as a guide. Check the offset on scrap.
- Miter joint: A miter joins two angled edges, often cut at 45 degrees for a 90-degree corner. Use the appropriate miter fence setting and test for blade breakthrough near the pointed edges. Clamp during glue-up.
Follow your model’s manual for the correct bearing surface.
What Common Mistakes Cause Bad Biscuit Joints?
Most poor biscuit joints come from mismatched reference faces, loose work, or slots cut at the wrong height or depth. Check these items before reaching for more glue or stronger clamps, because clamping pressure cannot correct a slot that was cut in the wrong place.
| Problem | Likely cause | Practical fix |
|---|---|---|
| One board sits higher | Fence measured from opposite faces | Recheck both reference faces; reset and test on scrap. |
| Biscuit won’t go in | Wrong size, chips in slot, or shallow cut | Check size and depth; clean the slot with power off. |
| Ends don’t line up | Pencil marks missed or boards shifted | Mark boards together and use firm clamps. |
| Joint has gaps | Edges are bowed or slot is too shallow | Straighten mating edges and verify slot depth. |
| Slot shows at an edge | Biscuit too large or center too close to an end | Use a smaller biscuit and move the layout inward. |
Common Mistake: Don’t use the joiner to force warped lumber straight. Biscuits help position wood during assembly; they won’t fix twisted stock or a poorly prepared glue edge. Start with straight edges.
Frequently Asked Questions
Do biscuits need glue to work?
Yes, for a permanent wood joint, biscuits are normally installed with wood glue. Glue bonds the biscuit to the slot walls and joins the mating wood surfaces. A dry biscuit helps you check alignment, but it isn’t a finished connection. Use glue suited to your wood and follow its clamp and cure times.
Can I use a biscuit joiner on plywood or MDF?
Yes, if the material is thick enough for the selected slot and the tool is suitable for it. Plywood layers can chip, and MDF makes fine dust, so test on offcuts and use dust collection. Avoid biscuits near thin edges where a slot could break through the face or weaken the material.
How deep should a biscuit joiner cut?
Set the slot depth to match the biscuit size, usually with the tool’s numbered #0, #10, or #20 stop. There isn’t one correct depth for every project. The biscuit must sit far enough into both parts for the joint to close, without the slot breaking through the wood. Check a test cut first.
Can a biscuit joiner make a joint strong without screws?
A well-made, properly glued edge joint can work without screws in suitable furniture or panel projects. The glue line between close-fitting long-grain edges carries much of the load. Biscuits mainly help with alignment, so don’t treat them as a substitute for structural fasteners or engineered joints in load-bearing work.
Can you use a biscuit joiner on a 2×4?
You can cut biscuit slots into a clean, dry 2×4 if the tool, biscuit size, and joint shape allow enough wood around each slot. Construction lumber is often wet or twisted, so prepare the mating faces first. For framing or other structural connections, follow the required building details instead of relying on biscuits.
Make Your First Biscuit Joint on Scrap Before the Real Project
Learning how to use a biscuit joiner is mostly about repeatable setup, not pushing the tool harder. Mark both boards while they’re together, choose a biscuit that fits the material, and set the depth and fence before you start the motor. Clamp each piece securely and cut with a smooth forward push.
The biggest accuracy habit is using the same reference face for both boards. It keeps the slots at matching heights so you don’t discover an uneven panel during glue-up. A quick dry-fit also shows you whether the biscuit seats correctly and the edges close without a fight.
For your next step, join two short scrap boards with two biscuits. Practice marking, cutting, checking, and clamping without rushing. Once that sample sits flat and cures, try a small shelf or panel. Take your time at the setup stage, and the glue-up becomes much easier.