How to Sharpen a Knife With a Belt Sander Safely
Sharpening a knife on a belt sander works fast: use a fine abrasive belt, match the existing bevel angle, make light passes from heel to tip, and cool the blade frequently. The main goal is to form a clean apex and small burr without grinding away excess steel or overheating the thin cutting edge.
A belt sander removes metal much faster than a sharpening stone. That speed can turn a dull knife sharp quickly, but too much pressure, a coarse belt, or a pause near the tip can remove more steel than intended. Heat is another concern because the narrow edge has very little mass and heats faster than the thicker part of the blade.
Good technique produces an even bevel with less unnecessary metal removal. A steady angle, fresh abrasive, short contact time, and controlled belt speed also reduce the chance of rounding the tip or leaving a heavy wire edge.
For U.S. workplace safety, OSHA standard 29 CFR 1910.243(a)(3) requires portable belt sanding machines to have guards at belt-to-pulley nip points and protection against accidental contact with the unused belt run. That rule applies to covered workplaces, but the hazards it addresses are useful reminders for any powered sharpening setup: exposed moving belts and pulleys can catch fingers, clothing, or other material.
If you are researching how to sharpen a knife with a belt sander, I recommend starting much finer than many general metal-grinding instructions suggest. Work Sharp, for example, supplies P220 abrasive for sharpening and reserves P80 belts for coarse shaping, followed by a much finer finishing belt. That progression reflects an important distinction between creating a new bevel and touching up an existing one.
What stood out to me during the research was the heat issue at the very edge. Metallurgical testing reviewed by Knife Steel Nerds found evidence that powered grinding can reduce hardness at an overheated edge, even though belt sharpening itself is not automatically damaging. Pressure, abrasive condition, speed, and contact time all affect the result.
The process below covers belt selection, angle control, burr formation, cooling, tip technique, finishing, and the mistakes most likely to damage a knife. The aim is a sharp, even edge while removing only the steel that needs to come off.
What You Need Before Sharpening
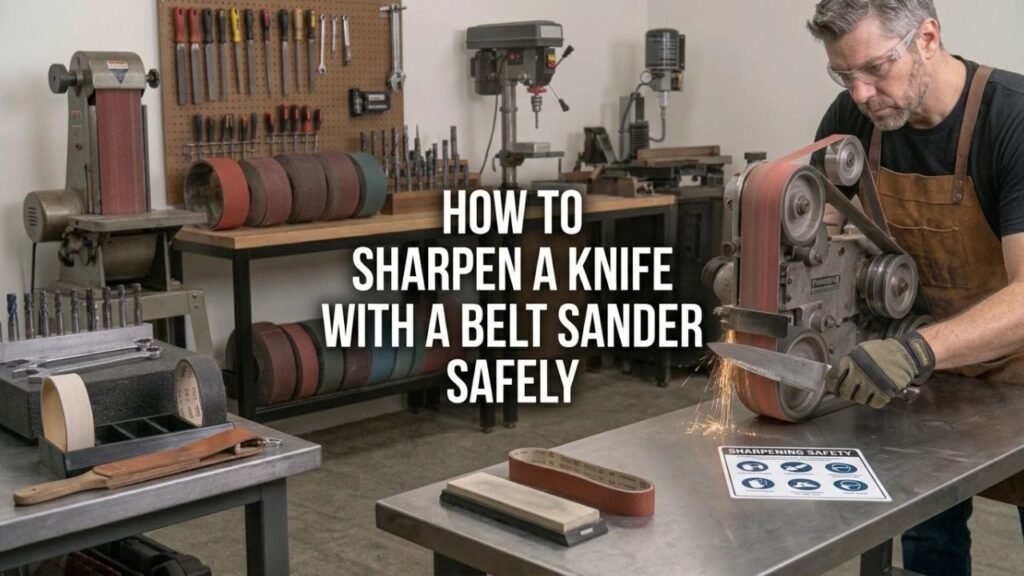
A basic setup does not require many items, but the abrasive belt matters more than having a large machine.
You will need:
- A stationary belt sander, belt grinder, or purpose-built belt knife sharpener
- Suitable abrasive belts
- A cup or container of clean water for cooling
- Safety glasses
- A permanent marker
- A clean, stable work area
- A leather strop or fine finishing belt if available
If you own a handheld woodworking belt sander, do not clamp it upside down or convert it into a stationary sharpener unless its manufacturer specifically permits that setup. A machine designed to stay fixed gives you far better control of both hands and the knife.
Belt Grit Guide
| Knife Condition | Suggested Starting Grit | Purpose |
| Small chips or major bevel repair | 80–120 | Rapid metal removal |
| Very dull knife | 180–220 | Establish the edge |
| Normal resharpening | 220–400 | Restore the apex |
| Edge refinement | 600–1,000+ | Reduce coarse scratches |
| Final deburring | Fine abrasive or leather | Remove the remaining burr |
Treat these grit numbers as practical ranges rather than exact equivalents. Abrasive grading systems and belt materials differ between manufacturers.
I would not start an ordinary dull kitchen knife at 40 or 60 grit. Such coarse belts cut rapidly, and a few seconds of poor angle control can change the bevel more than intended.
Safety Tip: Remove sawdust, oily rags, paper, and other combustible material before grinding steel. Metal sharpening creates sparks, so a woodworking station should be cleaned before it becomes a metal-grinding station. OSHA guidance also stresses guarding and cleanliness around sanding machinery.
How to Sharpen a Knife With a Belt Sander Step by Step
1. Set Up the Sander and Check Belt Direction
Place a stationary machine on a solid bench and make sure it cannot move during use. Check belt tracking before bringing the knife near the abrasive.
Inspect the belt for tears, badly frayed edges, loose seams, or heavy loading. Replace a damaged belt rather than trying to finish one more knife with it.
If the machine has variable speed, use a low setting for sharpening. Slower belt movement gives a beginner more time to control the angle and reduces the rate at which heat builds at the edge.
Follow the machine maker’s instructions for blade orientation. With a knife-sharpening setup, avoid presenting the cutting edge in a position where the moving belt can catch and pull the blade unexpectedly.
2. Choose the Least Aggressive Grit That Will Do the Job
For a normally dull knife with an intact edge, start around 220 to 400 grit. The belt should remove enough steel to restore the apex without rapidly changing the entire bevel.
Move down to roughly 80 to 120 grit only for work such as removing a noticeable chip, correcting severe edge damage, or changing the bevel angle.
A fresh belt often produces less friction than a worn, glazed belt. Pressing harder to make a worn belt cut is exactly the habit that raises heat and damages angle control.
3. Mark the Existing Bevel and Match Its Angle
Color the edge bevel with a permanent marker. Make one extremely light pass on the stopped or slow-running setup, then inspect where the ink disappears.
If the abrasive removes marker mainly at the very edge, your angle is too steep. If it removes marker near the shoulder of the bevel but leaves ink at the cutting edge, the angle is too shallow.
When the belt removes marker across most of the existing bevel, your angle is close.
This method is often more useful than choosing a generic degree setting because knives do not all leave the factory with the same edge geometry.
Many guided powered sharpeners use angles around 20° or 25° per side for common knife and tool applications. Work Sharp’s original Knife & Tool Sharpener, for example, uses 20° and 25° guides.
For a knife with a sound factory bevel, my preference is to match that bevel first rather than change it without a reason.
4. Make a Light Pass From Heel to Tip
Place the heel of the edge against the abrasive at the chosen angle. Use only enough pressure to maintain contact.
Draw the blade steadily across the belt toward the tip. Keep the knife moving rather than pausing on one section.
As the curved belly reaches the belt, raise the handle slightly so the edge remains in contact at the same approximate angle. The movement should follow the shape of the blade rather than dragging the tip straight across.
Do not pull the tip completely past the belt under pressure. That can round the point quickly. Ease pressure as the tip reaches the middle or edge of the abrasive zone, then lift the blade away.
5. Cool the Blade and Work Toward a Small Burr
After a short pass, check the blade temperature and cool it frequently. A cup of water beside the machine makes this simple for common kitchen and utility knives.
Do not wait for obvious blue discoloration before thinking about heat. The apex is extremely thin, so its local temperature may rise faster than the rest of the blade feels in your hand.
Repeat light passes until a small burr forms along the opposite side of the cutting edge.
A burr is a thin lip of displaced metal created after one bevel reaches the apex. You do not need a large burr. A heavy wire edge means extra steel has been removed.
Check for it carefully. A cotton swab drawn across the bevel toward the edge will often catch on a burr. If using a fingertip, move from the spine toward the cutting edge and never slide a finger lengthwise along the sharpened edge.
6. Sharpen the Second Side and Refine the Edge
Turn the knife over and repeat the same movement on the second bevel.
Try to use similar pressure, angle, and pass count on each side. Your goal is an edge centered between the two bevels rather than one bevel being ground much farther than the other.
Once the second side reaches the apex, begin alternating sides after each pass. Reduce pressure as the edge becomes sharper.
Switch to a finer abrasive if you want a smoother edge. Moving from roughly 220–400 grit into 600 grit or finer reduces the deep scratches left by the earlier belt.
You do not need a mirror-polished bevel for a knife to cut well. A clean apex and complete burr removal matter more than appearance.
7. Remove the Burr and Test the Edge
Finish with very light alternating passes on the finest belt available, or use a leather strop with suitable compound.
Stropping removes the thin remaining burr and cleans up the apex. Use light pressure. Pressing a knife deeply into a flexible leather belt can round the newly sharpened edge.
After stopping and unplugging the machine, wipe the knife clean.
Test the edge on paper, cardboard, or the food the knife normally cuts. A properly sharpened edge should bite into paper without snagging repeatedly or sliding before it starts the cut.
Do not test sharpness by running a thumb along the cutting edge.
Key Takeaway: Start with a fine belt, match the existing bevel, use light moving passes, cool the blade often, and stop grinding once both bevels reach a clean apex.
What Angle Should You Use on a Belt Sander?
The safest starting point is usually the knife’s existing bevel angle.
Coloring the bevel with a marker shows that angle without relying on a guess. It also accounts for blades that have previously been sharpened at a different angle from their original factory geometry.
Kitchen knives often use relatively acute edges because slicing is the main job. Outdoor and heavy-use knives commonly use a more obtuse edge for greater support behind the apex.
A general reference range looks like this:
| Knife Type | Common Per-Side Range |
| Fine kitchen knife | About 15°–20° |
| General kitchen knife | About 17°–20° |
| Pocket or EDC knife | About 18°–22° |
| Hard-use outdoor knife | About 20°–25° |
These are reference ranges, not rules for every blade. Steel, blade thickness, factory geometry, and intended cutting task can change the preferred angle.
If a knife already cuts well and simply became dull, I would preserve its current bevel instead of reprofiling it.
How to Prevent the Belt Sander From Overheating the Knife
Heat control is the part of belt sharpening that deserves the most attention.
Abrasive friction creates heat right where the edge is thinnest. Excessive temperature can alter heat-treated steel and leave the apex softer than intended. Research into belt-ground edges has documented hardness changes associated with overheating during powered sharpening.
Use Light Pressure and Short Contact
Do not push the blade into the belt to speed up sharpening. Let the abrasive cut.
Pressure increases friction and makes angle control harder. The last few finishing passes should be lighter than the first ones.
Keep the Blade Moving
A stationary contact point heats quickly.
Move from heel to tip at a steady rate and lift the blade away after the pass. Spend extra care near the tip because there is less steel there to absorb heat.
Cool Before the Blade Gets Hot
Dip the blade frequently rather than waiting until it is uncomfortable to touch.
Visible straw, brown, purple, or blue discoloration near the edge is a warning that the steel has become very hot. Avoid using color as your normal temperature gauge; edge damage can occur before a dramatic color change becomes obvious.
Use Fresh Abrasives
A sharp abrasive cuts steel instead of rubbing against it.
A glazed belt encourages harder pressure and longer contact, both of which add heat. Replace a belt that has stopped cutting normally.
Key Takeaway: Heat control comes from low pressure, short passes, constant movement, fresh abrasive, reduced speed when available, and frequent cooling.
Flat Platen or Slack Belt: Which Is Better?
A flat platen supports the abrasive directly behind the knife. This produces a flatter bevel and gives beginners a firm reference surface.
A slack belt uses an unsupported section of belt. The abrasive flexes around the bevel and naturally produces a slightly convex edge.
Convex edges can work very well, but belt flex adds another variable to the sharpening process. Pressing too hard into a slack belt can round the apex instead of refining it.
For someone sharpening a knife with a belt sander for the first time, I prefer a controlled platen or an angle-guided sharpening attachment. Once angle control becomes consistent, a slack belt becomes easier to use without changing the edge accidentally.
Common Belt-Sander Knife Sharpening Mistakes
Most poor results trace back to a small group of errors.
Starting too coarse: An 80-grit belt is useful for damage repair, but it is aggressive for routine sharpening. Starting near 220–400 grit gives far more control on an intact edge.
Pressing hard: Extra pressure generates heat, removes more metal, and makes your hand position less steady.
Staying in one spot: A pause can create an uneven bevel and a localized hot area.
Grinding the tip off the belt: Pulling the tip past the abrasive under pressure can round it. Reduce pressure and lift away as the tip reaches the end of the pass.
Creating an oversized burr: Once a small burr exists along the edge, continued coarse grinding mainly wastes steel.
Ignoring belt wear: A dull abrasive tends to rub rather than cut cleanly.
Changing angles between passes: Rocking the spine up and down creates a wide, rounded bevel and makes it difficult to bring both sides to a clean apex.
Skipping deburring: A knife may feel sharp immediately after grinding but lose that feeling quickly if a weak wire burr remains attached.
Sharpening around wood dust: Steel grinding can throw sparks. Clean woodworking dust and combustible debris from the machine and surrounding bench first.
When a Belt Sander Is the Wrong Sharpening Method
A belt sander is fast, but speed is not always an advantage.
Use a stone, guided manual sharpener, or professional sharpening service if the knife is expensive and you have no powered-sharpening practice. A belt gives very little time to correct a bad movement before steel is gone.
Manual methods also make sense for extremely thin Japanese kitchen knives, unusual asymmetric bevels, single-bevel knives, or blades with manufacturer-specific edge geometry that you do not want to alter.
A badly chipped blade, broken tip, warped edge, or knife that has already been heavily ground may need more than routine sharpening.
Practice on an inexpensive knife first if you are new to belt sharpening. The goal is not speed. It is controlling the angle, pressure, heat, and amount of steel removed.
Conclusion
The safest approach to how to sharpen a knife with a belt sander is to treat the machine as a precision sharpening tool rather than a fast metal-removal tool. Start with a fine enough belt, preserve the existing bevel angle, keep every pass light and moving, and cool the blade frequently.
For routine sharpening, a belt around 220–400 grit is a sensible starting range, followed by finer abrasive and careful deburring. Coarse belts belong mainly in repair or reprofiling work. A marker on the bevel gives you a simple way to check angle before removing much steel.
Pay the most attention to pressure, heat, and the knife tip. I would rather make several light, controlled passes than try to create the edge in one aggressive pass. Stop once both bevels reach the apex and the burr has been removed.
FAQs About Sharpening a Knife With a Belt Sander
What grit belt is best for sharpening a knife?
For an intact but dull knife, 220 to 400 grit is a practical starting range. Move to 600 grit or finer to refine the scratch pattern and edge.
Use roughly 80–120 grit only when removing chips, correcting major damage, or changing the bevel. A coarse belt removes steel rapidly and gives little room for angle errors.
Can a belt sander ruin a knife?
Yes. Excessive pressure, prolonged contact, poor angle control, or excessive heat can remove too much steel, round the tip, change the bevel, or overheat the cutting edge.
The belt itself is not automatically harmful. Controlled speed, fresh abrasive, short passes, frequent cooling, and light pressure greatly reduce these risks.
Should I cool a knife in water while belt sharpening?
For ordinary steel kitchen and utility knives, frequent water cooling is a common way to limit heat buildup during dry belt sharpening. Dip the blade before it becomes noticeably hot rather than waiting for discoloration.
The tip and apex need the most attention because their small mass lets them heat very quickly.
What angle should I hold a knife against a belt sander?
Match the existing bevel whenever possible. A permanent marker placed across the bevel makes the contact area easy to see after a light pass.
Many knives fall somewhere around 15° to 25° per side, with thinner slicing knives usually toward the lower end and hard-use blades toward the higher end. Factory specifications should take priority when available.
Can I sharpen kitchen knives on a belt sander?
Yes, kitchen knives can be sharpened on a belt sander, but their thin edges make heat and metal removal concerns more pronounced.
Use a fine belt, low speed when available, very light pressure, and frequent cooling. For a thin or expensive kitchen knife, a guided sharpener or sharpening stones give a beginner more time to correct angle errors.
How do I keep from rounding the knife tip?
Keep following the curve of the blade as you approach the tip, reduce pressure, and lift the knife away before the tip is pulled completely past the abrasive under load.
Do not pause at the tip. The small amount of steel there disappears quickly, so one careless pass can change the point noticeably.
Is a belt sander better than a sharpening stone?
A belt sander is much faster for restoring damaged or very dull edges, while a sharpening stone removes metal more slowly and gives the user more time to control the bevel.
A belt system suits fast sharpening once the technique is consistent. Stones are often a better starting method for expensive knives or anyone who wants maximum control over how much steel is removed.