Can You Use a Belt Sander on Metal? Safe Methods and Best Belts
Yes. A belt sander can remove rust, paint, weld marks, burrs, and surface imperfections from steel, stainless steel, aluminum, and other metals when the tool and abrasive belt are suited to the job. Use a metal-rated belt, control heat, secure the workpiece, and keep sparks away from wood dust and flammable material.
A handheld belt sander can remove metal quickly because a large abrasive area moves across the surface at high speed. That makes it useful for flattening edges, cleaning rough steel, smoothing welds, and preparing metal before refinishing.
The abrasive matters as much as the tool. 3M sells aluminum-oxide, zirconia, and ceramic abrasive belts specifically for metal deburring, grinding, blending, and finishing. Some of its cloth belts are rated for mild steel, carbon steel, stainless steel, aluminum, brass, and bronze.
Fire control deserves special attention. Metal sanding can create sparks and hot particles. Several belt-sander manuals warn users not to attach a normal dust bag while sanding metal because sparks can ignite material inside it. DEWALT’s DCW220 guidance also lists steel sanding with an 80-grit belt and warns against using the dust bag or vacuum where sparks could ignite flammable particles.
So, can you use a belt sander on metal safely? Yes, if the sander’s manual permits the material, the abrasive is made for metal, and you control sparks, heat, dust, and workpiece movement.
The sections below cover belt types, grit selection, steel and aluminum sanding, rust and paint removal, technique, fire risks, and situations where an angle grinder or dedicated belt grinder may be a better tool.
Can You Use a Belt Sander on Metal?
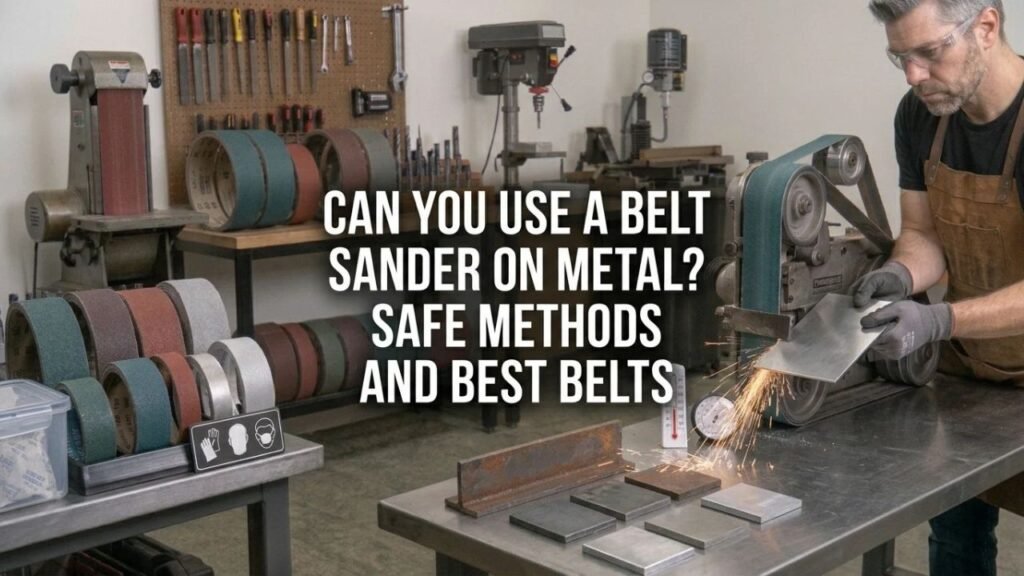
Yes. Belt sanding is a standard metalworking process.
3M describes abrasive belts for portable belt grinding, deburring, weld removal, surface preparation, and finishing on metal. Its 384F aluminum-oxide belt, for example, is intended for metalworking and can be used on portable belt-grinding equipment.
Jobs a Belt Sander Can Handle
A belt sander can work well for:
- Removing rust
- Stripping old paint
- Smoothing rough-cut edges
- Removing light weld buildup
- Flattening metal surfaces
- Deburring sharp edges
- Removing mill scale
- Cleaning oxidation
- Preparing metal for primer
- Creating a directional finish
- Blending scratches
The amount of material removed depends heavily on belt grit, abrasive type, belt speed, and pressure.
Handheld Wood Sanders Can Work on Metal
Many handheld belt sanders sold mainly for woodworking can also sand metal.
The tool manual should still be checked before use.
DEWALT’s DCW220 instructions list steel as a sanding application and recommend an 80-grit belt for that material.
A wood-oriented belt sander does not become a heavy metal grinder simply because a metal-rated belt fits it. Long sessions of aggressive grinding may place more heat and load on the tool than its intended work cycle supports.
Dedicated Metal Belt Grinders Are Better for Heavy Work
A metal belt grinder is built around jobs such as:
- Weld grinding
- Knife making
- Heavy stock removal
- Fabrication
- Edge shaping
- Continuous deburring
These machines commonly have stronger frames, metalworking platens, contact wheels, greater abrasive choices, and designs built around spark-producing work.
A portable belt sander still makes sense for occasional metal jobs.
Key Takeaway: A belt sander can sand metal, including steel and aluminum, but metal-rated abrasives and the tool maker’s instructions should guide the setup.
What Sanding Belt Should You Use on Metal?
Use a belt whose abrasive grain, backing, and bond are rated for the metal and amount of material you plan to remove.
Aluminum Oxide
Aluminum oxide is a common all-purpose abrasive for metal.
3M’s 384F uses aluminum oxide on a cloth backing and is listed for metal deburring and general metalworking on materials such as mild steel, carbon steel, aluminum, bronze, and brass.
It is a practical option for:
- Rust removal
- Paint removal
- Surface cleaning
- Light shaping
- General finishing
Zirconia Alumina
Zirconia belts are suited to more aggressive metal removal.
3M’s 577F uses alumina zirconia and is recommended for aluminum, mild steel, stainless steel, and other alloys. The heavy cloth backing also suits higher-pressure edge and stock-removal work.
Zirconia makes sense for:
- Weld blending
- Heavier rust
- Shaping steel
- Edge work
- Faster material removal
Ceramic Abrasive
Ceramic abrasive belts are aimed at demanding grinding and stock removal.
3M’s ceramic/aluminum-oxide belts are used for operations such as grinding, deburring, surface preparation, and stainless-steel finishing.
They can cut aggressively, so good control matters on thin material.
Cloth Backing Is Useful for Metal
Metal sanding places more stress and heat on the belt than many light wood-finishing jobs.
A durable cloth-backed belt is a good choice for aggressive metal work.
3M uses polyester or other cloth backing on many of its metalworking belts because the backing can withstand substantial heat, edge pressure, and grinding loads.
Key Takeaway: Aluminum oxide works well for general metal sanding, while zirconia and ceramic belts are better suited to heavier stock removal and demanding steel work.
What Grit Belt Should You Use for Metal?
The grit determines how quickly material is removed and how coarse the remaining scratch pattern will be.
| Job | Useful Starting Grit |
| Heavy rust or scale | 36–60 |
| Weld smoothing | 40–80 |
| Paint removal | 60–80 |
| General metal smoothing | 80–120 |
| Surface preparation | 80–150 |
| Scratch refinement | 150–220 |
| Fine finishing | 220–400 |
These are starting ranges rather than fixed rules.
3M’s general-purpose metalworking belt lines span coarse grades into fine finishing grades, including products ranging from roughly 36 through P400.
Use Coarse Grit for Fast Removal
A 36-, 40-, or 60-grit belt removes material quickly.
Use coarse belts for:
- Heavy corrosion
- Thick coatings
- Rough welds
- Sharp edge shaping
Watch thin sheet metal closely because coarse belts can remove too much material quickly.
Use 80 to 120 Grit for General Work
This range is useful for many garage metal jobs.
An 80-grit belt provides a good balance for:
- Rust cleanup
- Paint stripping
- Steel smoothing
- Weld blending
DEWALT’s belt-sander guidance lists 80 grit for steel on the DCW220.
Move Finer in Steps
If surface appearance matters, do not jump directly from a very coarse belt to a very fine one.
A sequence such as:
60 → 80 → 120 → 180
usually removes the previous scratch pattern more predictably.
Stop when the finish suits the next operation, such as painting, polishing, or coating.
Key Takeaway: Start coarse only when material removal demands it. Around 80 grit is a useful general steel starting point, with finer belts used to refine the surface.
How to Use a Belt Sander on Metal
A belt sander removes metal fast enough that control matters from the first contact.
1. Check the Sander Manual
Confirm that the tool permits metal sanding.
Also check:
- Approved belt dimensions
- Speed settings
- Dust-control warnings
- Required guards
- Work-cycle limits
Do not fit an abrasive belt that is the wrong width or length.
2. Remove the Dust Bag if Required
This is a major difference between sanding wood and sanding metal.
Milwaukee, Craftsman, Ryobi, WEN, and other belt-sander guidance warns against collecting metal sparks in a normal dust bag because hot particles may start a fire.
If the tool manual says to remove the bag for metal, follow that instruction.
Do not connect the sander to a wood-dust vacuum unless that extraction system is specifically approved for the metal dust and sparks involved.
3. Clean Wood Dust From the Work Area
Do not start metal sanding beside:
- Sawdust
- Wood shavings
- Solvents
- Gasoline
- Paint thinner
- Oily rags
- Cardboard
- Dry leaves
OSHA notes that grinding operations can produce sparks and flying metal and recommends removing flammable material from the work area.
Also clean wood dust from the sander before switching from woodworking to metalwork.
4. Clamp the Metal Securely
A moving belt exerts strong drag on the workpiece.
Clamp small parts to a stable bench rather than holding them with one hand.
Keep the sanding path away from clamps.
5. Install the Correct Belt
Disconnect power or remove the battery before changing the sanding belt.
Check the belt for:
- Tears
- Damaged seam
- Missing abrasive
- Incorrect direction
- Wrong dimensions
If the belt has directional arrows, install it in the marked running direction.
6. Check Belt Tracking
Run the sander clear of the workpiece.
Make sure the belt stays centered on the rollers and does not rub the housing.
Adjust tracking before applying the belt to metal.
7. Start With Light Pressure
Let the abrasive do the cutting.
Excess pressure can:
- Generate extra heat
- Wear the belt faster
- Load the motor
- Gouge the workpiece
- Slow the belt
- Make control harder
Use steady movement rather than forcing one spot.
8. Keep the Sander Moving
Do not park an aggressive belt in one place.
Metal can heat rapidly and thin sheet can distort.
Move along the work with overlapping passes.
9. Check Temperature Frequently
Stop if the workpiece becomes too hot to control safely.
Allow the metal and tool to cool naturally.
Do not touch recently sanded metal with bare hands just because it is no longer producing visible sparks.
10. Clean the Tool After Metal Work
Metal particles can remain in:
- Vents
- Housing recesses
- Belt area
- Platen area
- Rollers
Clean the sander using the method listed in its manual before returning to woodworking.
Key Takeaway: Secure the work, remove prohibited dust collection, use a metal-rated belt, apply light pressure, keep moving, and control heat and sparks throughout the job.
Can You Use a Belt Sander on Steel?
Yes.
Steel is one of the most common materials for abrasive belt grinding and finishing.
Mild Steel
Mild steel works well with:
- Aluminum oxide
- Zirconia alumina
- Ceramic abrasive
For general cleanup, 60–80 grit is a practical starting range.
Move finer for surface refinement.
Stainless Steel
Stainless steel needs more heat control.
A belt that cuts poorly can rub and generate unwanted heat instead of removing metal cleanly.
3M offers zirconia and ceramic belts with grinding aids intended to lower running temperature on stainless steel and other heat-sensitive alloys.
Keep a dedicated abrasive for stainless if surface contamination matters. Carbon-steel particles transferred by an old belt can later produce rust staining on stainless.
Hardened Steel
Hard steel can be slower to sand and may benefit from ceramic or high-grade zirconia abrasives.
Do not compensate for a dull belt by pressing harder.
Replace the belt once cutting speed falls sharply.
Key Takeaway: Belt sanders work well on mild and stainless steel. Use a sharp metal abrasive and watch heat closely, especially on stainless and hardened alloys.
Can You Use a Belt Sander on Aluminum?
Yes, but aluminum behaves differently from steel.
It is softer and can clog abrasive belts more quickly.
Aluminum Can Load the Belt
Small aluminum particles may lodge between abrasive grains.
As the belt loads, cutting slows and friction rises.
Use an abrasive marketed for aluminum or other non-ferrous metals.
3M lists several cloth belts for aluminum alongside steel and other metals.
Metal Dust Needs Extra Care
Fine aluminum dust can burn under the wrong conditions.
OSHA warns that aluminum grinding can create combustible dust and describes fire hazards when aluminum particles are mixed with iron oxide and exposed to ignition sources.
Do not mix aluminum dust with steel grinding debris or wood dust in an ordinary collection system.
Keep the area clean and follow workplace rules for combustible metal dust if the work produces substantial quantities.
Use Moderate Pressure
Heavy pressure tends to build heat and load the belt faster.
A sharp abrasive with light, steady pressure is a better approach.
Key Takeaway: Aluminum can be belt-sanded, but belt loading and combustible metal dust need more attention than with routine steel cleanup.
Can a Belt Sander Remove Rust From Metal?
Yes.
Rust removal is one of the easier metal jobs for a belt sander when the surface is flat enough for the tool.
Start Around 60–80 Grit
For moderate rust, 60 or 80 grit usually removes corrosion without being excessively coarse.
Heavy scale may call for 36 or 40 grit.
Move to a finer belt after the rust is gone if the surface will be painted.
Do Not Sand Through Thin Metal
Rust can leave sheet metal much thinner than it appears.
Aggressive sanding may uncover holes or make an already weak panel even thinner.
This is especially relevant for:
- Auto body panels
- Old tanks
- Sheet-metal covers
- Rusted brackets
Remove All Loose Corrosion Before Coating
After sanding, clean the surface using the coating maker’s preparation method.
A primer or coating performs best when loose rust, abrasive debris, grease, and contamination are removed.
Key Takeaway: A belt sander removes rust quickly from flat metal, but coarse belts can thin already corroded sheet metal fast.
Can a Belt Sander Remove Paint From Metal?
Yes.
A 60- or 80-grit belt can strip many paint systems from steel.
Paint chemistry still matters.
Old Coatings May Contain Hazardous Material
Older coatings can contain lead or other harmful substances.
Do not create airborne dust from an unknown coating without identifying the hazard and using the required controls.
Paint Can Load the Belt
Some coatings soften from friction and smear across the abrasive.
If the belt stops cutting and becomes coated, replace it rather than pressing harder.
Keep Sparks Away From Solvents
If the metal was cleaned with a solvent, make sure flammable vapors are gone before sanding.
Do not keep open solvent containers or solvent-soaked rags beside spark-producing work.
Key Takeaway: Belt sanders can strip paint from metal, but unknown coatings, flammable vapors, and abrasive loading need to be addressed first.
Belt Sander vs Angle Grinder for Metal
Both tools remove metal, but they behave differently.
| Task | Belt Sander | Angle Grinder |
| Large flat surfaces | Very good | Good |
| Smooth directional finish | Very good | Fair |
| Heavy weld removal | Moderate | Very good |
| Rust removal | Very good | Very good |
| Edge shaping | Good | Very good |
| Fine blending | Very good | Depends on disc |
| Tight access | Limited | Often better |
| Controlled flat sanding | Very good | Harder |
Choose the Belt Sander for Flat Blending
A belt sander gives a large flat contact area.
That makes it useful for:
- Long edges
- Sheet
- Flat bar
- Surface blending
- Directional finishes
Choose the Grinder for Heavy Removal
An angle grinder with the correct wheel or flap disc is usually faster for:
- Thick welds
- Heavy scale
- Cutting
- Deep shaping
A belt sander gives more surface contact and can leave a more uniform scratch pattern.
Key Takeaway: Use a belt sander for broad, controlled sanding and blending; use a grinder for aggressive localized removal or cutting.
Safety Tips for Belt Sanding Metal
Metal sanding adds spark, heat, and dust hazards that are less common during ordinary wood sanding.
Wear Eye Protection
Abrasive particles and metal fragments can leave the belt at high speed.
Wear safety glasses with side protection.
A face shield can add protection for heavy spark-producing work but does not replace safety glasses where both are called for.
Protect Your Hearing
Belt sanders and metal contact can produce substantial noise.
Use hearing protection when sound levels or the tool instructions call for it.
Keep Hands Clear
The belt can pull fingers, gloves, loose clothing, hair, or jewelry into the moving rollers.
Keep hands away from both belt edges and rollers.
Control Sparks
Aim sparks away from:
- People
- Batteries
- Fuel
- Gas cylinders
- Sawdust
- Plastic
- Finished surfaces
- Flammable liquids
OSHA identifies grinding sparks and flying particles as both injury and fire hazards.
Do Not Collect Metal Sparks in a Wood-Dust Bag
This deserves repeating.
A dust bag containing old sawdust can ignite when hot metal particles enter it.
Several belt-sander manuals explicitly prohibit dust-bag use during metal sanding.
Key Takeaway: Eye protection, hearing protection, secure workholding, spark control, and correct dust handling are central parts of safe metal belt sanding.
Conclusion
Can you use a belt sander on metal? Yes. A suitable belt sander can remove rust, paint, burrs, scratches, and small amounts of metal from steel, stainless steel, aluminum, and other alloys.
The abrasive choice controls much of the result. Aluminum oxide suits general sanding, zirconia works well for heavier metal removal, and ceramic belts are suited to demanding grinding. Choose grit from the amount of material you need to remove and the finish you want afterward.
Technique matters too. Clamp the workpiece, use light pressure, keep the belt moving, and stop periodically to control heat. A belt that has become dull or loaded should be replaced instead of forcing the sander harder.
Most of all, treat metal sanding as spark-producing work. Remove the normal dust bag when the tool manual tells you to, keep combustible material away, and never send hot metal particles into a dust collector that is not intended for that material.
FAQs About Using a Belt Sander on Metal
What type of sanding belt is best for metal?
Aluminum oxide is a good general-purpose choice for steel and many non-ferrous metals. Zirconia is better for faster stock removal, while ceramic abrasive works well for harder grinding jobs and demanding alloys. Match the belt maker’s material rating to the metal.
What grit belt should I use on steel?
Around 60–80 grit works for many rust-removal, paint-stripping, and general smoothing jobs. Use 36–40 grit for heavier removal and 120 grit or finer when refining the surface. DEWALT lists 80 grit for steel in its DCW220 belt-sander guidance.
Can I use a wood sanding belt on metal?
Some aluminum-oxide belts are rated for both wood and metal, but check the belt specification first. A light paper-backed woodworking belt may wear quickly during metal grinding. Cloth-backed metal-rated belts usually tolerate heat and edge pressure better.
Can I use the same belt on wood after sanding metal?
It is better to keep separate belts. Metal particles can become embedded in the abrasive and scratch wood. Some sander manuals specifically advise against using the same sanding belt for wood and metal.
Can I use a belt sander to remove welds?
Yes, especially for blending smaller welds and smoothing flat surfaces. Use a coarse zirconia or ceramic belt for faster removal. A heavy weld may be quicker to reduce first with an angle grinder, followed by belt sanding for a flatter finish.
Should I use the dust bag when sanding metal?
Usually no when the manual warns against it. Hot sparks and metal particles can ignite residual wood dust or the bag itself. Milwaukee and Craftsman belt-sander instructions both carry this warning.
Can a belt sander sand stainless steel?
Yes. Use an abrasive rated for stainless steel and control heat. Zirconia or ceramic belts with grinding aids are commonly used for stainless finishing and stock removal. Keep abrasives used on carbon steel separate if contamination of the stainless surface is a concern.
Is a belt sander better than an angle grinder for metal?
A belt sander is often better for flattening, blending, and producing a uniform finish across a broad surface. An angle grinder is generally faster for heavy weld removal, deep shaping, or cutting. Many metalworking jobs use both tools at different stages.