
How to Remove the Battery From a Cordless Drill Safely
Removing a battery from a cordless drill is usually simple, but the exact method depends on the drill’s battery design. Most modern cordless drills use a slide-in lithium-ion battery pack held in place by one or two release buttons. Older models may use stem-style batteries, spring clips, or different locking mechanisms.
Knowing how to remove the battery from a cordless drill correctly matters because pulling, twisting, or prying the pack can damage the battery housing, electrical contacts, or locking tabs. This is especially important if the battery feels stuck after heavy use, has been exposed to dust, or has remained attached to the drill for a long time.
In most cases, you simply turn the drill off, support the battery with one hand, press the battery-release button or buttons, and slide or pull the pack straight out in the direction it was designed to move. If it does not release easily, stop and check the locking mechanism rather than forcing it.
This guide explains how to remove common cordless drill battery types, what to do when a battery is stuck, which mistakes to avoid, and when a damaged battery needs extra caution.
How to Remove the Battery From a Cordless Drill
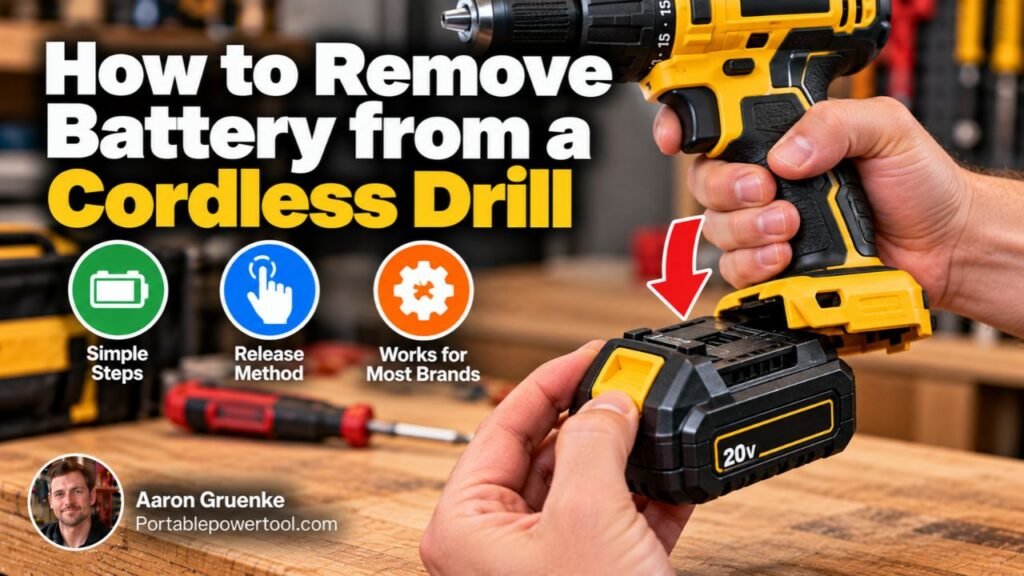
To remove a cordless drill battery, make sure the drill is switched off, locate the battery-release button or tabs, press them fully, and slide or pull the battery away from the drill handle.
For most modern drills, the basic process is:
- Stop using the drill and release the trigger.
- Set the forward/reverse switch to the center lock position if the drill has one.
- Hold the drill securely.
- Support the battery with your other hand.
- Press the battery-release button or buttons.
- Slide or pull the battery straight out.
- Place the battery on a clean, dry surface.
The battery should come out with moderate hand pressure. You should not need screwdrivers, pliers, or pry tools.
Locate the Battery Release Mechanism
Before pulling on the battery, find the mechanism that locks it into the drill.
The release system can differ depending on the manufacturer and battery style.
Single Release Button
Many cordless drill batteries have one large release button near the front, rear, or top of the battery.
Press the button fully while sliding the battery away from the drill.
Sometimes the button has to remain pressed until the battery clears the locking rail.
Two Side Release Buttons
Some battery packs use two buttons or tabs positioned on opposite sides.
Press both tabs inward at the same time, then pull or slide the battery out.
If you press only one side, the other locking tab may stay engaged.
Spring Clips or Tabs
Older cordless drills may use plastic clips on the sides of the battery.
Squeeze the clips inward and pull the battery downward from the handle.
Do not bend the clips farther than necessary because older plastic can become brittle.
How Slide-In Drill Batteries Come Off
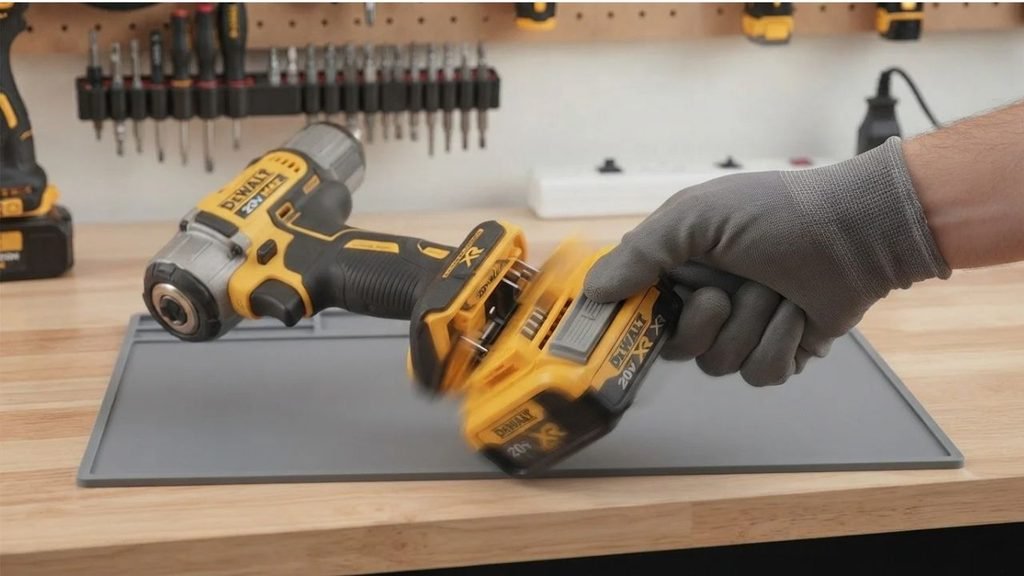
Most current cordless drills use a slide-style battery platform.
The battery has molded rails that fit into matching grooves on the drill.
To remove it:
- Grip the drill handle firmly.
- Support the bottom of the battery.
- Press the release button.
- Slide the battery along the rails.
Depending on the drill design, the battery may slide:
- Forward
- Backward
- Downward
Do not pull sideways unless the battery is designed to move in that direction.
If you are unsure, look at the battery rails. They usually show the direction in which the pack must travel.
How to Remove a Stem-Style Battery
Some older cordless drills use a stem-style battery.
Instead of sliding along horizontal rails, part of the battery inserts upward into the drill handle.
To remove one:
- Turn off the drill.
- Hold the handle firmly.
- Press or squeeze the release tabs.
- Pull the battery straight downward.
The battery may require slightly more pulling force than a modern slide pack because the stem fits tightly inside the handle.
Even so, avoid twisting it aggressively.
Why You Should Turn the Drill Off First
A cordless drill is unlikely to run while you are intentionally removing the battery, but accidental trigger activation is still possible.
Before handling the battery, move the forward/reverse selector into its center position if the drill provides a trigger-lock setting.
This helps prevent accidental operation.
Also remove any pressure from the trigger and place the drill in a stable position whenever possible.
How to Remove a Stuck Cordless Drill Battery
A battery that normally slides out easily can sometimes become difficult to remove.
Common reasons include:
- Dirt in the battery rails
- Sawdust or metal debris
- A damaged release tab
- Warped plastic
- Battery swelling
- Impact damage
- Heat expansion
- Corroded or contaminated contacts
Start with gentle methods.
Press the Release Button Completely
A partially pressed button may move but fail to disengage the internal latch.
Press it firmly to its full travel while applying gentle pressure in the battery’s removal direction.
You may need to slightly push the battery toward the drill first to remove tension from the latch, then press the button and slide the battery out.
Wiggle the Battery Gently
While holding the release mechanism, move the battery very slightly from side to side.
Do not aggressively twist it.
The goal is only to free dirt or reduce binding between the battery rails and drill housing.
Check for Dirt and Debris
Sawdust and workshop debris can collect around the locking rails.
With the drill turned off, inspect the visible gaps around the battery.
If debris is accessible without inserting anything into the electrical contacts, carefully remove it with a dry brush or cloth.
Do not pour water, solvents, or lubricant into the battery connection area unless the manufacturer specifically recommends a cleaning product.
What if the Battery Is Hot?
A battery can become warm during heavy drilling.
If a battery is unusually hot and difficult to remove, stop using the drill and allow the tool and battery to cool naturally.
Do not:
- Put a hot battery in a freezer
- Pour water over it
- Place it directly in front of extreme cold
- Continue forcing the battery
Normal heat can cause small amounts of material expansion, which may make a tight-fitting battery more difficult to slide.
After the pack returns to a normal temperature, try removing it again.
What if the Battery Is Swollen?
A swollen battery requires more caution.
Swelling can indicate damaged internal cells, particularly in lithium-ion battery packs.
Signs may include:
- Battery housing bulging
- Seams separating
- Battery suddenly becoming difficult to remove
- Cracked plastic
- Unusual heat
- Chemical odor
Do not aggressively squeeze, puncture, pry, or crush a swollen battery.
If the battery is stuck because it has expanded inside the drill, stop using the tool.
Professional service may be appropriate because forcing the pack could damage the battery cells.
A damaged lithium-ion battery should also be handled and recycled according to local hazardous-battery guidance rather than placed in regular household trash.
Should You Use a Screwdriver to Pry Out a Stuck Battery?
Generally, no.
A screwdriver can damage:
- Battery housing
- Locking tabs
- Electrical terminals
- Battery cells
- Drill casing
Metal tools can also create a short circuit if they contact battery terminals.
If moderate hand pressure cannot remove the battery, first inspect the release mechanism and battery condition.
A stuck battery caused by a broken latch may require careful disassembly or manufacturer service rather than prying.
How to Remove a Battery With a Broken Release Button
A release button may crack or stop moving after years of use.
If the button is broken, avoid forcing tools into the battery compartment.
First check whether the remaining part of the release button can still move the latch with normal finger pressure.
If the latch mechanism itself is broken, repairing the drill or battery housing may require partial disassembly.
For newer or expensive power tools, contacting the manufacturer or a qualified repair center is usually safer than cutting or prying the battery housing.
Why a Battery May Be Hard to Remove
A tight battery does not always mean something is broken.
New batteries can sometimes fit firmly because their rails and locking surfaces have not worn in yet.
Other possible reasons include:
Dust Buildup
Wood dust, drywall dust, and metal particles can collect in battery rails.
Regular cleaning can help prevent binding.
Damaged Rails
Dropping either the drill or battery can deform plastic guide rails.
Even a small deformation may make the battery harder to slide.
Worn Locking Tabs
Years of repeated battery changes can wear or damage release components.
A tab may become difficult to press or fail to retract completely.
Battery Swelling
Cell damage can cause a battery pack to expand.
This is more serious than ordinary mechanical sticking and should not be ignored.
How to Reinstall the Battery Correctly
Reinstalling the battery is essentially the reverse process.
For a slide-style battery:
- Align the battery rails with the drill.
- Slide the battery into position.
- Push until the locking mechanism clicks.
- Gently pull on the battery to confirm it is secured.
Do not slam the battery into the drill.
If the battery does not slide smoothly, remove it and check the rail alignment.
Forcing a misaligned battery can damage both the battery and tool.
Do You Need to Remove the Battery After Every Use?
Not necessarily.
Many cordless drill systems are designed so the battery can remain installed between short periods of use.
However, removing the battery can be helpful when:
- Transporting the drill
- Cleaning the tool
- Changing drill bits
- Performing maintenance
- Storing the drill for a long period
- Preventing accidental trigger activation
- Inspecting battery contacts
For long-term storage, follow the battery manufacturer’s recommendations regarding charge level and storage temperature.
Should You Remove the Battery Before Changing a Drill Bit?
Yes, removing the battery provides an extra level of protection against accidental startup.
This is especially useful when:
- Adjusting a keyless chuck
- Installing a drill bit
- Removing a jammed bit
- Cleaning the chuck
- Working near the trigger
At minimum, lock the trigger using the forward/reverse selector if your drill provides that feature.
For maintenance or hands-on work around rotating components, disconnecting the battery is the safer choice.
Cleaning the Battery Connection Area
Keeping the battery rails clean can make removal easier.
After removing the battery:
- Wipe loose dust from the rails.
- Keep terminals clean and dry.
- Inspect the housing for cracks.
- Check the locking tabs for damage.
Avoid inserting metal objects into the electrical contacts.
If corrosion, liquid contamination, or severe damage is present, follow the manufacturer’s service recommendations.
Battery Removal Safety Tips
Cordless drill batteries are generally safe when handled correctly, but basic precautions are worthwhile.
Keep these points in mind:
- Turn the drill off before battery removal.
- Do not pull the battery by excessive force.
- Avoid metal tools around exposed terminals.
- Do not remove or install batteries with wet hands.
- Do not use damaged or swollen batteries.
- Keep the battery away from extreme heat.
- Make sure the pack is cool before charging if it became unusually hot during use.
If the battery emits smoke, becomes extremely hot, leaks, or shows severe damage, move away from it and follow appropriate emergency and battery-safety guidance.
Common Mistakes When Removing a Drill Battery
One common mistake is pulling before fully pressing the release button.
This puts unnecessary force on the locking tabs.
Another mistake is twisting the battery sideways when it should slide along rails.
Other mistakes include:
- Using pliers to pull the battery
- Prying with a screwdriver
- Hitting the battery to loosen it
- Forcing a swollen pack
- Pulling on only one side
- Ignoring a broken latch
- Removing the battery while the drill is running
Most cordless drill batteries should release smoothly when the latch is fully disengaged.
If they do not, identify the cause before applying more force.
FAQs About How to Remove the Battery From a Cordless Drill
Where is the battery release button on a cordless drill?
The release button is normally located on the battery itself or near the point where the battery connects to the drill handle.
It may be a single button or a pair of side tabs.
Do I push or pull a cordless drill battery out?
It depends on the battery design.
Modern slide batteries usually move forward, backward, or away from the bottom of the handle along guide rails.
Older stem-style batteries generally pull downward after the release tabs are pressed.
Why won’t my drill battery come out?
The battery may be stuck because the release button is not fully engaged, debris is blocking the rails, the latch is damaged, or the battery housing has become distorted.
Battery swelling can also make removal difficult.
If the pack appears swollen or damaged, do not force it.
Can I pull the battery out without pressing the release button?
You should not.
The release button disengages locking tabs that hold the battery securely to the drill.
Pulling without releasing them can damage the battery or tool housing.
Is it safe to remove the battery when it is fully charged?
Yes.
Battery charge level does not normally prevent safe removal.
Turn the drill off, operate the release mechanism, and remove the pack normally.
Should I remove the battery before storing my drill?
For long-term storage, separating the battery from the drill is often a sensible choice.
Store the battery in a dry location away from excessive heat or cold and follow the manufacturer’s storage recommendations.
Can a hot battery get stuck in a drill?
It can.
Heat may cause slight expansion of the battery housing or surrounding components.
Allow the battery and tool to cool naturally before trying again.
What should I do if the release button is stuck?
Do not force it with sharp or metal tools.
Check for visible dirt around the button and battery rails. If the release mechanism remains jammed or appears broken, the tool may need repair.
Conclusion
Understanding how to remove the battery from a cordless drill is mostly a matter of identifying the battery-release mechanism and moving the pack in the correct direction. Turn the drill off, support the battery, press the release button or tabs completely, and slide or pull the pack out without excessive force.
If the battery refuses to move, check for dust, damaged rails, a stuck latch, excessive heat, or battery swelling before trying harder. Never pry aggressively around battery terminals or force a damaged lithium-ion pack.
Handled correctly, cordless drill batteries should be easy to remove, reinstall, charge, and store without damaging either the battery or the tool.