
How to Replace a Drain Valve on an Air Compressor Safely
The drain valve on an air compressor is a small component with an important job. Located near the lowest point of the receiver tank, it allows accumulated water, condensation, and sometimes traces of compressor oil to escape instead of remaining inside the tank. Over time, the valve can become clogged, corroded, damaged, or difficult to close completely.
Learning how to replace a drain valve on an air compressor is useful when the existing valve leaks continuously, refuses to open, has damaged threads, or has become so rusty that normal cleaning no longer helps. The basic repair involves completely depressurizing the tank, removing the old valve, cleaning and inspecting the tank threads, installing a correctly sized replacement with suitable thread sealant, and testing the new valve for air leaks.
The job is usually simple, but compressed-air tanks require respect. A drain valve should never be removed while pressure remains in the receiver. You also need the correct replacement thread size; forcing an incorrect valve into the tank can damage the threaded opening and turn a small maintenance job into a much larger repair.
This guide covers how to replace air compressor drain valve assemblies safely, how to choose between petcock and ball-valve designs, what to do with a stuck valve, how to seal the threads, and how to close drain valve on air compressor tanks correctly after installation.
How to Replace a Drain Valve on an Air Compressor
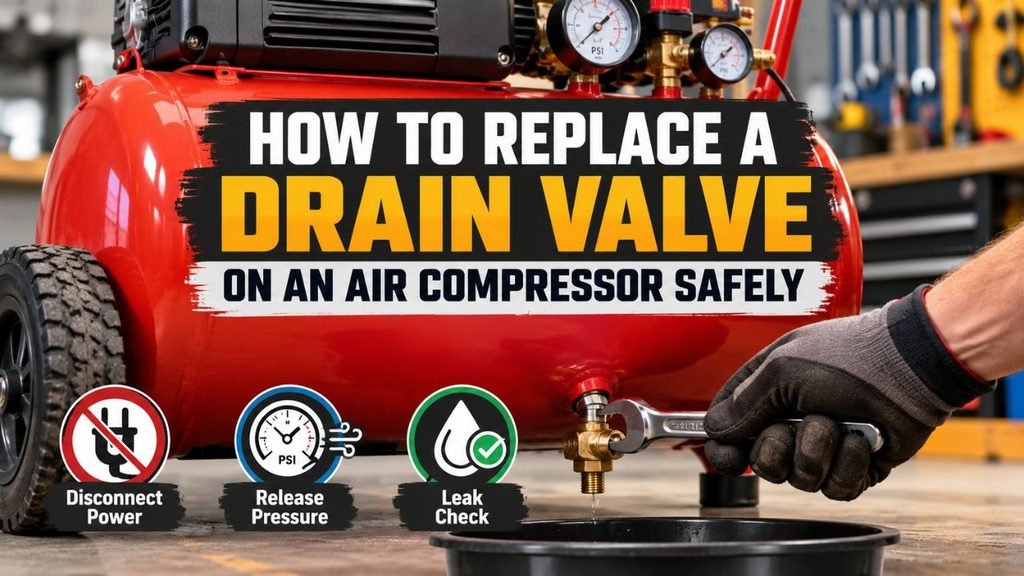
To replace a drain valve on an air compressor, shut the compressor off, disconnect its power source, and release all compressed air until the tank pressure gauge reads 0 PSI. Remove the old drain valve with the correct wrench, clean and inspect the threaded tank opening, apply compatible thread sealant to the replacement valve where required, and install it without overtightening.
After installation, close the new valve, repressurize the compressor gradually, and check the connection for leakage.
The basic process is:
- Turn the compressor off.
- Disconnect electrical power.
- Release all tank pressure.
- Allow the compressor to cool.
- Locate the drain valve.
- Remove the damaged valve.
- Clean and inspect the tank threads.
- Verify the new valve size and type.
- Apply appropriate thread sealant.
- Install the replacement valve.
- Close the valve.
- Repressurize the tank.
- Check for leaks.
- Test the valve by draining condensation.
Never attempt to unscrew a tank drain valve while the receiver is pressurized.
What Is an Air Compressor Drain Valve?
An air compressor drain valve is fitted to the bottom or another low point of the air receiver.
Compressing atmospheric air also concentrates the moisture naturally present in that air. As the compressed air cools inside the receiver, some water vapor condenses into liquid.
The drain valve allows this accumulated liquid to leave the tank.
Depending on the compressor, the valve may be a:
- Manual petcock
- Screw-type drain valve
- Quarter-turn ball valve
- Pull-cable drain
- Extended drain valve
- Automatic drain valve
Regardless of design, the goal is the same: remove moisture before it accumulates enough to contribute to internal tank corrosion or enter the compressed-air system.
Why Air Compressor Drain Valves Need Replacement
A drain valve can last for years, but its location exposes it to moisture, dirt, rust, and physical damage.
Replacement may be needed when the valve:
- Leaks after being closed
- Will not open
- Will not close
- Has seized from corrosion
- Has stripped operating threads
- Has a broken handle
- Has a damaged sealing surface
- Is clogged internally
- Has badly corroded external threads
- Was physically damaged while moving the compressor
A small amount of moisture coming from an open valve is normal.
Air escaping continuously from a valve that should be closed is not.
Drain Valve vs. Safety Valve
Do not confuse the tank drain valve with the pressure-relief or safety valve.
They perform completely different functions.
| Component | Purpose | Typical Location |
| Drain valve | Removes condensation from tank | Bottom or low point of receiver |
| Safety valve | Releases pressure during an overpressure condition | Usually near pressure switch/manifold |
| Check valve | Prevents tank air from flowing back toward pump | Tank inlet area |
| Regulator | Controls outlet pressure to tools | Control manifold |
The safety valve is a calibrated pressure-protection device and should not be replaced with a standard drain valve.
Make sure you have identified the correct component before removing anything.
What You Need to Replace the Drain Valve
The tools required are usually basic.
You may need:
- Correct replacement drain valve
- Open-end wrench, adjustable wrench, or socket
- Appropriate thread sealant
- Small wire or nylon brush
- Clean cloth
- Safety glasses
- Work gloves
- Flashlight
- Leak-detection solution or soapy water
- Owner’s manual
A penetrating lubricant may be useful when removing an externally corroded valve, provided it is used appropriately and kept away from areas where the manufacturer prohibits it.
Step 1: Identify the Correct Replacement Valve
Do not remove the old valve until you have a reasonable idea of what replacement you need.
Drain valves are commonly threaded into the receiver, but thread sizes vary.
Depending on the compressor, you may encounter pipe-thread sizes such as:
- 1/8 inch NPT
- 1/4 inch NPT
- 3/8 inch NPT
- 1/2 inch NPT
These are examples, not universal specifications.
NPT, or National Pipe Thread, is common on compressed-air equipment in the United States.
Pipe-thread sizing can be confusing because the nominal size does not equal the outside diameter you would measure with a ruler.
Whenever possible, identify the replacement using:
- Compressor model number
- Owner’s manual
- Parts diagram
- Original valve part number
- Manufacturer’s parts catalog
Do not force a valve into the tank because its threads appear approximately correct.
Step 2: Turn the Compressor Off
Move the compressor’s power switch to the OFF position.
Wait for the pump and motor to stop completely.
A compressor may start automatically whenever tank pressure falls below its cut-in pressure, so switching it off is essential before working on it.
Step 3: Disconnect the Power
Unplug a portable electric compressor from the electrical outlet.
For a stationary hardwired unit, isolate power using the appropriate disconnect or lockout procedure.
For a gasoline-powered compressor, shut off the engine and follow the manufacturer’s maintenance procedure.
Disconnecting power prevents the compressor from automatically starting while you have the drain valve removed.
Step 4: Release All Pressure From the Tank
This is the most important safety step.
The tank must be completely depressurized before you remove the drain valve.
Use an approved method to release the compressed air.
Depending on the compressor, this may involve:
- Opening the existing drain valve
- Disconnecting air through a regulated outlet
- Using another manufacturer-approved depressurization procedure
Watch the tank pressure gauge until it reads 0 PSI.
Do not rely solely on the gauge if you suspect it is defective. Verify that air has stopped escaping from the open drain or another appropriate outlet.
Never loosen the drain valve itself as a method of gradually releasing a fully pressurized tank.
Step 5: Allow the Compressor to Cool
If the compressor was recently running, allow it to cool.
Components around the pump and discharge tube can become very hot during operation.
Although the drain valve is normally at the bottom of the receiver, working around a hot machine adds unnecessary burn risk.
Step 6: Locate the Drain Valve
The manual drain valve is normally located at or near the lowest point of the air tank.
Portable compressors may have it:
- Directly underneath the tank
- Near one end of the tank
- On a short extension tube
Vertical compressors usually place the drain near the bottom center of the receiver.
Some units use an extension hose so the operator does not need to reach underneath the tank.
Make sure the component you are looking at actually connects to the air receiver and is intended for tank drainage.
Step 7: Try Opening the Old Valve
If the valve still operates, open it after the tank is safely depressurized.
Remaining condensation may come out.
Removing as much liquid as possible before unscrewing the valve helps prevent a sudden spill when the fitting comes free.
Expect the drained liquid to contain:
- Water
- Rust-colored residue
- Small quantities of compressor oil
Rust-colored water does not automatically mean the tank is structurally unsafe, but heavy corrosion or flaking material deserves closer inspection.
Step 8: Remove the Old Drain Valve
Place the correct wrench on the valve’s wrench flats or body.
Turn it counterclockwise when viewed from the threaded connection in the normal direction of removal.
Use controlled pressure.
Avoid grabbing delicate portions of the valve that may collapse or break.
If the valve is heavily corroded, increase force gradually rather than jerking the wrench.
If the Drain Valve Is Stuck
Corrosion can make an old valve difficult to remove.
A penetrating lubricant applied around the external threads may help loosen rust.
Allow it time to work before attempting removal again.
Use caution with excessive leverage.
The goal is to remove the valve—not twist, crack, or damage the threaded tank fitting.
If the fitting begins deforming or the valve breaks off inside the receiver connection, stop and consider professional repair.
What If the Drain Valve Breaks During Removal?
A badly rusted valve can break and leave threaded material inside the tank fitting.
Removing the remaining piece may require:
- Internal pipe extractor
- Specialized fitting extractor
- Careful thread repair
This becomes more complicated because damaging the receiver’s threads can compromise the connection.
Do not drill aggressively into the tank or weld on the receiver unless the work is performed under appropriate professional procedures.
An air receiver is a pressure vessel, not ordinary sheet metal.
Step 9: Inspect the Tank Opening
Once the old valve has been removed, inspect the threaded opening.
Look for:
- Rust
- Damaged threads
- Old sealant
- Dirt
- Metal fragments
- Severe corrosion
Clean loose debris from the threads carefully.
Do not remove substantial amounts of metal or enlarge the opening.
If the receiver fitting is cracked, severely rusted, or badly stripped, installing a new valve may not be sufficient.
The tank may require professional inspection or replacement.
Do Not Repair a Rusted Air Tank Casually
Surface rust around a fitting is different from serious pressure-vessel corrosion.
Warning signs can include:
- Deep pitting
- Significant metal loss
- Bulging
- Cracks
- Pinholes
- Active leakage through the tank wall
- Large flakes of internal rust
Do not attempt to repair a weakened receiver by welding, brazing, drilling, or patching it yourself.
A compromised compressed-air tank can fail violently.
If structural corrosion is suspected, stop using the compressor until the receiver has been properly evaluated.
Step 10: Compare the Old and New Drain Valves
Before installation, compare both valves.
Check:
- Thread diameter
- Thread type
- Thread length
- Valve clearance
- Pressure rating
- Operating mechanism
The replacement should be rated for compressed-air service and at least the pressure required by the compressor system.
Avoid choosing a valve based solely on appearance.
Step 11: Apply Thread Sealant Correctly
Many threaded drain-valve installations require a suitable pipe-thread sealant.
Depending on manufacturer instructions, this may be:
- PTFE thread-seal tape
- Compatible pipe-thread sealant paste
Use only a product appropriate for compressed-air fittings and the materials involved.
Using PTFE Tape
If PTFE tape is approved:
- Hold the valve with the threaded end facing you.
- Wrap the tape in the direction that allows tightening without unraveling it.
- Keep tape away from the first thread or two when practical.
- Use only enough to seal the threads.
Loose pieces of thread tape should not enter the air tank or valve.
Using Pipe Sealant
Apply a thin, even amount to the male threads according to the sealant manufacturer’s instructions.
Do not fill the inside passage with sealant.
More sealant is not necessarily better.
Step 12: Install the New Drain Valve
Start threading the replacement valve by hand.
It should turn smoothly for at least the initial engagement.
If it immediately binds or feels cross-threaded, stop.
Remove it and verify:
- Thread size
- Thread pitch/type
- Alignment
- Condition of tank threads
Once properly started, tighten the valve with a wrench.
Pipe-thread fittings are designed to become tighter as tapered threads engage, but overtightening can still damage the fitting or tank connection.
If the compressor manufacturer provides a torque specification, use it.
Otherwise, tighten only enough to obtain secure alignment and a leak-free seal without excessive force.
Step 13: Position the Valve for Easy Access
If you are installing a:
- Ball valve
- Lever valve
- Extended drain
- Cable-operated valve
make sure the final position allows convenient operation.
The handle should not:
- Hit the floor
- Contact a wheel
- Interfere with the compressor frame
- Point toward a vulnerable object
- Become the lowest impact point while moving the compressor
Good positioning makes routine draining easier, which makes you more likely to maintain the tank regularly.
How to Close Drain Valve on Air Compressor Tanks
For many manual drain valves, how to close drain valve on air compressor tanks depends on the valve style.
Screw-Type or Petcock Drain Valve
Many petcock-style valves close by turning the control clockwise until it seats.
Use gentle hand pressure.
Do not overtighten it with pliers unless the manufacturer specifically requires a tool.
Excess force can damage the seal or threads.
Quarter-Turn Ball Valve
A typical ball valve uses a lever.
Generally:
- Handle parallel with the flow passage = open
- Handle perpendicular to the flow passage = closed
Valve designs can differ, so confirm the markings or instructions on your specific model.
Knob-Style Drain Valve
Some compressors use a knob that closes by turning fully to the right, or clockwise.
Again, close it until it seals rather than forcing it beyond its stop.
Why Won’t My Air Compressor Drain Valve Close?
If a valve will not seal after turning it closed, several problems are possible.
Dirt Is Trapped in the Valve
Rust flakes or debris can become trapped on the sealing surface.
Opening and closing the valve after the tank is depressurized may dislodge small contamination.
Internal Seal Is Worn
A worn valve seat may leak even when the handle appears fully closed.
Replacement is usually easier than trying to rebuild a cheap petcock.
Threads Are Damaged
Damaged operating threads may prevent the valve mechanism from seating completely.
Valve Is Corroded
Internal rust can make the stem stiff or prevent full movement.
Incorrect Replacement Valve
A valve that does not match the tank fitting may leak around its external threads rather than through the valve itself.
Identify where the air is escaping before deciding what needs correction.
Step 14: Repressurize the Compressor Gradually
Once the replacement valve is installed and closed:
- Make sure tools are removed from around the compressor.
- Reconnect power.
- Start the compressor.
- Allow pressure to rise gradually.
- Watch and listen around the new drain fitting.
Do not put your face directly beside the fitting during this initial test.
If the fitting shows obvious movement or major leakage, shut the compressor off and depressurize it before making adjustments.
Step 15: Check for Air Leaks
A small leak may be difficult to hear.
Apply a suitable leak-detection solution or a mixture of soapy water around the threaded connection and valve.
Watch for growing bubbles.
Bubbles Around External Threads
This usually indicates a leak between the drain valve and tank fitting.
You may need to:
- Depressurize the tank
- Remove the valve
- Inspect the threads
- Reapply thread sealant
- Reinstall it correctly
Bubbles From the Valve Outlet
This indicates the valve itself is not sealing internally.
Make sure it is completely closed.
If a new valve still leaks through its outlet, it may be defective or contaminated.
Never tighten, remove, or reseal a drain valve while the tank remains pressurized.
Step 16: Test the Drain Function
After confirming the installation is leak-free, test the valve normally.
Turn the compressor off and follow the manufacturer’s tank-draining procedure.
Open the valve gradually.
You should hear air escaping and may see water leave the tank.
Once drainage is complete, close the valve again and verify that it seals correctly.
This confirms both functions:
- The valve can drain the tank.
- The valve can close without leaking.
Petcock vs. Ball Valve: Which Is Better?
A traditional petcock is compact and inexpensive.
A ball valve is generally easier to operate.
| Feature | Petcock Drain | Ball Valve Drain |
| Size | Compact | Larger |
| Cost | Usually lower | Usually higher |
| Operation | Multiple turns possible | Usually quarter-turn |
| Easy to reach | Sometimes difficult | Often easier with extension |
| Drain opening | Can be relatively small | Often larger |
| Resistance to clogging | Varies | Larger passage may help |
| Best use | Basic replacement | Frequent draining/convenience |
A ball-valve conversion can be convenient, but make sure:
- The fittings are pressure-rated.
- The assembly has adequate ground clearance.
- Added weight does not strain the tank fitting.
- The compressor manufacturer allows the configuration.
Should You Install a Drain-Valve Extension?
An extension can make draining a large or low-clearance compressor much easier.
Extensions are common on stationary compressors where the factory drain sits underneath a heavy tank.
A drain extension may use:
- Pipe nipple
- Flexible rated hose
- Elbow
- Ball valve
All components should be rated for:
- Compressed air
- System pressure
- Expected temperature
Support long or heavy extensions so vibration does not place unnecessary stress on the receiver connection.
Can You Install an Automatic Drain Valve?
Yes, on compatible compressors.
An automatic tank drain opens periodically or based on another control method to remove accumulated condensate.
Automatic drains can be useful for:
- Commercial shops
- High-use compressors
- Humid environments
- Tanks that are difficult to access
Common types include:
- Electronic timer drains
- Float drains
- Zero-loss drains
- Automatic mechanical drains
Installation requirements differ significantly by design.
Make sure the drain’s:
- Pressure rating
- Voltage, if electrical
- Thread size
- Flow capacity
match your compressor system.
An automatic drain does not eliminate the need for periodic inspection.
How Often Should You Open the Air Compressor Drain Valve?
Follow the compressor manufacturer’s maintenance schedule.
Many traditional compressor instructions recommend draining accumulated moisture daily or after use, especially when the compressor sees regular operation.
How quickly water collects depends on:
- Humidity
- Ambient temperature
- Compressor runtime
- Tank size
- Air consumption
- Cooling conditions
A compressor used heavily in humid summer weather can produce much more condensate than a lightly used compressor in a dry climate.
Regular draining reduces the amount of water sitting against the inside of the receiver.
Should the Drain Valve Stay Open During Storage?
Follow the manufacturer’s storage procedure.
Some owners leave a tank depressurized and the drain slightly open during storage to allow residual moisture to escape, but this is not appropriate for every design or environment.
An open valve can also allow:
- Dirt
- Insects
- Moisture
- Debris
to enter.
Use the storage instructions for your particular compressor.
For normal operation, the drain must be properly closed before pressurizing the tank.
Why Water Comes Out of an Air Compressor Drain Valve
Water coming from the drain is normally expected.
Atmospheric air always contains some moisture.
The compressor draws that air in, compresses it, and sends it into the receiver.
As the compressed air cools, water vapor condenses.
The amount varies with weather.
High humidity usually means more condensation.
The presence of water is exactly why the drain valve exists.
Why Oil Might Come Out With the Water
A small oily residue may occasionally be present in condensate from an oil-lubricated compressor.
However, large quantities of oil can indicate excessive oil carryover from the compressor pump.
Potential causes can include:
- Overfilled crankcase
- Worn piston rings
- Incorrect compressor oil
- Excessive operating temperature
- Pump wear
If the drain consistently releases significant quantities of oil, inspect the compressor rather than treating it as normal condensation.
Common Mistakes When Replacing an Air Compressor Drain Valve
Removing the Valve With Pressure in the Tank
This is the most dangerous mistake.
Always verify 0 PSI before removal.
Buying the Wrong Thread Size
Do not force an approximate-fitting valve into the tank.
Use the correct thread specification.
Cross-Threading the New Valve
Start the fitting by hand.
If it does not thread smoothly, stop.
Using Excessive Thread Tape
Loose pieces of tape can enter the valve or tank.
Use only the amount needed for sealing.
Overtightening the Valve
More force does not necessarily provide a better seal.
Excessive tightening can damage threads or fittings.
Forgetting to Leak-Test the Repair
A valve that appears correctly installed can still leak.
Pressure-test it after installation.
Ignoring Tank Corrosion
Replacing the drain valve does not repair a structurally weakened air receiver.
Investigate severe rust rather than covering it with new hardware.
When Professional Repair Is Better
Replacing a normal threaded drain valve is a manageable DIY job for many compressor owners.
Professional help is more appropriate if:
- The valve broke inside the tank fitting.
- Receiver threads are stripped.
- The fitting is cracked.
- The tank shows severe corrosion.
- The valve mounting area leaks through the tank wall.
- You cannot identify the correct fitting.
- The compressor uses a complicated automatic drain system.
- The receiver may have structural damage.
Because the tank stores high-pressure air, structural repairs are not a good place for improvised fixes.
FAQs About How to Replace a Drain Valve on an Air Compressor
How do you replace an air compressor drain valve?
Turn the compressor off, disconnect power, and completely depressurize the tank. Remove the old valve, clean and inspect the threaded opening, apply suitable thread sealant to the correct replacement valve, install it, close it, and pressure-test the connection for leaks.
How do I know what size air compressor drain valve I need?
Check the compressor model, owner’s manual, parts diagram, or existing valve specification.
Common sizes may include 1/8-inch, 1/4-inch, 3/8-inch, or 1/2-inch NPT, but your compressor may use something different.
How to close drain valve on air compressor tanks?
Many screw-type drain valves close by turning clockwise until gently seated. Quarter-turn ball valves normally close when the handle is perpendicular to the flow passage.
Follow your valve manufacturer’s markings and avoid overtightening.
Why does my air compressor drain valve keep leaking?
The valve may contain debris, have a damaged internal seat, be corroded, or not be fully closed.
Air can also leak around the external threads if the fitting was installed without a proper seal.
Can I replace a petcock with a ball valve?
Often, yes, if the new valve and any adapters have the correct thread size and pressure rating and the installation does not create clearance or structural problems.
A ball valve can make routine tank draining easier.
Should I use Teflon tape on an air compressor drain valve?
PTFE thread-seal tape is appropriate for many NPT compressed-air fittings when permitted by the manufacturer.
Apply it correctly and prevent loose tape from extending into the air passage.
A compatible pipe-thread sealant may also be specified.
Do I need to drain all the air before removing the drain valve?
Yes.
The receiver must be completely depressurized before the threaded drain valve is removed.
Verify that the tank pressure gauge reads 0 PSI and that no trapped pressure remains.
Why won’t my new air compressor drain valve close?
Debris may be caught inside the valve, the valve may be defective, or the operating mechanism may not be reaching its closed position.
If air is leaking around the threads rather than through the outlet, the problem is the fitting seal instead of the valve’s closed position.
Conclusion
Learning how to replace a drain valve on an air compressor is usually a straightforward repair when the receiver and threaded fitting are in good condition. The essential steps are to disconnect power, completely depressurize the tank, remove the old valve carefully, verify the replacement’s thread size and pressure rating, clean the tank threads, apply the appropriate thread sealant, and install the new valve without overtightening it.
After installation, the job is not complete until you close the valve, gradually repressurize the receiver, check both the valve and threaded connection for leaks, and confirm that the new drain opens and closes normally. If you are also wondering how to close drain valve on air compressor tanks, most petcock-style valves close clockwise, while typical quarter-turn ball valves close when their handle is perpendicular to the flow path.
Replacing a damaged drain valve restores convenient moisture removal, but the larger purpose is protecting the receiver. Drain condensation regularly, investigate recurring leaks, and pay attention to severe rust around the tank or threaded opening. If the receiver itself shows deep corrosion, cracking, or structural damage, replacing the valve alone is not an adequate repair; the pressure vessel should be professionally evaluated before the compressor is returned to service.