
How to Install an Air Compressor Automatic Drain: Step-by-Step
Water collecting inside an air compressor tank is normal. Atmospheric air contains moisture, and when that air is compressed and later cools inside the receiver tank, some of the moisture condenses into liquid water. If the tank is not drained regularly, water can accumulate and contribute to internal corrosion, contaminate air lines, and eventually reach pneumatic tools or other equipment.
An automatic drain valve solves much of this maintenance problem by periodically opening and releasing accumulated condensate without requiring you to crawl under the compressor and open a manual drain valve every day.
To install an automatic drain, depressurize the compressor completely, remove the existing tank drain valve, install a compatible auto drain using the correct thread sealant and orientation, connect its power or control system if required, and then test it carefully for leaks and proper draining.
Learning how to install an air compressor automatic drain is usually straightforward, but choosing the correct drain type, thread size, pressure rating, and installation position matters. Some auto drains use an electronic timer, while others operate mechanically or use a zero-loss condensate system.
This guide explains how air compressor auto drains work, how to install one safely, how to set an electronic timer drain, common installation mistakes, troubleshooting, and how often the drain should operate.
How to Install an Air Compressor Automatic Drain
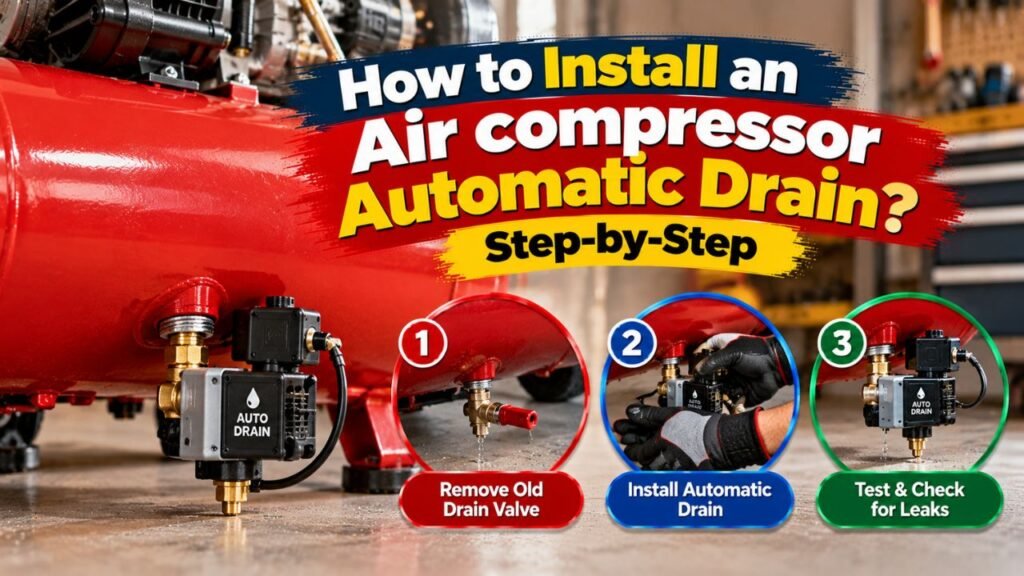
To install an air compressor automatic drain, first shut the compressor off, disconnect electrical power, and release all air pressure from the receiver tank. Remove the existing manual drain valve, verify the tank port size, install the compatible automatic drain, connect any required power supply or tubing, and test the system.
The basic process is:
- Turn the compressor off.
- Disconnect electrical power.
- Drain all air pressure from the receiver.
- Remove the existing manual drain valve.
- Clean and inspect the threaded drain port.
- Apply suitable thread sealant.
- Install the automatic drain valve.
- Position the outlet safely.
- Connect electrical power or control tubing if required.
- Set the drain interval and opening duration.
- Repressurize the tank.
- Check for air leaks.
- Test the drain manually.
- Adjust the timer based on condensate volume.
Never remove a tank fitting while the receiver is pressurized.
How Does Air Compressor Auto Drain Work?
An air compressor auto drain automatically removes condensed water and sometimes small amounts of oil from the bottom of the receiver tank or moisture separator.
The drain is installed at a low point where condensate collects.
Depending on the design, the valve opens:
- At timed intervals
- When condensate reaches a certain level
- In response to mechanical pressure cycles
- Through an electronically controlled condensate sensor
When the valve opens, tank pressure forces the accumulated water through the outlet.
After a short period, the valve closes again so the compressor does not continuously lose compressed air.
Why Does an Air Compressor Tank Collect Water?
Every compressor draws atmospheric air into its pump.
Atmospheric air contains water vapor.
During compression:
- Air temperature increases.
- Moisture remains suspended in the hot compressed air.
- The air enters the receiver tank.
- The air cools.
- Some water vapor condenses into liquid.
That liquid settles at the bottom of the tank.
The amount of water depends on:
- Ambient humidity
- Compressor runtime
- Tank size
- Air temperature
- Airflow demand
- Compressor operating temperature
A compressor running continuously in humid summer conditions may produce considerably more condensate than the same compressor operating occasionally in cool, dry weather.
Why an Automatic Drain Is Useful
A manual drain works perfectly well if someone remembers to use it regularly.
The problem is consistency.
An automatic drain can help:
- Reduce standing water inside the receiver
- Limit internal tank corrosion
- Reduce moisture entering air lines
- Simplify maintenance
- Improve drainage on difficult-to-access tanks
- Prevent forgotten drain intervals
An auto drain does not replace proper moisture filtration or an air dryer when very dry compressed air is required, but it handles the bulk liquid accumulating at the tank bottom.
Types of Air Compressor Automatic Drain Valves
Several auto drain designs are available.
Electronic Timer Drain
An electronic timer drain is one of the most common aftermarket options.
The valve usually contains a solenoid controlled by an electronic timer.
You typically adjust two settings:
- How often the valve opens
- How long it stays open
For example, a drain might open periodically for a few seconds.
The exact timing should be adjusted to actual condensate production rather than copied blindly from another compressor.
Mechanical Automatic Drain
Mechanical drains do not necessarily require electricity.
They may use:
- Float mechanisms
- Pressure changes
- Internal mechanical valves
These can be useful where electrical power at the drain location is inconvenient.
Zero-Loss Drain
A zero-loss condensate drain is designed to discharge accumulated condensate while minimizing the loss of compressed air.
These drains commonly use a level sensor.
When enough condensate accumulates, the drain opens only long enough to remove the liquid.
Zero-loss drains are especially useful on larger compressed-air systems where wasting compressed air can increase operating costs.
Float Drain
A float drain works similarly to the float mechanism in other liquid-control systems.
As condensate rises, the float activates a valve.
When the liquid leaves, the float returns and the valve closes.
Float drains are often found on:
- Filters
- Separators
- Receivers
- Refrigerated dryers
Before Installing an Automatic Drain
Do not start by ordering the first valve that appears to fit.
Check your compressor first.
Determine the Drain Port Size
Air receiver drain ports commonly use threaded pipe fittings, but sizes vary.
Possible sizes include:
- 1/8-inch NPT
- 1/4-inch NPT
- 3/8-inch NPT
- 1/2-inch NPT
Do not assume your compressor uses 1/4-inch NPT simply because that size is common.
Check the manual or measure the existing fitting.
Confirm Maximum Working Pressure
The drain valve must be rated above the compressor’s maximum operating pressure.
For example, if your compressor reaches 175 PSI, do not install a drain rated only for 125 PSI.
Check both:
- Maximum working pressure
- Temperature rating
Check Voltage Requirements
Electronic drains may operate from:
- 120V AC
- 230V AC
- 24V AC
- 24V DC
- Other control voltages
Match the valve to the available power supply.
Never connect a drain valve to an incorrect voltage.
Check Installation Orientation
Some drains can operate in multiple orientations.
Others must remain:
- Vertical
- Horizontal
- Within a limited angle
The manufacturer’s installation instructions take priority.
Tools and Materials You May Need
A typical installation may require:
- Adjustable wrench
- Correct-size open-end wrench
- Pipe wrench if appropriate
- Thread sealant
- PTFE tape if approved
- Brass adapters or reducers
- Drain tubing
- Electrical tools for powered drains
- Leak-detection solution
- Safety glasses
Avoid unnecessarily forcing fittings into the tank.
The receiver drain port should not be damaged or cross-threaded.
Step 1: Shut Down the Compressor
Turn the compressor off.
If it is a plug-in compressor, unplug it.
For permanently wired equipment, follow appropriate electrical isolation procedures.
The compressor must not be able to restart unexpectedly during installation.
Step 2: Depressurize the Air Tank Completely
Release all compressed air from the receiver tank.
Watch the pressure gauge until it reads zero.
Do not rely only on the gauge if you suspect it is inaccurate.
Open the existing drain valve carefully and verify that no pressure remains.
Compressed air stores significant energy, so never loosen or remove a threaded receiver fitting under pressure.
Step 3: Drain Existing Water
Before removing the old valve, let as much condensate as possible drain from the tank.
This reduces the amount of water that spills when the fitting is removed.
If the tank contains a large amount of rusty water, that may indicate the compressor has not been drained often enough.
Step 4: Remove the Existing Manual Drain Valve
Use the appropriate wrench to loosen the existing drain valve.
Work carefully.
Older fittings may be:
- Corroded
- Tight
- Painted over
- Damaged from previous service
Avoid using excessive force that could damage the threaded tank port.
If the valve breaks inside the fitting, extraction may require additional repair.
Step 5: Inspect and Clean the Drain Port
Inspect the receiver threads.
Look for:
- Rust
- Damaged threads
- Old sealant
- Metal debris
- Cracks
Remove loose old sealant without damaging the threads.
A damaged receiver tank connection should be evaluated properly rather than forced together with extra sealant.
Step 6: Compare the New Auto Drain Fitting
Before applying sealant, verify that the new drain fitting threads correctly into the existing port.
If an adapter is required, use a pressure-rated fitting compatible with compressed air.
Common configurations may include:
Tank → reducer/adapter → automatic drain
Try to avoid unnecessary chains of fittings because each connection creates another potential leak point.
Step 7: Apply the Correct Thread Sealant
Apply a thread sealant suitable for compressed-air service.
Depending on the equipment and fitting, this may be:
- PTFE thread-seal tape
- Pipe-thread sealant paste
If using PTFE tape, keep excess tape away from the inside edge of the fitting.
Loose fragments can enter the valve and interfere with its operation.
Do not use excessive amounts of sealant.
Step 8: Install the Auto Drain Valve
Thread the valve into the tank or adapter by hand first.
This helps prevent cross-threading.
Then tighten it with the appropriate wrench.
Do not use the electrical housing, timer body, or solenoid coil as a handle for tightening.
Apply force only to the designated wrench flats or fitting body.
Step 9: Position the Drain Correctly
The valve should be installed in the orientation specified by its manufacturer.
For a timer drain, you may also need enough clearance to access:
- Timer controls
- Manual test button
- Electrical connector
- Outlet connection
Remember that condensate exits under pressure.
The discharge should never point toward:
- Your face
- Electrical equipment
- Walkways
- Finished surfaces
Step 10: Install a Discharge Tube if Appropriate
Many auto drains have an outlet that can accept tubing.
A discharge tube can direct condensate into:
- A suitable collection container
- Condensate treatment equipment
- An approved drain arrangement
Make sure the hose:
- Is pressure compatible
- Cannot kink
- Is secured properly
- Does not create excessive backpressure
Compressed-air condensate from oil-lubricated compressors may contain oil. Disposal requirements vary, so do not automatically route oily condensate into a storm drain or onto the ground.
Step 11: Connect Power to an Electronic Auto Drain
If you are installing an electronic timer drain, connect its electrical supply according to the manufacturer’s instructions.
Confirm:
- Correct voltage
- Proper grounding where required
- Suitable connector
- Protection from moisture
- Proper wire routing
If the electrical work exceeds your experience or involves a permanently wired compressor, have a qualified electrician perform the connection.
Step 12: Set the Drain Interval
Timer drains normally have an interval control.
This determines how frequently the valve opens.
The correct interval depends on how quickly water accumulates.
Variables include:
- Compressor runtime
- Ambient humidity
- Tank capacity
- Compressed-air demand
A heavily used compressor in humid conditions needs more frequent drainage than a lightly used compressor in a dry environment.
Start with a reasonable manufacturer-recommended setting and observe actual drainage.
Step 13: Set the Drain Open Time
The second timer setting controls how long the solenoid remains open.
The drain should stay open long enough to discharge collected water without wasting large quantities of compressed air.
If water is still flowing strongly when the valve closes, the opening duration may be too short.
If only air blows for several seconds after all liquid has left, the valve may be open longer than necessary.
The ideal cycle often looks like:
Water discharge → brief air discharge → valve closes
Step 14: Repressurize the Tank Slowly
Close any manual valves opened during installation.
Restore power and allow the compressor to build pressure.
Watch the new drain connection carefully.
Listen for hissing.
If you hear an air leak, turn the compressor off and depressurize the system before tightening or resealing anything.
Never tighten a questionable receiver fitting while working directly around a fully pressurized tank unless the fitting and procedure are specifically designed for adjustment under pressure.
Step 15: Check for Leaks
Use a suitable leak-detection solution around threaded connections.
Bubbles growing continuously indicate escaping air.
Repair any leaks before putting the system into regular service.
Even a small leak can cause:
- Compressor cycling
- Energy waste
- Reduced tank pressure
- Extra compressor wear
Step 16: Test the Automatic Drain
Most electronic timer drains have a TEST button.
With the compressor pressurized, activate the manual test.
The valve should open and discharge water or air.
Check that:
- The solenoid activates.
- The valve opens fully.
- The outlet is unobstructed.
- No fitting leaks.
- The valve closes completely afterward.
If the drain continues leaking after the test, inspect it before regular operation.
How to Set an Air Compressor Auto Drain Timer
There is no single timer setting that is correct for every compressor.
A practical method is to start conservatively and adjust based on observation.
If a Large Amount of Water Comes Out Every Cycle
Drain more frequently or extend the discharge time slightly.
If Only Dry Air Comes Out
The valve may be operating too frequently.
Increasing the interval can reduce compressed-air waste.
If Water Comes Out Followed by Long Air Discharge
Reduce the valve’s open time.
The goal is to remove condensate while losing as little stored air as practical.
Where Should an Auto Drain Be Installed?
The most common location is the lowest point of the air receiver tank.
This is where liquid naturally collects.
Automatic drains are also commonly installed on:
- Moisture separators
- Air filters
- Refrigerated dryers
- Secondary receiver tanks
- Drop legs
A compressed-air system may therefore contain multiple automatic drains.
Can You Leave the Original Manual Drain Installed?
Sometimes you can install an auto drain in a configuration that retains manual drainage capability.
Whether this is practical depends on:
- Tank port arrangement
- Available clearance
- Fitting layout
- Drain manufacturer instructions
Having a manual means of checking the tank can be useful, but avoid complicated unsupported plumbing hanging from the tank port.
Can an Auto Drain Be Installed With an Extension Hose?
A short extension may be useful when the drain port is difficult to access.
However, the line should be:
- Rated for pressure
- Resistant to condensate
- Correctly supported
- Installed so liquid can flow toward the drain
Avoid creating loops or low spots that trap water.
If the drain itself depends on gravity or a float, mounting orientation becomes especially important.
How Often Should an Air Compressor Auto Drain Operate?
There is no universal frequency.
The correct cycle depends on condensate production.
A compressor in humid Florida summer conditions may need much more frequent drainage than a compressor operating occasionally in a dry climate.
The best timer setting removes water before significant accumulation occurs without releasing excessive compressed air.
Observe the drain periodically even after finding a good setting because seasonal humidity and compressor workload can change.
Does an Automatic Drain Waste Air?
A timer-style drain does release some compressed air every time it opens.
How much depends on:
- Valve opening size
- Tank pressure
- Open duration
- Number of cycles
A properly adjusted timer minimizes that loss.
A zero-loss drain can reduce compressed-air waste because it opens based on actual condensate level rather than a fixed schedule.
For a small home workshop compressor, the energy difference may not be significant. For a large industrial system, wasted compressed air can become expensive.
Automatic Drain vs Manual Drain
| Feature | Automatic Drain | Manual Drain |
| Requires daily attention | Low | High |
| Initial cost | Higher | Very low |
| Electricity required | Some types | No |
| Air loss | Possible with timer models | Controlled manually |
| Convenience | Excellent | Basic |
| Risk of forgetting | Low | Higher |
| Maintenance | Valve must be checked | Simple valve |
| Best use | Frequent compressor operation | Occasional compressor use |
An automatic drain is especially valuable when the compressor operates every day or the tank drain is difficult to reach.
Can You Install an Auto Drain on a Small Portable Compressor?
Often, yes, provided:
- The drain port is compatible.
- There is enough physical clearance.
- The valve is rated for the compressor pressure.
- The electrical supply matches if powered.
However, some portable compressors have very little clearance under the tank.
A large timer drain may contact the floor or interfere with wheels.
In those cases, a compact valve or properly designed extension arrangement may be necessary.
Can You Install an Auto Drain on a 60-Gallon Compressor?
Yes.
Automatic drains are especially useful on larger stationary compressors because these machines often see frequent use and can accumulate substantial condensate.
Check:
- Tank drain thread size
- Maximum pressure
- Available voltage
- Physical clearance
A quality timer drain or zero-loss drain can greatly simplify maintenance on a 60-gallon shop compressor.
Can You Install an Auto Drain on an 80-Gallon Compressor?
Yes.
The process is essentially the same.
Larger shop and industrial compressors may benefit even more because they often operate for longer periods.
For high-use installations, a zero-loss condensate drain may be worth considering because it reduces compressed-air waste.
What If the Automatic Drain Keeps Leaking Air?
A drain that will not close properly may have:
- Dirt in the valve seat
- Rust particles
- Damaged diaphragm
- Worn seal
- Incorrect installation
- Excessive backpressure
- Solenoid problem
Shut the system down and depressurize it before disassembly.
Sometimes flushing or cleaning the valve solves the problem. A worn or damaged valve may need replacement.
Why Is No Water Coming Out of the Auto Drain?
Several possibilities exist.
There Is Very Little Condensate
Dry environmental conditions or light compressor usage may simply produce little water.
The Drain Is Clogged
Rust, pipe scale, or debris can block the inlet.
Timer Settings Are Wrong
The valve may open too briefly to clear the condensate.
The Solenoid Is Not Receiving Power
Check the electrical supply and timer operation.
Drain Port Is Not at the Lowest Point
If the compressor is not level, water may collect away from the drain opening.
Why Does My Auto Drain Keep Blowing Air?
A short burst of air after condensate drains is normal for many timer drains.
Continuous air flow is not.
Possible causes include:
- Valve stuck open
- Dirt on the valve seat
- Failed solenoid
- Timer fault
- Damaged seal
A continuously leaking auto drain wastes energy and can make the compressor cycle unnecessarily.
Does an Automatic Drain Replace an Air Dryer?
No.
An automatic drain removes liquid condensate that has already separated from the compressed air.
An air dryer removes much more of the remaining water vapor.
For applications such as:
- Automotive painting
- Instrument air
- CNC equipment
- Plasma cutting
- Sensitive pneumatic systems
additional moisture treatment may be necessary.
A typical system might include:
Compressor → receiver → separator/filter → dryer → additional filtration → air line
The exact arrangement depends on the application.
Does an Auto Drain Need Maintenance?
Yes.
Automatic does not mean maintenance-free.
Periodically inspect the drain for:
- Leaks
- Clogging
- Damaged tubing
- Loose fittings
- Electrical damage
- Proper cycling
Use the manual test function when available.
A failed auto drain can be worse than a manual valve because you may assume the tank is being drained when it is actually accumulating water.
Common Auto Drain Installation Mistakes
Installing the Valve While the Tank Is Pressurized
Always depressurize the receiver completely before removing the existing drain.
Using the Wrong Thread Size
Forcing mismatched pipe threads can damage the tank fitting.
Choosing a Drain With Too Low a Pressure Rating
The valve’s pressure rating must exceed the system’s maximum pressure.
Using the Wrong Voltage
A 230V valve should not be connected to 120V, and vice versa.
Applying Too Much PTFE Tape
Loose tape can enter small valve passages and cause leakage or clogging.
Pointing the Outlet Toward People or Equipment
Condensate exits under pressure and may contain rust, oil, or other contaminants.
Setting the Timer Too Often
Excessive draining wastes compressed air.
Setting the Timer Too Short
If the valve closes before the water is discharged, condensate continues accumulating.
Assuming the Drain Will Never Need Inspection
Even a high-quality automatic drain can eventually clog or fail.
Safety Tips for Installing an Air Compressor Auto Drain
Compressed-air receiver tanks can store substantial energy.
Before installation:
- Shut off electrical power.
- Allow hot components to cool.
- Depressurize the tank fully.
- Wear eye protection.
- Use pressure-rated fittings.
- Avoid modifying or welding the receiver tank.
- Never drill a new tank opening unless the receiver manufacturer specifically provides an approved procedure.
If the existing drain port is severely corroded, cracked, or damaged, stop and have the receiver evaluated.
A compromised air receiver is a serious safety issue.
FAQs About How to Install an Air Compressor Automatic Drain
How Does Air Compressor Auto Drain Work?
An auto drain opens periodically or when condensate reaches a certain level, allowing tank pressure to push water out through the drain.
Timer drains operate on a fixed schedule, while zero-loss and float drains respond to actual condensate accumulation.
How Do I Install an Auto Drain Valve for an Air Compressor?
Depressurize and disconnect the compressor, remove the manual drain, install a compatible automatic valve using suitable thread sealant, connect any required power or tubing, repressurize the tank, check for leaks, and test the drain.
Do I Need to Empty the Air Tank Before Installing an Auto Drain?
Yes.
The receiver should be completely depressurized before you remove the existing tank drain or any threaded tank fitting.
How Long Should an Automatic Drain Stay Open?
Only long enough to remove accumulated condensate.
For a timer drain, adjust the duration so the cycle removes the water and produces only a brief burst of air afterward.
How Often Should an Air Compressor Automatic Drain Open?
It depends on compressor use and humidity.
The drain should operate often enough to prevent significant water accumulation without unnecessarily wasting compressed air.
Can an Auto Drain Valve Get Clogged?
Yes.
Rust, scale, oil residue, and debris can clog small valve passages.
Periodic testing and cleaning help keep the drain reliable.
Is an Automatic Drain Worth Installing on a Home Air Compressor?
It can be, particularly if you use the compressor frequently or often forget to drain the tank manually.
For a compressor used only occasionally, a manual drain may still be adequate if it is used consistently.
Does an Automatic Drain Remove All Moisture From Compressed Air?
No.
It removes collected liquid condensate from the tank or separator. Water vapor can remain in the compressed air, so filters, separators, or dryers may still be required.
Conclusion
The final verdict on how to install an air compressor automatic drain is that the upgrade is relatively simple and can make routine compressor maintenance much easier, provided the drain is correctly matched to the tank’s thread size, operating pressure, voltage, and intended mounting position.
A proper installation starts by disconnecting power and completely depressurizing the receiver. The existing manual drain is then removed, the new automatic drain is installed with suitable thread sealant, and any required power or discharge tubing is connected. After repressurizing the system, the fitting should be checked carefully for leaks and the valve should be tested before regular use.
Understanding how does air compressor auto drain work is equally important. Timer drains periodically open for a preset duration, while float and zero-loss designs operate according to actual condensate levels. Whatever design you choose, the goal is to discharge water before it accumulates while minimizing unnecessary compressed-air loss.
For most home garages and small shops, a properly adjusted timer drain is a practical and affordable solution. For larger or heavily used compressor systems, a zero-loss drain may offer better efficiency. Either way, an automatic drain should still be inspected periodically because blocked or failed valves can allow water to accumulate unnoticed inside the receiver.