
How to Test Air Suspension Compressor: Step-by-Step Diagnosis
An air suspension compressor should be tested as part of the entire leveling system. Check fault codes, air leaks, the fuse and relay, power and ground, compressor current draw, and air output before replacing the pump. A compressor that does not run may simply be overheated, poorly powered, or being prevented from operating by the control module.
Air suspension diagnosis can be misleading because a leaking air spring often damages the compressor indirectly. The pump runs repeatedly trying to restore ride height, overheats, and may eventually trip thermal protection or fail.
Arnott notes that a vehicle dropping about 1 inch or more overnight is a strong sign of leakage. It also warns that an air leak can force the compressor to run for extended periods, leading to heat damage, melted connectors, or compressor failure.
The vehicle’s control system adds another layer. Ride-height sensors, pressure sensors, valve blocks, relays, wiring, battery voltage, and control modules all influence when the compressor is commanded on.
For how to test air suspension compressor, start by proving that the vehicle is requesting compressor operation. Then check that full battery power and a good ground reach the motor. Only after those checks should you judge compressor pressure, airflow, noise, temperature, or current draw.
Do not work underneath a vehicle supported only by its air suspension. Arnott advises supporting the vehicle properly and depressurizing the system in a controlled manner before air-suspension service. Some vehicles also require jack or service mode before lifting.
The procedure below covers the most useful tests without assuming that every vehicle uses the same pressure, current, or run-time specifications.
How to Test Air Suspension Compressor Step by Step
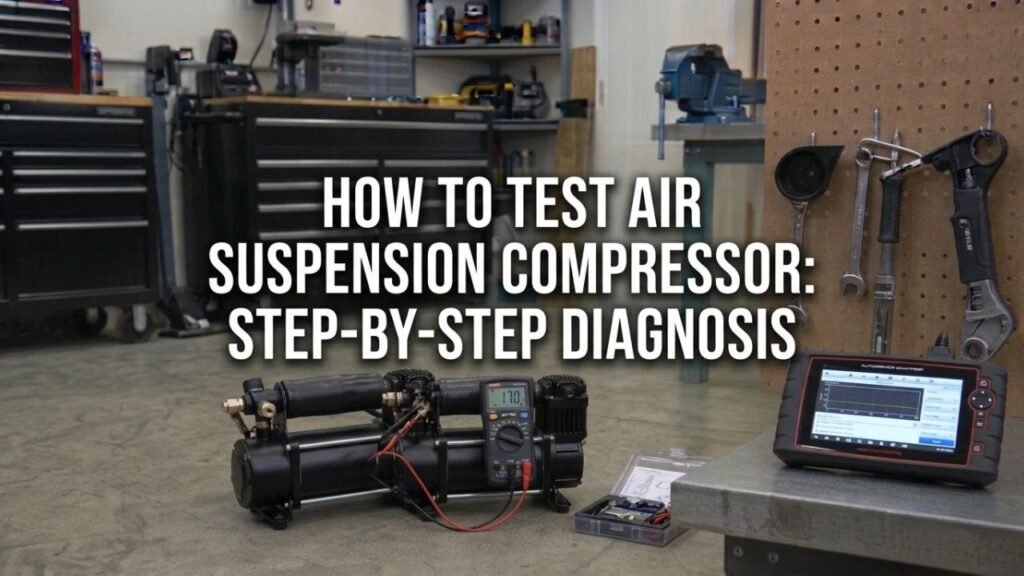
You will get the most reliable answer by testing the system in a logical order.
Useful tools may include:
- OBD-II or chassis-capable scan tool
- Digital multimeter
- DC clamp ammeter
- Wiring diagram
- Soapy-water leak solution
- Pressure gauge with suitable fittings
- Back-probe leads
- Fused test leads
- Basic hand tools
A basic engine-code scanner may not communicate with the suspension control module. Vehicles with electronic leveling often require a scan tool with chassis or air-suspension functions.
Step 1: Check Ride Height Before Testing the Compressor
Park the vehicle on level ground.
Compare the height at all four corners using a fixed reference point such as the wheel-center-to-fender measurement.
Look for:
- One corner sitting low
- Entire rear axle sitting low
- Front and rear both low
- Vehicle rising after startup
- Vehicle sinking after being parked
- Uneven side-to-side height
If the vehicle sits correctly after driving but drops overnight, begin with leak testing rather than condemning the compressor.
HELLA describes rear air-suspension vehicles that sink after being parked because small cracks or porous areas in the air springs allow pressure loss.
Step 2: Read Air Suspension Fault Codes
Connect a scan tool that can access the suspension or chassis control module.
Record all codes before clearing them.
Codes may relate to:
- Compressor run time
- Pressure buildup
- Ride-height sensors
- Valve block operation
- Compressor relay
- Supply voltage
- Thermal protection
- Compressor current
- System pressure
Also check live data if available.
Useful data can include:
- Requested ride height
- Actual ride height
- Compressor command
- System pressure
- Individual corner height
- Valve status
- Battery voltage
- Compressor temperature or run time
A compressor that is not being commanded on should not be blamed until the reason for the missing command is found.
Step 3: Inspect the Air Springs, Lines, and Fittings for Leaks
A leak is one of the most common causes of excessive compressor operation.
Mix soap and water and apply it to:
- Air spring folds
- Air-line fittings
- Valve block connections
- Compressor outlet
- Dryer fittings
- Line unions
- Damaged sections of nylon tubing
Watch for growing bubbles.
Firestone recommends using a soap-and-water mixture around air lines, fittings, air springs, and compressor connections to locate leaks.
Arnott also advises leak testing before installing a new compressor because a leak can overwork the replacement pump.
Step 4: Command the Compressor With a Scan Tool
Many vehicles let a technician activate the compressor through an output test.
This is one of the best diagnostic shortcuts.
If the scan tool commands the compressor on:
- Listen for motor operation.
- Watch system pressure.
- Watch ride height.
- Check compressor current.
- Note how long pressure takes to rise.
If the scan tool shows an ON command but the compressor remains silent, move to the electrical checks.
If the module refuses to command the compressor, investigate stored faults, ride-height inputs, battery voltage, temperature protection, and module conditions.
Step 5: Check the Compressor Fuse
Locate the air-suspension fuse using the owner’s manual or wiring diagram.
Do not rely only on visual inspection.
Check for battery voltage on both fuse test points with the circuit in the proper operating state.
A blown fuse may indicate:
- Shorted wiring
- Seized compressor motor
- Excessive current draw
- Water-damaged connector
- Relay or harness fault
Replacing a blown fuse repeatedly without finding the cause can damage wiring.
Step 6: Test the Compressor Relay
The compressor motor usually draws enough current that a relay is used between the control module and motor.
MOTOR notes that compressor relays are a common source of no-power conditions because compressor current places a substantial load on the relay contacts.
Check the relay circuit for:
- Battery feed
- Control command
- Output voltage
- Ground control if used
- Burned terminals
- Heat damage
- Loose socket tension
If the vehicle uses an interchangeable relay with the same part number, swapping it with a known-good matching relay can be a quick test.
Do not substitute a relay with different terminal functions or current ratings.
Step 7: Check Power and Ground at the Compressor
Command the compressor on and measure voltage at the compressor connector.
A compressor motor needs close to normal system voltage under load.
A meter may show 12 volts with the compressor disconnected while a corroded wire or poor terminal cannot carry enough current to run the motor.
This is why load testing matters.
MOTOR recommends load-testing suspension power and ground circuits rather than relying on a high-impedance digital meter alone, since a weak connection may show normal voltage without supporting real current flow.
Check:
- Power-side voltage drop
- Ground-side voltage drop
- Connector heat
- Corrosion
- Loose terminals
- Damaged harness sections
A good compressor connected through a weak ground may turn slowly, run hot, or fail to start.
Step 8: Measure Compressor Current Draw
A DC clamp ammeter is safer for many DIY checks than placing a normal multimeter directly in series with the compressor motor.
Clamp around the compressor power wire while commanding the pump on.
Compare current with the manufacturer’s specification.
Do not use a generic amperage number because compressor size and design vary greatly.
Possible patterns include:
Very high current:
The compressor may be mechanically binding, internally worn, or struggling against excessive load.
Very low current with poor output:
The motor may have worn brushes, damaged windings, poor internal contact, or low supply voltage.
Normal current but little pressure:
The motor may be running while the piston, seal, valve, dryer, or compressor head is no longer producing enough air.
Check current together with voltage and pressure rather than using amperage alone.
Step 9: Test Compressor Air Output
If the compressor runs, confirm that it actually moves air.
Some systems allow the outlet line to be disconnected at the dryer or compressor for a brief flow check.
MOTOR notes that certain Ford air-suspension compressors produce a rhythmic pulse of air that can feel weaker than expected even when operating normally.
Do not judge a compressor solely by how strong the air feels against your finger.
A pressure gauge or scan-tool pressure reading gives better evidence when factory specifications are available.
Step 10: Measure Pressure Buildup
Connect an approved pressure gauge at the service point specified by the vehicle manufacturer, or monitor system pressure through a scan tool.
Command the compressor on and watch:
- Starting pressure
- Maximum pressure reached
- Rate of pressure rise
- Time required to raise the vehicle
- Pressure loss after the compressor stops
There is no universal air-suspension compressor pressure specification.
Some systems operate at very different pressures from others. Use service data for the exact year, make, model, and suspension system.
If pressure rises very slowly despite full voltage, correct current supply, no major leak, and correct valve operation, the compressor may be worn.
Step 11: Let an Overheated Compressor Cool Before Condemning It
Many suspension compressors have thermal protection.
A compressor may have proper power and ground yet refuse to run because its internal thermal breaker has opened.
MOTOR describes this exact condition on Ford systems: an overheated compressor may show power and ground while remaining off until it cools.
If it begins working again after cooling, do not assume the problem has disappeared.
Find out why it overheated.
Common causes include:
- Leaking air spring
- Leaking fitting
- Bad valve block
- Stuck relay
- Restricted dryer
- Weak compressor requiring excessive run time
Step 12: Compare Compressor Operation With Ride-Height Response
The compressor is only one part of the leveling system.
If pressure rises normally but the car does not lift, check:
- Valve block
- Air-line routing
- Air spring solenoids
- Ride-height sensors
- Control commands
BILSTEIN notes that technicians may use diagnostic equipment to control compressor air supply and solenoid valves during air-suspension service.
Key Takeaway: Prove compressor command, power, ground, current draw, airflow, pressure buildup, and leak condition before deciding the pump itself is bad.
How to Test an Air Suspension Compressor Relay
A failed relay can create the same no-run symptom as a dead compressor.
Testing it first can prevent an unnecessary pump replacement.
Check the Relay Feed
Use the wiring diagram to identify:
- Battery-power terminal
- Compressor-output terminal
- Relay-coil power
- Relay-coil control
Battery feed should remain stable under load.
A corroded fuse box or overheated terminal may drop voltage when the compressor is commanded on.
Listen and Feel for Relay Operation
Command the compressor.
A click from the relay shows that the coil is moving the contact, but it does not prove that the high-current contacts are healthy.
Burned contacts may click normally while failing to send enough power to the motor.
Measure Voltage at the Output Side
With the relay commanded on, check voltage at the output terminal.
Then repeat the test with the compressor connected and under load.
A large voltage loss across the relay points toward burned contacts or a damaged relay socket.
Inspect for Heat Damage
Look for:
- Brown or black plastic
- Melted socket material
- Burned terminals
- Loose pins
- Heat-discolored wiring
Arnott advises replacing the compressor relay along with the compressor on applications where relay failure can contribute to repeated compressor damage.
Key Takeaway: A clicking relay is not automatically a good relay; verify that it carries full compressor current without a large voltage drop.
How to Test Air Suspension Compressor Pressure
Pressure testing tells you more about pump condition than noise alone.
Use Vehicle-Specific Pressure Data
Do not compare a Mercedes AIRMATIC compressor directly with an older Ford rear-leveling compressor or an aftermarket helper-spring compressor.
System design changes:
- Required pressure
- Reservoir use
- Compressor size
- Valve strategy
- Duty cycle
- Pressure-sensor location
Use the factory service specification.
Watch How Fast Pressure Builds
A worn compressor may still reach target pressure eventually.
The problem is that it takes too long.
A slow pressure rise can trigger run-time faults and thermal shutdown.
If the pressure rise is slow, check for leaks before replacing the compressor.
Blockage Can Also Reduce Pressure Delivery
A restricted dryer, damaged air line, or valve-block problem can make a healthy compressor appear weak.
Testing directly at an approved compressor outlet may separate pump output from downstream restriction.
Do not disconnect pressurized lines without first following the manufacturer’s depressurization procedure.
Key Takeaway: Test both final pressure and pressure-building speed, then compare those readings with factory specifications for the exact suspension system.
How to Tell if the Air Suspension Compressor Is Bad
Several symptoms make compressor failure more likely.
Compressor Does Not Run With Good Power and Ground
If the module commands the pump on, the relay supplies proper voltage, the ground passes a load test, and the compressor remains dead after cooling, internal motor failure becomes likely.
Possible internal faults include:
- Worn brushes
- Burned windings
- Seized bearings
- Thermal damage
- Internal connector failure
Compressor Runs but Vehicle Rises Very Slowly
Slow lifting may point toward a worn piston seal or weak pump.
Rule out air leaks first.
A large leak can make a healthy compressor appear weak because air escapes nearly as fast as the pump supplies it.
Compressor Is Excessively Noisy
Some compressor noise is normal.
Grinding, scraping, severe vibration, or a sudden change in sound may point toward mechanical wear.
Check rubber mounts too, since failed mounts can transmit normal compressor vibration into the body.
Compressor Gets Hot and Shuts Down
Repeated thermal shutdown usually means the pump is working too hard.
The compressor may itself be worn, or another fault may be making it run too long.
Arnott warns that leaks can cause sustained compressor operation and heat damage.
Burnt Smell or Melted Connector
Heat-discolored labels, burned wiring, melted air lines, and electrical smell point toward serious overheating.
Arnott lists discoloration, melted connectors or lines, and burned odor among signs associated with compressor burnout.
Key Takeaway: A dead motor with proper electrical supply, slow pressure buildup with no leaks, abnormal mechanical noise, repeated overheating, or burned components can justify compressor replacement.
How to Tell if the Compressor Is Good but the Suspension Still Fails
A working compressor does not mean the rest of the air suspension is healthy.
Bad Ride-Height Sensor
Ride-height sensors tell the control module when the vehicle is too high or too low.
A bad sensor can command incorrect adjustments or prevent the compressor from running.
MOTOR describes Ford height sensors that typically operate across roughly a 0.5- to 4.5-volt signal range and stresses that the signal should change smoothly as the sensor moves.
Vehicle-specific specifications still apply.
Leaking Air Spring
If a corner drops while parked and then rises after startup, the compressor may be doing exactly what it is supposed to do: replacing air lost through a leaking spring.
Leak-test the air spring before buying a compressor.
Faulty Valve Block
A stuck or leaking valve may:
- Prevent one corner from filling
- Cause one corner to sag
- Send air to the wrong circuit
- Let pressure bleed away
Arnott notes that uneven ride height can sometimes point toward valve-block trouble rather than the spring itself.
Weak Battery or Charging System
Suspension compressors draw substantial current.
Low battery voltage can slow the motor or cause the control module to disable compressor operation.
Firestone also notes that weak battery capacity can interfere with compressor operation in electronically controlled air systems.
Key Takeaway: If the compressor makes pressure normally, inspect sensors, air springs, valve blocks, battery condition, and control commands before replacing the pump.
Should You Jump Power Directly to an Air Suspension Compressor?
Direct-power testing can prove whether a motor runs, but it should not be the first test.
The compressor is a high-current load, and bypassing the vehicle control system can defeat thermal or pressure protections.
If a service procedure calls for direct power:
- Use the wiring diagram.
- Use correctly sized fused leads.
- Observe polarity.
- Keep clear of moving suspension.
- Do not run the compressor for an extended period.
- Stop if system pressure approaches its limit.
A scan-tool output test is usually preferable because it operates the compressor through the vehicle’s normal controls.
Do not apply battery power blindly to unknown connector terminals.
What to Check Before Replacing an Air Suspension Compressor
Before ordering a pump, verify:
- Air springs do not leak
- Air lines do not leak
- Valve block operates correctly
- Dryer is not badly restricted
- Relay works under load
- Fuse circuit is healthy
- Battery voltage is normal
- Compressor ground is solid
- Ride-height sensors report sensible data
- Control module commands compressor operation
- Compressor pressure is below specification
Replacing only the compressor while leaving a system leak can lead to another failure.
Arnott specifically recommends checking the entire system for leaks after compressor replacement and warns that compressor overuse from a leak can damage the new pump.
Conclusion
For how to test air suspension compressor, do not begin by unplugging the pump and guessing from its sound. Start with ride height, suspension codes, leaks, compressor command, the fuse, relay, and full-load voltage checks.
If the electrical supply is correct, measure current draw and pressure output. Compare the results with factory specifications instead of applying one universal PSI or amperage number to every vehicle.
A compressor that runs constantly may be a victim of a leaking air spring rather than the original fault. A compressor that appears dead may simply be in thermal shutdown after running too long.
I would replace the pump only after confirming that it receives proper power and ground yet fails to run, draws abnormal current, produces inadequate pressure with no major leak, or shows clear mechanical or thermal damage.
FAQs About Testing an Air Suspension Compressor
How Do I Know if My Air Suspension Compressor Is Working?
Listen for compressor operation when the vehicle is commanded to raise, then verify system pressure or ride-height change. A running sound alone is not proof of proper output. A worn compressor may run normally yet build pressure too slowly.
Can I Test an Air Suspension Compressor With a Multimeter?
Yes. A multimeter can check power, ground, relay control, and voltage drop. Use a clamp ammeter for motor current when possible because many ordinary multimeters cannot safely carry compressor-motor current through their internal current terminals.
What Voltage Should an Air Suspension Compressor Get?
Most passenger-vehicle compressors operate from the vehicle’s nominal 12-volt electrical system, but test against the wiring diagram and manufacturer specification. Voltage at the compressor should remain close to normal system voltage while the motor is under load.
How Many Amps Should an Air Suspension Compressor Draw?
There is no single correct amperage for all compressors. Motor size, system pressure, vehicle design, and compressor condition change current draw. Compare your reading with factory service data for the exact compressor.
What PSI Should an Air Suspension Compressor Produce?
There is no universal PSI specification. Different air suspension systems use different operating pressures. Check live pressure data or connect an approved gauge and compare the result with factory specifications for the exact vehicle.
Can a Bad Relay Make the Air Suspension Compressor Stop Working?
Yes. Compressor relays carry high motor current and their contacts can burn or overheat. MOTOR identifies faulty relays as a common cause of air-suspension compressor no-power complaints.
Can an Air Leak Make the Compressor Seem Bad?
Yes. A leaking air spring, line, fitting, or valve can force the compressor to run repeatedly and may make vehicle lifting seem slow. Long run times can then overheat and damage a compressor that originally had no fault.
Why Does My Air Suspension Compressor Work After It Cools Down?
Many compressors have thermal protection that switches the motor off when it overheats. MOTOR notes that an overheated compressor may have proper power and ground but remain off until it cools. Repeated thermal shutdown usually means the pump is overworked or another system fault is present.