How to Use a Bostitch Air Compressor Nail Gun Safely
To use a Bostitch air compressor nail gun, load the correct fasteners with the air hose disconnected, connect the nailer to the compressor, set the regulated outlet pressure within the nailer’s specified range, test the tool on scrap material, adjust nail depth, and then begin fastening while keeping your hands away from the firing path.
If you are learning how to use a Bostitch air compressor nail gun, the setup is fairly simple once you understand how the compressor, regulator, air hose, and pneumatic nailer work together. The compressor stores pressurized air, while its regulator controls how much pressure reaches the nail gun. Every time you pull the trigger, the nailer uses a short burst of compressed air to drive a fastener.
BOSTITCH makes several pneumatic nailer types, including brad, finish, framing, roofing, flooring, and specialty nailers. The loading method, fastener size, trigger system, and recommended operating pressure can differ between models. Therefore, the owner’s manual for your exact BOSTITCH model should always take priority over general instructions.
For beginners, the most important rules are to use the correct nails, never exceed the tool’s maximum operating pressure, disconnect the air supply before loading or clearing a jam, and test nail depth on scrap material before working on the finished project.
This guide explains the complete setup and operating process, including connecting your BOSTITCH nail gun to an air compressor, setting PSI, loading nails, adjusting depth, firing safely, troubleshooting common problems, and shutting everything down correctly.
How to Use a Bostitch Air Compressor Nail Gun
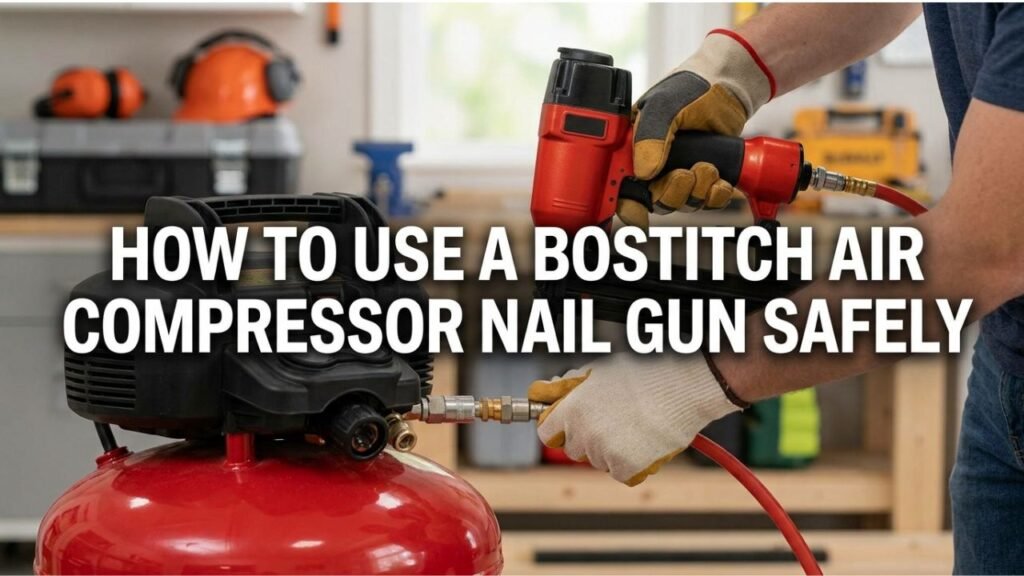
The basic process for how to use a Bostitch air compressor nail gun is to prepare the compressor, load the proper fasteners, connect the air hose, regulate the output pressure, and test the nailer before working on your project.
Start with the nail gun disconnected from the air hose. Check that you have the exact nail gauge, length, angle, and collation type specified for your BOSTITCH model. Load the magazine according to the tool’s instructions and close it securely.
Next, connect an appropriate air hose to the compressor and allow the compressor tank to fill. Adjust the regulated outlet pressure rather than simply relying on the compressor’s tank pressure.
Connect the nailer to the hose and fire a test fastener into scrap wood. If the nail sits above the surface, increase the nailer’s depth setting or regulated pressure slightly. If the nail is driven too deeply, reduce the depth setting or pressure.
Once the tool drives nails consistently at the correct depth, you can begin working.
Know Which Bostitch Nail Gun You Have
Before setting up the compressor, identify the nailer model.
BOSTITCH produces different pneumatic fastening tools, and they are not interchangeable.
For example, an 18-gauge brad nailer uses much thinner fasteners than a framing nailer. A roofing nailer normally uses coil roofing nails, while certain finish nailers use angled finish nails.
Common BOSTITCH pneumatic tool categories include:
Brad nailers for small trim, molding, cabinetry, and woodworking.
Finish nailers for heavier trim, baseboards, crown molding, and similar finish work.
Framing nailers for structural framing, sheathing, and larger construction fasteners.
Roofing nailers for asphalt shingles and compatible roofing applications.
Flooring nailers and staplers for hardwood flooring installations.
Check the model number printed on the tool and confirm its fastener specifications before loading anything.
What You Need to Use a Bostitch Pneumatic Nail Gun
A normal setup consists of a compatible air compressor, air hose, matching fittings, the BOSTITCH pneumatic nailer, and the correct fasteners.
Your compressor does not necessarily have to be made by BOSTITCH. A compatible compressor from another manufacturer can operate the nailer if it provides the required pressure and sufficient airflow.
BOSTITCH currently offers portable compressors such as its 6-gallon 150 PSI oil-free model as well as compressor-and-nailer combination kits, but the right compressor depends on the nailer and how heavily you use it.
For most individual nail guns, airflow demand is relatively low because the tool consumes air only when a nail is fired.
Step 1: Inspect the Nail Gun Before Connecting Air
Before every use, look over the nailer.
Make sure:
- No screws or parts appear loose.
- The magazine closes properly.
- The nose is not visibly damaged.
- The trigger moves normally.
- The air fitting is secure.
- No fastener is sticking from the nose.
Do this inspection before connecting compressed air.
Never place your hand in front of the nailer’s nose to inspect it.
Step 2: Wear the Right Safety Equipment
At minimum, wear appropriate eye protection.
Fasteners can deflect after hitting:
- Knots
- Other nails
- Metal hardware
- Hard grain
- Board edges
A nail can enter the wood and unexpectedly exit through the side.
Hearing protection may also be appropriate because both the compressor and repeated nail-gun firing can be loud.
Keep other people away from the immediate firing area.
Step 3: Make Sure the Nail Gun Is Disconnected From Air
Disconnect the hose before:
- Loading nails
- Removing nails
- Clearing a jam
- Adjusting internal components
- Performing maintenance
This prevents an accidental discharge while your hands are near the magazine or nose.
Do not rely only on keeping your finger off the trigger.
Step 4: Load the Correct Bostitch Nails
Open the nailer’s magazine according to the model’s design.
BOSTITCH nailers may use:
- Straight strips
- Angled strips
- Plastic-collated nails
- Wire-collated nails
- Paper-collated nails
- Coil nails
- Brad nails
The fastener has to match the nailer’s gauge, length, collation angle, and magazine design.
For example, putting the wrong angle of framing nails into a framing nailer can cause feeding problems or jams even if the nails look similar.
Place the nails into the magazine in the correct orientation and close or release the magazine follower according to the manual.
You should not need excessive force to load compatible fasteners.
Step 5: Prepare the Air Compressor
Place the compressor on a stable surface with adequate ventilation.
Before starting it, make sure the tank drain valve is closed.
Connect the compressor to a suitable electrical circuit and turn it on.
The motor should run until the receiver tank reaches its normal cut-out pressure, at which point the compressor will stop automatically.
Do not confuse tank pressure with nail-gun operating pressure.
A compressor may store air at 150 PSI while the nailer requires a much lower regulated pressure.
Step 6: Connect the Air Hose
Attach one end of the air hose to the compressor’s regulated outlet.
Most portable compressor setups use quick-connect couplers.
Pull back the coupler sleeve if required, insert the plug fully, and release the sleeve.
Make sure the fitting locks securely.
Then inspect the hose for:
- Cuts
- Cracks
- Bulges
- Damaged fittings
Do not use a damaged compressed-air hose.
Step 7: Set the Air Pressure Before Connecting the Nailer
The compressor normally has a pressure regulator.
This allows you to control outlet pressure independently of tank pressure.
Check the operating-pressure range printed on your BOSTITCH nailer or listed in its manual.
Different BOSTITCH tools can have different requirements, so there is no single PSI setting that should be used with every BOSTITCH nail gun.
Many pneumatic nailers operate somewhere in the general neighborhood of roughly 70–120 PSI, but your model’s specified range is the one that matters.
Start toward the lower part of the allowed range rather than immediately using maximum pressure.
Step 8: Connect the Nail Gun to the Air Hose
Keep your finger away from the trigger and point the tool in a safe direction.
Connect the air-hose coupler to the nailer’s air inlet fitting.
You may hear a brief burst of air as the connection is made.
There should not be continuous hissing afterward.
If air continues leaking, disconnect the tool and inspect the fitting, hose, and nailer.
Step 9: Test the Nail Gun on Scrap Wood
Do not make your first shot on finished trim or an expensive workpiece.
Use a scrap piece of the same or similar material.
Hold the nailer securely and place the nose where you want the fastener to enter.
Fire one nail.
Then inspect the result.
The nail head should generally sit at the depth appropriate for the job without unnecessarily crushing or damaging the surrounding material.
Step 10: Adjust Nail Depth
There are two main ways nail-driving depth may be adjusted.
Use the Tool’s Depth Adjustment
Many BOSTITCH nailers include a tool-free depth-control mechanism.
If your model has one, use that adjustment first.
This lets you change how deeply the fastener is driven without making unnecessary changes to compressor pressure.
Fine-Tune the Regulated Pressure
If necessary, adjust compressor outlet pressure gradually while remaining within the nailer’s approved operating range.
Increase pressure slightly if nails consistently remain too high.
Reduce pressure if nails are being driven excessively deep.
Do not simply turn the regulator to maximum pressure.
More PSI does not automatically produce better fastening.
How Much PSI Does a Bostitch Nail Gun Need?
There is no universal BOSTITCH nail-gun PSI because the company makes many different pneumatic models.
Depending on the tool, normal operating pressure may commonly fall somewhere around 70–120 PSI, but some models can specify a different range.
Always check:
- Tool label
- Owner’s manual
- BOSTITCH model documentation
Never exceed the nailer’s stated maximum pressure.
Your compressor’s maximum tank PSI does not tell you the pressure you should send to the tool.
Tank PSI vs. Regulated PSI
This difference is important for beginners.
Suppose your BOSTITCH compressor has a 150 PSI maximum tank pressure.
That does not mean your nail gun must receive 150 PSI.
The tank might contain air at 150 PSI while the regulator is set to send only 90 PSI to the nailer.
Think of the tank pressure as stored supply pressure and the regulator setting as the pressure actually delivered to the tool.
Always set the regulated outlet pressure according to the nail gun.
How Much CFM Does a Bostitch Nail Gun Need?
Pneumatic nailers generally use relatively little air compared with continuous air tools such as:
- Sanders
- Die grinders
- Spray guns
A nail gun takes a brief pulse of compressed air with each shot.
For a single brad or finish nailer, a small portable compressor usually provides enough airflow.
Framing and roofing nailers use more air per shot, particularly during rapid production work, so recovery rate becomes more important.
Compare the nailer’s air requirement with the compressor’s CFM rating at the specified PSI if you are unsure whether your compressor is large enough.
Is a 6-Gallon Bostitch Compressor Enough for a Nail Gun?
For most individual pneumatic nailers, yes.
A 6-gallon portable compressor is particularly suitable for:
- Brad nailers
- Finish nailers
- Staplers
- Many framing-nailer tasks
It provides substantially more stored air than a brad nailer requires during normal trim work.
A framing or roofing nailer used rapidly all day can place higher demands on compressor recovery, but tank size alone should not be used to determine capacity. CFM and firing rate also matter.
How to Hold a Bostitch Nail Gun Correctly
Hold the handle firmly with your dominant hand.
Keep your other hand well away from the location where the fastener may travel.
This is especially important when fastening:
- Narrow boards
- Thin trim
- Board edges
- Angled joints
Nails do not always travel perfectly straight through wood.
They can follow the grain, hit a knot, bend, and exit through the side.
Keep your supporting hand several inches away from the possible nail path.
Sequential vs. Contact Firing Modes
Some pneumatic nailers offer more than one trigger or firing system.
The two common concepts are sequential firing and contact/bump firing.
With sequential operation, specific trigger and contact actions must occur in sequence before a fastener fires. This provides better control for precise fastening.
Contact firing can allow faster repetitive fastening because holding the trigger and contacting the workpiece can fire fasteners repeatedly, depending on the tool.
BOSTITCH models vary, and some tools use specialized trigger systems. Follow the instructions supplied with your exact model and do not modify the trigger mechanism.
For beginners, controlled single-fastener operation is generally the easier way to maintain placement accuracy.
How to Use a Bostitch Brad Nailer
A BOSTITCH brad nailer is commonly used for trim, small molding, cabinet work, and other finish applications.
Load the correct brads while the air is disconnected.
After connecting the compressor, start at the lower end of the approved operating-pressure range and make a test shot.
Because brads are small, excessive pressure can easily sink the fastener farther than needed and leave a deeper mark in soft trim.
Use the nailer’s depth adjustment to fine-tune the result.
How to Use a Bostitch Finish Nailer
Finish nailers drive larger fasteners than brad nailers and are useful for jobs such as:
- Baseboard
- Crown molding
- Door casing
- Window trim
Select the correct finish nail gauge and length for your specific tool.
Again, test on scrap first.
For trim work, the goal is normally to set the nail head slightly below the finished surface so the hole can be filled without unnecessarily crushing the wood.
How to Use a Bostitch Framing Nailer
Framing nailers require extra attention because they drive much larger fasteners with significantly more energy.
Make sure the nail angle and collation type match the nailer exactly.
Hold the tool firmly against the intended fastening point and keep hands well away from the opposite side of the lumber.
Never fire blindly into an area where:
- Electrical wiring may be present
- Plumbing may be present
- Another person could be behind the material
Use only fasteners appropriate for the structural application.
How to Use a Bostitch Roofing Nailer
A roofing nailer normally uses coil roofing nails.
Correct depth is especially important.
A roofing nail should not be driven so deeply that the head cuts into or damages the roofing material, nor should it remain excessively raised.
Compressor pressure, depth control, roof material, and tool technique all influence results.
Follow the roofing-material manufacturer’s fastening requirements in addition to the BOSTITCH nailer’s instructions.
Should You Put Oil in a Bostitch Nail Gun?
This depends on the exact model.
Some pneumatic nailers require a small amount of pneumatic tool lubricant, while others may be designed for oil-free operation or have different lubrication requirements.
Do not automatically add oil just because the tool uses compressed air.
Check the model manual.
If lubrication is specified, use the correct pneumatic tool oil and the recommended amount. Adding excessive oil can send lubricant through the exhaust and onto the workpiece.
Also remember that compressor oil and pneumatic tool oil are not automatically the same product.
Why Is My Bostitch Nail Gun Not Shooting?
If the nailer does not fire, disconnect it from the air supply before inspecting it.
Several problems can cause a no-fire condition.
The compressor may not have enough regulated pressure, the magazine may be empty, a nail may be jammed, the wrong fasteners may be installed, or the trigger/contact system may not be operating correctly.
Check the simple issues first.
Verify pressure, nails, magazine loading, and air connection.
If the problem remains, follow the troubleshooting procedure for your exact model rather than disassembling pressurized components.
Why Won’t the Bostitch Nail Gun Drive Nails All the Way?
If nails consistently remain above the work surface, possible causes include insufficient outlet pressure, an incorrect depth setting, an undersized compressor, a leaking hose, or unusually hard material.
First check the tool’s depth control.
Then verify that regulated pressure is within the approved range.
Do not exceed maximum pressure to compensate for a mechanical problem.
If the nailer previously worked correctly at the same settings but suddenly loses driving power, it may require maintenance.
Why Is the Bostitch Nail Gun Driving Nails Too Deep?
Excessive depth usually means either the depth control is set too aggressively or regulated pressure is higher than necessary.
Reduce the tool’s depth setting first.
If necessary, lower compressor pressure slightly while remaining within the tool’s recommended operating range.
Test again on scrap material.
Soft woods can require less driving force than dense material.
What to Do if the Bostitch Nail Gun Jams
Disconnect the air hose immediately.
Do not attempt to clear a jam while the nailer remains connected to compressed air.
Remove remaining fasteners from the magazine if required by the manufacturer’s instructions.
Many nailers provide relatively easy access to the nose for jam clearing, but the exact method differs by model.
Use the procedure specified in the manual.
After removing the jammed fastener, inspect the driver area and reload the correct nails before reconnecting air.
Frequent jams can indicate:
- Wrong fasteners
- Damaged fastener strip
- Dirty magazine
- Worn parts
- Improper loading
Repeated jamming deserves further inspection.
How to Disconnect a Bostitch Nail Gun
When you are finished, point the tool safely away from yourself and others and keep your finger off the trigger.
Disconnect the air hose from the nailer.
Only after the tool is disconnected should you remove unused nails, inspect it, clear debris, or prepare it for storage.
Do not leave a connected pneumatic nailer unattended.
Shut Down the Air Compressor Properly
Turn the compressor off when the job is finished.
Disconnect electrical power if you are storing or servicing it.
Then release pressure according to the compressor manufacturer’s procedure and drain condensation from the receiver tank.
Compressed atmospheric air creates water inside the tank as it cools.
Regular draining helps reduce internal corrosion.
If you use your compressor frequently, tank draining should become part of your normal shutdown routine.
Store the Nail Gun Safely
Before storage, make sure the tool is disconnected from the compressor.
Follow your manual regarding whether nails should be removed during storage.
Keep the nailer:
- Dry
- Clean
- Away from children
- Protected from impact
Do not store it with the air hose connected.
Periodically inspect the magazine, nose, trigger, fasteners, and air fitting.
Common Mistakes When Using a Bostitch Air Compressor Nail Gun
One of the most common beginner mistakes is turning compressor pressure all the way up because the nail is not sinking properly. If the nailer is already receiving its recommended pressure, excessive pressure can damage the work surface and unnecessarily stress the tool. Check depth adjustment, fasteners, material, and tool condition instead.
Another mistake is loading nails while the tool remains connected to compressed air. Disconnecting the hose before loading, clearing jams, or working near the nose greatly reduces the chance of an accidental discharge.
Using fasteners that “almost fit” is another common problem. Nail gauge, length, angle, and collation style all matter. A visually similar nail can still be incompatible with the magazine.
Finally, do not hold the workpiece directly behind or beside the intended fastener path. Nails can bend inside the material and exit somewhere unexpected.
Bostitch Nail Gun Safety Tips
Treat a pneumatic nailer as a tool capable of causing serious injury every time it is connected to air.
Never point it toward yourself or another person, even if you believe it is unloaded. Keep your finger away from the trigger while carrying or positioning it, and disconnect the hose before servicing or clearing jams.
Do not defeat or modify safety mechanisms.
Always stay within the tool’s specified operating pressure and use the correct fasteners.
If the nailer begins firing unexpectedly, leaking heavily, or operating abnormally, disconnect it from the air supply and stop using it until the cause is identified.
FAQs About How to Use a Bostitch Air Compressor Nail Gun
How do you connect a Bostitch nail gun to an air compressor?
Connect an air hose to the compressor’s regulated outlet, set the proper outlet pressure, and attach the other end of the hose to the nailer’s air inlet using compatible quick-connect fittings.
Keep your finger off the trigger while connecting the tool.
What PSI should I set my Bostitch nail gun to?
Use the operating-pressure range specified for your exact BOSTITCH model.
Many pneumatic nailers operate within roughly 70–120 PSI, but this is not a universal BOSTITCH specification. Never exceed the tool’s stated maximum pressure.
Can I use a Bostitch nail gun with any air compressor?
Yes, in many cases.
The compressor does not have to be BOSTITCH, but it must supply the correct regulated pressure and enough airflow for the nailer.
Is a 6-gallon compressor enough for a Bostitch nail gun?
A 6-gallon compressor is generally more than adequate for a brad or finish nailer and can operate many framing nailers during normal intermittent use.
Rapid production work can require greater airflow and faster recovery.
Why does my Bostitch nail gun leave nails sticking out?
Possible causes include low regulated air pressure, incorrect depth adjustment, low compressor output, an air leak, hard material, or a nailer that needs service.
Check depth adjustment and pressure before increasing PSI unnecessarily.
Do Bostitch nail guns need oil?
Some models require pneumatic tool lubricant while others have different lubrication requirements.
Check the manual for your exact model rather than automatically adding oil.
How do I load nails into a Bostitch nail gun?
Disconnect the air hose first, open the magazine according to the tool design, insert the exact compatible fasteners in the correct direction, and secure the magazine or follower.
Loading procedures differ between brad, finish, framing, and coil nailers.
Do I need to drain the compressor after using my Bostitch nail gun?
Draining accumulated tank condensation regularly is important regardless of which pneumatic tool you used.
Follow the compressor manufacturer’s draining procedure, particularly after regular use or operation in humid conditions.
Conclusion
Learning how to use a Bostitch air compressor nail gun comes down to setting up the compressed-air system correctly, using the exact fasteners designed for the nailer, and controlling nail depth instead of simply using as much pressure as possible.
Begin with the nailer disconnected from air, inspect the tool, load the correct nails, and allow the compressor to fill its tank. Then set the regulated outlet pressure within the operating range specified for your particular BOSTITCH nailer, connect the hose, and make a test shot on scrap material. Use the tool’s depth control and small pressure adjustments to achieve the correct nail depth before working on the actual project.
The most important safety habits are equally straightforward: keep your hands away from the possible fastener path, wear eye protection, never point the nailer toward anyone, and always disconnect the air hose before loading, clearing a jam, or performing maintenance.
A BOSTITCH pneumatic nailer does not require a huge compressor for most fastening jobs. What matters is having sufficient CFM and the correct regulated PSI. Once those settings are correct and you understand your nailer’s firing and depth controls, a BOSTITCH air compressor nail gun can provide fast, consistent fastening for trim, woodworking, framing, roofing, or other applications appropriate for the specific model.