How to Use a Nail Gun With an Air Compressor: Beginner Guide
A pneumatic nail gun can make framing, trim installation, woodworking, and other fastening jobs much faster than driving nails by hand. Instead of using an electric motor inside the nailer, a pneumatic model receives compressed air through a hose connected to an air compressor. That air powers the internal piston that drives each nail into the material.
To use a nail gun with an air compressor, connect a compatible air hose, set the compressor regulator within the nail gun’s recommended PSI range, load the correct nails, connect the air supply, test the nail depth on scrap material, and then fire the nailer while keeping its nose firmly against the workpiece.
Learning how to use a nail gun with an air compressor is not difficult, but beginners need to understand a few important details first. The compressor must provide enough pressure and airflow for the nailer, the hose and fittings need to be compatible, and the regulator should be adjusted correctly rather than simply turned to maximum pressure.
Safety also matters. Pneumatic nail guns can drive fasteners into wood almost instantly, and a nail can sometimes follow the grain and exit unexpectedly from the side of a board. Good hand placement, eye protection, proper trigger technique, and disconnecting the air supply before clearing jams are essential.
This guide explains the entire process from compressor setup to connecting the hose, choosing the correct PSI, loading the nail gun, adjusting nail depth, firing safely, and troubleshooting common problems.
How to Use a Nail Gun With an Air Compressor Step by Step
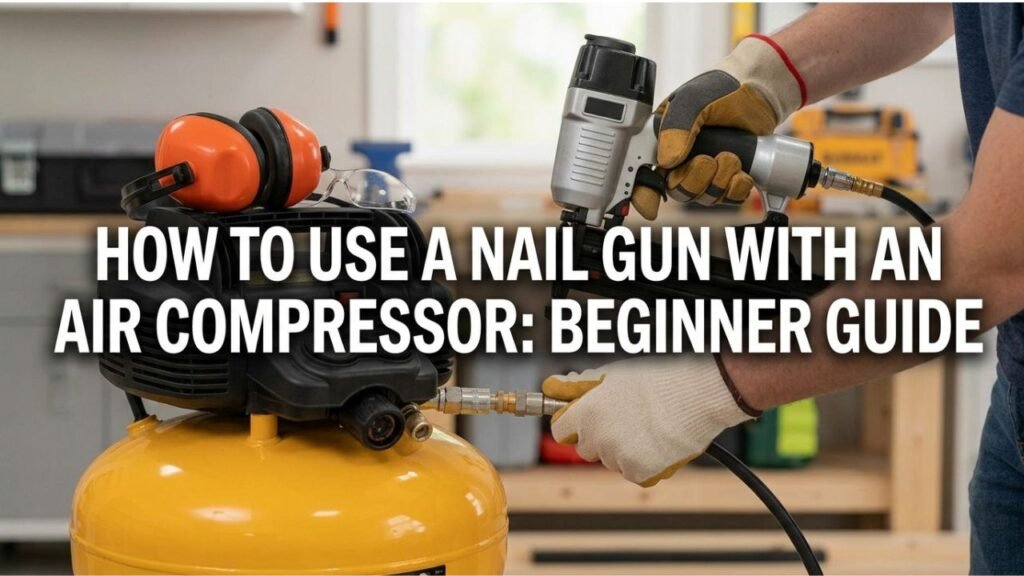
The basic setup is straightforward: prepare the compressor, attach the correct hose and fittings, set the pressure, load the nail gun, connect the air line, and test the tool before working on your actual project.
The process is easiest if you follow this order:
- Confirm that your compressor can run the nail gun.
- Inspect the air hose and fittings.
- Turn on the compressor and let the tank fill.
- Adjust the outlet pressure.
- Load the correct nails into the nail gun.
- Connect the air hose to the nailer.
- Test the nail depth on scrap material.
- Adjust pressure or the nailer’s depth control if necessary.
- Hold the tool squarely against the workpiece.
- Fire nails while keeping hands away from the fastener path.
- Disconnect the air hose before clearing jams or servicing the nailer.
The exact controls and loading mechanism differ between framing nailers, finish nailers, brad nailers, roofing nailers, and staplers, so follow the tool manufacturer’s instructions whenever they differ from these general steps.
Make Sure the Air Compressor Can Run the Nail Gun
Pneumatic nail guns usually require far less air than continuously running tools such as sanders or grinders.
Because a nailer consumes air only for a moment each time it fires, even a relatively small portable compressor can often operate one successfully.
The compressor needs to meet two main specifications:
PSI, or pounds per square inch, tells you the air pressure.
CFM, or cubic feet per minute, tells you how much air the compressor can deliver.
For a nail gun, pressure determines whether the tool can drive the fastener correctly, while airflow determines how well the compressor keeps up when nails are fired repeatedly.
A small compressor may work perfectly for occasional nailing but cycle frequently during rapid production work.
What PSI Should You Use for a Nail Gun?
Many pneumatic nail guns operate somewhere around 70 to 120 PSI, but the exact range depends on the specific tool.
Do not assume every nail gun should run at 90 PSI.
Look for the operating-pressure range printed on:
- The nail gun
- Tool manual
- Manufacturer specifications
Start near the lower end of the recommended range and test the tool.
If the nail is not being driven fully, increase the regulated pressure gradually.
Do not exceed the manufacturer’s maximum operating pressure.
More pressure is not automatically better. Excessive pressure can increase tool wear, damage the workpiece, and drive nails too deeply.
Tank Pressure and Outlet Pressure Are Different
Most compressors have at least two pressure readings.
The tank gauge shows the pressure stored inside the compressor tank.
The regulated outlet gauge shows the pressure being sent to the nail gun.
For example, your compressor tank might contain 150 PSI while your regulator delivers only 90 PSI to the hose.
The nail gun should receive the pressure specified by its manufacturer, regardless of how much pressure the tank can store.
Use the regulator knob to control outlet pressure.
What Size Air Compressor Do You Need?
The ideal compressor depends on the type of nail gun and how quickly you work.
For many DIY projects, a small 2- to 6-gallon portable compressor is enough for a single pneumatic nailer.
A 6-gallon pancake compressor is especially popular because it provides enough stored air for many fastening tasks while remaining easy to carry.
Smaller compressors can also work, especially with brad and finish nailers.
If several people are using nail guns at once or you are firing rapidly for framing or roofing, higher CFM and a larger tank can reduce compressor cycling.
The nail gun’s published air requirement should always be compared with the compressor’s output.
What Air Hose Should You Use?
A flexible air hose connects the compressor to the nail gun.
For many nailers, a 1/4-inch air hose works well because the airflow demand is relatively low.
A lightweight hose is particularly convenient for trim and finish work because it places less drag on the tool.
Long hoses can cause some pressure loss, especially if they are narrow or paired with restrictive fittings.
If the nail gun becomes weak when working far away from the compressor, check the hose, couplers, and outlet pressure before assuming the compressor is too small.
Check the Air Hose and Fittings
Before connecting the nail gun, inspect the hose.
Look for damage such as:
- Cracks
- Cuts
- Bulges
- Loose couplers
Pneumatic systems usually use quick-connect fittings.
The plug on the nail gun must be compatible with the coupler on the air hose.
There are several fitting profiles used in the United States, so two 1/4-inch fittings are not automatically compatible just because the thread size appears similar.
Use matching fitting types throughout the system.
Should You Use Teflon Tape on Air Fittings?
Thread-sealing tape or another approved pneumatic thread sealant may be used on threaded air fittings where appropriate.
Apply it only to tapered pipe threads and keep sealing material away from the inside of the fitting.
Loose pieces of tape can enter pneumatic tools.
Do not add tape to quick-connect surfaces that are designed to seal internally.
Step 1: Position the Air Compressor
Place the compressor on a stable surface in a dry, ventilated location.
Make sure the electrical cord, if present, can reach a suitable outlet without creating a trip hazard.
Avoid covering ventilation openings because compressors generate heat while running.
If using an extension cord, follow the compressor manufacturer’s requirements. For many electric compressors, using a longer air hose is preferable to using an undersized electrical extension cord because voltage drop can make the motor overheat.
Step 2: Close the Tank Drain Valve
Before starting the compressor, verify that the air-tank drain valve is closed.
The drain is normally located at the bottom of the receiver tank.
If it remains open, air will escape and the compressor may struggle or fail to build pressure.
The valve should be snug enough to seal but does not normally need excessive tightening.
Step 3: Turn On the Compressor and Fill the Tank
Connect the compressor to its power source and switch it on.
The motor should run while the tank fills.
When tank pressure reaches the compressor’s cut-out setting, the pressure switch automatically stops the motor.
This is normal.
The compressor will restart later when tank pressure falls to its cut-in level.
You do not need to wait for the tank to become completely empty before the motor cycles again.
Step 4: Set the Regulator Pressure
Once the tank contains compressed air, adjust the outlet regulator.
Turn the regulator until the outlet gauge shows a pressure within the nail gun’s approved operating range.
For example, if your tool specifies 70–120 PSI, you might begin around 80 or 90 PSI and adjust after testing.
Do not set the regulator based only on the compressor’s maximum tank pressure.
Step 5: Load the Correct Nails
Before connecting the air hose to the tool, load the correct fasteners.
The correct nails depend on the nailer type.
A nail gun may require a specific:
- Gauge
- Length
- Collation angle
- Head shape
- Shank type
- Collation material
A framing nailer designed for 21-degree plastic-collated nails, for example, should not automatically be loaded with nails intended for a 30-degree paper-collated tool.
Using the wrong fastener can cause jams or damage the tool.
Open the magazine according to the manufacturer’s instructions, insert the nail strip, and close the magazine securely.
Step 6: Connect the Air Hose to the Nail Gun
With the tool pointed in a safe direction and your finger away from the trigger, connect the air hose.
Most quick couplers work by pulling back the coupler sleeve, inserting the tool fitting, and releasing the sleeve until the connection locks.
You may hear a brief burst of air while connecting.
Gently pull on the hose afterward to confirm that it is locked.
Do not hold the nail gun by the trigger while making the connection.
Step 7: Test the Nail Gun on Scrap Material
Never begin by testing pressure on the finished piece.
Use a scrap piece of the same or similar material.
Place the nail gun’s nose firmly against the workpiece and fire one nail.
Then inspect its depth.
If the nail head remains too high, you may need slightly more pressure or a deeper tool setting.
If the nail sinks excessively below the surface, reduce the depth setting or pressure.
Use the Nail Gun’s Depth Adjustment First
Many modern nail guns include a tool-free depth adjustment near the nose.
This allows you to control how deeply the nail is driven without constantly changing compressor pressure.
A good setup is to keep the compressor within the manufacturer’s recommended range and use the nailer’s depth control for fine adjustment.
Increase air pressure only if the tool does not have enough energy to drive nails consistently.
Step 8: Hold the Nail Gun Correctly
Place the nose of the nailer flat against the work surface.
Try to hold the gun roughly perpendicular to the material unless the job specifically requires angled fastening.
Keep your other hand away from the expected nail path.
This is especially important when fastening near:
- Board edges
- Thin trim
- Knots
- Angled joints
A nail can bend or follow the grain and exit through the side of the workpiece.
Step 9: Fire the Nail Gun
Most pneumatic nailers have a contact safety mechanism at the nose.
The nailer generally fires only when the nose is pressed against the workpiece and the trigger is activated.
However, trigger systems vary.
Two common operating modes are sequential firing and contact/bump firing.
Sequential Firing
Sequential operation generally requires you to place the nose against the material and then pull the trigger for each fastener.
This provides more deliberate control and is often easier for beginners.
Bump or Contact Firing
In contact mode, the trigger may be held while pressing the nose against the workpiece to fire repeatedly.
This allows faster nailing but provides less deliberate control.
Use the trigger mode recommended for the job and tool.
Beginners generally benefit from sequential firing when accuracy matters.
Do Not Disable the Safety Contact
Never tape down, remove, or modify the nail gun’s contact safety mechanism.
It helps reduce accidental firing.
If the safety tip becomes difficult to operate, clean or repair the nailer according to the manufacturer’s procedure instead of bypassing the mechanism.
How to Adjust Nail Depth Correctly
The nail head should normally finish at the depth appropriate for the material and job.
For trim, you may want the head slightly below the surface so the hole can be filled.
For framing, the nail should hold the material firmly without being excessively overdriven.
If nails are too shallow, first check:
- Depth adjustment
- Regulated pressure
- Tank pressure
- Hose restrictions
- Correct nail size
If nails are consistently too deep, reduce the depth setting before making major pressure changes.
Why Is My Nail Gun Not Driving Nails All the Way?
Low pressure is one possibility, but it is not the only one.
A nailer may under-drive fasteners because of insufficient compressor pressure, a leaking hose, wrong nails, worn internal seals, restricted fittings, or incorrect depth adjustment.
If the compressor is cycling constantly and the pressure drops significantly during use, it may also be too small for the firing rate.
Avoid exceeding the tool’s maximum PSI to compensate for a mechanical problem.
Why Does the Compressor Keep Turning On?
This is normal.
Every nail removes a small amount of compressed air from the tank.
As tank pressure falls, the compressor reaches its cut-in pressure and the motor automatically starts.
The motor stops again when the tank reaches cut-out pressure.
Frequent cycling can become more noticeable with a small compressor or rapid nailing.
As long as the compressor remains within its intended duty cycle and can maintain adequate pressure, cycling itself is not a problem.
Does a Nail Gun Need Oil?
Some pneumatic nail guns require a small amount of pneumatic tool oil regularly.
Others are designed as oil-free tools.
Check the nail gun manual.
If lubrication is required, the manufacturer may instruct you to place a few drops of pneumatic tool oil into the air inlet.
Do not use random motor oil, compressor crankcase oil, penetrating oil, or other lubricants unless the nailer manufacturer specifies them.
Too much oil can also create unnecessary mess and buildup.
Air Compressor Oil and Nail Gun Oil Are Not the Same Job
If you have an oil-lubricated compressor, the compressor pump may contain its own crankcase oil.
That oil lubricates the compressor pump.
Pneumatic tool oil lubricates the nail gun.
Do not confuse the two maintenance requirements.
An oil-free compressor can still operate an oil-lubricated pneumatic nail gun because the tool receives its own lubrication separately when required.
What to Do if the Nail Gun Jams
If a nail jams, stop immediately.
Before placing your hands near the nose or magazine, disconnect the air hose.
Do not trust the trigger safety alone.
After the tool is disconnected, follow its jam-clearing procedure.
Many nailers have a tool-free nose release that provides access to the driver channel.
Remove the damaged fastener carefully, inspect the magazine, and make sure the driver can move normally before reconnecting air.
How to Disconnect the Nail Gun From the Air Compressor
When you finish working, keep the tool pointed in a safe direction.
Release the trigger and disconnect the air coupler.
A small amount of trapped air may escape when the connection separates.
Once disconnected, unload the remaining nails if the tool will be stored or serviced.
Then shut off the compressor and follow its shutdown procedure.
Drain Water From the Compressor Tank After Use
Air compressors naturally collect condensation inside their receiver tanks.
After use, drain accumulated moisture according to the compressor manufacturer’s instructions.
Regular draining helps reduce internal tank corrosion and prevents water from traveling through the air hose.
This is especially useful in humid environments.
If your nail gun frequently receives visibly wet air, a moisture separator may also be helpful.
Can Water in the Air Line Damage a Nail Gun?
Excessive moisture can contribute to corrosion and lubrication problems inside pneumatic tools.
A small amount of moisture in compressed air is common, but frequent liquid water reaching the nailer is undesirable.
Regularly drain:
- Compressor tank
- Moisture separator
- Filter bowl where installed
A properly maintained air system helps extend tool life.
Nail Gun Safety Tips for Beginners
Eye protection is essential because nails and wood fragments can deflect unexpectedly.
Keep your hands several inches away from where the nail will travel, especially when nailing thin or angled pieces.
Never point the nail gun at yourself or another person, even when you believe it is unloaded.
Disconnect the air line before adjusting, servicing, clearing jams, or leaving the tool unattended.
Also inspect the work area before nailing. Hidden electrical wires, plumbing, or other materials can be damaged by long fasteners.
Can You Use a Nail Gun Without an Air Compressor?
A pneumatic nail gun requires a source of compressed air.
That is usually an air compressor, although specialized compressed-gas systems exist for some applications.
If you do not want to use an air compressor, alternatives include:
- Battery-powered cordless nailers
- Fuel-cell nailers
- Electric nailers
These tools use different power systems and do not require a traditional air hose.
What Size Compressor Works for Different Nail Guns?
Although exact requirements vary, pneumatic nailers are generally low-air-demand tools.
A compact compressor can often run:
- Pin nailer
- Brad nailer
- Finish nailer
- Stapler
A framing or roofing nailer can also work from many portable compressors, although fast production work may benefit from greater airflow and tank capacity.
For any nailer, match the compressor to the manufacturer’s specified CFM and PSI rather than relying only on tank size.
Common Mistakes When Using a Nail Gun With an Air Compressor
One common mistake is turning the pressure too high because the compressor is capable of producing it.
The nailer should operate within its own rated pressure range.
Another mistake is loading fasteners that are almost—but not quite—compatible. Incorrect angle, gauge, or collation can create repeated jams.
Beginners may also place their free hand too close to the fastening point. Nails do not always travel perfectly straight through wood, so maintain a safe distance from the potential exit path.
Finally, never clear a jam while the tool is still connected to compressed air.
FAQs About How to Use a Nail Gun With an Air Compressor
What PSI should I set my air compressor for a nail gun?
Use the pressure range specified by the nail gun manufacturer. Many pneumatic nailers operate somewhere around 70–120 PSI, but the correct setting varies.
Start near the lower end and increase gradually if necessary.
Do you connect the nail gun before or after turning on the compressor?
You can let the compressor fill first, set the regulator, load the nailer while disconnected, and then connect the air hose.
Keeping the tool disconnected while loading or making adjustments reduces accidental firing risk.
Can a 6-gallon air compressor run a nail gun?
Yes. A typical 6-gallon pancake compressor can run most pneumatic nail guns very well for normal DIY and jobsite use, provided its airflow and pressure meet the tool’s requirements.
Can a 3-gallon compressor run a nail gun?
Usually, yes.
Brad and finish nailers generally work especially well with small compressors. A framing nailer may also work, although the compressor may cycle more often during rapid use.
Why won’t my air nail gun shoot nails?
Possible causes include low air pressure, an empty magazine, incorrect fasteners, a jammed nail, disconnected air supply, or an engaged safety mechanism.
Disconnect the air hose before inspecting the nose or clearing a jam.
Should I oil my pneumatic nail gun?
Only if the manufacturer specifies lubrication.
Some pneumatic nailers require several drops of pneumatic tool oil periodically, while others are designed to operate without routine oiling.
Can I use 120 PSI with a nail gun?
Only if 120 PSI is within the nailer’s approved operating range.
Never exceed the tool’s maximum rated pressure simply because the compressor can produce more.
Do I need a moisture separator for a nail gun?
It is not always necessary for occasional DIY use, but keeping excessive moisture out of pneumatic tools is beneficial.
Regularly draining the compressor tank is the first step. A moisture separator can provide additional protection in humid or heavily used systems.
Conclusion
The overall process for how to use a nail gun with an air compressor is simple once you understand the relationship between the compressor, regulator, air hose, and nailer. Make sure the compressor provides enough CFM and PSI, fill the receiver tank, regulate the outlet pressure to the nail gun’s approved range, load the correct fasteners, connect the hose, and test the nail depth on scrap material before beginning the actual project.
For most nail guns, you do not need a huge compressor. Small portable compressors can usually keep up because nailers consume air in short bursts rather than continuously. Correct pressure and compatible fittings matter more than simply buying the largest tank available.
The most important practical consideration is safe operation. Keep your free hand away from the nail path, wear eye protection, do not exceed the nailer’s rated pressure, and always disconnect the air supply before clearing a jam or servicing the tool. With the compressor adjusted correctly and the nail gun loaded with the proper fasteners, a pneumatic nailer can provide fast, consistent fastening for everything from trim work to framing.