How to Use Craftsman Air Compressor Nail Gun Safely
To use a Craftsman air compressor with a pneumatic nail gun, connect the hose and fittings securely, set the regulator within the nail gun’s recommended PSI range, load the correct fasteners, test the nail depth on scrap material, and then begin fastening with the tool held firmly against the work surface.
Using a pneumatic nail gun with a Craftsman air compressor can make framing, trim work, furniture projects, flooring, and other fastening jobs much faster than driving every nail by hand. The setup is fairly simple once you understand how the compressor, regulator, air hose, quick-connect fittings, and nail gun work together.
If you are learning how to use Craftsman air compressor nail gun equipment for the first time, the most important part is matching the nail gun’s pressure and airflow requirements to the compressor rather than simply turning the regulator as high as possible. Too little pressure can leave nails sticking above the surface, while too much pressure can drive fasteners too deeply or damage the material.
Craftsman has sold many different portable and stationary air compressors, and pneumatic nail guns also vary by model. A small brad nailer may require very little air, while a framing or flooring nailer can need a higher working pressure. Because of those differences, the tool and compressor manuals should always take priority over general pressure recommendations.
This guide explains how to set up a Craftsman compressor, attach a pneumatic nail gun, choose the correct PSI, load fasteners, adjust nail depth, troubleshoot weak performance, disconnect the tool safely, and avoid the most common beginner mistakes.
How to Use Craftsman Air Compressor Nail Gun Equipment
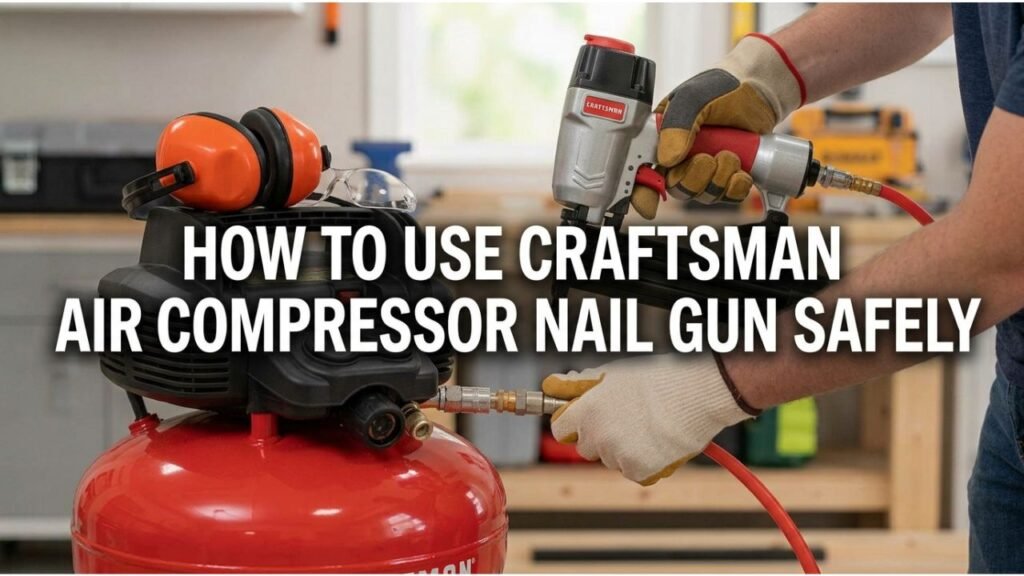
To use a Craftsman air compressor nail gun setup, first make sure the compressor is on a stable surface and the tank is properly drained. Connect an appropriate air hose to the compressor outlet, attach the hose to the nail gun, charge the compressor tank, regulate the outlet pressure to the nailer’s specified operating range, load the correct nails, and test the tool on scrap material.
The basic workflow is:
- Inspect the compressor, hose, fittings, and nail gun.
- Connect the air hose to the compressor.
- Connect the hose to the nail gun.
- Turn the compressor on and allow the tank to fill.
- Set the regulated outlet pressure.
- Load the correct nails.
- Test the nail gun on scrap material.
- Adjust pressure or depth as needed.
- Begin fastening.
- Disconnect and depressurize the tool when finished.
The compressor tank pressure and the air pressure sent to the nail gun are not the same thing. That distinction is especially important for beginners.
Understand the Compressor Gauges Before You Start
Many Craftsman compressors have two pressure gauges.
One gauge normally shows tank pressure.
The second shows regulated outlet pressure.
The tank may store air at a much higher pressure than the nail gun actually needs. The regulator controls how much pressure reaches the hose and tool.
For example, the compressor tank may contain 125 PSI or more, while the nail gun may only need around 70–100 PSI.
Do not confuse those numbers.
You generally adjust the regulated outlet pressure, not the internal tank pressure.
Check the Nail Gun’s Required PSI
Before connecting the tool, read the nail gun label or manual.
Many pneumatic nail guns operate somewhere around:
70–120 PSI
but the actual range varies.
A brad nailer may operate well at a relatively low setting, while a framing or flooring nailer may require more pressure to drive larger fasteners.
Never exceed the nail gun manufacturer’s maximum pressure rating.
Higher pressure does not automatically make the tool work better.
Excessive pressure can:
Drive nails too deeply
Damage trim or wood
Increase recoil
Stress internal seals
Increase air consumption
Shorten tool life
Start near the lower end of the recommended range and increase only as necessary.
Check the Compressor’s CFM Rating
PSI is only one part of the setup.
You should also make sure the compressor can supply enough CFM, or cubic feet per minute.
Nail guns are relatively easy for small compressors to run because they use air in short bursts rather than continuously.
A typical portable Craftsman compressor can usually handle one brad, finish, framing, or similar nailer if the nailer’s airflow requirement is within the compressor’s output rating.
A nail gun requiring 2 CFM at 90 PSI should ideally be paired with a compressor that can supply at least that amount, preferably with some reserve.
If the compressor cannot keep up, pressure will drop during repeated firing.
Inspect the Air Compressor Before Use
Before switching the compressor on, inspect it for obvious problems.
Check the:
Power cord
Air hose
Quick-connect couplers
Pressure gauges
Tank drain
Regulator
Safety valve
Compressor housing
Do not use equipment with damaged electrical wiring, cracked hoses, severely corroded tanks, or leaking fittings.
The receiver tank is a pressure vessel, so visible structural corrosion or damage should never be ignored.
Drain Moisture From the Compressor Tank
Compressed air naturally produces condensation.
Water can collect at the bottom of the tank.
Before or after use, drain the tank according to the compressor manufacturer’s procedure.
Regular drainage helps reduce:
Tank corrosion
Water entering the hose
Moisture reaching the nail gun
Rust inside pneumatic tools
Do not remove a threaded fitting from a pressurized tank.
Use the designated drain valve and follow the Craftsman model’s instructions.
What Air Hose Should You Use With a Nail Gun?
A 1/4-inch air hose is normally sufficient for one nail gun.
This size is lightweight and easy to move around a work area.
For very long hose runs or multiple pneumatic tools, a 3/8-inch hose may reduce pressure drop.
The hose should be rated for pressure higher than the maximum pressure your compressor can produce.
Do not use a hose with:
Cuts
Cracks
Bulges
Damaged fittings
Exposed reinforcement
A failed pressurized hose can whip unpredictably and cause injury.
How to Connect the Air Hose to a Craftsman Compressor
Most portable compressor systems use quick-connect fittings.
The exact coupler style can vary, so the hose plug and compressor coupler must be compatible.
First, make sure the compressor outlet regulator is turned down or the system is not heavily pressurized at the hose outlet.
Pull back the collar on the compressor’s quick coupler if required.
Insert the hose plug fully.
Release the collar.
Gently pull on the hose to make sure the connection is locked.
You should not hear continuous air leaking from the connection.
A small momentary release of air during connection can be normal.
How to Connect the Nail Gun to the Air Hose
Attach the opposite end of the hose to the nail gun’s air inlet.
Again, use compatible quick-connect fittings.
Make sure the connection locks securely.
Do not hold your finger on the nail gun trigger while attaching the air hose.
Keep the nail gun pointed away from yourself and other people.
The safest habit is to treat the tool as if it could fire whenever it is connected to compressed air.
Do Pneumatic Nail Guns Need Air Tool Oil?
Some do, while others are designed as oil-free nailers.
Check the Craftsman nail gun manual.
If the tool requires pneumatic oil, the manufacturer may instruct you to place a small number of drops of air-tool oil into the air inlet before use.
Do not assume more oil is better.
Excess oil can:
Spray onto the work surface
Collect dirt
Affect internal operation
Stain finished material
Also, do not substitute compressor crankcase oil, automotive engine oil, or gear oil for pneumatic-tool oil unless the nail gun manufacturer explicitly permits it.
If the tool is labeled oil-free, do not add oil unnecessarily.
How to Start the Craftsman Air Compressor
Once the hose is connected and everything is inspected, plug the compressor into an appropriate electrical outlet.
Avoid undersized extension cords.
A long, thin extension cord can cause voltage drop, which may make the compressor motor:
Start slowly
Run hot
Trip protection
Perform poorly
When possible, keep the electrical cord short and use a longer air hose instead.
Switch the compressor on.
Allow the tank to fill until the compressor reaches its cut-out pressure and the motor stops.
The exact cut-out pressure depends on the model.
How to Set PSI for the Nail Gun
Once the compressor tank is charged, adjust the regulator.
Watch the outlet pressure gauge, not the tank-pressure gauge.
Start near the lower end of the nail gun’s recommended operating range.
For example, if the nail gun is rated for 70–120 PSI, you might begin somewhere around 70–80 PSI and test the result.
The best setting is the lowest pressure that consistently seats the fastener correctly.
This reduces unnecessary stress on the tool and workpiece.
How to Load Nails Into the Nail Gun
The nail gun must use the correct:
Nail type
Gauge
Length
Collation style
Angle
depending on the model.
Do not load nails simply because they physically fit into the magazine.
An incorrect fastener can cause:
Jams
Misfeeds
Tool damage
Poor nail placement
Unsafe firing
Disconnect the air hose before loading or clearing fasteners unless the nail gun manual specifically states another procedure.
Open the magazine, insert the correct strip or coil of nails, and close the magazine securely.
Brad Nailer vs. Finish Nailer vs. Framing Nailer
Craftsman pneumatic nailers may be designed for very different jobs.
Brad Nailer
A brad nailer usually drives small 18-gauge brads.
It is useful for:
Light trim
Craft projects
Small molding
Furniture assembly
Brad nailers generally use very little compressed air.
Finish Nailer
A finish nailer typically uses larger 15- or 16-gauge finish nails.
It is commonly used for:
Baseboard
Door casing
Window trim
Crown molding
Cabinet work
Framing Nailer
A framing nailer drives much larger nails.
It is intended for:
Wall framing
Decks
Sheathing
Construction lumber
Framing nailers require more driving power but still generally have relatively modest average air consumption because each shot is brief.
Test the Nail Gun on Scrap Material First
Never begin on the finished workpiece without testing first.
Use a scrap piece of the same or similar material.
Press the safety contact firmly against the wood and fire one nail.
Check whether the nail is:
Too high
Flush
Slightly countersunk
Too deep
Your target depends on the project and material.
For most finish work, you want the nail set slightly below the surface without crushing the surrounding wood.
How to Adjust Nail Depth
Many modern nail guns include a depth adjustment near the nose.
If your model has one, use it before changing compressor pressure dramatically.
Depth adjustment allows the nailer to drive deeper or shallower while staying within the correct pressure range.
A good adjustment method is:
Set proper PSI.
Test one fastener.
Adjust the tool’s depth control.
Test again.
Change regulator pressure only if needed.
This approach gives better control than using excessive pressure to compensate for a depth setting.
What if the Nail Does Not Go in Far Enough?
If nails remain above the surface, several causes are possible.
First, check the regulated pressure.
If it is below the nailer’s recommended range, increase it gradually.
If pressure is already correct, inspect:
Nail length and type
Tool depth adjustment
Air hose restrictions
Compressor recovery
Air leaks
Nail gun maintenance
Hardwood can also require more driving energy than softer wood.
Do not exceed the tool’s maximum pressure to force a nail into difficult material.
What if the Nail Goes Too Deep?
Reduce the nailer’s depth setting if it has one.
If necessary, lower the regulator pressure slightly.
Excessively deep fasteners can:
Damage trim
Split thin material
Create large holes
Weaken edge areas
Cause poor finish quality
Use scrap material to find the correct setting before returning to the actual project.
How to Hold and Fire a Pneumatic Nail Gun
Hold the nail gun firmly by its intended grip.
Keep fingers away from the nose and fastener path.
Place the contact tip flat against the workpiece.
Keep the tool stable.
Activate the trigger according to the nail gun’s firing mode.
The nailer should fire one fastener cleanly into the material.
Do not place your free hand close to the point where the nail will enter.
Nails can sometimes deflect inside wood and exit from the side.
Maintain a safe distance between your hand and the expected fastener path.
Sequential vs. Bump Firing
Some pneumatic nailers support different trigger systems.
Sequential Firing
With sequential firing, you usually place the nose against the workpiece and then pull the trigger.
This method provides greater placement control.
For beginners, sequential operation is generally easier to manage safely.
Contact or Bump Firing
With contact firing, the trigger may remain depressed while the contact tip fires the tool each time it touches the workpiece.
This allows much faster fastening but increases the chance of unintended double firing or accidental placement.
Use only the firing mode intended by the manufacturer and appropriate for the work.
Do not modify the trigger or safety contact.
Why the Compressor Keeps Turning On and Off
This is normal.
The compressor stores air in its receiver tank.
As the nail gun consumes air, tank pressure falls.
When pressure reaches the compressor’s cut-in pressure, the motor automatically starts.
The pump refills the tank.
When the tank reaches cut-out pressure, the motor stops again.
This cycling is normal as long as the compressor is operating within its rated duty cycle.
Is It Normal for the Compressor to Run Often With a Nail Gun?
It can be.
A small compressor may cycle frequently during rapid nailing.
If the nail gun continues driving fasteners consistently and tank pressure recovers normally, frequent cycling alone does not mean something is wrong.
However, if the compressor runs almost continuously and cannot recover, check for:
Air leaks
Undersized compressor
Loose hose fittings
High regulator setting
Damaged hose
Excessive tool air consumption
A compressor that is too small may still fire a nail gun but require frequent pauses.
How to Use a Craftsman Pancake Compressor With a Nail Gun
A pancake compressor is one of the most common setups for pneumatic nailers.
The process is straightforward.
Place the compressor on a stable surface.
Drain the tank if required.
Connect the air hose.
Connect the nail gun.
Turn the compressor on.
Allow it to reach cut-out pressure.
Set the regulated outlet pressure.
Load the nailer.
Test on scrap.
Adjust depth.
Begin work.
A 6-gallon pancake compressor is typically well suited to one brad, finish, or framing nailer as long as its CFM rating meets the tool requirement.
Can a Small Craftsman Compressor Run a Nail Gun?
Usually, yes.
Nail guns are intermittent tools.
Even a small compressor can often operate a nailer because the tool only needs air for a fraction of a second each time it fires.
A smaller tank means the motor may restart more frequently, but that does not automatically prevent proper operation.
Compare the nail gun’s required CFM and PSI with the compressor rating.
What PSI Should a Craftsman Nail Gun Use?
There is no universal Craftsman nail gun PSI.
Many pneumatic nailers operate somewhere around 70–120 PSI, but individual models can require narrower ranges.
Always check the exact nail gun label or manual.
Start low and increase only until the nail is properly seated.
Do not use the compressor’s maximum tank pressure as the nail-gun setting.
Can You Use a 150 PSI Compressor With a Nail Gun?
Yes, as long as the regulated outlet pressure is set within the nail gun’s safe working range.
A compressor rated to store 150 PSI does not mean 150 PSI must be sent directly to the tool.
The regulator reduces the working pressure.
For example, a 150 PSI tank can still safely supply a nailer that requires 90 PSI when the regulator is set correctly.
What if the Nail Gun Leaks Air?
A small momentary release of air can occur during connection, but continuous leaking is not normal.
Common leak sources include:
Quick coupler
Air inlet fitting
O-ring
Trigger valve
Head valve
Internal seals
Disconnect the air supply before inspecting or servicing the tool.
Sometimes a loose threaded fitting can be corrected with proper resealing, but internal leakage may require a rebuild kit or professional service.
What if the Nail Gun Does Not Fire?
First, disconnect the air hose before troubleshooting.
Then check whether:
The magazine contains correct fasteners.
A nail is jammed.
The contact safety moves freely.
The tool is receiving enough pressure.
The hose is connected fully.
The compressor has tank pressure.
The nailer requires lubrication.
If the tool receives air but still does not operate, internal service may be necessary.
Do not disable safety mechanisms in an attempt to make it fire.
How to Clear a Jammed Nail Gun
Disconnect the nail gun from compressed air before clearing a jam.
Remove the remaining fasteners if the design allows.
Open the nose or jam-clearing mechanism according to the manual.
Remove the jammed fastener with the appropriate tool.
Inspect the driver blade and magazine.
Reload the correct nails.
Reconnect the air hose only after the tool is fully reassembled.
Never place your face near the nose while clearing a jam.
How to Disconnect the Nail Gun From the Compressor
When finished, keep your finger away from the trigger.
Place the nail gun in a safe position.
Depending on the coupler design, pull back the quick-connect collar and remove the air hose.
Some compressed air may release from the hose or tool.
Then turn the compressor off.
If you are finished for the day, release pressure and drain condensation from the tank according to the compressor’s instructions.
Should You Leave Air in the Compressor Tank?
For routine storage, many users shut the compressor off, release stored pressure, and drain moisture after the workday.
The exact storage procedure varies by model.
Regularly removing condensate is particularly important because water left inside a steel receiver tank can promote internal corrosion.
Follow the Craftsman manual for your compressor.
Should You Leave the Nail Gun Connected Overnight?
Generally, disconnect the nail gun from the air supply when it is not being used.
This prevents accidental firing and relieves unnecessary pressure from tool seals.
Store the nail gun in a clean, dry place.
If the nailer requires oil, follow its maintenance schedule before storage.
Do You Need to Drain the Compressor After Using a Nail Gun?
Yes, draining condensate regularly is good compressor maintenance.
How much water accumulates depends on:
Humidity
Runtime
Ambient temperature
Tank size
In humid conditions, surprisingly large amounts of water can collect inside the tank.
Drain it using the designated tank drain valve.
Why Is Water Coming Through the Nail Gun Air Hose?
Water in the hose usually comes from moisture condensing inside the compressed-air system.
Possible causes include:
Tank not drained regularly
High humidity
Long hot compressor runs
No moisture separator
Cold air line causing condensation
For ordinary nail-gun use, draining the tank regularly is usually sufficient.
An inline moisture separator can provide additional protection in humid environments.
How to Avoid Pressure Drop in the Air Hose
Pressure drop increases when air must travel through narrow or restricted passages.
To reduce it, avoid:
Very long undersized hoses
Kinked hoses
Damaged quick couplers
Small restrictive fittings
Air leaks
If you are using a long hose and the nail gun becomes weak even though the compressor gauge looks correct, hose restriction may be part of the problem.
Can You Use an Extension Cord With a Craftsman Compressor?
You may be able to, but only if the compressor manufacturer permits it and the cord is appropriately sized.
Undersized extension cords can reduce voltage reaching the motor.
This may lead to:
Hard starting
Motor overheating
Breaker trips
Reduced compressor life
Using a longer air hose rather than a long lightweight extension cord is often the better option.
Check the compressor manual for approved cord gauge and length.
Important Nail Gun Safety Rules
A pneumatic nail gun can drive a fastener deeply enough to cause severe injury.
Wear eye protection whenever operating the tool.
Hearing protection may also be appropriate, especially during prolonged indoor work.
Never point the nail gun at another person, even when you believe it is unloaded.
Keep your finger off the trigger while carrying or repositioning the tool.
Disconnect the air hose before:
Loading when required by the manual
Clearing jams
Adjusting internal parts
Performing maintenance
Leaving the tool unattended
Do not tape down, remove, or modify the contact safety.
Common Mistakes When Using a Craftsman Air Compressor Nail Gun
One of the most common mistakes is setting the PSI too high. More pressure does not automatically produce a better result.
Another is ignoring the nailer’s required fastener type. A similar-looking nail may still have the wrong gauge, angle, or collation.
Beginners also sometimes connect a pneumatic tool before checking the regulator. If the outlet pressure was previously set for another high-pressure tool, the nailer may receive more pressure than intended.
Another common mistake is forgetting to drain the compressor tank. Moisture accumulation can promote corrosion and send water into the air hose.
Finally, never troubleshoot a jammed nail gun while it remains connected to compressed air.
FAQs About How to Use Craftsman Air Compressor Nail Gun Equipment
How Do I Connect a Craftsman Nail Gun to an Air Compressor?
Attach a compatible air hose to the compressor’s regulated outlet using the quick-connect fitting, then connect the opposite end to the nail gun.
Make sure both couplers lock securely before pressurizing the system.
What PSI Should I Set My Craftsman Compressor for a Nail Gun?
Use the operating pressure specified for your exact nail gun.
Many pneumatic nailers operate somewhere around 70–120 PSI, but you should begin near the lower end and increase only enough to seat the fasteners correctly.
Do I Need to Oil a Craftsman Nail Gun?
It depends on the model.
Some pneumatic nailers require a few drops of air-tool oil periodically, while others are designed to operate oil-free.
Check the nail gun manual before adding lubricant.
Can a 6-Gallon Craftsman Air Compressor Run a Nail Gun?
Yes, in most cases.
A 6-gallon portable compressor usually provides enough air for one brad, finish, framing, or similar nailer as long as its CFM and pressure ratings meet the tool’s requirements.
Why Won’t My Nail Gun Drive Nails All the Way In?
The regulated pressure may be too low, the depth adjustment may be set too shallow, the compressor may be unable to keep up, or the hose may be restricting airflow.
Incorrect fasteners or very hard material can also affect nail depth.
Why Does My Craftsman Air Compressor Keep Running While Nailing?
The nail gun uses compressed air with every shot, causing tank pressure to fall.
The compressor automatically turns on at its cut-in pressure to refill the tank.
Frequent cycling can be normal with a small compressor.
Can I Use Any Air Hose With a Craftsman Nail Gun?
Use a hose and fittings that are compatible with the compressor and nailer and rated for the system pressure.
A 1/4-inch hose is usually sufficient for one pneumatic nail gun.
Do I Need to Drain My Craftsman Compressor After Using the Nail Gun?
Regular drainage is recommended because moisture condenses inside the tank.
Many users drain their compressor after each day of use, especially in humid conditions.
Follow the maintenance procedure for your exact model.
Conclusion
The practical method for how to use Craftsman air compressor nail gun equipment is to match the nailer to the compressor, connect the hose and couplers securely, let the compressor build tank pressure, and then set the regulated outlet pressure within the nail gun’s specified range. After loading the correct fasteners, test the nail depth on scrap material and use the lowest pressure that produces consistent results.
For most brad, finish, and framing nailers, a portable Craftsman compressor can supply enough air because pneumatic nail guns use compressed air in short bursts rather than continuously. The key specifications are the tool’s required PSI and CFM, not simply the compressor’s tank size or maximum pressure.
Most problems come from incorrect regulator settings, air leaks, restricted hoses, wrong fasteners, poor maintenance, or compressor capacity that cannot keep up with rapid firing. Set up the system correctly, keep the tank drained, follow the nailer’s lubrication requirements, and always disconnect compressed air before clearing jams or performing maintenance. With those basics in place, a Craftsman compressor and pneumatic nail gun can provide fast, consistent fastening for a wide range of DIY and professional projects.