
How to Connect Nail Gun to Air Compressor Safely
Using a pneumatic nail gun is fairly simple once the air compressor, hose, fittings, and pressure regulator are set up correctly. The most important part is making the connection in the right order so the tool does not receive excessive pressure or accidentally fire while you are handling it.
To connect a nail gun to an air compressor, attach the air hose to the compressor outlet, connect the other end to the nail gun’s air inlet, set the regulator within the nailer’s recommended PSI range, and test the tool on scrap material. To disconnect it, turn off the compressor if appropriate, release or isolate air pressure, hold the hose coupler securely, and remove the fitting carefully.
Learning how to connect nail gun to air compressor equipment correctly also helps prevent common problems such as leaking fittings, nails not driving fully, excessive pressure, hose whip, and unnecessary compressor cycling. The setup is similar for brad nailers, finish nailers, framing nailers, roofing nailers, and many pneumatic staplers, although exact pressure requirements vary by tool.
This guide explains the complete connection process, how to choose the right hose and fittings, how to set air pressure, how to check for leaks, and how to disconnect nail gun from air compressor safely when the job is finished.
How to Connect Nail Gun to Air Compressor
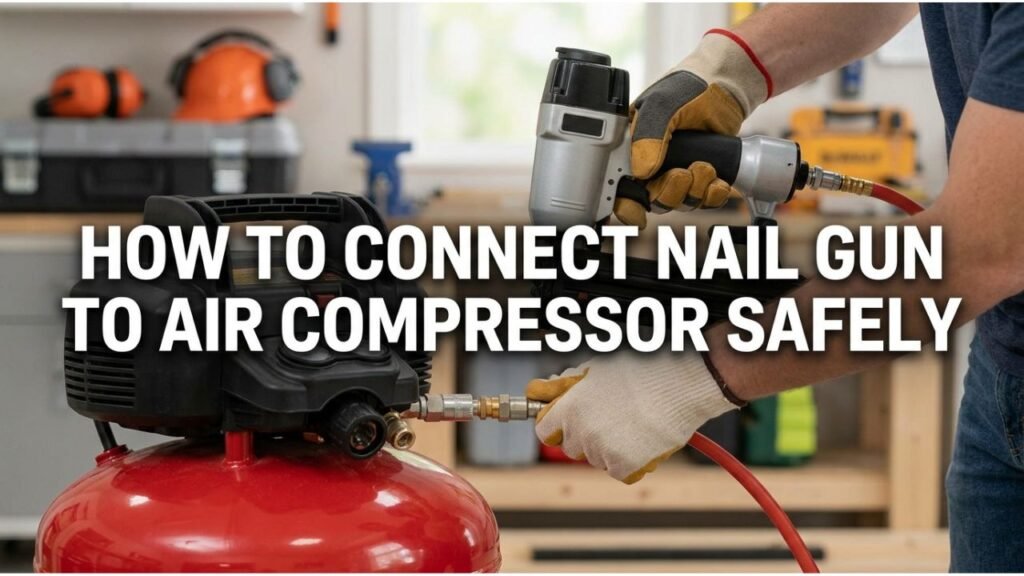
To connect nail gun to air compressor equipment, start with both the compressor and nail gun in a safe condition. Make sure the nailer is not pointed toward anyone, keep your finger away from the trigger, and confirm that the compressor regulator is turned down before supplying air.
The basic order is:
- Connect the air hose to the compressor.
- Connect the hose to the nail gun.
- Start or pressurize the compressor.
- Set the regulator to the nail gun’s required PSI.
- Check the fittings for leaks.
- Test the nailer on scrap material.
- Fine-tune pressure and depth adjustment.
Do not simply connect the tool and turn the regulator to maximum pressure.
What You Need Before Connecting the Nail Gun
A basic pneumatic nailer setup includes the nail gun, air compressor, air hose, compatible quick-connect fittings, and a working pressure regulator.
The fittings on the hose and tool need to match each other. Many portable compressor systems use common quick-connect couplers, but plug profiles can differ.
If a fitting does not connect smoothly, do not force it. The male plug and female coupler may be different styles.
You should also confirm that the compressor can provide the nail gun’s required airflow and pressure.
Check the Nail Gun’s PSI Requirement First
Before connecting the tool, find the operating pressure listed on the nail gun or in its manual.
Many pneumatic nailers operate somewhere around 70 to 120 PSI, but the correct range depends on the specific model.
A brad nailer may work well at relatively low pressure, while a framing or roofing nailer may require more.
The compressor tank itself may hold 125, 150, 175 PSI, or another pressure. That does not mean the nail gun should receive full tank pressure.
The regulator reduces the pressure before the air reaches the tool.
Step 1: Inspect the Nail Gun and Air Hose
Before making any connection, check the equipment.
Inspect the air hose for:
- Cuts
- Cracks
- Bulges
- Damaged fittings
Also inspect the nail gun’s air inlet fitting.
If the fitting is loose, damaged, or heavily corroded, repair it before use.
Make sure the hose is rated for more pressure than the compressor will produce.
Step 2: Turn the Compressor Regulator Down
Before connecting the nail gun, reduce the regulated outlet pressure.
You do not necessarily have to empty the compressor tank.
The goal is simply to prevent the tool from suddenly receiving unnecessarily high pressure as soon as it is connected.
Turn the regulator control toward a lower setting according to the compressor design.
After the nailer is connected, you can raise pressure gradually to the correct level.
Step 3: Connect the Air Hose to the Compressor
Attach one end of the air hose to the compressor’s regulated outlet.
Most portable compressors use a female quick-connect coupler.
To connect:
- Hold the hose plug straight.
- Pull back the coupler sleeve if required.
- Insert the male plug fully.
- Release the sleeve.
- Tug gently on the hose to confirm it is locked.
Some modern couplers automatically lock when the plug is pushed in, so the sleeve may not need to be pulled back.
Do not assume every coupler operates identically.
Step 4: Connect the Hose to the Nail Gun
Now connect the other end of the air hose to the nail gun’s air inlet.
The inlet is usually located at the bottom of the handle.
Keep the nail gun pointed in a safe direction with your finger away from the trigger.
Push the hose fitting into the nail gun coupler or connect the nailer’s plug to the hose coupler, depending on your setup.
Make sure the connection locks securely.
A partially connected fitting can leak or separate unexpectedly.
Step 5: Start the Air Compressor
Turn the compressor on and allow the tank to build pressure.
The compressor will normally stop automatically when it reaches its cut-out pressure.
You can use the nail gun before the tank reaches maximum pressure if sufficient regulated pressure is already available, but allowing the compressor to fill completely gives you a larger air reserve.
Step 6: Set the Correct Pressure
Adjust the regulator while watching the outlet-pressure gauge.
Set the pressure within the nail gun manufacturer’s recommended range.
A good approach is to begin near the lower end of the allowed range.
Then fire a test nail into scrap material.
If the nail sits too high, increase pressure slightly or adjust the nailer’s depth-of-drive control.
If the nail is driven too deeply, reduce the depth setting or pressure as appropriate.
Do not exceed the tool manufacturer’s maximum operating pressure.
Step 7: Check for Air Leaks
Listen around the fittings.
A very slight brief hiss during connection may be normal.
Continuous hissing is not.
Common leak locations include:
- Compressor coupler
- Hose fittings
- Nail gun inlet
- Threaded plugs
A leaking fitting wastes air and can make the compressor run more frequently.
If a threaded fitting leaks, depressurize the system before tightening or resealing it.
Step 8: Test the Nail Gun on Scrap Material
Never begin directly on the finished workpiece.
Use a piece of scrap wood similar to the material you will actually nail.
Fire one or two fasteners and check the depth.
The nail head should generally sit where the job requires without excessive crushing or damage to the surface.
Adjust pressure or the nailer’s depth control gradually.
Should You Adjust Pressure or Nail Depth First?
If the nail gun has a depth-of-drive adjustment, use both controls intelligently.
Set compressor pressure within the normal operating range first.
Then use the tool’s mechanical depth adjustment to fine-tune how deeply the nail is driven.
Avoid using extreme air pressure just to compensate for a poor depth setting.
Higher pressure than necessary increases tool stress and can damage softer materials.
How Much PSI Should a Nail Gun Use?
There is no universal setting.
Many nail guns operate around:
- 70–100 PSI
- 80–110 PSI
- 90–120 PSI
The exact range depends on the tool.
Always follow the specification printed on the nailer or listed in the manual.
Start low and increase only enough to drive the fastener properly.
How Much CFM Does a Nail Gun Need?
Most nail guns use relatively little air compared with continuous-use tools.
A nailer consumes a short burst of compressed air each time it fires.
That is why small portable compressors can operate many nail guns successfully.
The exact CFM requirement depends on the nailer and how rapidly you fire.
For one user, a portable compressor producing a few CFM at 90 PSI is often enough.
Rapid roofing or framing work may benefit from more compressor capacity.
What Size Air Hose Should You Use?
A 1/4-inch air hose is usually adequate for one nail gun.
It is popular because it is light and easy to move around.
A 3/8-inch hose can be useful when:
- Hose runs are very long
- Multiple tools are used
- Greater airflow is required
For a typical brad, finish, or framing nailer, a 1/4-inch hose is usually sufficient.
Does Hose Length Affect Nail Gun Performance?
Yes.
Longer hoses create more pressure drop.
A 25- or 50-foot hose generally works well for nailers, but very long hose runs can reduce pressure at the tool.
If the nail gun works normally near the compressor but struggles at the end of a very long hose, pressure loss may be contributing.
A larger-diameter hose can reduce this effect.
Can You Connect a Nail Gun Directly to the Compressor?
Yes, through the compressor’s regulated air outlet and a proper air hose.
Do not bypass the regulator.
The compressor tank pressure may be much higher than the nail gun’s recommended operating pressure.
The correct path is generally:
Compressor tank → regulator → air hose → nail gun
Some compressor systems may also include filters or lubricators.
Do You Need a Moisture Filter?
A moisture separator can be useful because compressed air naturally contains water.
Moisture inside a nail gun can contribute to:
- Corrosion
- Internal wear
- Sticky components
For occasional home use, draining the compressor tank regularly and using basic filtration may be enough.
For frequent professional use, better moisture control can improve tool life.
Does a Nail Gun Need Air Tool Oil?
Some pneumatic nail guns require regular lubrication, while others are specifically designed as oil-free nailers.
If the manufacturer says the tool requires oil, add the specified number of drops of pneumatic tool oil into the air inlet before connecting the hose.
Do not use compressor oil unless the nail gun manufacturer explicitly approves it.
If the nailer is oil-free, do not add oil unnecessarily because it may contaminate the workpiece or affect internal components.
How to Connect a Brad Nailer to an Air Compressor
The connection method is the same as for most pneumatic nail guns.
Connect the hose to the regulated compressor outlet, connect the other end to the brad nailer, and adjust pressure within the tool’s recommended range.
Brad nailers generally use little air, so small compressors work well.
Start with lower pressure and increase only enough to seat the brad correctly.
How to Connect a Finish Nailer to an Air Compressor
Finish nailers also use a standard air hose and quick-connect fitting.
Because finish nails are larger than brads, the tool may require slightly more pressure.
Always test on scrap trim before working on finished molding or cabinetry.
Too much pressure can bury the nail head deeply and damage the surface.
How to Connect a Framing Nailer to an Air Compressor
A framing nailer connects the same way but normally uses more air than a small trim nailer.
A 4- to 6-gallon portable compressor is commonly suitable for one framing nailer.
Set the regulator according to the nailer’s operating range and test fastener depth.
If rapid firing causes pressure to fall, allow the compressor to recover or use a higher-CFM compressor.
How to Disconnect Nail Gun From Air Compressor
Knowing how to disconnect nail gun from air compressor equipment safely is just as important as making the connection.
Compressed air remains in the hose even after the compressor is turned off.
The best procedure depends on the type of coupler, but the general process is straightforward.
First, stop using the nail gun and keep it pointed in a safe direction.
If you are finished for the day, switch the compressor off.
You can then isolate or release air pressure from the hose as appropriate.
Hold the air hose near the coupler before disconnecting it.
This helps prevent the hose from moving suddenly when the fitting releases.
Step-by-Step: How to Disconnect Nail Gun From Air Compressor
1. Keep Your Finger Off the Trigger
Treat the nail gun as ready to fire until the air supply has been removed.
Keep it pointed away from yourself and others.
2. Turn Off the Compressor if You Are Finished
If you are simply changing tools, the compressor may remain pressurized.
If you are ending work, switch it off.
3. Reduce or Isolate Hose Pressure
Some compressor setups have a valve that lets you isolate the hose.
Some safety couplers vent downstream air before fully releasing the plug.
If your system does not have these features, expect some air to escape when you disconnect.
4. Hold the Coupler and Hose Securely
Do not pull the connector apart while allowing the hose to hang loose.
A pressurized hose can move suddenly.
Keep control of both the hose and coupler.
5. Release the Quick Coupler
Pull back the coupler sleeve or operate it according to its design.
Remove the plug in a controlled manner.
A short burst of air may escape.
6. Confirm the Nail Gun Is Depressurized
Once the hose is disconnected, the nail gun should no longer have an external air supply.
Follow the manufacturer’s unloading procedure before clearing jams, servicing, or storing the tool.
Should You Disconnect the Hose From the Nail Gun or Compressor First?
If you are simply changing pneumatic tools, disconnecting the hose at the nail gun is usually the most convenient method.
If you are shutting down the entire system, you may disconnect the tool first, then depressurize and drain the compressor according to the manufacturer’s instructions.
The important point is to keep the hose controlled and avoid unexpected hose movement.
Why Can an Air Hose Whip When Disconnected?
Compressed air stores energy in the hose.
If a pressurized fitting is released suddenly, the escaping air can push the hose in the opposite direction.
This creates hose whip.
The risk is higher with:
- Long hoses
- High pressure
- Large-diameter hoses
- Damaged couplers
Holding the hose near the connector and using venting or safety couplers reduces the risk.
Do You Need to Empty the Compressor Tank Every Time You Disconnect the Nail Gun?
No.
You do not need to drain the entire receiver tank simply to remove a nail gun from the hose.
The tank can remain pressurized if the compressor will be used again soon and the manufacturer permits normal pressurized storage.
However, compressor tanks still need regular condensate drainage.
When finishing work for the day, follow the compressor manufacturer’s shutdown and drain procedure.
Can You Leave a Nail Gun Connected to the Compressor?
It is generally better to disconnect the nail gun when it is not being used, especially for storage or maintenance.
Leaving the tool connected means it may remain pressurized.
Disconnecting reduces the chance of accidental activation and makes it easier to inspect, clear, or store the nailer safely.
What If the Hose Will Not Connect to the Nail Gun?
If the fitting will not lock, do not force it.
Possible reasons include:
- Wrong plug profile
- Damaged coupler
- Bent fitting
- Dirt inside coupler
- Excessive pressure acting on the coupler
Different quick-connect styles may look similar but are not always compatible.
Use matching fittings throughout the system.
Why Does the Nail Gun Leak Air After Connection?
A small leak may come from the fitting rather than the nail gun itself.
Check whether the leak is located at:
- Quick coupler
- Threaded inlet fitting
- Trigger valve
- Tool exhaust
- Head valve
If the leak comes from inside the nail gun rather than the connection, worn O-rings, seals, or valves may need service.
Disconnect the tool before attempting repairs.
Why Won’t the Nail Gun Drive Nails Fully?
If the tool connects correctly but leaves nails sticking out, possible causes include low pressure, inadequate airflow, incorrect depth setting, or a mechanical issue inside the nailer.
First verify regulated PSI.
Then check the depth control.
If the pressure falls rapidly while firing repeatedly, the compressor may not be recovering quickly enough.
Do not exceed the nail gun’s maximum rated pressure to compensate.
Common Mistakes When Connecting a Nail Gun
One common mistake is setting the compressor regulator too high before attaching the tool.
Another is using mismatched quick-connect fittings and forcing them together.
Poorly maintained hoses and leaking couplers also cause unnecessary pressure loss.
A nail gun should never be connected while you are holding the trigger down or pointing the nose toward yourself or another person.
Safety Tips for Using an Air Compressor With a Nail Gun
Wear appropriate eye protection and follow the nail gun manufacturer’s safety instructions.
Keep hands away from the fastener exit point and remember that nails can deflect when they hit knots, metal, or other fasteners hidden inside wood.
Do not carry the nail gun by the air hose.
When climbing, changing position, clearing a jam, or servicing the tool, disconnect the air supply when required by the manufacturer.
Never disable contact-safety mechanisms to increase firing speed.
FAQs About How to Connect Nail Gun to Air Compressor
How Do I Connect a Nail Gun to an Air Compressor?
Connect an air hose to the compressor’s regulated outlet, attach the other end to the nail gun’s air inlet, and adjust the regulator to the PSI specified by the nailer manufacturer.
Test the nailer on scrap material before beginning the actual job.
Should the Compressor Be On When Connecting a Nail Gun?
It can be pressurized, but setting the regulator low before connection provides better control.
Keep your finger off the trigger and point the tool safely throughout the process.
What PSI Should I Set My Compressor for a Nail Gun?
Use the operating range listed for the specific nail gun.
Many pneumatic nailers operate somewhere around 70–120 PSI, but the exact requirement varies.
Can I Use Any Air Hose With a Nail Gun?
Use a hose that is pressure-rated for the compressor and large enough for the tool’s airflow.
A 1/4-inch hose is commonly sufficient for one nail gun.
How Do I Disconnect Nail Gun From Air Compressor Safely?
Keep the tool pointed safely, hold the hose and coupler securely, isolate or release hose pressure when practical, and operate the quick coupler carefully.
Expect a brief air release unless the coupler is designed to vent pressure first.
Do I Need to Turn Off the Compressor Before Disconnecting the Nail Gun?
Not necessarily if you are simply switching tools.
If you are finished using the compressor, turning it off before disconnecting and shutting down the system is a good practice.
Should I Oil the Nail Gun Before Connecting It?
Only if the nail gun manufacturer requires lubrication.
Some nailers need a few drops of pneumatic tool oil, while others are oil-free and should not receive routine oil.
Why Does Air Escape When I Disconnect the Nail Gun?
The hose contains compressed air.
When the connection opens, some of that stored air escapes. Safety-style couplers may release the pressure in a more controlled way.
Conclusion
The overall process for how to connect nail gun to air compressor equipment is simple: use compatible fittings, attach the hose securely, regulate the air pressure to the nail gun’s specified range, check for leaks, and test fastener depth on scrap material before beginning the real job.
The most important factor is not simply connecting the hose—it is supplying the tool with the correct regulated pressure. Too little air can leave nails partially driven, while excessive pressure can damage the workpiece or place unnecessary stress on the nailer. A properly sized hose, sound quick-connect fittings, and adequate compressor CFM also help the tool perform consistently.
Knowing how to disconnect nail gun from air compressor is equally important. Keep control of the pressurized hose, keep your finger away from the trigger, release the quick coupler carefully, and disconnect the tool before servicing, clearing jams, or storing it. Following the correct connection and disconnection routine makes pneumatic nailer use safer, more predictable, and easier on both the compressor and the tool.