
How to Mount Air Compressor on Wall: Safe Installation Guide
You can wall-mount a small air compressor only if the compressor is designed or manufacturer-approved for that mounting position. Attach its bracket to structural wood framing or suitable masonry, use hardware rated for the compressor’s weight and vibration, preserve cooling clearance, and keep the drain, controls, safety valve, hose, and electrical connection accessible.
Putting a compressor on the wall can free garage floor space, keep the machine away from vehicle traffic, and make a retractable hose easier to reach. The mounting surface also has to deal with vibration every time the pump starts and stops.
A wall-mount-rated Campbell Hausfeld compressor weighing about 25 pounds, for example, specifies attachment to a wood stud or concrete surface and warns against hanging the unit from unsupported wallboard. That principle applies broadly: the structural support behind the wall matters more than the drywall itself.
The first step in how to mount air compressor on wall is confirming that your exact compressor can operate in that orientation. Some oil-free compact units are built for wall operation. Many portable pancake, horizontal-tank, and oil-lubricated compressors are designed to stay on a level floor.
Cooling space matters too. Some purpose-built wall compressors specify roughly 20 inches, or 50 cm, of clearance from nearby obstacles for airflow. Your model may call for a different distance, so the owner’s manual takes priority over a generic measurement.
A good installation also leaves enough room to drain condensation, service the intake filter, reach the power switch, pull the safety valve when required by the manual, and remove the compressor later without dismantling the wall.
Can You Mount Any Air Compressor on a Wall?
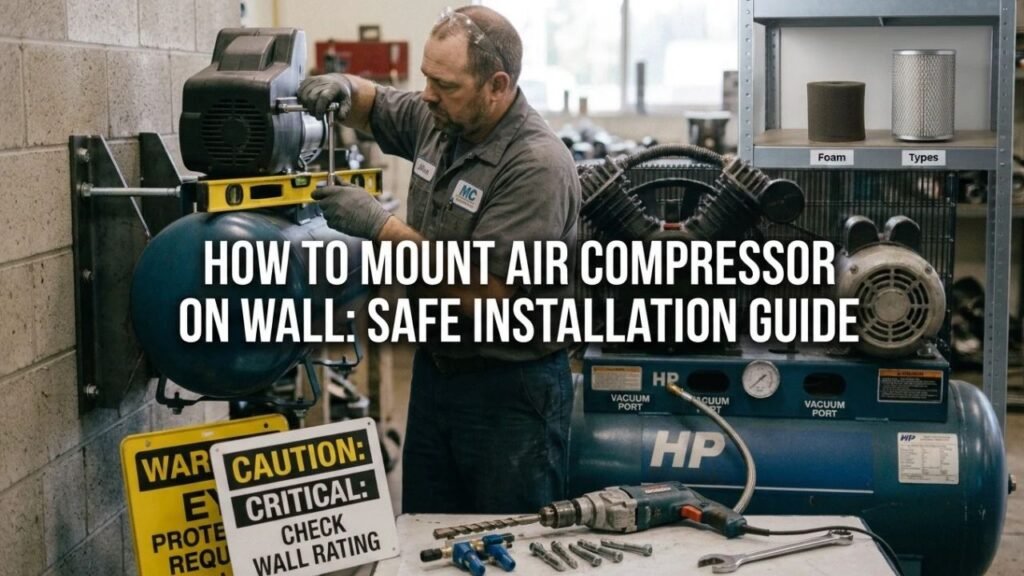
No. The fact that a compressor physically fits on a shelf or bracket does not mean it should operate there.
The compressor’s design and approved operating orientation come first.
Wall-Mount Air Compressors
Purpose-built wall compressors normally have one or more of these features:
- Factory mounting bracket
- Dedicated mounting holes
- Retaining pin or locking mechanism
- Integrated hose reel
- Oil-free pump
- Instructions for wall installation
- Specified wall clearances
These units are the easiest and safest candidates because their mounting system was designed as part of the product.
Some models can also rotate on the wall bracket so the hose reel can face different parts of the work area.
Portable Compressors Not Designed for Wall Use
Do not automatically convert a normal portable compressor into a wall-mounted machine.
A compressor designed to sit on rubber feet may rely on that position for:
- Pump orientation
- Cooling
- Vibration control
- Tank drainage
- Stability
- Oil level
- Pressure-switch operation
- Access to the safety valve
A custom shelf that merely keeps the compressor above the floor is also different from a manufacturer-approved wall mount.
If the manual does not permit wall operation, keep the compressor in its approved position.
Oil-Lubricated Compressors Need Extra Caution
Oil-lubricated pumps are especially sensitive to orientation.
Tilting or rotating the compressor from its intended position can change the oil level around internal pump components.
That can cause:
- Poor lubrication
- Oil carryover
- Pump damage
- Incorrect oil-level readings
Do not turn a floor-mounted oil compressor sideways just to make it fit against a wall.
Large Stationary Compressors Belong on the Floor
Large vertical and horizontal receiver compressors can weigh hundreds of pounds.
Their motors and pumps also create repeated vibration and torque during startup.
Unless the manufacturer supplies a wall-installation system for the exact machine, mount a large stationary compressor according to its floor or foundation instructions instead.
Key Takeaway: Wall-mount only a compressor approved for that position. Purpose-built compact units are good candidates; large stationary and ordinary floor compressors should stay in their manufacturer-specified orientation.
How to Mount Air Compressor on Wall Safely
The exact installation instructions for your compressor come first. The following process covers the main steps common to small compressors designed for wall mounting.
Step 1: Read the Compressor Manual
Before drilling anything, verify that wall mounting is permitted.
Look for:
- Mounting orientation
- Compressor weight
- Bracket type
- Fastener requirements
- Required clearance
- Electrical requirements
- Service access
- Hose-reel movement
- Drain location
If the manual provides a mounting template, use it.
Do not drill new holes into the compressor tank, frame, or pressure vessel to create your own mounting points.
Step 2: Choose the Right Wall Location
Pick a location with enough structural support and enough room around the compressor.
Good locations are usually:
- Wood-framed wall with accessible studs
- Solid concrete wall
- Suitable structural masonry
Avoid positioning the compressor where it can be struck by:
- Vehicle doors
- Lumber
- Ladders
- Moving equipment
- Shop carts
Keep it away from wet areas and locations where flammable vapors or combustible dust may collect.
The compressor intake also needs reasonably clean air. Do not place it where vehicle exhaust, grinding debris, paint overspray, or heavy dust is routinely drawn into the intake.
Step 3: Plan Maintenance Access
Do not choose the mounting height based only on appearance.
You need to reach the compressor after installation.
Check access to:
- On/off switch
- Regulator
- Pressure gauges
- Quick coupler
- Intake filter
- Drain valve
- Safety relief valve
- Hose reel
- Power plug
If you have to remove the compressor from its bracket for a specific service procedure, leave enough open space to do so.
Step 4: Locate the Structural Support
For a wood-framed wall, locate the studs with a stud finder and confirm their positions.
A manufacturer-approved bracket may be designed to attach directly to one stud. Wider or heavier equipment may need a mounting plate that spreads the load across multiple studs.
Do not treat drywall as structural framing.
For concrete or masonry, use anchors made for that wall material and for the required load.
Hollow concrete block needs different anchoring methods from solid poured concrete.
Step 5: Position the Bracket and Mark the Holes
Hold the factory bracket or mounting template in its final position.
Use a spirit level to keep it aligned.
Mark every mounting hole.
Before drilling, check the wall for hidden:
- Electrical wiring
- Water pipes
- Gas lines
- Drain pipes
- Other utilities
A misplaced drill hole can create a much larger repair than the compressor installation itself.
Step 6: Drill the Mounting Holes
Use the drill bit size specified for your screws, lag bolts, or masonry anchors.
For wood framing, a pilot hole reduces the chance of splitting the stud and makes large fasteners easier to drive.
For concrete or masonry, use the bit and drilling method required by the anchor manufacturer.
Remove drilling dust before installing masonry anchors when their instructions call for a clean hole.
Step 7: Secure the Wall Bracket
Fasten the bracket firmly to the structural wall.
Use:
- Manufacturer-supplied hardware when specified
- Structural screws or lag fasteners suitable for wood framing
- Correctly rated masonry anchors for concrete or masonry
The fasteners must support more than the compressor’s static weight.
The mount also sees repeated vibration and movement as the motor starts, the pump runs, and a retractable hose is pulled.
Do not use ordinary drywall screws as structural compressor fasteners.
Step 8: Install the Compressor on the Bracket
Lifting a compressor onto a wall bracket can be awkward.
Use a second person if the machine is heavy or difficult to control.
Place the compressor on the bracket using the manufacturer’s sequence.
Install all required:
- Retaining pins
- Bolts
- Locking clips
- Safety catches
- Washers
- Secondary restraints
Confirm that the compressor is fully seated rather than merely resting on the edge of the bracket.
Step 9: Check Clearance and Movement
After mounting, check every side of the compressor.
Nothing should block:
- Cooling vents
- Fan openings
- Intake filter
- Motor airflow
- Hose reel movement
Some wall compressors rotate through a wide arc. Pull the hose in several directions and confirm the unit or hose cannot strike shelves, doors, lighting, or electrical equipment.
Step 10: Connect the Air Hose and Electrical Supply
Use an air hose and fittings rated for the compressor’s maximum system pressure.
Connect the compressor only to the electrical supply specified on its nameplate and in the manual.
Avoid stretching the power cord tightly between the wall unit and receptacle.
If a permanent electrical circuit or new receptacle is required, use a qualified electrician and follow local electrical requirements.
Step 11: Test the Installation
Before normal use:
- Check every mounting fastener.
- Confirm the bracket is level.
- Verify the retaining mechanism is engaged.
- Turn the compressor on.
- Let the tank reach cut-out pressure.
- Watch the bracket while the pump runs.
- Check for excessive movement or vibration.
- Inspect hose and electrical clearance.
- Check air fittings for leaks.
Stop the compressor if the bracket moves, fasteners loosen, or the wall flexes noticeably.
Key Takeaway: Mount into real structure, follow the factory bracket layout, leave cooling and service space, secure every retaining device, and test the installation under a full compressor cycle before regular use.
What Hardware Do You Need to Wall-Mount an Air Compressor?
The exact hardware depends on the compressor and wall construction.
A typical installation may require:
| Item | Purpose |
| Factory wall bracket | Supports the compressor |
| Stud finder | Locates wood framing |
| Spirit level | Keeps bracket aligned |
| Drill and bits | Creates pilot or anchor holes |
| Structural fasteners | Attach bracket to framing |
| Masonry anchors | Secure bracket to suitable masonry |
| Wrenches/socket set | Tighten bolts |
| Tape measure | Positions bracket and clearance |
| Safety glasses | Protect eyes while drilling |
| Vibration isolators, if approved | Reduce transmitted vibration |
| Mounting backer, if required | Spreads load across framing |
Do not select fastener size only by matching the diameter of the bracket holes.
The fastener must be suitable for:
- Wall material
- Compressor weight
- Bracket design
- Vibration
- Required embedment
- Edge distance
If the compressor manufacturer specifies hardware, follow that specification.
How to Mount an Air Compressor on Different Wall Types
Wall construction changes the mounting method.
A fastener that works well in a wood stud may be wrong for concrete block.
Mounting to Wood Studs
Wood studs provide a good structural mounting point for small approved wall compressors.
A common process is:
- Find the center of the stud.
- Position the bracket.
- Level it.
- Mark the mounting holes.
- Drill correctly sized pilot holes.
- Install the specified structural fasteners.
Campbell Hausfeld wall-mount instructions for one compact model direct the bracket into a wood stud rather than drywall alone.
If the compressor bracket is wider than the stud layout, a structural backer spanning multiple studs may provide mounting points.
The backer and its attachment still need enough strength for the compressor and operating vibration.
Mounting to Drywall
Drywall by itself is a poor place to suspend a vibrating compressor unless the compressor maker specifically provides an approved drywall-anchor method.
For most garage installations, attach through the drywall into wood framing.
Another option for an approved small wall compressor is a structural backer anchored into multiple studs, with the compressor bracket attached to that backer.
Do not hang a heavy compressor from ordinary plastic drywall plugs.
Mounting to Concrete
Solid concrete provides a strong mounting surface when suitable anchors are installed correctly.
Use:
- Correct masonry drill bit
- Anchors rated for concrete
- Proper hole depth
- Required embedment
- Manufacturer-specified spacing
Do not substitute random screws or plastic plugs for structural anchors on a heavy vibrating unit.
Mounting to Concrete Block or Brick
Masonry walls need more attention because hollow block, solid brick, and filled block do not hold fasteners in the same way.
The anchor must be approved for the exact masonry type.
Avoid placing heavy loads near weak edges, cracked mortar, or damaged masonry.
For a heavy compressor or uncertain wall construction, having the mounting method checked by a contractor or structural professional is a sensible choice.
Key Takeaway: Wood studs and sound concrete are strong mounting surfaces when matched with suitable fasteners. Drywall alone should not carry a compressor unless the manufacturer’s installation system explicitly permits it.
How to Reduce Air Compressor Vibration on a Wall
A compressor creates vibration every time its pump and motor run.
Wall mounting can transmit that vibration through framing and make noise noticeable in adjacent rooms.
Use the Factory Isolation System
If the compressor includes:
- Rubber pads
- Isolation bushings
- Rubber feet
- Grommets
keep them in the mounting system unless the manual directs otherwise.
Do not tighten a rubber isolation mount so aggressively that the rubber can no longer flex as designed.
Consider an Approved Vibration Pad
For a custom backer or bracket approved by the compressor maker, suitable vibration-isolation material may reduce structure-borne noise.
The isolator still has to keep the compressor restrained.
A very soft mounting arrangement that lets a heavy compressor bounce or sway creates a different hazard.
Avoid Mounting on a Shared Living-Space Wall
If noise matters, avoid a wall shared with:
- Bedroom
- Office
- Living room
Mounting into garage framing can carry pump vibration directly into the structure.
A floor-mounted compressor on isolation pads may actually produce less noise inside the house than a compressor bolted to a shared wall.
Check Fasteners After Initial Use
A newly mounted compressor should be inspected after it has gone through several operating cycles.
Look for:
- Loose bolts
- Bracket movement
- Worn isolators
- Cracks
- New rattles
- Hose rubbing
Do not continue operating a unit with a loose mount.
Key Takeaway: Vibration control needs a balance between isolation and restraint. Preserve factory rubber mounts, avoid overly soft supports, and inspect the bracket after the compressor has run through repeated cycles.
Ventilation and Electrical Requirements for Wall Mounting
A secure bracket is only one part of the installation.
The compressor still needs cooling air and a suitable electrical supply.
Leave the Required Cooling Clearance
Compressors produce heat during operation.
Blocking cooling openings can raise motor and pump temperature.
OSHA electrical rules state that equipment relying on natural airflow or ventilation openings should be installed so nearby surfaces do not block cooling airflow.
Some purpose-built wall compressors specify about 50 cm, or roughly 20 inches, from walls or obstacles.
Do not apply that number to every machine. Follow the clearance printed in your exact manual.
Keep the Compressor Near a Suitable Receptacle
A wall location close to the correct outlet reduces the temptation to use a long undersized extension cord.
Long or small-gauge cords can cause voltage drop.
Possible results include:
- Hard starting
- Motor overheating
- Breaker trips
- Thermal overload trips
Use the electrical arrangement stated by the compressor manufacturer.
Keep the Power Cord Away From the Hose Reel
If the wall compressor has a retractable hose, route the cord so pulling or rewinding the hose cannot:
- Snag the cord
- Rub through insulation
- Pull the plug
- Wrap the cord around the compressor
The hose should move freely across its intended working area.
Key Takeaway: A wall-mounted compressor still needs open cooling airflow and the correct electrical supply. Do not sacrifice ventilation or electrical safety just to fit the machine into a smaller space.
Common Air Compressor Wall-Mounting Mistakes
Avoid these installation errors:
- Mounting a compressor that is not approved for wall operation
- Hanging the unit from drywall instead of structural framing
- Using ordinary drywall screws as load-bearing fasteners
- Drilling new holes into the pressure tank
- Rotating an oil-lubricated compressor from its intended position
- Blocking intake or cooling vents
- Mounting so high that the drain cannot be reached
- Hiding the safety relief valve behind the bracket
- Pulling a retractable hose against an inadequately anchored mount
- Using anchors that are wrong for the wall material
- Installing near gasoline fumes or other flammable vapors
- Letting the electrical cord rub against moving hose components
- Mounting next to a shared living-space wall without considering vibration
- Operating the compressor before checking every retaining pin and bolt
- Ignoring movement or new cracks around the mounting points
A wall mount should make the compressor easier to live with, not harder to inspect and maintain.
Can You Put a Regular Portable Compressor on a Wall Shelf?
A shelf is not the same as a wall-mount bracket.
If a portable compressor’s manual requires it to sit on a level horizontal surface, a properly designed shelf can preserve that position better than hanging the compressor vertically.
The shelf would still need to handle:
- Compressor weight
- Motor vibration
- Hose pulling forces
- Tank movement
- Service access
The compressor should also be restrained so vibration cannot make it move toward the shelf edge.
A heavy portable or large receiver compressor should not be placed on a homemade elevated shelf without a design suitable for its load.
For many normal portable compressors, keeping the machine on the floor and mounting only a retractable hose reel on the wall is the simpler setup.
Should You Mount a Large Vertical Air Compressor on a Wall?
Normally, no.
Large stationary vertical compressors are generally designed for floor installation.
A large unit may have:
- Heavy steel receiver
- Large electric motor
- Belt-driven pump
- High center of gravity
- Strong startup torque
- Substantial vibration
Trying to support that mass on a residential garage wall creates unnecessary structural risk.
Follow the manufacturer’s foundation and anchoring instructions instead.
If floor space is the concern, a vertical tank already uses relatively little floor area compared with a horizontal compressor.
You can then mount:
- Air hose reel
- Filter
- Regulator
- Dryer
- Distribution piping
on the wall while leaving the compressor on its intended foundation.
Conclusion
How to mount air compressor on wall starts with one question: is your compressor actually designed or approved to run there? If it is, attach the factory bracket to structural framing or suitable masonry, use correctly rated fasteners, preserve ventilation, and keep controls and service points accessible.
Do not rely on drywall alone for a vibrating machine, and do not rotate an oil-lubricated or floor-mounted compressor simply to save space. Large stationary compressors should normally remain on their specified floor mounting system.
For a small wall-mount-rated unit, I would spend as much attention on the wall structure and bracket as on the compressor itself. A secure mounting surface, correct hardware, controlled vibration, clean hose routing, and clear service access make the finished setup far safer and easier to use.
FAQs About Mounting an Air Compressor on a Wall
Can You Mount Any Air Compressor on the Wall?
No. Wall-mount only a compressor designed or approved for that operating position.
Many normal portable and stationary compressors are meant to remain level on the floor. Changing orientation can affect cooling, lubrication, drainage, stability, and service access.
Can You Mount an Air Compressor to Drywall?
Do not rely on drywall alone for a typical compressor.
For a wood-framed wall, mounting into structural studs is a stronger approach. A backer spanning multiple studs may also be used for an approved wall compressor when its mounting design permits it.
Can You Mount a Pancake Air Compressor on the Wall?
Only if the manufacturer permits wall operation for that exact model.
Many pancake compressors are designed to sit horizontally on their rubber feet. Mounting one vertically can change its operating position and block service or cooling points.
How High Should a Wall-Mounted Air Compressor Be?
Mount it high enough to free useful space but low enough to reach the controls, regulator, drain, hose, and service items safely.
The correct height also needs to provide the clearance specified in the manual and keep the compressor away from vehicle or equipment impacts.
Should I Use Rubber Between the Compressor and Wall?
Use factory vibration isolators or an isolation method approved for the compressor and bracket.
Rubber can reduce structure-borne vibration, but the mounting system still needs to restrain the compressor securely.
Can I Mount an Oil-Lubricated Compressor on Its Side?
Do not change the operating orientation unless the manufacturer specifically approves it.
An oil-lubricated pump relies on its designed position for correct oil distribution and oil-level measurement.
Is It Better to Wall-Mount the Compressor or the Hose Reel?
For a compressor not designed for wall operation, mounting the hose reel is usually the better choice.
You keep the compressor in its intended position while still gaining convenient hose storage and reducing hose clutter across the garage floor.
Do I Need to Bolt a Wall-Mounted Compressor Into Studs?
For a wood-framed wall, structural framing is normally the correct attachment point unless the compressor manufacturer specifies another tested mounting method.
Use the bracket, fasteners, and wall attachment method appropriate for the exact compressor and wall construction.