How to Use a Craftsman 125 PSI Air Compressor: Setup & Safety
Using a Craftsman 125 PSI compressor starts with placing it on a stable surface, checking the tank and controls, connecting the correct air hose and accessory, setting the regulator to zero, turning the compressor on, letting the tank fill, and then slowly adjusting outlet pressure to the PSI required by your tire or air tool.
The 125 PSI number normally refers to the compressor’s maximum tank or cut-out pressure on models rated that way. It does not mean every tool connected to the compressor should receive 125 PSI.
Setting the outlet pressure correctly protects nailers, inflators, blow guns, and other pneumatic accessories from excessive pressure. Many air tools operate well below the compressor’s maximum tank pressure.
For how to use a Craftsman 125 PSI air compressor, the controls you will use most are the power or Auto/Off switch, tank-pressure gauge, outlet-pressure gauge, regulator, quick-connect coupler, safety valve, and tank drain valve.
Craftsman has sold several 125 PSI compressors over the years, including small portable units, larger tank-mounted compressors, oil-free designs, and oil-lubricated models. Control layout and first-use instructions can differ, so the model-specific owner’s manual should take priority when a procedure differs from the steps below.
A new compressor may also require a break-in procedure before normal use. Some older Craftsman models call for running the pump with the tank drain open for a set period, while other models do not require that procedure.
The instructions below explain setup, pressure adjustment, tire inflation, air-tool operation, shutdown, tank draining, break-in, and troubleshooting for common Craftsman 125 PSI electric compressors.
Know the Controls Before Turning the Compressor On
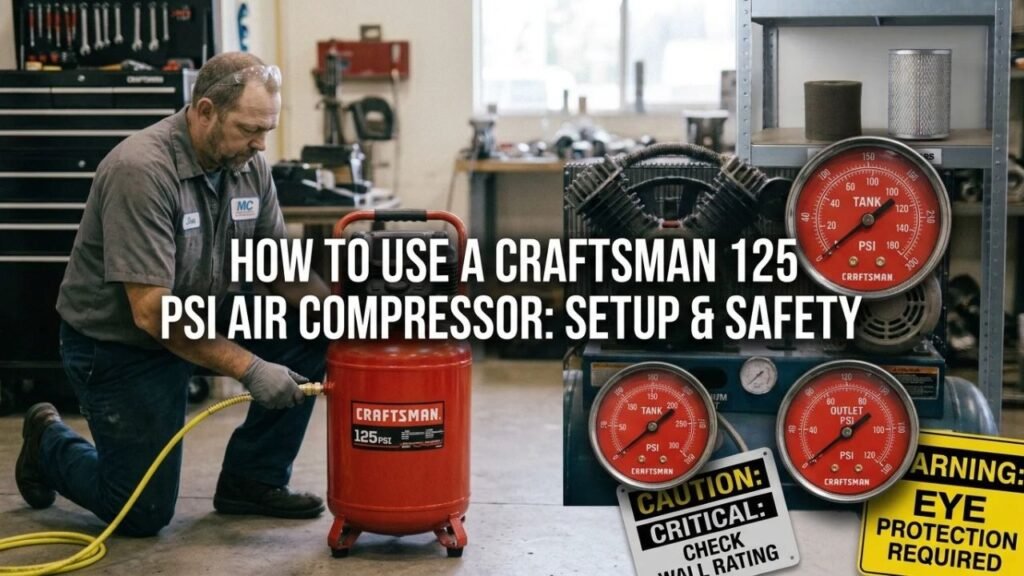
Spend a minute identifying the controls before plugging the compressor into power.
This makes pressure adjustment and shutdown much easier.
On/Auto/Off Switch
Many Craftsman tank compressors use an On/Auto/Off or Auto/Off switch.
In the Auto or On position, the motor starts when tank pressure drops to the compressor’s cut-in level. It stops automatically when tank pressure reaches its cut-out level.
The motor can restart without warning while the switch remains in Auto.
Move the switch to Off before connecting, disconnecting, adjusting, or servicing components when the manual calls for the unit to be shut down.
Tank Pressure Gauge
The tank gauge shows the amount of compressed-air pressure stored inside the tank.
When you first start the compressor, this reading rises as the pump fills the tank.
A 125 PSI compressor may automatically stop near its rated cut-out pressure.
You normally do not adjust tank pressure during ordinary use. The pressure switch controls pump cycling.
Outlet Pressure Gauge
The outlet gauge shows the pressure being sent toward your air hose or accessory.
This is the reading you use when setting pressure for an air tool.
Tank pressure may show 120 PSI while the outlet is regulated to only 90 PSI, for example.
Pressure Regulator
The regulator controls outlet pressure.
On many compressors:
Turning clockwise raises outlet pressure.
Turning counterclockwise lowers outlet pressure.
Some regulator knobs need to be pulled outward before adjustment and pushed back in afterward to lock the setting.
Check the markings on your compressor because control designs differ.
Quick-Connect Coupler
The quick coupler is where the air hose connects.
Push the correct plug firmly into the coupler until it locks.
Pull the coupler sleeve back when disconnecting if your design uses a sliding sleeve.
Air hoses can move suddenly when disconnected while pressurized, so reduce outlet pressure first.
Safety Valve
The safety valve protects the tank if system pressure becomes excessive.
It normally has a pull ring.
Do not change, plug, modify, or defeat the safety valve.
If it leaks continuously or does not move correctly during the specified inspection, stop using the compressor until the problem is repaired.
Tank Drain Valve
The drain valve is normally located at the lowest part of the air tank.
Water condenses inside an air-compressor tank during normal operation. Opening the drain after use lets that moisture escape.
Leaving water in a steel tank promotes internal corrosion.
Key Takeaway: Know the difference between tank pressure and regulated outlet pressure, and identify the power switch, regulator, gauges, coupler, safety valve, and drain before starting the compressor.
Before Using a Craftsman 125 PSI Compressor
A few checks before startup reduce electrical, pressure, and mechanical problems.
Place the Compressor on a Stable Surface
Set the compressor on a flat, solid surface.
Keep its ventilation openings and air intake clear.
Do not push the pump directly against a wall or cover it with stored items.
The motor and pump need airflow for cooling.
Operate the compressor in a dry, ventilated area and away from gasoline fumes, paint-solvent vapors, or other flammable materials.
Check the Power Requirements
Read the compressor nameplate before plugging it in.
Confirm:
- Required voltage
- Circuit amperage
- Grounding requirement
- Extension-cord restrictions
Many portable Craftsman compressors use 120V household power, but that does not apply to every model.
A compressor motor can draw a large current during startup. Sharing the circuit with heaters, saws, refrigerators, or other heavy electrical loads may trip a breaker.
Use the proper grounded receptacle.
Avoid lightweight household extension cords. If the manual permits an extension cord, use the specified wire gauge and maximum length.
A longer air hose is often preferable to a long power cord.
Check Oil if Your Model Is Oil-Lubricated
Do not assume every Craftsman 125 PSI compressor is oil-free.
Older belt-driven or oil-lubricated models may have:
- Oil-fill cap
- Dipstick
- Sight glass
- Crankcase
Check the oil level before startup if your model has an oil-lubricated pump.
Use only the oil type specified for that compressor.
A permanently lubricated or oil-free compressor does not need crankcase oil added by the user.
Inspect the Tank and Hose
Do not operate a tank that is badly rusted, cracked, leaking, or damaged.
Check the hose for:
- Cuts
- Bulges
- Cracks
- Damaged fittings
- Loose connectors
The hose and fittings must be rated for the pressure they will experience.
Key Takeaway: Place the compressor where it can cool, confirm electrical requirements, check pump oil when applicable, and inspect the tank, hose, and fittings before pressurizing the system.
How to Use a Craftsman 125 PSI Air Compressor Step by Step
The following process fits many Craftsman tank-mounted electric compressors.
Use the model-specific manual if its operating sequence differs.
1. Turn the Compressor Off
Start with the power or Auto/Off switch in the Off position.
Do not plug the unit in while its switch is already set to Auto unless the manual specifically instructs you to do so.
The motor may start immediately if tank pressure is low.
2. Close the Tank Drain Valve
Check the drain at the bottom of the tank.
It needs to be closed before normal tank filling.
Do not overtighten a threaded drain valve. It only needs to seal properly.
If you are carrying out a manufacturer-required first-use break-in procedure, the drain may intentionally remain open during that procedure.
3. Turn the Regulator Down
Set the regulated outlet pressure to zero or its lowest setting before connecting the air tool.
This reduces the chance of sending excessive pressure into an accessory when the system becomes pressurized.
4. Connect the Air Hose
Insert the correct hose plug into the compressor’s quick-connect fitting.
Make sure the connection locks securely.
Attach the other end of the hose to the inflator, nailer, blow gun, impact tool, or other accessory.
Check the tool’s maximum pressure rating before applying air.
5. Plug In the Compressor
Connect the compressor to the correct grounded receptacle.
Keep the cord away from standing water, sharp edges, vehicle traffic, and places where it can be crushed.
6. Turn the Switch to Auto or On
Move the switch to its normal operating position.
The motor should start if tank pressure is below the cut-in point.
Watch the tank-pressure gauge.
The reading should gradually rise as the tank fills.
7. Let the Tank Reach Cut-Out Pressure
Allow the compressor to fill the tank.
The motor should automatically stop when the pressure switch reaches its factory-set cut-out pressure.
On a model rated for 125 PSI maximum pressure, that may be around the 125 PSI range.
Do not adjust the pressure switch to force the compressor above its designed rating.
8. Set the Outlet Pressure
Check the pressure required by the tool or accessory.
Turn the regulator until the outlet gauge shows the appropriate pressure.
For example, if a pneumatic nailer specifies a working range below 125 PSI, set the outlet within that tool’s specified range rather than opening the regulator fully.
Make pressure adjustments while watching the outlet-pressure gauge, not the tank gauge.
If reducing pressure, turn the regulator down and briefly operate the tool or bleed air so the outlet gauge can settle to the lower setting.
9. Use the Air Tool
Operate the tool according to its own instructions.
As you use air, tank pressure falls.
When tank pressure reaches the compressor’s cut-in setting, the motor should restart automatically.
It will run until the tank reaches cut-out pressure again.
This cycling is normal.
10. Monitor Compressor Cycling
Pay attention to how frequently the motor runs.
A tool that requires more CFM than the compressor can continuously produce may drain the tank faster than the pump can refill it.
The result can be:
- Falling tool pressure
- Long compressor run times
- Reduced tool performance
- Motor overheating
- Frequent thermal-overload shutdown
A 125 PSI pressure rating does not tell you the compressor’s airflow capacity. Check the SCFM or CFM rating at the tool’s required pressure.
Key Takeaway: Fill the tank first, set outlet PSI with the regulator, and let the pressure switch cycle the motor automatically while you work.
How to Set the Pressure on a Craftsman Air Compressor
Correct regulator use is one of the most important parts of compressor operation.
The compressor can store more pressure than many air tools should receive.
Check the Tool’s Required PSI
Look at the tool label or manual.
Do not exceed its maximum inlet-pressure rating.
Common pneumatic tools may operate at pressures around 70–100 PSI, but requirements vary.
Tires also need the pressure specified for the vehicle or tire application, not the compressor’s maximum pressure.
Use the Outlet Gauge
Tank PSI tells you how much pressure is stored.
Outlet PSI tells you what the regulator is sending to the tool.
Suppose the gauges show:
Tank pressure: 120 PSI
Outlet pressure: 90 PSI
The connected tool receives approximately the regulated 90 PSI, subject to pressure drop through the hose and fittings.
Adjust Pressure With Air Flowing if Needed
Some regulators are easier to set accurately while a small amount of air is flowing.
If the gauge does not drop after turning the regulator counterclockwise, briefly trigger the air tool or blow gun so trapped downstream pressure can escape.
Then readjust.
Key Takeaway: Set pressure from the outlet gauge according to the tool’s rating; never assume the full 125 PSI tank pressure should be sent directly to an accessory.
How to Use the Compressor to Inflate Car Tires
A 125 PSI compressor has more than enough pressure for most passenger-vehicle tire inflation.
The important part is controlling the outlet and checking tire pressure separately.
Find the Correct Tire Pressure
Use the pressure listed on the vehicle’s tire-information placard, commonly found on the driver-side door jamb.
Do not inflate a tire to the maximum pressure molded on its sidewall unless that is specifically required for the application.
Vehicle manufacturers set normal cold-tire pressure based on vehicle load and handling requirements.
Connect a Tire Inflator
Attach a tire inflator with an accurate gauge to the air hose.
Set compressor outlet pressure high enough to inflate the tire but within the inflator and hose ratings.
Press the chuck firmly onto the valve stem.
Add air in short intervals and check pressure frequently.
Check Tires Cold When Possible
Recommended tire pressures normally refer to cold tires.
Driving heats the tire and can raise its pressure.
If you are setting normal maintenance pressure, checking before driving gives a more useful comparison with the door-jamb specification.
How to Use a Craftsman Compressor With Air Tools
Pressure and airflow both matter.
A compressor can provide enough PSI but still be too small for a high-demand tool.
Check PSI
Set the regulator to the tool’s specified operating pressure.
Do not exceed the tool manufacturer’s maximum.
Check SCFM or CFM
Look at the compressor’s air-delivery rating, often stated as SCFM at 40 PSI and 90 PSI.
Then compare it with the tool’s consumption.
A brad nailer uses air in short bursts and can work well with a relatively small compressor.
Tools such as:
- Die grinders
- Sanders
- Cutoff tools
- Large impact tools
- Spray equipment
can require much more continuous airflow.
If the tank pressure keeps dropping while the compressor runs, the tool may be consuming more air than the pump can supply continuously.
Let the Compressor Recover
Stop the tool and allow the tank to refill when pressure falls too low for normal tool operation.
Do not bypass thermal protection or alter the pressure switch to make a small compressor behave like a larger unit.
Key Takeaway: Match both PSI and SCFM to the tool; tank pressure alone does not tell you if the compressor can keep up with continuous pneumatic work.
Does a New Craftsman Compressor Need a Break-In?
Some models do, while others do not.
This is one part of the procedure where the exact model number matters.
Older Models May Have a Break-In Procedure
Certain Craftsman manuals instruct users to open the drain valve and operate the compressor for a period with little or no tank pressure.
This allows moving pump components to run before the unit begins normal loaded operation.
A common older Craftsman procedure uses approximately 15 minutes, but do not apply that number automatically to every model.
Some Modern Oil-Free Models Are Ready for Normal Setup
Other compressors use permanently lubricated pumps and may not require the same break-in routine.
Always check the manual before first use.
Running a compressor incorrectly during break-in can produce unnecessary heat or load.
Key Takeaway: Break-in requirements vary between Craftsman models; follow the manual for the exact model rather than assuming every 125 PSI unit needs the same first-run procedure.
How to Shut Down the Compressor Correctly
Shutdown includes more than flipping the switch.
Removing stored moisture after use is an important part of tank care.
1. Turn the Switch Off
Move the Auto/On switch to Off.
Do not unplug a running compressor as the normal way to stop it.
2. Unplug the Compressor
Disconnect electrical power before maintenance or storage.
Pull the plug rather than yanking the cord.
3. Reduce Outlet Pressure
Turn the regulator down.
Disconnect the air tool after pressure on the hose has been safely reduced.
4. Drain the Tank
Open the drain valve according to the manual.
Compressed air and moisture may discharge rapidly, so direct the outlet away from your face, eyes, electrical equipment, and other people.
Many tank-compressor instructions call for draining accumulated moisture daily or after use.
Tilting a portable compressor slightly may help move water toward the drain if the manufacturer permits it.
5. Close the Drain After Moisture Is Removed
Once the air and condensed water have drained, close the valve for storage unless the manual states otherwise.
Store the compressor in a clean, dry area.
Key Takeaway: Turn the compressor off, remove power, reduce pressure, disconnect the tool safely, and drain condensed water from the tank before storage.
Common Mistakes When Using a 125 PSI Craftsman Compressor
Avoiding a few common mistakes can extend compressor and tool life.
Setting Every Tool to 125 PSI
The compressor’s maximum pressure is not the correct pressure for every accessory.
Always regulate outlet pressure.
Ignoring the Tank Drain
Moisture accumulates inside compressed-air tanks.
Failure to drain the tank can lead to internal corrosion.
Never weld, drill, or patch a damaged pressure tank.
Replace a tank that has become unsafe.
Using a Thin Extension Cord
Voltage drop can cause hard starting, overheating, and breaker trips.
Use the electrical setup specified by the manufacturer.
Blocking Compressor Ventilation
Do not cover the compressor or operate it in a sealed box.
Heat needs a path out.
Pulling the Safety Valve to Release the Whole Tank
The safety valve is a protective component, not the normal daily tank drain.
Use the drain valve for removing tank air and condensation according to the owner’s procedure.
Adjusting the Factory Pressure Switch
Do not alter the cut-in or cut-out settings to gain extra PSI.
The tank, safety valve, motor, and pump are designed around specific pressure limits.
Using More Air Than the Pump Can Produce
A compressor can have a large enough tank to run a demanding tool briefly yet still lack enough CFM for continuous use.
Compare airflow ratings before assuming a performance problem exists.
What to Do if the Craftsman Compressor Will Not Start
Start with simple checks.
Make sure:
- The compressor is plugged in
- The switch is in Auto/On
- The circuit breaker has not tripped
- The extension cord is not undersized
- Tank pressure is below cut-in pressure
- Thermal overload has not activated
A compressor with a nearly full tank may not start immediately because it does not need to.
If the motor hums but cannot start, stop trying to run it. Possible causes include low voltage, a failed start capacitor, mechanical binding, or a pressure-unloader problem.
What if It Runs but Will Not Reach 125 PSI?
Do not automatically assume the pump is bad.
Possible causes include:
- Open drain valve
- Air leak
- Loose fitting
- Damaged hose
- Dirty intake filter
- Worn pump seals
- Reed-valve problem
- Check-valve problem
- Tool using air while the tank fills
A compressor does not need to remain exactly at 125 PSI during use. Once pressure drops to the cut-in point, the motor restarts and rebuilds tank pressure.
If the compressor runs continuously with all outlets closed and never approaches its normal cut-out pressure, stop it and investigate the fault.
Conclusion
For how to use a Craftsman 125 PSI air compressor, start with the unit switched off, close the tank drain, turn the regulator down, connect the hose and accessory, plug the compressor into its proper circuit, and let the tank reach its automatic cut-out pressure.
Then set outlet pressure to the requirement of the tire or pneumatic tool. Do not send the full 125 PSI to an accessory unless that equipment is specifically rated and intended for that pressure.
Watch the compressor’s airflow capacity as well as PSI. Nailers and tire inflators generally use air differently from sanders, grinders, and spray equipment, so a compressor that handles one tool well may struggle with another.
When the job is finished, I would turn the unit off, remove power, reduce outlet pressure, disconnect the accessory, and drain moisture from the tank. That simple routine keeps the compressor safer and reduces internal tank corrosion.
FAQs About Using a Craftsman 125 PSI Air Compressor
What does 125 PSI mean on a Craftsman air compressor?
It generally refers to the compressor’s maximum tank or cut-out pressure for a model rated at 125 PSI. The motor stops automatically near its designed upper pressure. You use the regulator to reduce that stored pressure to the level required by your tool or tire.
Do I need to fill the tank before using an air tool?
It is usually best to let the tank reach cut-out pressure before beginning normal tool use. This gives you the full stored-air reserve and lets you set the regulated outlet pressure accurately.
Which gauge do I use to set air-tool pressure?
Use the outlet or regulated-pressure gauge. The tank gauge shows stored pressure and may remain near 125 PSI even when the tool receives a much lower regulated pressure.
Can I use a Craftsman 125 PSI compressor for car tires?
Yes. A 125 PSI compressor can provide more than enough pressure for typical passenger-car tires. Inflate according to the vehicle’s recommended cold-tire pressure and use a reliable tire gauge or inflator gauge.
Should I leave my Craftsman compressor switched to Auto?
During use, Auto lets the pressure switch start and stop the motor as tank pressure changes. When you finish working or service the unit, move the switch to Off and follow the shutdown instructions for your model.
How often should I drain a Craftsman compressor tank?
Tank-mounted compressor instructions commonly call for regular draining, often daily or after use. Humid conditions can produce more condensate. Follow the interval in the manual for your model and never leave large amounts of water inside the tank.
Why does my Craftsman compressor turn back on by itself?
That is normal when the switch is in Auto. As you use air, tank pressure drops to the pressure switch’s cut-in point. The motor starts automatically and stops again when the tank reaches cut-out pressure.
Do I need oil in a Craftsman 125 PSI air compressor?
It depends on the model. Many Craftsman compressors have permanently lubricated oil-free pumps, while some older or larger models use oil-lubricated pumps. Look for an oil sight glass, oil-fill cap, and the model manual before adding any oil.