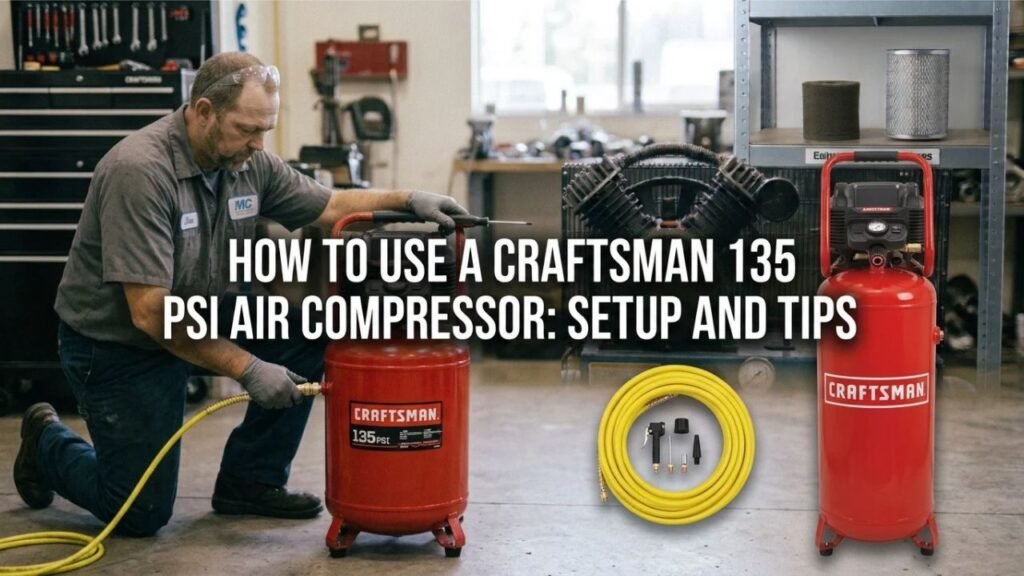
How to Use a Craftsman 135 PSI Air Compressor: Setup and Tips
Start by placing the compressor on a stable surface, closing the tank drain, connecting the air hose, plugging it into the correct grounded outlet, and switching it to AUTO/ON. Let the tank fill until the motor stops, then use the regulator—not the tank-pressure setting—to match the outlet PSI to your air tool.
The 135 PSI rating is the compressor’s maximum tank pressure on many Craftsman models, not the pressure every tool should receive. The tank can hold air at 135 PSI while the regulator sends a much lower pressure through the hose.
Craftsman has sold several 135 PSI compressors, including oil-free and oil-lubricated designs with different tank sizes. Controls are similar, but an oil-lubricated model needs an oil-level check before operation, while an oil-free pump does not require compressor oil.
Pressure is only part of safe compressed-air use. In U.S. workplaces, OSHA limits compressed air used for cleaning to below 30 PSI unless specified chip-guarding and personal-protection requirements are met. Never direct compressed air toward your skin, eyes, or another person.
If you want to know how to use a Craftsman 135 PSI air compressor, focus on four things: tank pressure, regulated outlet pressure, tool airflow demand, and proper shutdown. Once those are clear, normal operation is straightforward.
Your exact Craftsman model number still matters. Check the label on the compressor and use its manual for circuit requirements, duty cycle, oil type, break-in procedure, maintenance intervals, and any model-specific controls.
Know the Main Controls Before Starting the Compressor
Spend a minute identifying the gauges, regulator, coupler, switch, drain, and safety valve before connecting a tool.
Tank Pressure Gauge
The tank gauge shows how much pressure is stored inside the air tank.
As the compressor runs, this gauge rises.
When tank pressure reaches the factory-set cut-out level, the motor stops automatically. As you use air and tank pressure falls to the cut-in level, the motor starts again.
Do not try to adjust the factory cut-in or cut-out settings.
Outlet Pressure Gauge
The outlet gauge shows the pressure being sent to your hose and tool.
This number can be much lower than tank pressure.
For example, your tank may contain close to 135 PSI while the regulator is set to supply 90 PSI to a pneumatic tool.
Pressure Regulator
The regulator controls outlet pressure.
On many compressors:
- Turning clockwise raises outlet pressure.
- Turning counterclockwise lowers outlet pressure.
After lowering the setting, you may need to release a small amount of downstream air before the gauge displays the new lower pressure.
Quick-Connect Coupler
The quick coupler is where the air hose connects.
Most setups use a male air plug on the hose and a female coupler on the compressor.
Pull the coupler sleeve back if required, push the plug fully into place, then release the sleeve and check that the fitting has locked.
ON/AUTO and OFF Switch
The compressor usually has an ON/AUTO and OFF control or a pressure-switch lever.
In AUTO mode, the compressor can restart without warning whenever tank pressure falls.
Treat the machine as capable of starting any time the switch is in AUTO and power is connected.
Tank Drain Valve
The drain valve sits near the lowest part of the tank.
Its job is to release compressed air and accumulated condensation.
Close it before filling the tank and drain the tank after use according to your Craftsman manual.
Safety Relief Valve
The safety valve protects the tank from excessive pressure.
Do not remove, plug, modify, or substitute an unapproved valve.
Test it only according to the instructions for your exact compressor.
Key Takeaway: The tank gauge shows stored pressure, the outlet gauge shows tool pressure, and the regulator controls only the air leaving the tank.
How to Use a Craftsman 135 PSI Air Compressor Step by Step
Use this sequence for normal operation, then check your model manual for any differences.
1. Put the Compressor on a Stable Surface
Set the unit on a firm, level surface.
Keep the compressor in an area with adequate airflow and leave room around cooling vents.
Do not cover the pump or motor while it is running.
Avoid wet locations and standing water.
If you are spraying coatings or working around flammable vapors, follow the compressor and material manufacturer’s placement rules.
2. Check the Compressor Before Use
Look over the compressor before switching it on.
Check for:
- Damaged power cord
- Cracked air hose
- Loose fittings
- Tank damage
- Missing guards
- Oil leaks on lubricated models
- Damaged gauges
- Blocked intake filter
Do not operate a compressor with a leaking, heavily rusted, or physically damaged air tank.
3. Check the Oil if Your Craftsman Model Is Oil-Lubricated
Some Craftsman 135 PSI compressors use oil-lubricated pumps.
Check the oil sight glass, dipstick, or level indicator according to the manual.
Do not run an oil-lubricated compressor without the required amount and type of oil.
If your compressor is labeled oil-free, do not add pump oil.
4. Close the Tank Drain Valve
Check the valve at the bottom of the tank.
Close it before starting the compressor.
If it is left open, the motor may run continuously because the tank cannot build pressure.
The valve only needs to seal properly. Do not apply excessive force to a small drain valve.
5. Turn the Regulator Down
Before attaching or operating a tool, reduce the outlet-pressure setting.
Starting with a low regulated pressure reduces the chance of sending too much pressure to an accessory.
Do not alter the tank-pressure switch to accomplish this. Use the outlet regulator.
6. Connect the Air Hose
Insert the air hose plug into the compressor’s quick coupler.
Make sure:
- Hose working pressure exceeds the planned pressure.
- Fittings are compatible.
- Couplers lock fully.
- Hose has no cuts, swelling, or severe cracking.
Then connect the tool or accessory to the other end.
Keep the tool trigger released during connection.
7. Plug the Compressor Into the Correct Outlet
Use the voltage and circuit listed on the compressor nameplate.
Many portable U.S. Craftsman compressors operate from a grounded 120-volt outlet, but check the exact model instead of assuming.
Avoid long or undersized extension cords.
Voltage drop can make an electric compressor:
- Start slowly
- Trip its overload
- Run hot
- Hum without reaching normal speed
When more reach is needed, a longer air hose is often preferable to a long electrical extension cord.
8. Switch the Compressor to AUTO or ON
Move the switch to its operating position.
The motor should start and fill the tank.
Watch the tank-pressure gauge.
You may hear the motor stop once the compressor reaches its factory cut-out pressure.
A brief hiss immediately after shutdown can be normal on compressors that unload pressure from the pump discharge line.
9. Let the Tank Reach Full Pressure
You do not always have to start work with a completely full tank, but allowing the compressor to reach cut-out makes it easier to judge normal operation.
For a unit rated at 135 PSI maximum, the motor should stop around its designed cut-out setting.
Do not become concerned if the gauge does not land on an exact printed number. Gauge tolerances and model specifications vary.
A compressor that runs continuously and never reaches normal cut-out pressure needs inspection.
10. Set the Regulator for the Tool
Check the tool’s operating-pressure specification.
Then turn the regulator until the outlet gauge reaches the required setting.
For example, if an air tool calls for 90 PSI, set the regulated outlet near the tool manufacturer’s specified pressure rather than sending the full 135 PSI from the tank.
Never exceed the lowest pressure rating among:
- Tool
- Air hose
- Couplers
- Regulator
- Accessory
11. Start Using the Tool
Operate the tool normally.
As you consume compressed air:
- Tank pressure drops.
- The pressure switch reaches its cut-in point.
- The motor starts automatically.
- The compressor refills the tank.
- The motor shuts off again at cut-out.
This cycling is normal.
12. Watch Pressure During Use
A compressor can reach 135 PSI yet still be too small for a high-air-demand tool.
Watch the regulated gauge while the tool is running.
If tool pressure falls continuously and the compressor cannot recover, the tool may require more SCFM than the compressor can supply.
Key Takeaway: Close the drain, connect the hose, fill the tank, set outlet pressure with the regulator, and let the pressure switch cycle the motor automatically during use.
What PSI Should You Set a Craftsman 135 PSI Compressor To?
Do not automatically set the regulator to 135 PSI.
The correct outlet pressure comes from the tool or accessory.
Air Tools
Many common pneumatic tools are rated around 90 PSI, but check the tool label or manual.
An impact wrench, nailer, spray gun, ratchet, or blow gun may use a different setting.
Start at the specified pressure rather than raising pressure until the tool feels stronger.
Tire Inflation
Use the vehicle or tire-equipment specification when inflating tires.
For a passenger vehicle, the correct tire pressure is normally found on the vehicle’s tire placard, commonly located around the driver’s door opening.
Do not use the maximum pressure molded onto the tire sidewall as the routine inflation target unless the vehicle or tire application specifically calls for it.
Use an accurate tire-pressure gauge.
Nail Guns
Pneumatic nailers often operate across a pressure range rather than at one fixed number.
Start toward the lower end of the nailer’s rated range and adjust within that range until the fastener depth is correct.
Do not exceed the nailer’s maximum operating pressure.
Blow Guns
Use only the pressure required for the task.
Never direct a blow gun toward your body or clothing.
Compressed air entering the skin can cause severe injury.
Key Takeaway: The 135 PSI number describes tank capacity on the compressor; set regulated outlet pressure according to the tool, tire, or accessory specification.
Why PSI and SCFM Both Matter
A compressor can have plenty of pressure and still fail to run a tool properly.
You need enough airflow too.
PSI Is Pressure
PSI tells you how strongly the compressed air is pushing.
A 135 PSI tank stores air at a higher pressure than the typical operating pressure of many portable pneumatic tools.
SCFM Is Airflow
SCFM tells you how much air the compressor can deliver over time.
A tool that consumes air faster than the pump produces it will drain the tank.
The pressure then falls even though the compressor motor is running.
Small Compressors Work Better With Intermittent Tools
Compact Craftsman compressors are commonly suitable for jobs such as:
- Tire inflation
- Brad nailing
- Finish nailing
- Stapling
- Short blow-gun use
- Small inflation jobs
High-air-demand tools may outrun a small compressor, including:
- Air sanders
- Die grinders
- Large spray guns
- Continuous blow guns
- Some impact tools under long use
Check the compressor’s SCFM rating at the PSI you need and compare it with the tool’s air-consumption rating.
Key Takeaway: PSI tells you pressure, while SCFM tells you sustained airflow. A 135 PSI compressor still needs enough SCFM to keep the tool running properly.
How to Shut Down a Craftsman 135 PSI Air Compressor
Proper shutdown removes moisture and leaves the compressor ready for storage.
Turn the Compressor Off
Move the pressure switch or power control to OFF.
Do not stop routine operation by simply pulling the plug while the switch remains in AUTO.
Unplug the Compressor
Disconnect the power cord after switching the machine off.
Remember that the pump, tubing, cylinder head, and nearby parts may be hot.
Allow the unit to cool before maintenance.
Disconnect the Air Tool
Reduce regulated outlet pressure before removing tools where practical.
Release trapped hose pressure carefully.
Keep your face away from quick couplers during disconnection.
Drain Condensation From the Tank
Water collects in an air receiver because moisture in compressed air condenses as the air cools.
Drain the tank according to your manual.
Wear eye protection and direct the discharge away from people and objects that could be damaged by dirty or rusty condensate.
Close the drain valve after the tank is empty.
Leaving water in a steel tank promotes internal corrosion.
Store the Compressor Dry
Keep the machine in a clean, dry place.
Protect:
- Power cord
- Hose
- Couplers
- Gauges
- Intake filter
Do not leave a portable compressor exposed to rain.
Key Takeaway: Switch the compressor off, unplug it, release downstream pressure, drain tank moisture, close the drain, and store the unit somewhere dry.
How to Use the Two Gauges Correctly
The two gauges are easy to confuse when using a compressor for the first time.
Tank Gauge
Think of the tank gauge as the stored-air gauge.
You normally do not control this pressure manually.
The compressor’s factory pressure switch handles tank filling.
Regulated Gauge
Think of the regulated gauge as the tool-pressure gauge.
This is the one you adjust.
For more accurate setup, connect the tool and set pressure under the conditions recommended by the tool maker.
Some systems show a small pressure drop once air begins flowing.
Never Adjust Factory Tank Controls for More Pressure
Do not modify:
- Pressure switch
- Safety valve
- Tank
- Cut-in setting
- Cut-out setting
Trying to make a 135 PSI compressor produce higher tank pressure can exceed its designed operating range.
Key Takeaway: Leave tank pressure under automatic factory control and use only the regulator to set pressure delivered to your tool.
What to Do Before Using a New Craftsman Compressor
A newly purchased compressor may need a few extra checks.
Find the Exact Model Number
Craftsman has used the 135 PSI rating on more than one compressor.
Find the model label and identify:
- Tank size
- Pump type
- Voltage
- Circuit requirement
- SCFM rating
- Oil requirement
- Duty cycle
This prevents instructions for one compressor from being applied to a different design.
Check for a Break-In Procedure
Some compressor models require an initial break-in cycle.
Others arrive ready for normal use.
Follow the break-in steps in the model manual rather than using a generic procedure, since valve position and run time can differ.
Install Required Oil on Lubricated Models
Some oil-lubricated compressors may need oil added or verified before their first startup.
Running a pump without oil can damage it quickly.
Oil-free models skip this step.
Inspect Shipping Components
Remove only packaging, plugs, or shipping pieces identified by the assembly instructions.
Never remove a safety part because it appears temporary.
Common Problems When Using a Craftsman 135 PSI Compressor
A few symptoms are common enough to check before assuming the compressor has failed.
| Problem | Possible Cause |
| Motor will not start | No power, breaker issue, low voltage, overload, pressure trapped at pump |
| Compressor runs but tank stays empty | Drain valve open, major air leak, pump problem |
| Tank fills very slowly | Air leak, dirty intake, pump wear, loose connection |
| Tool feels weak | Regulator too low, hose restriction, tool needs more SCFM |
| Compressor runs constantly during tool use | Tool air demand exceeds pump output or system leaks |
| Air leaks after motor shuts off | Fitting, check valve, hose, or connection leak |
| Water comes from hose | Tank not drained, humid air, no moisture separator |
| Compressor gets very hot | Long run time, restricted cooling, electrical problem, pump issue |
Compressor Will Not Start With Air in the Tank
The motor may face a heavier startup load if pressure remains trapped in the pump discharge line.
A properly working unloader system releases that pressure after shutdown.
If the motor starts normally with an empty tank but struggles during automatic restart, the unloader, check valve, voltage supply, or motor circuit may need inspection.
Compressor Cycles Too Often
Frequent cycling may come from:
- Small tank
- High tool air use
- Hose leak
- Coupler leak
- Tank fitting leak
A small compressor running a high-CFM tool may cycle frequently even when nothing is broken.
Regulator Pressure Falls While Using a Tool
If pressure is correct before pulling the trigger but drops sharply during operation, check:
- SCFM capacity
- Hose diameter
- Hose length
- Restrictive fittings
- Regulator
- Leaks
A larger compressor may be needed for continuous-use tools.
Key Takeaway: Starting trouble, weak tools, constant running, and pressure drops often come from power supply, leaks, airflow demand, regulator settings, or hose restrictions rather than the 135 PSI rating itself.
Basic Maintenance for a Craftsman Air Compressor
Simple maintenance keeps the compressor safer and more dependable.
Drain the Tank
Drain condensation at the interval specified by your manual, commonly after use or on a routine basis tied to operating conditions.
Humid weather creates more condensate.
Never drill or weld a damaged pressure tank.
Check the Intake Filter
A dirty intake filter restricts air entering the pump.
Inspect it regularly and clean or replace it according to the model instructions.
Do not operate the compressor for long periods with the intake filter removed.
Check Oil on Lubricated Models
If your Craftsman compressor has an oil-lubricated pump, monitor the level and change the oil at the specified interval.
Use only the grade listed for the model.
Oil-free compressors do not need this service.
Inspect Hoses and Couplers
Replace hoses with:
- Cuts
- Cracks
- Swelling
- Severe abrasion
- Damaged fittings
Repair leaking couplers instead of compensating by running the compressor more often.
Keep Cooling Areas Clear
Dust buildup around motor and pump cooling areas can raise operating temperature.
Clean accessible areas with the compressor off, unplugged, depressurized, and cool.
Key Takeaway: Drain moisture, maintain the intake filter, check pump oil when applicable, inspect hoses, and keep cooling areas clean.
Conclusion
The basic process for how to use a Craftsman 135 PSI air compressor is simple: inspect the unit, close the drain, connect a rated air hose, power the compressor, let the tank fill, and use the regulator to set the pressure required by your tool.
Do not confuse the 135 PSI tank rating with tool pressure. Leave tank pressure under control of the factory pressure switch and adjust only the regulated outlet. Also compare the compressor’s SCFM with the tool’s airflow requirement, especially for sanders, grinders, and spray equipment.
After use, switch the compressor off, unplug it, release downstream pressure, and drain condensation according to the model instructions. Oil-lubricated Craftsman compressors also need the correct pump-oil level and service schedule.
Check the model number before using break-in instructions, oil recommendations, extension cords, or duty-cycle limits. Craftsman has sold several compressors with a 135 PSI rating, and the exact operating requirements are not identical.
FAQs About Using a Craftsman 135 PSI Air Compressor
What Does 135 PSI Mean on a Craftsman Air Compressor?
It normally refers to the compressor’s maximum or cut-out tank pressure for models carrying that rating.
It does not mean every connected air tool should operate at 135 PSI. Use the regulator to set the outlet pressure to the tool manufacturer’s specification.
Do I Leave a Craftsman Air Compressor in AUTO While Using It?
Yes, during normal operation the AUTO or ON position lets the pressure switch restart the motor as tank pressure falls.
The compressor can start without warning in this mode, so keep hands away from moving parts and switch it OFF before service.
What PSI Should I Set My Craftsman Compressor To?
Set the regulated outlet to the pressure listed for the tool or accessory.
Many pneumatic tools operate around 90 PSI, but nailers, inflators, spray equipment, and other accessories may require different pressure ranges.
Why Does My Craftsman Compressor Stop at 135 PSI?
That is normal for a Craftsman model designed with a 135 PSI cut-out pressure.
The pressure switch stops the motor when the tank reaches its upper setting. The motor starts again automatically after enough air is used and tank pressure reaches the cut-in setting.
Should I Drain My Craftsman Air Compressor After Use?
Drain condensate according to the compressor manual and operating conditions.
Water left inside a steel receiver can promote internal corrosion. Switch off and unplug the compressor, then use the tank drain as instructed for your model.
Does a Craftsman 135 PSI Air Compressor Need Oil?
It depends on the model.
Some Craftsman 135 PSI compressors have oil-lubricated pumps and need the specified compressor oil. Others are oil-free and should not have oil added to the pump. Check the label and manual before servicing it.
Can I Run an Impact Wrench From a Craftsman 135 PSI Compressor?
Possibly, but maximum tank PSI does not determine compatibility.
Compare the compressor’s SCFM rating at the tool’s operating pressure with the impact wrench’s air requirement. A small-tank compressor may run an impact wrench in short bursts but may not keep up with long operation.