How to Use Craftsman Pancake Air Compressor Safely and Correctly
To operate a CRAFTSMAN pancake air compressor, close the tank drain, connect the air hose, turn the regulator down, plug the compressor into the correct outlet, switch it on, and let the tank fill. Once the motor stops automatically, adjust outlet pressure to match your air tool and begin working.
CRAFTSMAN has sold several pancake-style compressors, but the common current corded model is the 6-gallon CMEC6150 family. It uses an oil-free pump, stores air at up to 150 PSI, and supplies about 2.6 SCFM at 90 PSI.
If you want to know how to use craftsman pancake air compressor, start by understanding its two pressure gauges. One displays pressure stored in the tank, while the other shows regulated pressure going to your hose and pneumatic tool.
The compressor does not need to stay running constantly. Its pressure switch automatically stops the motor after the tank reaches cut-out pressure and starts it again after pressure drops to the factory-set cut-in level. That cycling is normal.
Compressed air also needs to be treated with care. Never point an air nozzle at your skin or another person. For workplace cleaning applications, OSHA generally limits compressed-air cleaning pressure to less than 30 PSI when the required guarding and personal protective measures are used.
Normal operation is simple once you understand the controls: prepare the compressor, connect the hose, fill the tank, set the outlet pressure, operate the tool, and drain the receiver when the job is finished.
Know the Controls on a CRAFTSMAN Pancake Compressor
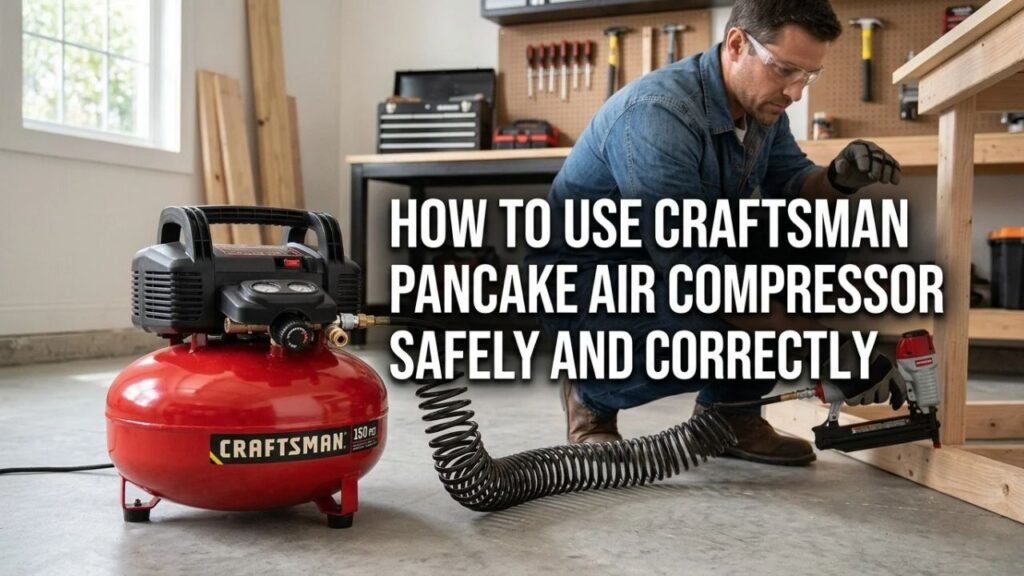
A few controls manage almost everything you need during normal use.
On/Off Switch
The switch powers the compressor’s automatic pressure-control system.
When switched ON, the compressor may start immediately if tank pressure is below its cut-in setting.
When tank pressure reaches the upper cut-out setting, the motor stops automatically.
The compressor can start again without you touching the switch, so treat the machine as capable of starting at any time while it is switched on.
Tank Pressure Gauge
One gauge displays pressure inside the receiver tank.
As the compressor fills, this gauge rises.
While using air, tank pressure drops.
The tank gauge does not tell you exactly how much pressure your tool is receiving.
Regulated Outlet Pressure Gauge
The second gauge displays the pressure being sent toward your hose.
This is the gauge you normally use when setting pressure for:
- Brad nailer
- Finish nailer
- Framing nailer
- Tire inflator
- Blow gun
- Small pneumatic tools
The tool manufacturer specifies the allowed operating pressure.
Pressure Regulator
The regulator changes outlet pressure without changing the compressor’s tank-pressure setting.
On the common CMEC6150:
- Turn clockwise to raise outlet pressure.
- Turn counterclockwise to lower outlet pressure.
Do not adjust the compressor’s internal pressure switch to get more tank pressure.
Quick-Connect Couplers
CRAFTSMAN pancake compressors commonly use quick couplers for the air hose.
The CMEC6150 has two quick-connect outlets, allowing two hoses or tools to be connected.
Both tools still share the compressor’s available airflow.
Tank Drain Valve
The drain is located at the bottom of the tank.
It releases:
- Stored compressed air
- Condensed water
- Small amounts of contamination
Water should not be left sitting inside the steel receiver.
Safety Relief Valve
The safety valve is emergency pressure protection.
It should never be:
- Plugged
- Tied closed
- Modified
- Used as the normal pressure regulator
CRAFTSMAN instructs users to make sure the safety valve operates freely before compressor use.
Key Takeaway: Use the regulated-pressure gauge to set tool PSI, the tank gauge to monitor stored air, and leave the factory pressure switch and safety valve unchanged.
How to Set Up a CRAFTSMAN Pancake Air Compressor
Check the compressor before each job.
Place It on a Stable Surface
Set the compressor upright on a firm, level surface.
Give the motor enough open space for cooling airflow.
Avoid operating it:
- In standing water
- In heavy rain
- Near flammable vapors
- Where cooling openings are blocked
Do not place materials over the compressor while it is running.
Check the Power Cord
Inspect the cord and plug for:
- Cuts
- Exposed conductors
- Melted areas
- Bent plug blades
- Loose connections
Do not operate the compressor with damaged electrical components.
Use the Correct Electrical Circuit
The common corded CRAFTSMAN pancake compressor operates from household power.
Plug it into a correctly grounded receptacle and avoid sharing the circuit with other high-current equipment if possible.
If the breaker trips repeatedly, do not simply replace it with a larger breaker.
The cause might be:
- Too many loads on the circuit
- Low voltage
- Extension-cord voltage drop
- Motor problem
- Compressor trying to restart under abnormal conditions
Check the Drain Valve
Make sure the tank drain is closed before filling the receiver.
If it is open, compressed air will escape continuously.
Inspect the Air Hose
Look for:
- Cracks
- Cuts
- Bulges
- Damaged fittings
- Loose couplers
The hose must be rated above the pressure it will experience.
Turn the Regulator Down
CRAFTSMAN’s CMEC6150 instructions call for turning the regulator counterclockwise until regulated pressure reads zero before startup.
This prevents an unknown pressure setting from reaching the tool as soon as it is connected.
Key Takeaway: Put the compressor on a stable surface, inspect the electrical supply and hose, close the tank drain, and reduce regulated pressure before switching it on.
How to Use a CRAFTSMAN Pancake Air Compressor Step by Step
The following process works for the common 6-gallon CRAFTSMAN pancake design.
Step 1: Switch the Compressor Off
Make sure the On/Off switch is in the OFF position before connecting hoses or accessories.
Step 2: Close the Tank Drain
Check the valve under the tank.
Close it securely without overtightening it.
Step 3: Reduce Outlet Pressure
Turn the regulator counterclockwise until the regulated gauge reaches zero.
Step 4: Connect the Air Hose
Push the hose plug into the quick-connect coupler.
Depending on the coupler design, you may need to pull its sleeve back first.
Push the fitting fully into place, then release the sleeve.
Give the hose a gentle pull to make sure it is locked.
Hold the hose firmly during connection or disconnection because trapped pressure can make it move suddenly.
Step 5: Connect Your Air Tool
Attach the other end of the hose to the tool.
Examples include:
- Nail gun
- Tire inflator
- Blow gun
- Stapler
- Small impact tool
Make sure the tool trigger is released before connecting air.
Step 6: Plug In the Compressor
Connect the power cord to the correct grounded receptacle.
Using the wall outlet directly is preferable when practical.
Step 7: Switch It On
Move the switch to ON.
The compressor should begin filling its tank.
Watch the tank-pressure gauge rise.
Step 8: Wait for the Motor to Stop
Let the compressor fill completely.
The pressure switch automatically shuts the motor off when cut-out pressure is reached.
CRAFTSMAN’s common 6-gallon pancake model has a maximum tank-pressure rating of 150 PSI.
You do not need to turn the power switch off when the motor automatically stops.
Step 9: Set the Tool Pressure
Find the pressure requirement printed on your pneumatic tool or in its manual.
Turn the regulator clockwise until the regulated-pressure gauge reaches the desired PSI.
Do not simply turn it to maximum.
Step 10: Use the Tool
Begin operating normally.
As you use air:
- Tank pressure falls.
- The compressor reaches cut-in pressure.
- The motor starts automatically.
- The tank begins recovering.
- The motor stops again at cut-out pressure.
This cycle may happen frequently when using a tool that consumes substantial air.
Key Takeaway: Connect the hose with outlet pressure lowered, let the receiver fill completely, then set regulated pressure to the tool’s requirement before beginning work.
How to Adjust Pressure on a CRAFTSMAN Pancake Compressor
One of the most common beginner mistakes is confusing tank pressure with tool pressure.
Tank PSI Is Not Tool PSI
Suppose the tank contains 150 PSI.
That does not mean 150 PSI must reach your nail gun.
If the nailer is designed to operate at 90 PSI, use the regulator to provide approximately the required pressure.
To Increase Outlet Pressure
Turn the regulator clockwise.
Watch the regulated gauge.
Stop at the tool manufacturer’s setting.
To Decrease Outlet Pressure
Turn the regulator counterclockwise.
You may need to release a small amount of downstream air before the gauge settles at the lower setting.
Never Exceed Tool Pressure Rating
Too much pressure can:
- Damage seals
- Damage fittings
- Increase recoil
- Drive nails too deeply
- Create a hose or accessory hazard
More pressure does not mean better tool performance once the tool already has what it needs.
Key Takeaway: Tank pressure represents stored air; regulated pressure represents what reaches the tool. Always set the regulator from the tool’s pressure specification.
How to Connect a Nail Gun to a CRAFTSMAN Pancake Compressor
Pancake compressors are commonly used with pneumatic nailers.
Connect the Hose First
Connect the hose to the compressor’s quick coupler.
Then connect the other end to the nailer.
Keep your finger away from the trigger and the nailer’s nose away from people.
Set the Nailer Pressure
Check the nailer’s operating-pressure range.
Start toward the lower end of its recommended range.
Test the tool on scrap material.
Increase pressure slightly if the fastener is not driven deeply enough.
Do not exceed the nailer’s maximum rating.
Adjust Nail Depth at the Tool When Available
Many nailers have mechanical depth adjustment.
Use that feature instead of raising compressor pressure unnecessarily.
Disconnect Before Clearing a Jam
Always remove the air supply before:
- Clearing jammed nails
- Opening the magazine
- Servicing the nose
- Performing maintenance
Key Takeaway: Start nailers at the lower end of their approved pressure range, test on scrap material, and disconnect the air hose before clearing jams or servicing the tool.
Can You Fill Tires With a CRAFTSMAN Pancake Compressor?
Yes.
A 6-gallon pancake compressor works well for normal tire inflation.
Attach a Tire Chuck or Inflator
CRAFTSMAN sells a CMEC6150K kit that includes:
- Air hose
- Tire chuck
- Tire gauge
- Inflation adapters
A separate compatible tire inflator can also be used.
Find the Vehicle’s Recommended Tire Pressure
For passenger vehicles, check the tire-information placard, usually found around the driver’s door jamb.
Do not automatically inflate tires to the maximum PSI printed on the tire sidewall.
Inflate Gradually
Add air in short intervals.
Check the tire pressure frequently with an accurate gauge.
Stop when the tire reaches the vehicle manufacturer’s specified cold pressure.
What Tools Can a CRAFTSMAN Pancake Compressor Run?
The common 6-gallon model produces about 2.6 SCFM at 90 PSI, so it works better with intermittent tools than continuous high-air-demand equipment.
Good Matches
Common applications include:
- Brad nailer
- Pin nailer
- Finish nailer
- Framing nailer
- Roofing nailer
- Stapler
- Tire inflation
- Blow gun in short bursts
Impact Wrench
A small impact wrench may work for short bursts if its pressure and airflow demands fit the compressor.
The tank can provide temporary airflow beyond what the pump continuously produces.
After several fasteners, you may need to wait for recovery.
Air Ratchet
An air ratchet may work intermittently.
Long use can drain the receiver quickly.
Pneumatic Sander
A full-size pneumatic orbital sander is generally a poor match.
Many sanders consume substantially more air than a pancake compressor can continuously produce.
Die Grinder
The same problem applies to many die grinders.
They can drain the tank faster than the pump refills it.
Spray Gun
Small touch-up spraying may be possible with a compatible low-demand spray gun.
Many full-size spray guns need more continuous airflow than a pancake compressor provides.
Key Takeaway: CRAFTSMAN pancake compressors are strongest with nailers, inflation, staplers, and other intermittent tools; high-CFM sanders, grinders, and spray guns can exceed the pump’s output.
What Does 150 PSI Mean on a CRAFTSMAN Pancake Compressor?
The 150 PSI rating describes maximum stored tank pressure on models such as the CMEC6150.
It does not mean every connected tool should receive 150 PSI.
Higher Tank Pressure Stores More Usable Air
Compressing air to a higher receiver pressure allows more air mass to be stored inside a given tank volume.
The regulator then reduces that pressure before sending air to the tool.
CFM Still Controls Recovery
A 150 PSI tank does not mean the compressor produces large continuous airflow.
The CMEC6150’s airflow rating at 90 PSI is far more useful when deciding if it can keep up with a pneumatic tool.
Why Does the Compressor Keep Turning On?
Automatic cycling is normal.
The pressure switch monitors receiver pressure.
Motor Starts at Cut-In Pressure
Once enough stored air has been used, pressure falls to the lower factory setting.
The pressure switch starts the motor.
Motor Stops at Cut-Out Pressure
After the pump refills the tank, the pressure switch stops the motor.
The unit remains electrically ready to restart.
This is why CRAFTSMAN warns that the compressor can cycle automatically while switched on.
Very Frequent Cycling Can Indicate a Problem
If the motor cycles rapidly without meaningful tool use, inspect for:
- Air leaks
- Loose couplers
- Hose leaks
- Open tank drain
- Regulator leakage
- Check-valve problems
How to Shut Down a CRAFTSMAN Pancake Air Compressor
A proper shutdown includes draining accumulated moisture.
1. Switch It Off
Move the power switch to OFF.
2. Unplug the Compressor
Disconnect it from the electrical outlet.
3. Turn Regulated Pressure Down
Turn the regulator counterclockwise until outlet pressure reaches zero.
4. Disconnect the Tool
Remove the pneumatic tool from the hose.
Hold the hose securely so residual pressure does not cause whipping.
5. Reduce Tank Pressure
Follow the draining procedure specified for your exact model.
CRAFTSMAN’s CMEC6150 procedure calls for bleeding tank pressure down before fully draining the receiver.
6. Open the Tank Drain
Place the compressor where discharged moisture will not damage flooring.
Open the drain at the bottom of the tank.
Air, water, and sometimes rusty-looking condensation may escape.
7. Let the Tank Drain
Allow accumulated moisture to leave the receiver.
CRAFTSMAN warns that leaving water inside can corrode and weaken the air tank.
8. Close the Drain for Storage
After pressure and moisture have been released, close the drain valve without forcing it excessively.
Key Takeaway: Switch off, unplug, reduce pressure, disconnect accessories, and drain tank moisture after use instead of storing the compressor with accumulated condensation inside.
Does a CRAFTSMAN Pancake Compressor Need Oil?
The common CMEC6150 does not require pump oil.
It uses an oil-free pump.
Do not pour compressor oil into an oil-free pump.
Air Tools May Still Need Oil
The compressor and pneumatic tool have separate lubrication requirements.
Some tools need a few drops of pneumatic-tool oil.
Others should remain oil-free.
Follow the tool manual.
Oil-Free Does Not Mean No Maintenance
You still need to:
- Drain tank moisture
- Check hoses
- Inspect fittings
- Inspect power cord
- Keep cooling openings clean
- Check the safety valve according to the manual
Should You Use an Extension Cord?
Direct connection to the wall outlet is preferable.
Long or undersized extension cords create voltage drop.
Low voltage can make the compressor motor:
- Start slowly
- Overheat
- Trip a breaker
- Trigger its thermal overload
A longer air hose is often a better solution than moving the compressor farther away with a long electrical cord.
If an extension cord must be used, follow the wire-gauge and length limits in the manual for your exact model.
Why Won’t My CRAFTSMAN Pancake Compressor Build Pressure?
Start with simple checks.
Drain Valve Is Open
An open tank drain lets air escape continuously.
Close it before operation.
Hose or Fitting Is Leaking
Listen for hissing.
Check:
- Quick couplers
- Hose ends
- Regulator
- Accessories
Air Tool Uses Too Much Air
Disconnect the tool.
If the compressor fills normally without it, the tool may be consuming more airflow than the compressor can continuously provide.
Loose Fittings
Threaded connections can leak.
Depressurize and unplug the compressor before servicing connections.
Internal Pump Problem
If the compressor runs but cannot build normal pressure with no external leaks, internal service may be required.
Why Does My CRAFTSMAN Pancake Compressor Trip the Breaker?
Several conditions can cause electrical trips.
Too Many Loads on the Circuit
Other high-current devices may already be using the branch circuit.
Extension Cord Is Too Small
A thin or long cord can cause voltage drop during motor startup.
Motor Is Hot
The CMEC6150 has thermal motor-overload protection.
If it overheats, the manual instructs the user to turn it off, unplug it, let the motor cool, reconnect power, and restart.
Compressor Has a Mechanical or Electrical Problem
Repeated breaker trips on the correct circuit deserve inspection.
Do not install a larger breaker without confirming that the circuit wiring and equipment are designed for it.
Key Takeaway: Breaker trips often come from circuit overload, voltage drop, motor overheating, or a compressor fault—not simply from having too small a breaker.
Common CRAFTSMAN Pancake Compressor Mistakes
A few habits cause many compressor problems.
Using Maximum Pressure for Every Tool
Always regulate pressure to the tool’s rating.
Ignoring CFM Requirements
A tool may need 90 PSI but still consume far more CFM than the compressor supplies.
Leaving Water in the Tank
Drain accumulated condensation after use.
Pulling the Hose Out While It Is Pressurized
Firmly control the hose and release downstream pressure first.
Using Compressed Air on Skin
Never clean yourself with compressed air.
High-pressure air and airborne debris can cause serious injuries.
Running High-Air-Demand Tools Continuously
If tank pressure falls continuously while the motor runs, the tool is probably consuming air faster than the pump produces it.
Servicing the Compressor While It Is Plugged In
Switch it off, unplug it, and release stored air before maintenance.
Key Takeaway: Regulate tool pressure, respect compressor CFM, drain the tank, handle hoses carefully, and completely depressurize and unplug the unit before service.
Conclusion
For how to use craftsman pancake air compressor, begin by closing the tank drain, lowering regulated pressure, connecting the hose, and plugging the compressor into the correct grounded electrical circuit.
Switch the compressor on and allow the tank to fill until the motor stops automatically. Then set the regulated outlet pressure to the level specified by your pneumatic tool. Do not use maximum tank pressure as the default tool setting.
During use, expect the motor to cycle automatically as stored air is consumed. The common 6-gallon CRAFTSMAN pancake compressor is best suited to nailers, staplers, inflation, and other intermittent pneumatic jobs rather than tools requiring large amounts of nonstop airflow.
After the job, switch the compressor off, unplug it, remove pressure from the outlet, disconnect the tool, and drain condensation from the receiver. Those simple steps protect the tank, hoses, tools, and compressor for the next use.
FAQs About Using a CRAFTSMAN Pancake Air Compressor
How do you start a CRAFTSMAN pancake air compressor?
Set the switch to OFF, close the drain valve, turn regulated pressure down, connect the hose, plug the compressor into the correct outlet, and switch it ON. Let the tank fill until the motor automatically stops before setting tool pressure.
What PSI should I set my CRAFTSMAN pancake compressor to?
Set regulated outlet pressure according to the pneumatic tool’s specifications. Many tools operate around 70–100 PSI, but each tool can have a different range. Never exceed its maximum pressure rating.
Why are there two gauges on my CRAFTSMAN air compressor?
One gauge shows stored tank pressure. The other displays regulated outlet pressure going to the hose. Use the regulated gauge when setting pressure for an air tool.
Does a CRAFTSMAN pancake compressor automatically shut off?
The motor automatically stops when tank pressure reaches the factory cut-out setting. The compressor remains switched on and will automatically restart when pressure falls to the cut-in level.
Do I need to drain my CRAFTSMAN pancake compressor?
Yes. Moisture condenses inside the receiver during normal use. Draining it regularly reduces internal corrosion and removes accumulated water from the tank.
Does a CRAFTSMAN pancake compressor need oil?
The common 6-gallon CMEC6150 uses an oil-free pump and does not need routine pump-oil changes. Connected pneumatic tools may have separate lubrication requirements.
Can a CRAFTSMAN pancake compressor run an impact wrench?
It can operate some impact wrenches for short bursts if pressure and airflow requirements are compatible. The small tank and roughly 2.6 SCFM at 90 PSI output mean extended impact use may require recovery pauses.
Can I leave my CRAFTSMAN pancake compressor pressurized overnight?
It is better to follow the shutdown and storage procedure in your model’s manual. After use, turn the unit off, unplug it, relieve pressure as directed, and drain accumulated moisture from the receiver.