How to Use a Craftsman 150 PSI Air Compressor: Step-by-Step Guide
Using a Craftsman 150 PSI compressor starts with placing it on a stable surface, turning the regulator down, connecting the hose and tool, switching the compressor on, and letting the tank fill. Once the motor stops at cut-out pressure, set the regulated outlet PSI to match the tool rather than sending the full 150 PSI to it.
CRAFTSMAN sells several compressors with different tank sizes and layouts, so control placement can vary. One common current model is the CMEC6150/CMEC6150K 6-gallon pancake compressor. It stores air at up to 150 PSI and delivers 2.6 SCFM at 90 PSI.
The 150 PSI number is the compressor’s maximum tank pressure, not the setting every air tool should receive. Your nailer, tire inflator, blow gun, or other accessory has its own pressure range, and the regulator controls how much pressure reaches the hose.
The current CMEC6150 manual lists about 120 PSI as its cut-in pressure and 150 PSI as its cut-out pressure. It also specifies a 15-amp minimum branch circuit and a 50% duty cycle, meaning the compressor should run no more than about 5 minutes during a 10-minute period.
For how to use a Craftsman 150 PSI air compressor, the two gauges are among the first controls to understand. One shows stored tank pressure, while the other shows regulated outlet pressure sent toward the tool. Mixing up those readings is a common beginner mistake.
CRAFTSMAN also instructs users to drain tank condensation after use and to keep the compressor in a clean, dry, ventilated location. The CMEC6150 manual calls for at least 12 inches of clearance from walls or objects that could block cooling airflow.
The steps below use the common 6-gallon 150 PSI CRAFTSMAN pancake compressor as the main example. If your model number is different, keep the same basic operating principles but follow its specific manual for electrical requirements, duty cycle, drain procedure, and pressure limits.
How to Use a Craftsman 150 PSI Air Compressor Step by Step
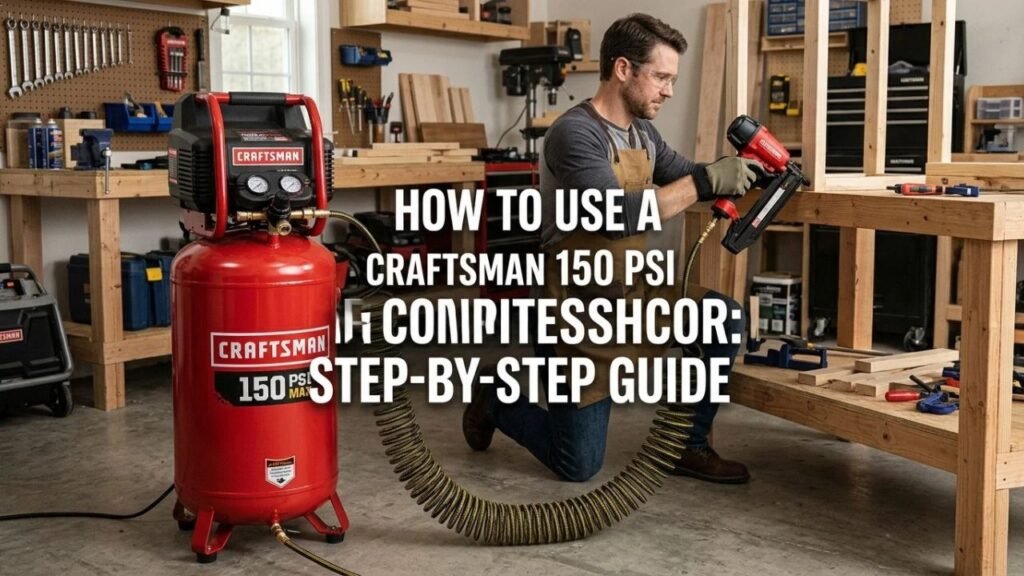
Before connecting a pneumatic tool, identify the main controls.
Common parts include the power switch, tank-pressure gauge, outlet-pressure gauge, regulator knob, quick-connect coupler, safety valve, and drain valve.
Step 1: Place the Compressor on a Stable Surface
Set the compressor upright on a level, secure surface.
Keep it in a clean and dry location with open space around the housing.
For the CMEC6150, CRAFTSMAN specifies at least 12 inches of clearance around walls or other obstructions so cooling air can pass through the vents.
Do not cover the compressor with rags or place objects against the cooling openings.
Step 2: Inspect the Power Cord, Hose, and Tank
Before switching it on, check for:
- Damaged electrical cord
- Broken plug or grounding pin
- Split or cracked air hose
- Damaged quick couplers
- Loose fittings
- Tank damage
- Missing guards
- Damaged pressure gauges
Do not operate a compressor with obvious tank damage or missing protective parts.
The manual also calls for a grounded electrical outlet and warns against altering the factory plug.
Step 3: Close the Tank Drain Valve
The drain is located near the lowest point of the tank.
Make sure it is closed before filling the compressor.
If the valve remains open, air will escape as fast as the pump attempts to fill the receiver, and the compressor may run continuously.
Do not overtighten the valve.
Step 4: Turn the Regulator Down to Zero
Before connecting the tool, turn the regulator knob counterclockwise until the outlet-pressure gauge reads zero.
This matches the startup procedure in the CMEC6150 manual.
Reducing the regulator first prevents the tool from receiving unexpected pressure as soon as the hose is connected.
Step 5: Connect the Air Hose
Push the hose plug into the compressor’s quick-connect fitting until it locks.
The common CMEC6150 uses 1/4-inch industrial quick connects and provides two couplers.
Hold the hose firmly when attaching or removing it.
A pressurized hose can whip if it disconnects unexpectedly.
Step 6: Connect the Air Tool or Accessory
Attach your:
- Tire chuck
- Brad nailer
- Finish nailer
- Stapler
- Blow gun
- Inflation nozzle
- Other compatible pneumatic accessory
Check the tool’s maximum pressure rating before adding pressure.
CRAFTSMAN specifically warns that regulated outlet pressure must not exceed the tool or accessory manufacturer’s maximum rating.
Step 7: Plug the Compressor Into the Correct Outlet
The common 6-gallon CMEC6150 operates on 120V, 60 Hz power and calls for a 15-amp branch circuit.
A grounded wall outlet is preferred.
If an extension cord must be used, the CMEC6150 manual specifies a three-wire grounded cord in good condition, no longer than 50 feet, with suitable wire size.
Voltage drop from a small or very long extension cord can make the motor struggle to start.
Step 8: Turn the Compressor On
Move the switch to the ON position.
The motor will start filling the tank automatically.
For the CMEC6150:
- Approximate cut-in pressure: 120 PSI
- Approximate cut-out pressure: 150 PSI
The motor shuts off once the tank reaches its factory cut-out pressure.
You do not need to turn the compressor off manually every time the tank reaches 150 PSI.
Step 9: Set the Outlet Pressure for the Tool
Once the tank is filled, slowly turn the regulator clockwise.
Watch the outlet-pressure gauge, not the tank gauge.
Stop at the pressure required by your tool.
For example, a pneumatic nailer might call for a pressure range such as 70–120 PSI. Start toward the lower end permitted by the tool and increase only as needed to drive the fastener correctly.
Never assume that 150 PSI is the right working pressure.
Step 10: Use the Tool and Watch Compressor Cycling
As you use compressed air, tank pressure falls.
Once it reaches the factory cut-in point, the compressor motor starts again automatically.
The CMEC6150 manual recommends a 50% duty cycle, or about 5 minutes running followed by enough rest that it does not exceed 5 minutes of motor operation in a 10-minute period.
If the motor runs almost nonstop, the connected tool may demand more air than the compressor can supply.
Step 11: Turn the Compressor Off After Work
Once the task is finished:
- Move the switch to OFF.
- Unplug the compressor.
- Reduce regulated pressure to zero.
- Disconnect the air tool.
- Release tank pressure as instructed by the manual.
- Drain the tank.
CRAFTSMAN says the compressor should be unplugged when not in use.
Step 12: Drain Water From the Tank
Compressed air creates condensation inside the receiver.
For the CMEC6150, CRAFTSMAN instructs the user to reduce tank pressure to about 20 PSI, then open the drain valve at the bottom of the tank and remove accumulated water. Eye protection is recommended because air, rust, and moisture may exit the drain.
Do not skip this step.
Water left inside a steel receiver can contribute to internal corrosion.
Key Takeaway: Start with zero regulated pressure, fill the tank, set outlet PSI for the connected tool, stay within the compressor’s duty cycle, then shut it down and drain condensation.
Understanding the Two Gauges on a Craftsman 150 PSI Compressor
The two gauges perform different jobs.
Once you understand them, the compressor becomes much easier to operate.
Tank Pressure Gauge
The tank-pressure gauge shows how much pressure is stored in the receiver.
On the common 150 PSI Craftsman pancake compressor, it may rise all the way to roughly 150 PSI before the motor shuts off.
The pressure switch controls this automatically.
You normally do not adjust the factory cut-in or cut-out settings.
Outlet Pressure Gauge
The outlet gauge shows the pressure leaving the regulator and traveling toward the hose.
CRAFTSMAN states that regulated outlet pressure will always be equal to or lower than tank pressure. Turning the regulator clockwise raises outlet pressure; turning it counterclockwise lowers it.
This is the gauge you watch when setting pressure for an air tool.
150 PSI Does Not Mean Every Tool Gets 150 PSI
Suppose the tank contains 150 PSI and your nailer requires 90 PSI.
The setup can be:
- Tank pressure: 150 PSI
- Outlet pressure: 90 PSI
- Tool receives: approximately 90 PSI
The tank holds reserve air at the higher pressure while the regulator reduces what reaches the tool.
Key Takeaway: Tank pressure tells you how much stored pressure is available; outlet pressure tells you what the connected tool receives.
What Can You Run With a Craftsman 150 PSI Air Compressor?
Maximum PSI is only one part of tool compatibility.
SCFM tells you how much air the compressor can replenish.
The current 6-gallon CRAFTSMAN 150 PSI pancake compressor supplies 3.7 SCFM at 40 PSI and 2.6 SCFM at 90 PSI.
Good Uses for the 6-Gallon Model
It works well for many intermittent tasks such as:
- Brad nailing
- Finish nailing
- Stapling
- Tire inflation
- Sports-ball inflation
- Short blow-gun bursts
- Small pneumatic fastening jobs
CRAFTSMAN currently sells the same 6-gallon compressor in a kit with an 18-gauge brad nailer and also supplies inflation and blow-gun accessories in another kit.
Tools That May Need More Air
The compressor may struggle with:
- Air sanders
- Die grinders
- Large spray guns
- Continuous blow guns
- High-air-demand impact tools
- Sandblasting equipment
A tool might run briefly using stored tank air, then slow as the tank empties.
Compare the tool’s SCFM requirement at its working PSI against the compressor rating.
Tank Size Does Not Increase Pump Output
A larger tank stores more air.
It does not make the compressor pump produce more SCFM.
If a tool needs 6 SCFM continuously and the compressor produces only 2.6 SCFM at 90 PSI, tank pressure will eventually fall no matter how high it was at the start.
Key Takeaway: The CRAFTSMAN 6-gallon 150 PSI model fits nailers, inflation, and short air bursts best; continuous high-air-demand tools need more SCFM.
How to Inflate a Car Tire With a Craftsman 150 PSI Compressor
Tire inflation is one of the easiest jobs for this compressor.
Use a tire chuck or inflator with a pressure gauge.
Find the Correct Tire Pressure
Check the vehicle’s tire-information label, commonly located on the driver’s door jamb.
Use the recommended cold tire pressure listed for the vehicle.
Do not inflate a passenger-car tire to 150 PSI just because the compressor can produce that pressure.
The compressor’s rating and the tire’s required pressure are unrelated.
Set the Compressor Regulator
You can set the compressor outlet pressure above the tire’s target pressure while staying within the inflator and hose ratings.
Add air in short bursts and check the tire frequently.
Stop at the vehicle manufacturer’s target pressure.
Never Leave the Tire Unattended
Stay beside the tire while air is entering it.
An inflator or gauge fault can lead to overinflation if air is left flowing unattended.
How to Use a Craftsman Compressor With a Nail Gun
A 6-gallon CRAFTSMAN compressor pairs well with many pneumatic nailers.
CRAFTSMAN’s current compressor-and-brad-nailer kit uses this same 150 PSI compressor.
Start at the Nailer’s Lower Pressure Range
Check the nailer’s manual for its approved operating PSI.
Set the compressor regulator near the lower end of that range.
Drive a test fastener into scrap material.
If the nail remains proud, increase pressure gradually or adjust the nailer’s depth control.
Do Not Use Excess Pressure to Fix Every Nailing Problem
Poor fastener depth can also come from:
- Wrong fastener
- Jammed magazine
- Tool wear
- Low tank pressure
- Compressor recovering
- Incorrect depth setting
Stay below the nailer’s maximum rated PSI.
Disconnect Air Before Servicing the Nailer
Remove the hose before clearing a jam or working near the driver mechanism unless the nailer manufacturer gives a different procedure.
How to Use the Craftsman Blow Gun Safely
The current CMEC6150K accessory kit includes a blow gun and an OSHA-style safety nozzle.
Compressed air can propel chips and dust at high speed.
For workplace cleaning, OSHA requires compressed air used for cleaning to be reduced below 30 PSI under static conditions and calls for chip guarding and personal protective equipment. Compressed air must not be used to clean a person’s body or clothing.
Wear eye protection and keep the nozzle pointed away from people.
Never use compressed air to blow dust off your skin, hair, or clothing.
Why Does the Craftsman Compressor Keep Turning On and Off?
Automatic cycling is normal.
The compressor uses a pressure switch to control the motor.
Motor Stops at Cut-Out Pressure
When tank pressure reaches the upper factory setting, the pressure switch shuts the motor off.
On the CMEC6150, this occurs at roughly 150 PSI.
Motor Restarts at Cut-In Pressure
As air is used, tank pressure falls.
At about 120 PSI on the CMEC6150, the pressure switch restarts the motor.
This cycle repeats while the power switch remains ON.
Very Frequent Cycling Can Point to a Problem
If the compressor starts every few seconds with little or no tool use, check for:
- Hose leaks
- Loose couplers
- Leaking drain valve
- Regulator leaks
- Check-valve problems
Apply soapy water to suitable external air fittings and look for bubbles.
Keep water away from electrical components.
Key Takeaway: Normal cycling occurs between cut-in and cut-out pressure; unusually frequent cycling with little air use deserves a leak check.
What to Do if the Craftsman Compressor Stops Running
A stopped motor does not always mean the compressor has failed.
The CMEC6150 has thermal overload protection that can shut the motor down if it overheats. CRAFTSMAN instructs the user to turn the compressor off, unplug it, let the motor cool, then reconnect it to the proper branch circuit before restarting.
Check the Power Supply
Verify:
- Wall outlet works
- Breaker has not tripped
- Plug is fully inserted
- Extension cord is suitable
- Power switch is ON
An undersized extension cord can cause voltage drop.
Check the Duty Cycle
Running a high-air-demand tool can keep the compressor motor operating continuously.
The CMEC6150 is rated for 5 minutes on and 5 minutes off under its recommended 50% duty cycle.
Give the motor time to cool.
Check for Unusual Noise or Vibration
CRAFTSMAN instructs users to shut the compressor down if unusual noise or vibration appears and have it inspected.
Do not keep operating it to see if the noise disappears.
Key Takeaway: Overheating, poor electrical supply, excessive run time, and mechanical trouble can stop the compressor; let thermal protection cool before restarting.
Craftsman 150 PSI Air Compressor Maintenance
The common oil-free 6-gallon model does not require pump-oil changes.
It still needs basic care.
Drain the Tank After Use
CRAFTSMAN calls for tank draining daily or after use on the CMEC6150.
Condensation left inside can corrode the steel receiver.
Test the Safety Valve
Before starting, the manual instructs users to pull the safety-valve ring and confirm that the valve moves freely.
If it sticks or fails to operate smoothly, it should be replaced with the correct type rather than modified.
Keep Cooling Vents Clear
Dust and objects blocking the housing can trap heat.
Leave open space around the compressor and keep the vents clear.
Inspect the Hose and Couplers
Replace damaged hoses or fittings.
A pressurized hose failure can create a whipping hazard.
Store It Dry
Keep the compressor indoors in a dry storage location after the tank has been drained.
Protect the cord, couplers, and gauges from impact.
Key Takeaway: Drain condensation, check the safety valve, keep cooling vents open, inspect hoses, and store the compressor dry.
Conclusion
For how to use a Craftsman 150 PSI air compressor, the basic sequence is simple: turn regulated pressure down, connect the hose and tool, plug the compressor into the proper grounded circuit, switch it on, let the tank fill, then set outlet PSI for the connected accessory.
The common CMEC6150 6-gallon model stores air up to about 150 PSI, automatically restarts around 120 PSI, and provides 2.6 SCFM at 90 PSI. Those specifications make it a good match for inflation, nailers, staplers, and other short-duration pneumatic jobs.
Remember that 150 PSI is tank capacity, not the pressure every tool should receive. Use the outlet gauge and regulator to match the tool manufacturer’s stated PSI range.
At the end of the job, turn the compressor off, unplug it, disconnect the tool, reduce pressure, and drain condensation from the receiver. Regular draining and staying within the rated duty cycle are two of the simplest ways to avoid unnecessary trouble.
FAQs About Using a Craftsman 150 PSI Air Compressor
What PSI Should I Set My Craftsman Air Compressor To?
Set the regulated outlet pressure to the requirement listed for the connected tool. Do not automatically set it to 150 PSI. The tank may hold 150 PSI while a nailer or other accessory receives 70, 90, or another approved pressure.
How Long Does a Craftsman 150 PSI Compressor Take to Fill?
Fill time changes by model, tank size, temperature, and starting pressure. The motor should run until the tank reaches its factory cut-out setting, then shut off automatically. A 6-gallon model fills far faster than a large stationary tank using a similar pump output.
Does a Craftsman 150 PSI Air Compressor Need Oil?
The current CMEC6150 6-gallon pancake model uses an oil-free pump and does not require routine compressor-pump oil changes. Other Craftsman 150 PSI models may use different pump designs, so check the model-specific manual.
Can a Craftsman 150 PSI Compressor Inflate Car Tires?
Yes. A 6-gallon Craftsman compressor is well suited to passenger-car tire inflation. Inflate to the vehicle manufacturer’s cold-tire specification rather than the compressor’s 150 PSI maximum.
Can I Run an Impact Wrench With a Craftsman 6-Gallon Compressor?
Some impact wrenches can work for short bursts, but compare the wrench’s SCFM requirement with the compressor’s 2.6 SCFM rating at 90 PSI. A high-demand impact wrench may use stored air quickly and require recovery pauses.
Why Does My Craftsman Compressor Stop at 150 PSI?
That is normal on models designed for 150 PSI cut-out pressure. The pressure switch shuts the motor off when the tank reaches the factory upper limit and restarts it when pressure falls to the cut-in level.
Should I Drain My Craftsman Air Compressor After Every Use?
For the CMEC6150, CRAFTSMAN calls for draining the tank daily or after each use. Moisture condenses inside the receiver, and leaving it there can contribute to internal corrosion.
Can I Use an Extension Cord With My Craftsman Compressor?
The CMEC6150 manual permits a suitable grounded extension cord when needed and specifies a maximum length of 50 feet along with proper wire size. A better setup is often to use a longer air hose and keep the compressor close to the wall outlet.