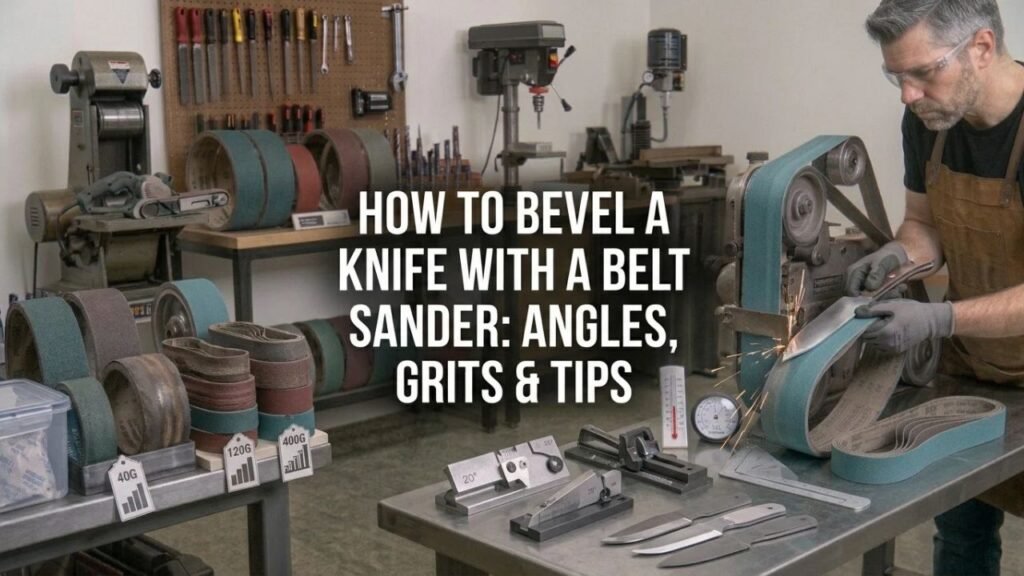
How to Bevel a Knife With a Belt Sander: Angles, Grits & Tips
To grind an even knife bevel with a belt sander, mark the edge and bevel boundaries first, start with a coarse abrasive, hold the blade at a consistent angle against the platen, and make smooth passes from the plunge area toward the tip. Alternate sides often and keep the steel cool so both bevels develop evenly.
Bevel grinding removes much more steel than final sharpening. The goal is to create the main sloping faces that run from the blade flats or spine area toward the cutting edge, not simply to sharpen an already finished edge.
A belt grinder makes this work faster, but speed also makes mistakes happen quickly. A moment of extra pressure can cut a low spot, move the plunge line, make one side thinner, or overheat a hardened edge.
For how to bevel a knife with a belt sander, beginners usually get cleaner results by marking clear reference lines, using a flat platen, starting with controlled shallow bevels, and widening them gradually rather than trying to reach the final grind line in one pass.
Abrasive suppliers that serve knife makers commonly recommend coarse ceramic belts for initial bevel work. Red Label Abrasives places rough beveling in roughly the P36-P150 range and recommends smooth, continuous passes instead of stopping midway through a stroke, while Combat Abrasives commonly uses 36-60 grit for initial bevel grinding and 80-120 grit for refinement.
Heat control deserves extra attention after a blade has been hardened and tempered. Knife Steel Nerds has documented that powered grinding can overheat the very thin material near a finished edge and reduce hardness, so post-heat-treatment grinding should use fresh belts, light pressure, short passes, and careful temperature control.
The process below covers marking the blade, choosing grit, setting the angle, grinding both sides evenly, controlling the plunge line, dealing with the tip, refining the bevel, and avoiding the mistakes that commonly ruin symmetry.
What Is a Knife Bevel?
A knife bevel is the sloped section of the blade that transitions from the thicker body of the knife toward the cutting edge.
A blade can have one bevel or several.
Primary Bevel
The primary bevel is the large grind that forms most of the blade geometry.
On a full-flat-ground knife, it may extend almost from the cutting edge to the spine.
On a saber grind, the bevel starts farther down the blade, leaving a flat section between the spine and grind line.
Secondary or Edge Bevel
The secondary bevel is the small bevel created during final sharpening.
This is commonly the part people mean when discussing angles such as 15, 20, or 25 degrees per side.
Do not confuse that number with the primary bevel angle.
A full-height primary bevel on a relatively thin knife blade may sit at only a few degrees per side because it spreads the thickness reduction across a much larger distance.
Plunge Line
The plunge line is where the primary bevel stops near the handle or ricasso.
It may be:
- Straight
- Slightly curved
- Rounded
- Swept
Keeping both plunge lines at the same location is one of the harder parts of freehand bevel grinding.
Combat Abrasives recommends marking the intended plunge position before grinding and developing the bevel from the plunge toward the tip.
Key Takeaway: The primary bevel forms the main blade geometry, while the small edge bevel is created later during sharpening; they usually use very different angles.
What Belt Sander Works Best for Knife Bevels?
A dedicated knife grinder gives the most control, but several belt sizes can grind a bevel.
2×72 Belt Grinder
A 2×72-inch belt grinder is a common choice among knife makers.
It provides:
- Large abrasive selection
- Long belt life
- Good heat management
- Flat platen options
- Contact wheels
- Variable-speed choices on many machines
- Plenty of working space
It is not required for making a knife, but it is one of the most versatile setups.
1×30 or 1×42 Belt Sander
Smaller machines can also grind knife bevels.
They remove material more slowly and use narrower belts, which can make it harder to maintain broad, flat bevels.
The lower purchase price makes them attractive for occasional projects.
Red Label Abrasives sells knife-making belt sets for 1×30, 1×42, 2×42, and 2×72 machines, reflecting how many belt sizes are used for blade work.
A Flat Platen Helps
For a flat-ground bevel, use the section of belt supported by a flat platen.
The platen keeps the abrasive from flexing deeply around the blade.
A slack belt creates a more rounded or convex surface, which can be useful for certain grind styles but is harder to control when the goal is a crisp flat bevel.
Key Takeaway: A 2×72 grinder offers the most flexibility, but smaller belt sanders can work; use a solid platen when you want a flat, controlled primary bevel.
Tools and Supplies for Bevel Grinding
You do not need a large collection of tools, but a few items make consistency much easier.
Useful supplies include:
- Belt sander or belt grinder
- Flat platen
- Fresh abrasive belts
- Permanent marker or layout dye
- Calipers
- Scribe or edge-marking tool
- Ruler
- Bevel jig if desired
- Water container for cooling
- Eye protection
- Hearing protection
- Suitable dust protection
- Good lighting
A respirator or suitable dust-control system becomes more important when grinding metal, handle material, coatings, or composites.
OSHA identifies grinding and sanding as operations that can create flying particles and calls for suitable eye and face protection in workplace settings. It also requires guarding at belt-sander nip points.
Keep sparks away from fuel, solvents, sawdust piles, paper, oily rags, and other combustible material.
What Grit Belt Should You Use for Knife Bevels?
The right grit depends on how much steel needs to be removed and how close the bevel already is to its final shape.
36-60 Grit for Initial Stock Removal
A fresh ceramic belt in the 36-60 grit range removes steel quickly.
This works well for:
- Starting a primary bevel
- Removing thick stock
- Raising the grind line
- Correcting a low initial bevel
- Profiling before refinement
Red Label recommends coarse belts from about P36 upward for initial bevel work, while Combat Abrasives lists 36-60 grit as a common bevel-grinding range.
A coarse belt cuts faster with less rubbing than a worn fine belt.
That can actually make heat easier to control if pressure and belt speed are reasonable.
80-120 Grit for Refinement
Once the geometry is close, move to 80 or 120 grit.
These belts remove the deep scratches left by coarse grinding while letting you refine:
- Grind-line height
- Plunge shape
- Tip geometry
- Symmetry
- Surface flatness
Combat Abrasives describes 80-120 grit as a common bevel-refinement stage.
180-220 Grit for Cleanup
After the bevel shape is finished, 180-220 grit can clean the scratch pattern and prepare the blade for hand sanding or further machine finishing.
Red Label places P180-P220 in the bevel-finishing range and notes that many makers switch to hand sanding after this stage.
A simple progression could be:
36 or 60 → 80 → 120 → 220
You do not need every grit if the next belt can fully remove the previous scratch pattern.
Key Takeaway: Use coarse ceramic belts for shaping, 80-120 grit for control and refinement, and around 180-220 grit when the geometry is finished and you are preparing the surface for final finishing.
How to Choose the Knife Bevel Angle
There is no single primary-bevel angle that fits every knife.
Blade thickness, bevel height, edge thickness, steel, grind type, and intended use all affect the geometry.
Primary Bevel Angle Is Often Quite Shallow
Imagine a blade that is 1/8 inch thick with a bevel roughly 1 inch high.
If you grind symmetrically from both sides and leave a small amount of thickness at the edge, each bevel only needs to slope inward by a small amount across that 1-inch height.
The resulting primary angle may be only a few degrees per side.
This surprises beginners who assume the entire bevel should be ground at 20 degrees.
Sharpening Angle Is Different
Angles around 15-25 degrees per side are more commonly associated with the final edge bevel, not a full-height primary grind.
Lower edge angles cut more easily but provide less material behind the apex.
Knife Steel Nerds testing and analysis shows that thinner, more acute edge geometry generally improves cutting performance, while thicker, more obtuse geometry provides greater resistance to deformation and chipping.
Let Blade Geometry Set the Primary Angle
For a flat bevel, your target is usually better defined by three reference points:
- Current blade thickness
- Desired edge thickness
- Desired bevel height
Set the blade angle so the belt connects the edge reference line to the planned grind line.
Once that surface is established, keep the bevel flat on the platen and gradually expand it.
Key Takeaway: Do not use a sharpening-angle number for the whole primary bevel; set the primary grind from blade thickness, desired edge thickness, and bevel height.
How to Bevel a Knife With a Belt Sander Step by Step
The easiest way to keep both sides even is to establish reference lines first and remove steel gradually.
1. Mark the Center of the Edge
Color the edge with a permanent marker or layout dye.
Use calipers and an edge scribe to mark one or two lines along the center of the blade edge.
For a double-bevel knife, many makers use two parallel lines with a small gap between them.
That gap represents the thickness you want to leave before final edge finishing.
Do not grind straight to a razor edge during rough beveling.
2. Mark the Bevel Height
Draw a line along each side of the blade showing where you want the primary bevel to stop.
This may be:
- Partway up the blade for a saber grind
- Near the spine for a high flat grind
- At the spine for a full flat grind
Also mark the plunge line near the ricasso.
Clear layout marks give you a visual warning before you remove too much steel.
3. Install a Fresh Coarse Belt
Start with roughly 36-60 grit when substantial steel needs to be removed.
Track the belt correctly and check that the platen and guards are secure before starting the machine.
Let the belt reach full operating speed before bringing the blade into contact.
4. Establish a Small Starter Bevel
Begin with a steeper angle than the finished primary grind and lightly grind a small bevel along the edge.
This creates a stable surface that you can gradually lay flatter against the platen.
Do not try to hit the final bevel height immediately.
The first passes should only establish a straight, repeatable reference surface.
5. Start Near the Plunge and Move Toward the Tip
Bring the blade into contact near the plunge line.
Move it smoothly across the belt toward the tip.
Avoid stopping in the middle of a pass.
Red Label warns that hesitation during a beveling pass can dig into the surface and create a wobble or uneven grind line.
Use steady motion and consistent pressure.
6. Grind From the Edge Toward the Spine
Once the starter bevel is established, gradually lower the blade angle so the grind moves higher toward your marked bevel line.
Think of the bevel as expanding upward.
Do not force the grind line higher in one pass.
Remove a little steel, inspect it, then repeat.
Red Label recommends developing the bevel from the edge toward the spine rather than attacking the upper grind line first.
7. Alternate Sides Frequently
Grind a few passes on one side, then switch to the other.
Alternating sides makes it easier to keep:
- Edge thickness centered
- Bevel heights matched
- Plunge lines aligned
- Heat distributed
- Blade warping under control
If you completely finish one side before starting the second, correcting asymmetry can become much harder.
8. Watch the Center Lines
As the bevel approaches the edge, keep checking your scribed lines.
Do not erase the entire center reference too early.
If one side reaches the line first, stop grinding that side and work the opposite bevel until both match.
Use calipers at several points along the blade if you want tighter control.
9. Blend the Tip Carefully
The tip loses thickness faster than the straight portion of the blade.
As you approach the tip, follow the blade profile while keeping the bevel face supported.
Reduce pressure.
Do not twist aggressively into the belt because this can round the tip or create a deep hollow just behind it.
Inspect the tip after every few passes.
10. Keep the Plunge Lines Even
Work both plunge lines toward the same marked location.
For a crisp plunge, keep the belt edge aligned closely with the platen.
For a softer transition, some makers let the belt track slightly beyond the platen edge so it flexes near the plunge. Red Label describes this method for creating a softer, rounded transition.
Do not let the moving belt cut into the ricasso beyond your marked stop.
11. Raise the Bevel Gradually
As the bevel gets wider, lay more of the existing bevel flat against the platen.
You should begin to feel the blade settle onto the broad ground surface.
At this stage, the bevel itself becomes your angle guide.
Make long, controlled passes and watch the grind line rise toward your layout mark.
12. Stop Before the Edge Gets Too Thin
If the blade still needs heat treatment, leave enough edge thickness for the steel and heat-treatment method you plan to use.
Different steels and heat treaters have different preferences, so follow the steel data and heat treater’s instructions rather than using one universal number.
Grinding after heat treatment has the advantage of working from a flat hardened blank, but heat control becomes more demanding. Knife Steel Nerds notes that post-heat-treatment bevel grinding requires greater care to keep the steel cool.
13. Switch to 80 or 120 Grit
Once the bevel geometry is close, change to a finer belt.
Do not use the finer belt to make large geometry corrections.
Its job is to:
- Remove coarse scratches
- Flatten small irregularities
- Improve plunge symmetry
- Refine the grind line
Mark the bevel with a permanent marker between grits if needed. Remaining marker or coarse scratches show you where the new belt has not yet reached.
14. Finish Around 180-220 Grit
Use light pressure as you approach final dimensions.
At this stage, small errors become harder to hide.
Check the blade in strong side lighting and look for:
- Waves
- Low spots
- Uneven grind height
- Different plunge positions
- Unequal edge thickness
After about 220 grit, many makers move to hand sanding for greater control over the final scratch pattern.
Key Takeaway: Mark the center and bevel boundaries, establish shallow starter bevels, alternate sides, raise the grind gradually, control the tip and plunge, then refine the geometry through progressively finer belts.
How to Keep Both Knife Bevels Even
Symmetry is one of the hardest parts for beginners.
The solution is frequent inspection rather than trying to grind entirely by feel.
Count Passes
Counting passes can help during early rough grinding.
For example, make two controlled passes on one side, flip the blade, then make two on the other.
This does not guarantee equal material removal because pressure can differ between hands, but it reduces large imbalances.
Use Layout Dye Often
Recolor the blade when your lines become hard to see.
A dark marker makes fresh belt contact easy to identify.
Measure Edge Thickness
Check edge thickness at:
- Heel
- Middle
- Belly
- Near the tip
If one area is becoming too thin, stop grinding that area until the rest catches up.
Compare Grind-Line Height
Hold the knife under strong light and compare the bevel lines from side to side.
The plunge positions and upper grind lines should mirror each other unless the design intentionally uses an asymmetric grind.
Correct Errors Early
A grind line that is 1/16 inch uneven is far easier to correct during 60-grit shaping than after the blade has reached final dimensions.
Key Takeaway: Alternate sides, count early passes, remark reference lines, measure edge thickness, and correct asymmetry before moving to finer abrasives.
Freehand Grinding vs Using a Bevel Jig
Both methods can produce good bevels.
The choice depends on your experience and the grind style.
Freehand Grinding
Freehand grinding lets you change pressure and angle naturally along the blade.
It works well for:
- Distal tapers
- Curved blades
- Convex blends
- Complex tips
- Experienced makers
The downside is that your hands control every part of the angle.
Small changes in wrist position can create waves.
Bevel Jig
A bevel jig supports the blade at a fixed angle against the platen.
It can make it easier for a beginner to establish:
- Straight bevel faces
- Matching angles
- Even grind height
- Predictable starter bevels
A jig is less flexible around curved tips and does not remove the need to watch center lines and edge thickness.
Many makers use a jig to establish the bevel and then finish freehand.
How to Keep the Blade Cool While Grinding
Heat is a major concern once the steel has been hardened.
Thin edge material heats much faster than the thicker spine.
Use Sharp Belts
A worn belt rubs rather than cuts cleanly.
That friction creates heat.
Fresh ceramic belts remove steel faster and can reduce the time the blade spends against the platen.
Use Short Passes
Do not hold one spot against the belt.
Keep the blade moving.
After a pass, inspect and cool the blade before continuing.
Use Light Pressure During Finishing
Heavy pressure is unnecessary once the bevel is near final size.
As the edge becomes thin, switch to lighter pressure and finer control.
Do Not Trust Your Fingers Alone
The blade body can still feel comfortable while the very thin edge has already become much hotter.
Knife Steel Nerds testing shows that powered grinding can overheat the apex locally before the rest of the blade feels extremely hot.
For hardened blades, remove tiny amounts of material per pass and treat discoloration near the edge as a warning that too much heat has been generated.
Key Takeaway: Fresh belts, continuous movement, short passes, and light finishing pressure are more reliable than waiting until the whole blade feels hot.
Common Knife Bevel Grinding Mistakes
Small technique errors can quickly become large geometry problems.
Grinding One Side Completely First
This often leaves the edge off-center.
Alternate sides throughout the process.
Using Too Much Pressure
Heavy pressure makes it harder to control the grind and creates more heat.
Let the abrasive cut.
Starting With a Fine Belt
Fine abrasives remove heavy stock slowly and can generate unnecessary heat.
Start coarse enough for the amount of steel you need to remove.
Chasing the Grind Line
If one small section is low, repeatedly grinding only that spot can create a hollow.
Use full controlled passes whenever possible.
Letting the Tip Stay on the Belt Too Long
The tip has little mass and disappears quickly.
Reduce pressure as you reach it.
Grinding Past the Plunge Mark
A plunge line that moves too far into the ricasso is difficult to bring back.
Establish it gradually and check both sides often.
Grinding a Hardened Edge Too Hot
Heat can reduce hardness near the edge even when the blade is not glowing.
Once the bevel becomes thin, use very short controlled passes.
Moving to Fine Grit Too Soon
Do all major geometry correction with coarse belts.
Fine belts should refine the bevel rather than fix major unevenness.
Should You Grind Bevels Before or After Heat Treatment?
Both methods are used.
Beveling Before Heat Treatment
Grinding before heat treatment means working softer steel.
Material removal is faster, and belt life is generally better.
The tradeoff is that thin or uneven sections can distort during heat treatment.
Leave the edge thick enough for the steel and heat-treatment process being used.
Beveling After Heat Treatment
Grinding after heat treatment lets you heat-treat a flatter blank.
Knife Steel Nerds notes that keeping the blank flat can be useful for plate quenching air-hardening steels.
The downside is harder steel and greater sensitivity to grinding heat.
Many makers split the process: rough the bevels before heat treatment, then finish the geometry afterward.
Key Takeaway: Pre-heat-treatment grinding removes steel more easily, while post-heat-treatment grinding can start from a flatter hardened blank but requires stricter heat control.
Safety Tips for Bevel Grinding
A belt grinder can remove skin as quickly as it removes steel.
Wear suitable safety glasses with side protection and consider a face shield for heavy grinding.
OSHA guidance identifies flying fragments and particles as eye hazards during grinding and sanding.
Keep machine guards installed, especially around belt-to-pulley nip points.
Direct sparks toward a clear, nonflammable area.
Avoid loose sleeves, jewelry, gloves that can be grabbed by moving machinery, and long hair near the belt.
Use suitable hearing protection when grinder noise is high, and control metal dust with ventilation or respiratory protection appropriate for the material being ground.
Keep the work rest, platen, belt tracking, and machine mounting in good condition before touching steel to the belt.
Conclusion
For how to bevel a knife with a belt sander, good results come from reference lines, a fresh coarse belt, a flat platen, smooth passes, and frequent side-to-side comparison. Establish the bevel near the edge first and gradually raise the grind toward the intended bevel line.
A progression such as 36 or 60 grit, followed by 80, 120, and around 220 grit works well for many stock-removal projects. Complete the major geometry with coarse abrasives before trying to create a finished surface.
Primary bevel angle should come from blade thickness, desired bevel height, and remaining edge thickness rather than a generic sharpening angle. A full-flat bevel can be much shallower than the final edge bevel.
I would spend more time checking symmetry than grinding continuously. Stop frequently, inspect the center line, compare both sides, and control heat. Removing steel is easy; putting it back is impossible.
FAQs About Beveling a Knife With a Belt Sander
What grit should I use to bevel a knife?
A 36-60 grit ceramic belt works well for rough bevel shaping when substantial steel needs to be removed. Move to 80-120 grit for refinement and around 180-220 grit for cleanup before hand finishing. Start finer if the bevel is already close to final shape.
What angle should I hold a knife at when grinding the primary bevel?
There is no universal primary-bevel angle. It depends on blade thickness, bevel height, and the amount of material you plan to leave at the edge. Full-height flat grinds often use only a shallow angle per side, much lower than a typical sharpening angle.
Can I use a 1×30 belt sander to make knife bevels?
Yes. A 1×30 can grind knife bevels, though its narrow belt, smaller platen, and lower power can make broad flat grinds slower than on a 2×72 machine. Use sharp belts, light pressure, and careful reference lines.
Should I grind both sides of the knife equally?
For a conventional double-bevel blade, yes. Alternate sides frequently and monitor the center line so the edge stays centered. Chisel-ground and other asymmetric designs intentionally remove different amounts from each side.
How do I stop my bevel from becoming wavy?
Use long, smooth passes and avoid stopping halfway across the blade. Keep the existing bevel flat against the platen, reduce unnecessary wrist movement, and correct geometry with coarse belts before switching to fine grits.
How do I make both plunge lines match?
Mark both plunge locations before grinding. Establish them shallowly, compare both sides after a few passes, and avoid pushing aggressively into the platen edge. A slight belt overhang can create a softer plunge, while alignment with the platen edge produces a crisper transition.
Can I grind knife bevels after heat treatment?
Yes. Post-heat-treatment grinding is common, but hardened steel requires good abrasives and careful heat control. The thin edge can overheat quickly, so use fresh belts, short passes, light pressure, and frequent inspection.
Should I grind the knife all the way sharp with the coarse belt?
No. Leave some edge thickness during primary bevel grinding and create the final cutting edge later with finer abrasives or sharpening equipment. Grinding to a zero edge too early makes the blade easier to overheat, damage, or distort.