
How to Change a Sanding Belt: Easy Steps, Tracking, and Tips
Changing the belt on a belt sander usually takes only a few minutes. Unplug the sander or remove its battery, release the belt-tension lever, slide the old belt off the rollers, install the correct replacement in the proper direction, restore tension, and check the belt tracking before sanding.
A sanding belt should be replaced when the abrasive becomes smooth, clogged, torn, badly frayed, or damaged at its seam. Continuing to work with a worn belt can slow material removal, create excess heat, leave uneven sanding marks, and make the sander harder to control.
Most handheld belt sanders use a spring-loaded tension lever that moves one roller inward. Stationary belt sanders and narrow file sanders may use a different tensioning system, but the basic idea remains the same: remove belt tension before taking the belt off.
The replacement belt must match the sander’s specified width and length. A 3 × 21-inch sander, for example, needs a 3 × 21-inch sanding belt. Grit and abrasive type may change with the job, but the physical belt size must fit the machine.
If you are trying to understand how to change a sanding belt, pay close attention to the direction arrow printed inside many belts. Directional belts should run in the direction marked by the manufacturer so the belt seam travels through the rollers as intended.
After fitting the new belt, tracking is the final step. The belt should stay centered on the rollers without rubbing the sander housing or trying to run off one side.
How to Change a Sanding Belt Step by Step
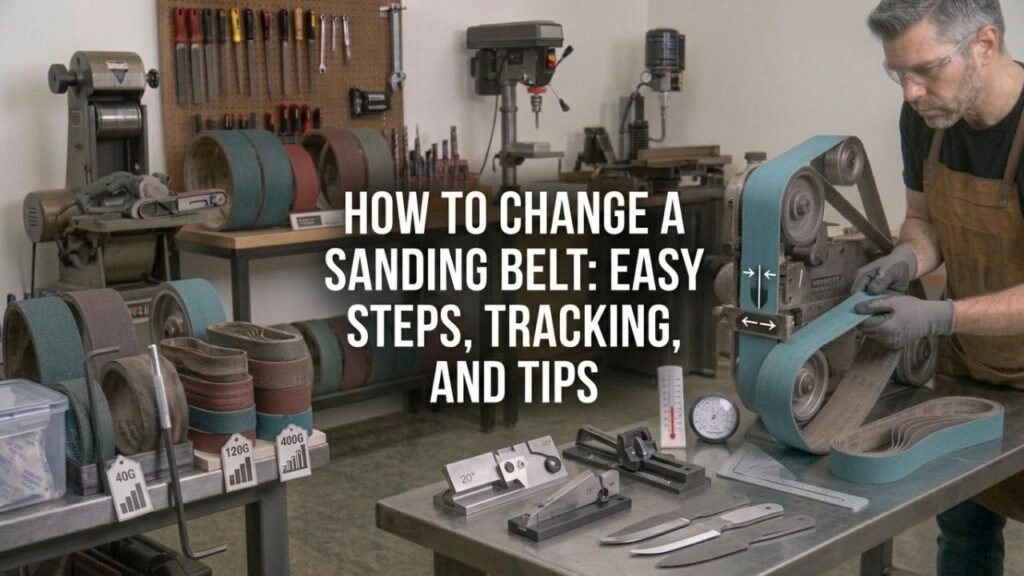
Changing a sanding belt is simple once you know where the tension release and tracking control are located.
1. Disconnect the Sander From Power
For a corded belt sander, unplug it from the outlet.
For a cordless model, remove the battery pack.
Do not change the belt while the tool is connected to power. The belt and rollers can move fast enough to cause severe hand injuries if the trigger is pressed accidentally.
Wait until the belt has stopped completely before handling it.
2. Place the Sander in a Stable Position
Set a handheld sander on its side or upside down according to the manufacturer’s instructions.
Choose a position where you can reach:
- Belt-tension lever
- Front roller
- Rear roller
- Tracking knob
Avoid resting the tool on the trigger.
For a stationary belt sander, make sure the machine is switched off and disconnected before opening guards or belt-access covers.
3. Release the Belt Tension
Find the tension-release lever.
On many handheld sanders, moving this lever causes one roller to slide inward, making the sanding belt loose.
Once tension is released, the belt should move easily by hand.
Do not pry a tight belt from the rollers with a screwdriver. If the belt is still tight, confirm that the tension mechanism has fully released.
4. Remove the Old Sanding Belt
Slide the old belt sideways off the rollers.
Look at the belt before throwing it away.
Check for:
- Uneven edge wear
- Tears
- Split seam
- Heavy glazing
- Clogged abrasive
- One edge worn more than the other
Uneven wear may indicate a tracking or alignment problem that should be corrected before installing the new belt.
5. Clean Dust Around the Rollers
With the tool still disconnected, remove loose sanding dust from accessible areas.
Pay attention to:
- Rollers
- Belt path
- Tracking area
- Dust openings
- Belt guards
Use the cleaning method approved by the sander manufacturer.
Do not soak bearings, rollers, or electrical components with solvents.
A buildup of sanding dust around the rollers can interfere with belt tracking.
6. Check the New Belt Size
Read the size printed on the belt or packaging.
Common belt-sander sizes include:
- 3 × 18 inches
- 3 × 21 inches
- 3 × 24 inches
- 4 × 24 inches
Those are examples only. Use the size specified for your exact machine.
A belt that is too short may not install at all. A belt that is too long may remain loose even after the tension lever is engaged.
7. Check the Direction Arrow
Turn the new sanding belt inside out enough to inspect the backing.
Many belts have arrows showing the required running direction.
Compare the arrow with the normal belt movement of the sander.
Some modern belts are bidirectional and may not have an arrow. If the belt has a direction mark, follow it.
8. Slide the New Belt Onto the Rollers
Fit the belt around both rollers while tension is released.
Center it roughly by hand.
The belt should sit flat without:
- Folding
- Twisting
- Buckling
- Catching on the housing
Do not force the belt over the roller edge.
If it does not fit easily, recheck the belt size and confirm that the tension lever is fully released.
9. Restore Belt Tension
Move the tension lever back into its operating position.
The spring-loaded roller should move outward and tighten the belt.
Check that the belt sits flat across the rollers.
Do not operate the sander if the belt remains visibly loose.
10. Check Belt Tracking
Before sanding your workpiece, verify that the belt runs in the center of the rollers.
Reconnect power only after your hands and tools are clear of the belt.
Hold the sander securely and run it briefly without touching the workpiece.
Watch the belt.
If it moves toward one side, use the tracking control in small adjustments until it stays centered.
Disconnect power again before making any adjustment that requires your hands near the belt.
11. Test the Sander on Scrap Material
Once tracking is stable, make a short test pass on scrap wood or another suitable material.
Check for:
- Smooth belt movement
- Normal sanding action
- No rubbing
- No unusual vibration
- No belt slipping
- No burning smell
If the belt begins shifting sideways, stop and correct the tracking before continuing.
Key Takeaway: Release tension before removing or installing the belt, match the exact belt size, follow any direction arrow, restore tension, and set tracking before sanding.
How to Choose the Correct Replacement Sanding Belt
A new belt needs the correct dimensions, grit, abrasive material, and backing for the job.
Match the Belt Width and Length
The sander’s belt size may be printed on:
- Tool label
- Owner’s manual
- Belt guard
- Existing sanding belt
- Product specification sheet
Do not estimate the size by looking at the old belt.
A 3 × 18 belt and a 3 × 21 belt may look similar when they are not installed, but they are not interchangeable.
Choose the Grit for the Job
Lower grit numbers remove material faster.
A simple guide is:
| Grit Range | Common Use |
| 36–60 | Heavy stock removal, rough shaping |
| 80–100 | General sanding |
| 120–150 | Smoothing |
| 180+ | Fine sanding where suitable |
Belt sanders are usually used for faster material removal rather than final ultra-fine finishing.
The correct grit also depends on the material.
Select the Abrasive Material
Common sanding-belt abrasives include:
- Aluminum oxide
- Zirconia alumina
- Ceramic
- Silicon carbide
Aluminum oxide is common for wood and general-purpose sanding.
Zirconia and ceramic belts are often chosen for aggressive metal sanding because they can resist heavy wear and heat better under demanding conditions.
Use a belt rated for the material you plan to sand.
Key Takeaway: The belt dimensions must match the sander exactly, while grit and abrasive material should match the amount of material removal and the surface being sanded.
How to Adjust Sanding Belt Tracking
Tracking controls where the belt sits while it rotates.
A correctly tracked belt stays near the center of the rollers.
Find the Tracking Knob
Most handheld belt sanders have a tracking knob or screw near the front roller.
The control slightly changes the roller angle.
That small change guides the belt left or right.
Make Small Adjustments
Do not turn the tracking knob several full turns at once.
Run the sander briefly and make small corrections.
Watch how the belt responds before adjusting again.
The correct direction of adjustment differs between models.
Keep the Belt Away From the Housing
The belt should not scrape against:
- Side housing
- Belt guard
- Frame
- Roller supports
If the abrasive edge touches the housing, it can quickly fray.
A badly tracked belt may also come off the rollers.
Check Tracking Again Under Light Load
A belt that looks centered while the machine is free-running should also remain stable during sanding.
Make a light test pass.
If the belt immediately moves sideways under pressure, inspect tracking, belt fit, and roller condition.
Key Takeaway: Adjust tracking in small increments until the belt stays centered during both free-running operation and light sanding.
Why Does My New Sanding Belt Keep Coming Off?
A belt that repeatedly moves off the rollers usually has a tracking, tension, sizing, or mechanical problem.
Tracking Is Incorrect
This is the first thing to check.
If the front roller angle guides the belt outward, it will eventually leave the machine.
Reset tracking according to the sander manual.
The Belt Is the Wrong Size
An oversized belt may never develop enough tension.
Check the dimensions printed on the replacement against the tool specification.
Belt Tension Is Not Engaging
The tension mechanism may be:
- Jammed
- Dirty
- Damaged
- Worn
- Not fully locked
With power disconnected, move the tension lever and watch the roller position.
If the roller does not move normally, the mechanism may need service.
Roller Surface Is Worn or Dirty
A damaged roller can affect belt movement.
Inspect accessible roller surfaces for:
- Heavy dust
- Damage
- Loose material
- Uneven wear
Do not sand or modify the roller unless the manufacturer specifies a repair procedure.
Key Takeaway: A belt that keeps coming off usually points to poor tracking, the wrong belt size, failed tension, or a roller problem rather than a defective abrasive surface alone.
Why Does the Sanding Belt Slip?
A sanding belt should move with the rollers without obvious hesitation.
Slipping can reduce sanding speed and generate heat.
Belt Tension Is Too Low
If the tension mechanism does not tighten the belt fully, the drive roller may spin without gripping it properly.
Inspect the tension mechanism.
Belt Is Too Large
The wrong belt length creates the same symptom as weak tension.
Compare the replacement size with the sander specification.
Belt Backing or Roller Is Contaminated
Oil, grease, or other contamination can reduce grip.
Do not apply belt dressing, oil, or lubricant unless the tool manufacturer specifically calls for it.
Internal Drive Components May Be Worn
If the sanding belt is tight but the rollers themselves stop under load, the problem may be inside the tool.
Possible areas include:
- Drive belt
- Gear system
- Motor
- Roller bearings
That requires a different repair from changing the sanding belt.
Key Takeaway: A slipping sanding belt may come from poor tension, incorrect size, contamination, or an internal drive problem.
Why Is My Sanding Belt Running to One Side?
Constant sideways movement is a tracking problem.
Correct it before the belt becomes damaged.
Tracking Needs Adjustment
The tracking control should be the first check.
A very small adjustment may move the belt noticeably.
The Belt May Be Damaged
A stretched edge, weak seam, or distorted backing can prevent a belt from tracking correctly.
Try another correctly sized belt if the tracking problem began immediately after installing a questionable belt.
The Sander May Have Roller Alignment Problems
If several new belts all run to the same side and normal tracking adjustment cannot correct the issue, inspect the tool.
A bent, damaged, or worn roller assembly may require repair.
Does Sanding Belt Direction Matter?
It does when the belt has a direction arrow.
Directional belts are manufactured so their lap joint or seam performs correctly when traveling in the marked direction.
Install the arrows so they follow the sander’s belt rotation.
What if There Is No Arrow?
Some belts use a joint that permits operation in either direction.
If no directional mark is provided, follow the belt manufacturer’s instructions.
Do not assume the belt is directional simply because another brand was.
What Happens if a Directional Belt Is Installed Backward?
Possible problems include:
- Seam stress
- Premature belt failure
- Rough operation
- Shorter belt life
If you notice that the belt arrow is reversed before using it, disconnect the sander, release tension, and turn the belt around.
How Often Should You Change a Sanding Belt?
There is no fixed number of minutes or hours for every sanding belt.
Replace it based on condition and performance.
Change the Belt When It Stops Cutting Well
If you need much more pressure to remove the same amount of material, the abrasive may be worn or clogged.
Do not push harder just to keep using a dead belt.
Extra pressure can:
- Heat the surface
- Heat the belt
- Slow the sander
- Increase scratch inconsistency
Replace Torn or Frayed Belts
Do not continue using a belt with:
- Split seam
- Torn edge
- Exposed backing
- Missing abrasive sections
- Deep cracks
A damaged belt can fail while rotating at high speed.
Replace a Glazed Belt
A glazed belt may look shiny and feel smooth.
It often produces more heat than cutting action.
Depending on the material, a belt-cleaning stick can remove some wood dust buildup, but it cannot restore abrasive grains that are already worn away.
Sanding Belt Replacement Safety Tips
Disconnecting power is the first step every time.
Do not rely on the trigger being released.
Keep fingers away from pinch points between the belt and rollers.
Never test belt tracking by touching the moving belt.
Wear eye protection during sanding because abrasive particles and workpiece debris can be thrown from the tool.
Use suitable respiratory protection and dust collection for materials that create hazardous dust.
Do not sand materials that the sander or belt manufacturer prohibits.
If the belt makes a new slapping sound, produces smoke, or starts shredding, stop the machine immediately and inspect the setup.
Conclusion
The basic process for how to change a sanding belt is to disconnect the sander from power, release the tension lever, remove the worn belt, install a correctly sized replacement in the proper direction, restore tension, and adjust tracking until the belt stays centered.
Do not force a belt onto tight rollers or guess at the size. The belt should slide into place easily while tension is released and become firm once the tension mechanism is engaged.
Tracking deserves attention after every belt change. A new belt that rubs one side of the housing can fray quickly and may come off during use.
Inspect the old belt before discarding it too. Uneven wear, torn edges, or repeated tracking problems can reveal an issue with tension, roller alignment, or the sander itself rather than normal abrasive wear.
FAQs About Changing a Sanding Belt
How Do I Know Which Sanding Belt Size I Need?
Check the sander label, manual, existing belt, or manufacturer specifications.
Common sizes include 3 × 18, 3 × 21, 3 × 24, and 4 × 24 inches, but you need the exact dimensions specified for your sander.
Do You Have to Unplug a Belt Sander to Change the Belt?
Yes. Unplug a corded sander or remove the battery from a cordless model before touching the belt or rollers.
The sander should remain disconnected while you release tension and install the replacement.
Which Way Should a Sanding Belt Go?
Look for an arrow printed on the inside backing.
If an arrow is present, install the belt so the arrow follows the tool’s normal direction of rotation. Some belts are bidirectional and may not have a direction mark.
Why Won’t My New Sanding Belt Fit?
The tension lever may not be fully released, or the belt may be the wrong size.
Check the belt dimensions against the tool specification before attempting to stretch or force it onto the rollers.
Why Does My Sanding Belt Keep Moving Sideways?
The tracking adjustment is probably incorrect.
Make small tracking adjustments while observing the belt. If several correctly sized belts still move to one side, inspect the rollers and tension system for damage or misalignment.
How Tight Should a Sanding Belt Be?
On most handheld belt sanders, belt tension is set automatically by the spring-loaded tension mechanism.
You normally do not manually stretch the sanding belt. Engage the tension lever fully and follow the sander manual if the machine uses an adjustable tension system.
Can I Use a Different Grit Belt on the Same Sander?
Yes, as long as the belt dimensions and construction are compatible with the sander.
Use coarse grit for faster stock removal and finer grit for smoothing, and choose an abrasive type suitable for the material being sanded.