
How to Clean a Belt Sander Safely: Dust, Rollers, Belts, Vents
Cleaning a belt sander starts by disconnecting its power, removing the sanding belt, emptying the dust system, and clearing sanding debris from the housing, vents, rollers, and platen. Use a dry cloth, soft brush, or the cleaning method stated in the tool manual. Keep liquids and harsh solvents away from the motor and plastic parts.
Belt sanders create large amounts of fine dust because the abrasive moves across the workpiece at high speed. That dust can collect around the rollers, tracking mechanism, ventilation openings, dust port, and inside accessible parts of the housing.
A dirty sander may run hotter, collect dust poorly, track belts badly, or leave debris around moving parts. RYOBI advises keeping belt-sander air vents clear with a brush so cooling air can move through the tool.
Dust-bag care matters too. Milwaukee states that its M18 belt-sander bag should be emptied before it becomes more than half full because extra open volume improves airflow through the bag. The company also says the bag should be emptied fully before storage.
For how to clean a belt sander, start with dry cleaning methods and the instructions for your exact model. Corded sanders should be unplugged, and cordless models should have the battery removed before the belt, rollers, dust port, or vents are touched.
A normal cleaning session should cover the sanding belt, dust bag, dust outlet, motor vents, drive and front rollers, platen area, exterior housing, cord or battery contacts, and belt-tracking area. Worn parts found during cleaning should be replaced rather than hidden under a layer of fresh dust.
How to Clean a Belt Sander Step by Step
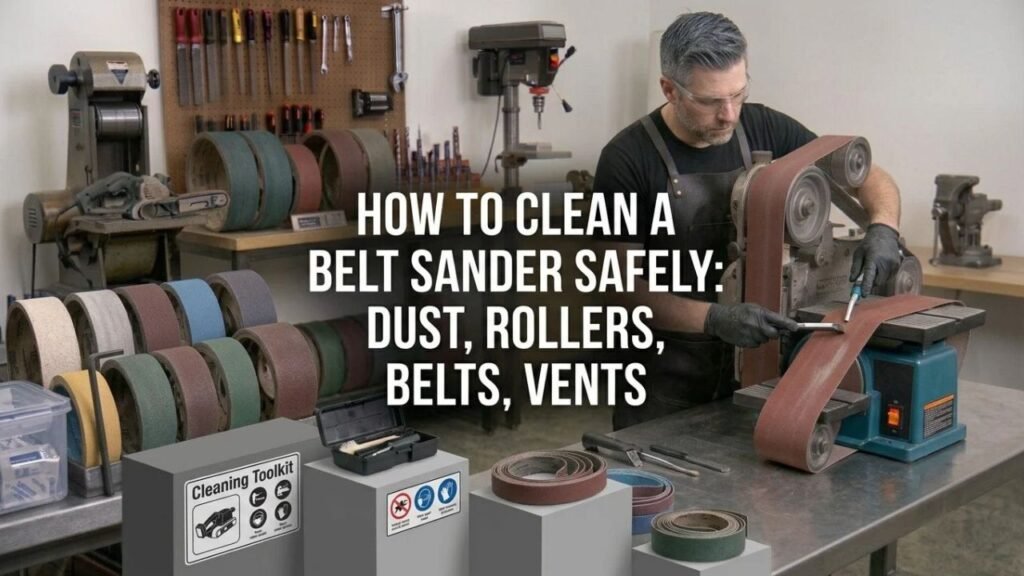
A full cleaning does not require taking the motor or gearbox apart.
The main goal is to remove loose sanding debris while leaving electrical, bearing, and drive parts intact.
1. Disconnect the Power
For a corded belt sander:
- Switch the tool off.
- Wait for the belt to stop.
- Unplug the power cord.
For a cordless model:
- Switch the tool off.
- Wait for all movement to stop.
- Remove the battery pack.
Do not clean around rollers or the belt while the tool can start unexpectedly.
Makita instructs users to switch off and unplug applicable belt sanders before inspection or maintenance.
2. Move the Sander to a Clean Work Area
Do not clean it directly over a pile of sawdust.
Use a bench or floor area where debris can be collected easily.
If you recently sanded metal, keep the resulting metal debris separate from wood dust and other combustible material.
3. Remove the Sanding Belt
Release the belt-tension lever.
Slide the abrasive belt off both rollers.
This exposes areas that normally collect dust:
- Drive roller
- Front tension roller
- Platen
- Belt edges
- Tracking mechanism
- Inside belt path
Inspect the belt before setting it aside.
Look for:
- Tears
- Cracked seam
- Missing abrasive
- Frayed edges
- Heavy resin buildup
- Deep creases
- Uneven wear
A damaged belt should be replaced.
Bauer’s belt-sander instructions state that torn or worn sanding belts should be replaced and that the tool should be unplugged before belt changes.
4. Empty the Dust Bag
Remove the bag from the dust outlet.
Open its zipper or closure and empty the contents into a suitable waste container.
Keep the opening away from your face.
Milwaukee recommends emptying its belt-sander dust bag when it reaches roughly half capacity and fully emptying it before storage.
RYOBI manuals give similar advice and note that some coating dust can present a fire risk if left collected in the bag.
5. Clean the Dust Port
Dust can pack into the sander’s exhaust port before it ever reaches the bag.
Use a soft brush to loosen buildup around:
- Dust outlet
- Internal opening you can safely reach
- Bag adapter
- Vacuum adapter
Do not push a screwdriver or metal rod deep into the dust channel.
You could damage internal parts.
6. Brush the Motor Vents
Use a clean paintbrush or soft detailing brush to loosen dust from the cooling slots.
RYOBI specifically recommends a paintbrush for keeping belt-sander vents clear.
Work around all ventilation openings, including those near the motor and trigger area.
Do not pack dust farther into the housing.
7. Clean the Rollers
With the abrasive removed, rotate the accessible rollers by hand while the tool remains disconnected from power.
Brush away:
- Sawdust
- Resin
- Abrasive particles
- Fibers
- Small chips
Pay close attention to the roller edges.
Packed debris on one side can interfere with smooth belt movement.
Do not soak the rollers with solvent unless the tool maker gives a procedure that calls for it.
8. Clean Around the Platen
The platen sits behind the sanding belt and supports it against the workpiece.
Dust can collect around its edges and underneath nearby covers.
Use a brush and dry cloth to remove loose debris.
Inspect the platen surface for:
- Deep grooves
- Warping
- Loose hardware
- Damaged cork or backing
- Heavy wear
DEWALT documentation for applicable belt sanders shows that platen components are service parts, so worn platen material should be serviced rather than ignored.
9. Wipe the Exterior
Use a clean dry cloth.
If your manual permits a slightly damp cloth, keep moisture away from:
- Motor vents
- Switch
- Battery terminals
- Cord entry
- Dust port
- Bearings
Makita warns against gasoline, benzine, thinner, alcohol, and similar chemicals for tool maintenance because they may damage tool materials.
RYOBI also tells users to avoid solvents and cleaning agents on or inside its belt sanders.
10. Reinstall or Replace the Belt
Once the sander is clean, reinstall a usable sanding belt or fit a new one.
Check directional arrows printed on the inside of the belt.
Release the tension mechanism so the belt sits firmly around both rollers.
11. Check Belt Tracking
Reconnect power only after your hands and cleaning materials are clear of the belt path.
Run the sander without touching a workpiece.
Watch the belt briefly.
It should remain centered rather than moving toward either edge.
Adjust the tracking control according to the manual if needed.
Makita notes that incorrect tracking can fray belt edges and wear the sander frame.
Key Takeaway: Disconnect power, remove the abrasive, empty the dust system, brush the vents and rollers, clean the platen area, wipe the housing, then reinstall the belt and verify tracking.
How to Clean the Dust Bag on a Belt Sander
The dust bag needs its own cleaning routine because airflow falls as the fabric pores and interior fill with fine debris.
Empty It Before It Is Packed Full
Do not wait until the bag feels solid.
Milwaukee says emptying at no more than half full gives air more room to flow through the dust bag.
RYOBI gives the same general half-full guidance for some models.
A packed bag can reduce dust pickup at the sanding surface.
Shake Loose Dust Into a Container
Remove the bag from the sander.
Open it carefully and shake the contents into a trash container.
Tap the bag lightly rather than striking it hard against a wall or bench.
Fine dust tends to cling to the inner fabric.
Follow the Bag-Specific Cleaning Rule
Dust bags are not all maintained the same way.
Milwaukee specifically says not to clean the M18 2832-20 dust bag with water or compressed air.
Older RYOBI instructions for certain models say the bag can periodically be turned inside out for a more thorough dry cleaning.
Use the rule for your exact bag.
Never Store the Tool With a Full Dust Bag
Some sanding dust can retain heat or react after collection.
RYOBI warns that dust from coatings such as polyurethane or linseed-oil finishes can self-ignite and says the dust bag should be emptied before storage.
Keep collected dust away from flame, sparks, and hot metal.
Key Takeaway: Empty the dust bag before it packs tightly, use only the cleaning method listed for that bag, and leave it empty before the sander goes into storage.
How to Clean Belt Sander Rollers
Dirty rollers may affect belt movement and tracking.
The front roller and powered rear roller deserve inspection each time a large amount of material has been sanded.
Remove Loose Dust First
Take the sanding belt off.
Use a soft brush around the roller surface, ends, and nearby housing.
Rotate each accessible roller slowly by hand.
Do not power the sander while your fingers are near the rollers.
Check for Resin Buildup
Sanding resinous wood, painted surfaces, adhesive, or old finish can leave sticky material on the roller area.
Do not reach automatically for paint thinner or another strong solvent.
The rubber, plastic, adhesive, seals, or nearby housing may not tolerate it.
Check the tool manual before using any chemical.
Check Roller Condition
A roller may need service if you find:
- Cracks
- Missing surface material
- Severe glazing
- Side-to-side looseness
- Rough rotation
- Damaged bearing area
Cleaning cannot repair a mechanically worn roller.
Keep the Tracking Area Clear
Dust around the tension or tracking mechanism can make inspection harder.
Brush accessible debris away while the belt is removed.
Do not disassemble spring-loaded tracking parts unless the service manual calls for it.
Key Takeaway: Clean rollers dry whenever possible, inspect them for damage, and keep debris away from the tracking mechanism instead of flooding the area with solvent.
How to Clean a Clogged Sanding Belt
Sometimes the sander is clean but the abrasive belt itself is loaded with sawdust, finish, resin, or paint.
A loaded belt cuts slowly and produces more friction.
Use an Abrasive Cleaning Stick for Wood Dust
A rubber abrasive-cleaning stick can remove packed wood dust from many sanding belts.
With the belt installed and the sander secured according to the cleaning-stick instructions, the stick is held against the moving abrasive.
This method is mainly suited to dry woodworking debris.
Keep hands well away from moving rollers and follow both the sander and cleaning-stick instructions.
Replace Belts Loaded With Paint or Resin When Needed
Some coatings melt or smear deeply into the abrasive.
Once the belt stops cutting cleanly, replacement may make more sense than repeated cleaning.
Pressing harder on a clogged belt raises heat and puts more load on the sander.
Do Not Wash a Belt Unless Its Maker Permits It
Sanding belts use backing material, abrasive grain, adhesive bonds, and a joined seam.
Water or solvent may weaken some belt constructions.
Treat the belt as dry unless its manufacturer states that wet cleaning is allowed.
Inspect the Belt Seam
Look at the joint where the sanding belt forms a loop.
Replace the belt if the joint begins to:
- Lift
- Crack
- Separate
- Tear
A broken belt can leave the rollers at high speed and damage the tool or workpiece.
Key Takeaway: A cleaning stick works for many dry wood-dust deposits, but belts with damaged seams, severe resin loading, or worn abrasive should be replaced.
Should You Use Compressed Air to Clean a Belt Sander?
This depends on the manufacturer.
Some manuals permit clean, dry air for tool vents and housing. Other manufacturers favor brushing to keep debris from being forced deeper into the motor.
DEWALT Permits Dry Air on Some Models
DEWALT instructions for the DW433-XE call for blowing dirt and dust from air vents with clean, dry air and tell the user to wear eye protection while doing so.
Other Makers Prefer Brushing
RYOBI’s current cleaning instructions tell owners to use a paintbrush on the air vents and avoid cleaners or moisture entering the tool.
That is why compressed air should not be treated as a universal cleaning rule.
Do Not Spin Bearings With High-Pressure Air
Avoid directing a close high-pressure nozzle into bearings, seals, switches, or the motor.
A strong air stream may push dust farther inside rather than removing it.
If your manual permits compressed air, use eye protection and follow its stated pressure and direction.
Key Takeaway: Compressed air is approved for some belt sanders but not required for all. The model manual should decide if you brush the vents or blow them clean.
Can You Wash a Belt Sander?
Do not wash the tool itself.
A belt sander contains electrical parts, bearings, switches, and drive components that should not be soaked.
Keep Water Out of the Housing
Do not:
- Spray the tool with a hose
- Rinse it in a sink
- Immerse any section
- Pour cleaner into vents
- Saturate the trigger area
RYOBI says moisture should not enter the unit or motor and recommends a cloth or rag for exterior cleaning.
A Damp Cloth May Be Allowed on Some Housings
Some manuals permit a slightly damp soft cloth on external plastic.
Use very little moisture.
The cloth should clean the surface, not leave liquid running toward openings.
Avoid Strong Solvents
Makita and other tool makers warn against harsh chemicals on non-metal tool parts.
Strong cleaners may discolor, soften, crack, or weaken plastics.
Key Takeaway: Do not wash or soak a belt sander. Keep cleaning mainly dry and restrict any damp wiping to external surfaces when the manual permits it.
Should You Lubricate a Belt Sander After Cleaning?
Do not oil random parts after cleaning.
Many electric belt sanders use sealed or self-lubricating bearings that require no routine owner lubrication.
DEWALT states that self-lubricating ball and roller bearings in an applicable belt-sander model do not require user relubrication, while periodic internal service is handled by a service center.
Adding oil in the wrong place can create new problems.
Oil can:
- Attract sanding dust
- Contaminate the abrasive belt
- Reach the workpiece
- Affect rubber components
- Enter areas not meant for lubricant
Do not spray penetrating oil, silicone spray, or general-purpose lubricant around the rollers unless the service instructions call for it.
How Often Should You Clean a Belt Sander?
A quick cleaning after each use is a good routine, with a deeper inspection after dusty or extended sanding sessions.
After Each Use
Do these basic tasks:
- Empty the dust bag
- Brush visible dust away
- Clear vents
- Wipe the exterior
- Inspect the sanding belt
RYOBI advises cleaning the body and keeping vents clear, while Milwaukee directs users to empty the dust bag fully at the end of sanding and before storage.
After Heavy Sanding
Remove the sanding belt and inspect:
- Rollers
- Platen
- Belt path
- Tracking area
- Dust port
Floor sanding, deck work, paint removal, and long stock-removal sessions can produce much more debris than small touch-up jobs.
Before Long-Term Storage
Clean the tool thoroughly.
Empty the dust bag.
Remove packed material from vents and the dust port.
Store the tool dry and keep the cord or battery system according to its manual.
Key Takeaway: Clear surface dust and the collection system after each job, then inspect the rollers and belt path after heavy use or before long storage.
Signs Your Belt Sander Needs Cleaning
Cleaning may be due before you see a large pile of dust around the tool.
Dust Collection Gets Weak
A bag that stays nearly empty while dust spreads around the work area may indicate:
- Full bag
- Clogged dust port
- Blocked vacuum hose
- Packed internal dust path
Start by emptying the bag and checking the outlet.
The Tool Runs Hotter
Blocked ventilation openings can reduce motor cooling.
RYOBI states that keeping vents clear supports airflow and reduces overheating risk.
Unusual heat can also come from heavy pressure, motor wear, a failing bearing, or another mechanical fault.
The Belt Tracks Poorly
Debris around the roller or tracking area may interfere with operation.
Clean the belt path before assuming the tracking mechanism is broken.
Makita warns that poor tracking can fray belt edges and wear the frame.
The Sander Leaves Marks
Debris stuck to the platen or roller area may contribute to uneven sanding.
A damaged platen, worn belt, or incorrect technique can create similar marks.
You Smell Excess Heat
Stop using the tool if you notice a strong burning smell.
Disconnect power and inspect for:
- Blocked vents
- Packed dust
- Damaged belt
- Belt rubbing the housing
- Motor trouble
- Bearing trouble
Cleaning may solve a dust problem, but electrical or mechanical faults need repair.
Key Takeaway: Weak dust pickup, excess heat, poor tracking, unusual marks, and burning odors are reasons to stop and inspect the sander before continuing.
Common Belt Sander Cleaning Mistakes
Cleaning While the Tool Is Connected to Power
Always unplug a corded tool or remove the battery before touching the belt path.
Spraying Cleaner Into the Motor
Aerosol cleaner can carry liquid and dissolved dirt deeper into electrical parts.
Use dry cleaning around the vents unless the maker states otherwise.
Using Harsh Solvents on Plastic
Solvents may weaken housings, handles, seals, and other non-metal parts.
Makita specifically warns against several strong solvents in its maintenance guidance.
Ignoring the Dust Bag
Cleaning the housing while leaving a packed bag attached does not restore normal dust collection.
Forgetting the Rollers
Dust and sticky debris can hide behind the sanding belt.
Remove the belt during deeper cleaning.
Oiling the Rollers
Do not assume exposed moving parts need spray lubricant.
Follow the lubrication section of the manual.
Reusing a Damaged Belt
Cleaning does not restore a torn backing, damaged seam, or badly frayed edge.
Replace unsafe abrasives.
Storing Collected Dust
Do not leave the dust bag full between jobs.
Some coating dust can pose a fire hazard while stored. Milwaukee and RYOBI both instruct users to empty dust bags after sanding and before storage.
Key Takeaway: Disconnect power, keep liquids and unapproved solvents out of the tool, clean the hidden belt path, avoid random lubrication, and discard damaged abrasives.
Conclusion
How to clean a belt sander safely starts by unplugging the tool or removing its battery. Take off the sanding belt, empty the dust bag, clear the dust port, brush the ventilation openings, and remove debris from the rollers and platen.
Use dry methods for most of the tool. A soft brush and clean cloth are suitable for routine work, while compressed air should be used only when the manufacturer permits it. Avoid gasoline, paint thinner, and other strong solvents on the housing.
Inspect the sanding belt while it is removed. A torn seam, frayed edge, heavy loading, or worn abrasive is a reason to replace the belt instead of cleaning it repeatedly.
Finish by reinstalling the abrasive, checking its direction and tension, and watching its tracking during a brief no-load run. Keeping dust out of the vents, roller area, and collection system reduces buildup and makes the next sanding job cleaner.
FAQs About Cleaning a Belt Sander
Can I use compressed air to clean my belt sander?
Some manufacturers permit clean, dry compressed air around vents, while others recommend a brush. DEWALT permits dry-air cleaning on certain models, while RYOBI recommends brushing its belt-sander vents. Follow the manual for your exact model.
Can I wash a belt sander with water?
No. Do not hose down, rinse, or immerse a belt sander. Water can reach the motor, switch, bearings, and electrical parts. Some manuals allow a lightly damp cloth on exterior surfaces, but liquid should never be allowed to enter the housing.
How do I clean the rollers on a belt sander?
Disconnect the power and remove the sanding belt. Brush loose debris from the front and rear rollers while slowly turning accessible rollers by hand. Check the edges for packed dust and inspect each roller for cracks, heavy wear, or rough movement.
How do I clean a belt sander dust bag?
Remove the bag with the tool disconnected from power and empty it into a waste container. Milwaukee says its current M18 belt-sander bag should not be cleaned with water or compressed air, so check the instructions for your exact bag before deeper cleaning.
How often should I clean my belt sander?
Brush off dust, empty the collection bag, and inspect the vents after each sanding session. Remove the abrasive and clean around the rollers, platen, and belt path after heavy use or whenever tracking, heat, or dust pickup starts changing.
Should I oil my belt sander rollers after cleaning?
Not unless the manufacturer calls for lubrication at that location. Many electric sanders use bearings that need no routine owner lubrication. Extra oil can collect sanding dust and contaminate the abrasive or workpiece.
Why does my belt sander get dusty inside?
Fine particles can pass around the belt path and cooling system during sanding. Dust collection captures much of the debris but not all of it. Models such as Makita’s 9403 even use internal labyrinth construction to reduce contamination reaching the motor and bearings.
Should I remove the sanding belt before cleaning the sander?
For a deeper cleaning, yes. Removing it exposes the front roller, drive roller, platen, and tracking area, where debris often collects. Disconnect power first, then inspect the belt itself before reinstalling it.