
How to Change Belt on Craftsman Belt and Disc Sander Properly
To replace the sanding belt on a Craftsman belt-and-disc sander, unplug the machine, remove any belt guard or table that blocks access, release belt tension, slide the old abrasive belt off both drums, install the new belt in its marked direction, restore tension, then adjust tracking until the belt stays centered.
The exact release mechanism varies by Craftsman model. Some machines use a tension knob that slides sideways, while others use a tension lever near the idler drum. Certain models also require removal of the dust chute, worktable, backstop, or belt cover before the abrasive belt can come off.
Belt direction also matters. Several Craftsman manuals specify following the arrow printed on the smooth inner surface of the sanding belt so the belt splice travels in its intended direction. Installing a directional belt backward can place extra stress on that splice.
For how to change belt on Craftsman belt and disc sander, the safest approach is to find the model number first, then use the procedure that matches its tension and guard design. The model number is often printed on a label on the base or rear of the machine.
After installation, belt tracking must be checked before sanding. On Craftsman models such as the 113.226423, the manual calls for briefly switching the machine on and immediately off, watching which direction the belt moves, then making small tracking adjustments until it stays centered.
One other distinction matters: “changing the belt” may mean replacing the abrasive sanding belt or replacing the internal drive belt that transfers motor power. Most owners searching this phrase mean the sanding belt, so that procedure comes first. Drive-belt replacement is covered separately below.
How to Change Belt on Craftsman Belt and Disc Sander
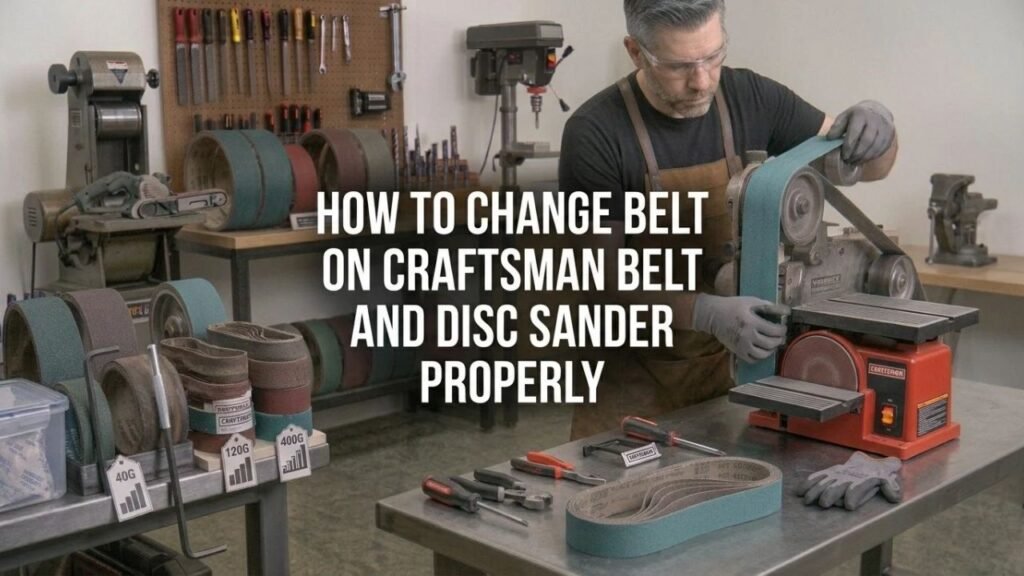
Before starting, disconnect the machine from electrical power.
Do not rely on the power switch alone.
Step 1: Find the Model Number
Craftsman has sold many belt-and-disc sanders over the years.
Common models include:
- 113.226423
- 113.226424
- 113.226431
- 137.215360
- 351.215140
- 351.226061
- 572.247600
The sanding-belt replacement method is similar across these machines, but the covers, tables, tension systems, and tracking controls differ.
Check the identification label before removing parts.
Step 2: Turn the Sander Off and Unplug It
Move the switch to OFF.
If the switch has a removable safety key, remove it.
Pull the power plug from the wall outlet.
Craftsman manuals repeatedly call for disconnecting the machine from power before removing or installing the sanding belt.
This prevents the belt or disc from starting while your fingers are close to the drums.
Step 3: Remove Parts Blocking Belt Access
Look at the side and rear of the sanding-belt assembly.
Depending on the model, you may need to remove:
- Worktable
- Backstop
- Dust chute
- Side cover
- Belt guard
- Pointer
- Cover knobs
For example, Craftsman model 137.215360 requires removal of the dust chute and backstop before belt tension is released.
The 351.215140 procedure calls for removing the table assembly and moving the cover out of the way before taking off the abrasive belt.
Do not force the belt past a guard that is intended to be removed.
Step 4: Release Sanding-Belt Tension
Find the belt-tension control.
On Craftsman 113.226423 and similar models, the tension knob slides to the right to release belt tension.
On model 137.215360, the tension lever also moves to the right.
On model 351.215140, the lever is pushed toward the idler drum.
On model 351.226061, the belt-tension handle is raised to release tension.
Once released, the belt should become loose enough to slide from the drums without prying.
Step 5: Slide the Old Sanding Belt Off
Pull the abrasive belt sideways from the drive and idler drums.
Inspect the old belt as it comes off.
Replacement is appropriate when the belt is:
- Torn
- Cracked
- Frayed
- Glazed
- Clogged beyond cleaning
- Missing abrasive
- Damaged at the splice
- Tracking poorly because the belt itself is distorted
Craftsman documentation for the 351.215140 specifically calls for replacement when the belt becomes worn, torn, or glazed.
Step 6: Confirm the Replacement Belt Size
Use the same belt dimensions specified for the machine.
A common Craftsman benchtop combination sander size is 4 × 36 inches, but do not assume every Craftsman model uses that size.
Check:
- Owner’s manual
- Old belt markings
- Model-specific parts information
- Width of both drums
- Belt length
A belt that is too wide may rub the machine housing.
A belt that is too narrow reduces the available sanding area.
The wrong length may prevent proper tensioning.
Step 7: Check the Direction Arrow
Look inside the new sanding belt.
Many belts have an arrow printed on the backing.
Install the belt so the arrow follows the normal travel direction of the machine.
Craftsman manuals for the 113.226423 and 113.226424 state that the directional arrow should be followed so the belt splice does not separate.
If the belt has no arrow, follow the abrasive manufacturer’s instructions. Some modern butt-spliced belts may be bidirectional.
Step 8: Slide the New Belt Over Both Drums
Place the new abrasive belt around:
- Drive drum
- Idler drum
Center it by hand as closely as possible.
Do not restore full tension while a large part of the belt hangs off one side of a drum.
The belt should sit flat without folds or twists.
Step 9: Restore Belt Tension
Return the tension lever or knob to its operating position.
On the 113.226423, that means sliding the tension knob back to the left.
Other Craftsman models use different lever directions.
Once tensioned, the abrasive belt should sit firmly across both drums.
Do not modify the tension mechanism to make the belt excessively tight.
Step 10: Rotate the Belt by Hand if the Model Allows It
Before reconnecting power, rotate the belt or drum manually and watch its path.
Craftsman documentation for model 351.226061 specifically advises manually rotating the belt after replacement to check tracking.
Keep the sander unplugged during this check.
If the belt immediately walks hard toward one edge, make a preliminary tracking adjustment before starting the motor.
Step 11: Reinstall Required Guards and Covers
Reinstall any:
- Dust chute
- Backstop
- Belt cover
- Work support
- Table
- Guard
- Retaining knobs
Do not operate the machine with a required belt or drive guard removed.
Make sure fasteners are secure before reconnecting power.
Step 12: Check Belt Tracking
Stand clear of the belt path.
Plug the machine in.
Switch it ON briefly, then OFF.
Watch which direction the belt moves.
On Craftsman 113.226423:
- If the belt moves toward the disc, the manual calls for turning the tracking knob counterclockwise about 1/4 turn.
- If the belt moves away from the disc, it calls for turning the tracking knob clockwise about 1/4 turn.
Your model may use the opposite physical arrangement, so follow its manual rather than treating those directions as universal.
Repeat short start-stop checks until the belt remains centered.
Key Takeaway: Disconnect power, gain access to the belt, release tension, install the correct directional belt, restore tension, then adjust tracking in small increments before sanding.
How to Adjust Belt Tracking After Replacement
A correctly installed belt can still drift toward one side.
Tracking changes the angle of the idler drum so the belt stays centered.
Start With the Belt Centered by Hand
Before powering the sander, place the belt roughly in the middle of both drums.
Tracking adjustment should fine-tune belt position rather than move a severely misaligned belt across the entire drum width.
Run the Sander Only Briefly at First
Use short ON-OFF bursts.
Craftsman’s 113.226423 procedure specifically calls for turning the machine on and immediately off while observing belt movement.
This gives you time to stop the belt before it runs off a drum.
Turn the Tracking Control in Small Steps
A quarter-turn can make a noticeable difference.
Avoid spinning the tracking knob several turns at once.
After each adjustment:
- Start the sander briefly.
- Watch belt movement.
- Switch it off.
- Make another small correction if needed.
Let the Belt Run Longer After It Centers
Once it stays centered during several short tests, let the sander run slightly longer with no workpiece touching the belt.
Watch for:
- Sideways drift
- Belt rubbing
- Vibration
- Flapping
- Unusual noise
A belt that cannot be made to track may have a damaged splice, distorted backing, incorrect size, worn drum, loose bearing, or faulty tension mechanism.
Key Takeaway: Make small tracking adjustments and test between each one; a large adjustment can send the new belt off the drums very quickly.
Which Direction Should the Sanding Belt Face?
The arrow printed inside the belt tells you its intended running direction.
The direction matters mainly because of the belt splice.
Follow the Printed Arrow
Craftsman documentation states that the arrow should follow the normal belt travel direction so the splice is loaded correctly.
On many benchtop sanders, the working surface of the belt travels toward the table or work support.
Do not use that statement alone to set belt direction because the drum arrangement changes across models.
Use the belt arrow and sander manual together.
What if There Is No Arrow?
Some abrasive belts use a joint that permits operation in either direction.
If no arrow appears:
- Check the belt packaging.
- Check the abrasive manufacturer’s instructions.
- Inspect the splice.
- Confirm that the belt is the correct type for your machine.
Do not create your own direction mark unless you know the belt construction.
How Tight Should the Sanding Belt Be?
Most Craftsman combination sanders use a spring-loaded or lever-operated tension system.
That system sets the working tension automatically.
You normally do not tighten the abrasive belt by pulling it as tight as possible.
Too Loose
A loose sanding belt may:
- Slip on the drive drum
- Wander sideways
- Stop under pressure
- Flap
- Sand unevenly
Too Tight
Excessive tension can place extra load on:
- Drum bearings
- Shafts
- Belt splice
- Tension mechanism
If the machine uses a factory lever or tension knob, put it in its specified operating position rather than modifying the mechanism.
Older Craftsman models with screw-adjusted tension require a different procedure, so the model manual matters.
Why Does the New Belt Keep Sliding Off?
Belt walk is usually a tracking or mechanical issue.
Tracking Is Not Adjusted
This is the most common reason immediately after a belt change.
Use the tracking knob in small increments.
Belt Is Not Centered on Installation
A belt installed against one edge may leave too little adjustment range.
Release tension, reposition it near the center, and start again.
Wrong Belt Size
A belt with incorrect length or width may not track correctly.
Compare it with the old belt and the model specification.
Belt Is Distorted
A poorly stored or defective belt may have a warped backing.
If tracking changes constantly as the belt rotates, try another belt before taking the machine apart.
Drum or Bearing Is Worn
Unplug the sander and inspect both drums.
Look for:
- Side play
- Rough bearings
- Loose shaft
- Damaged drum surface
- Bent hardware
Mechanical play can prevent stable tracking.
Key Takeaway: Persistent belt walk after adjustment usually points to poor centering, wrong belt size, a defective belt, or worn drum hardware.
What Grit Belt Should You Install?
The correct grit depends on the job.
60- to 80-Grit
Good for:
- Fast stock removal
- Removing old finish
- Shaping wood
- Flattening rough edges
These grits remove material quickly and leave deeper scratches.
100- to 120-Grit
Useful for general-purpose sanding and refining surfaces after coarse shaping.
Older Craftsman parts listings for some combination sanders included 80-, 120-, and 320-grit sanding belts, showing the range of jobs these machines were intended to cover.
150- to 220-Grit
Better for lighter smoothing and preparation before finishing.
Fine Grits
Fine belts can smooth surfaces, but a belt-and-disc sander is primarily a shaping and material-removal machine.
For finish preparation, hand sanding or an orbital sander may leave a more suitable surface.
How Often Should You Change the Sanding Belt?
There is no fixed time interval.
Replace it based on condition and cutting performance.
Signs include:
- Sanding takes much longer
- Belt surface looks shiny or glazed
- Abrasive grains are missing
- Belt edges are torn
- Splice is separating
- Belt is heavily loaded with resin or finish
- Tracking becomes inconsistent because the belt is damaged
Do not apply excessive workpiece pressure to compensate for a dull belt.
A fresh abrasive usually cuts faster with less heat.
Can You Clean a Sanding Belt Instead of Replacing It?
Sometimes.
Wood dust and resin can load the spaces between abrasive grains before the abrasive itself is worn out.
An abrasive cleaning stick can remove some buildup while the belt is still serviceable.
Replace the belt if it is:
- Torn
- Cracked
- Glazed beyond cleaning
- Separating at the joint
- Missing large abrasive areas
- Structurally distorted
Cleaning does not repair physical damage.
How to Change the Internal Drive Belt on a Craftsman Belt and Disc Sander
Some Craftsman combination sanders also have an internal drive belt between the motor and sanding assembly.
This is different from the abrasive belt.
Confirm That the Drive Belt Is the Problem
Possible drive-belt symptoms include:
- Motor runs but sanding belt and disc do not
- Sander slips under very light pressure
- Rubber debris appears inside the base
- Drive belt is cracked or broken
- Unusual squealing comes from the drive system
Do not assume an abrasive-belt tracking problem means the drive belt has failed.
Disconnect Power
Unplug the machine before opening any motor or drive cover.
Wait for every moving part to stop.
Remove the Required Guards
The procedure varies substantially by model.
For example, the Craftsman 572.247600 manual has a separate drive belt replacement procedure that begins by unplugging the sander and removing the belt-sander table before accessing the drive system.
Other models use different covers and pulley arrangements.
Replace With the Exact Drive Belt
Use the model-specific part number or an exact dimensional replacement approved for the machine.
The internal drive belt must fit:
- Motor pulley
- Driven pulley
- Belt profile
- Required tension
Do not substitute the abrasive sanding belt for the internal drive belt.
Reassemble All Guards
Once the drive belt is installed, reinstall every cover and guard before reconnecting power.
If replacement requires removing motor mounts, shaft hardware, electrical parts, or pulley alignment components beyond your experience, professional repair is the safer option.
Key Takeaway: The abrasive sanding belt and internal motor drive belt are separate parts; internal drive-belt replacement is model-specific and usually requires deeper disassembly.
Common Mistakes During a Belt Change
A belt replacement is simple once the tension system is understood, but several mistakes create tracking or safety problems.
Avoid:
- Working with the sander plugged in
- Installing the wrong belt size
- Ignoring the direction arrow
- Forcing the belt on without releasing tension
- Running the sander with guards removed
- Making large tracking adjustments
- Touching the belt during a powered tracking test
- Sanding before checking tracking
- Reusing a torn belt
- Overtightening a manual tension system
- Assuming every Craftsman model uses the same lever direction
The model number removes most of the guesswork.
Safety Tips After Installing a New Sanding Belt
Keep your hands clear while checking tracking.
Do not place a workpiece against the belt until it has run centered without load.
Wear eye protection because a damaged or poorly installed abrasive belt can tear or throw debris.
Use dust collection if the machine provides a dust port.
Keep loose clothing, jewelry, long hair, gloves, and dangling objects away from the moving abrasive.
The belt and disc continue moving briefly after the switch is turned off, so wait until they stop completely before making another adjustment.
Conclusion
For how to change belt on Craftsman belt and disc sander, unplug the machine first, remove any parts blocking the sanding belt, release tension, slide off the old belt, and fit a correctly sized replacement over the drive and idler drums.
Follow the directional arrow printed inside the abrasive belt, then restore the factory tension mechanism. Center the belt manually before reconnecting power.
Tracking is the final part of the job. Start and stop the machine briefly while watching belt movement, then make small tracking-knob corrections until the belt remains centered on both drums.
If the motor runs but neither sanding surface moves, you may be dealing with the internal drive belt rather than the abrasive belt. That repair depends much more heavily on the exact Craftsman model, so use the model-specific drive-belt procedure before opening the base.
FAQs About Changing a Craftsman Belt and Disc Sander Belt
What Size Belt Does a Craftsman Belt and Disc Sander Use?
Many Craftsman benchtop combination sanders use a 4 × 36-inch abrasive belt, but Craftsman has produced many designs. Check the model number, manual, or markings on the old belt before ordering a replacement.
Which Way Does the Belt Go on a Craftsman Belt Sander?
Follow the arrow printed on the smooth inner surface of the sanding belt. Several Craftsman manuals state that the belt should run in the arrow direction to protect the splice.
How Do I Release the Belt Tension?
It depends on the model. Some Craftsman sanders use a knob that slides sideways, some use a lever near the idler drum, and others use an upward-moving tension handle. Check the model-specific mechanism before forcing anything.
Why Does My Craftsman Sanding Belt Keep Moving Sideways?
The tracking adjustment may be off, the belt may not be centered, or the replacement belt may be damaged or the wrong size. Worn drum bearings can also cause unstable tracking.
Should I Adjust Tracking While the Sander Is Running?
Craftsman procedures commonly use very brief powered tests between adjustments. Keep your hands away from the moving belt, make the adjustment as directed for your model, and use short ON-OFF checks until the belt stays centered.
Can I Install a Sanding Belt Backward?
A belt marked with a direction arrow should be installed in that direction. Craftsman manuals warn that incorrect direction can place the belt splice at risk of separating.
When Should I Replace the Sanding Belt?
Replace it when the abrasive is worn, the belt is glazed, torn, frayed, distorted, or separating at the splice. Craftsman documentation specifically lists worn, torn, and glazed belts as replacement candidates.
Is the Sanding Belt the Same as the Drive Belt?
No. The sanding belt is the abrasive surface used on the workpiece. The drive belt is an internal power-transmission belt between mechanical components. Some Craftsman models have separate procedures for replacing each one.