
How to Change Sandpaper on a Belt Sander Safely and Correctly
Changing a sanding belt is usually a quick job: disconnect power, release the belt-tension lever, slide the worn belt off the rollers, install the replacement in the correct direction, restore tension, and adjust tracking so the belt stays centered. Never change or reposition a belt while the sander is connected to power.
Most handheld belt sanders use a spring-loaded tensioning system. A lever on the side releases pressure from the front or rear roller so the sanding belt can slide off without removing screws or dismantling the tool.
The most important detail is belt direction. Many sanding belts have arrows printed inside the belt. If directional arrows are present, they should match the direction of belt travel marked on the sander.
If you are learning how to change sandpaper on a belt sander, also check belt size before installation. A belt that is too long, too short, too narrow, or too wide will not track correctly even if the installation procedure is right.
After installation, the tracking knob centers the belt on the rollers. This adjustment should be checked carefully during a brief test run because a badly tracked belt can rub the housing, move off a roller, or damage the edge of the belt.
The entire process usually takes only a few minutes once you know where the tension lever and tracking adjustment are located.
What You Need Before Changing a Belt Sander Belt
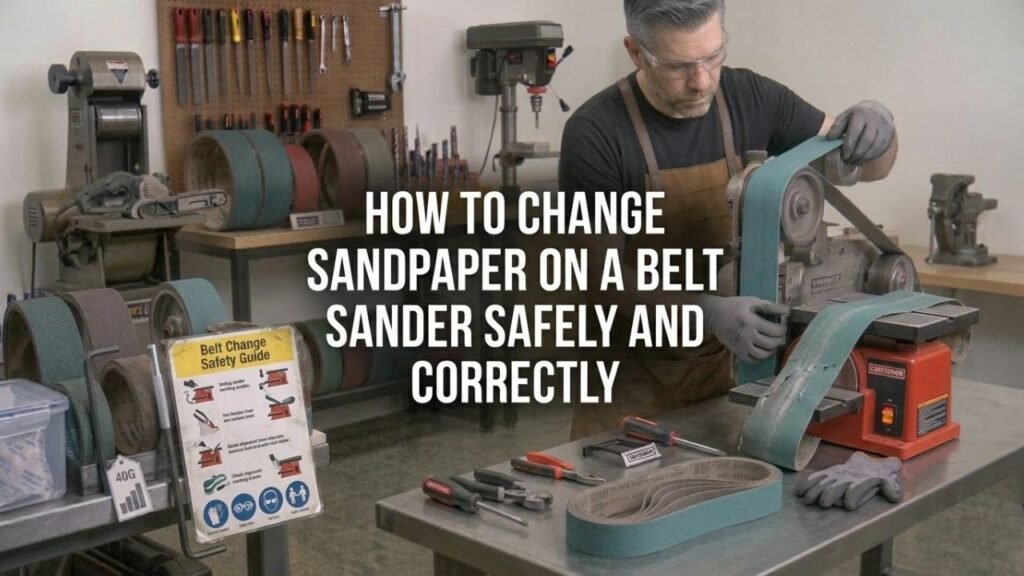
You normally need very few tools.
Correct Replacement Sanding Belt
Check the dimensions printed on the old belt or listed in the sander manual.
Common belt sizes include:
- 3 × 18 inches
- 3 × 21 inches
- 3 × 24 inches
- 4 × 24 inches
The width and circumference must both match the sander.
A 3 × 21-inch belt cannot normally replace a 3 × 18-inch belt simply because both are 3 inches wide.
Correct Sandpaper Grit
Choose grit according to the job.
Typical starting points include:
- 40–60 grit for aggressive material removal
- 80 grit for general sanding
- 100–120 grit for smoothing
- 150 grit and finer for lighter finishing work
Belt sanders remove material quickly, so very coarse belts can cut deeply into wood.
Eye and Dust Protection
Changing the belt itself creates little dust, but inspect and test the sander in a clean area.
Wear eye protection during operation.
Use suitable respiratory protection and dust extraction when sanding materials that produce harmful dust.
Key Takeaway: Match both the belt dimensions and grit to the sander and job. The correct installation cannot compensate for the wrong belt size.
How to Change Sandpaper on a Belt Sander Step by Step
The exact lever location changes between brands, but the basic procedure is similar on most handheld belt sanders.
Step 1: Disconnect the Sander From Power
For a corded belt sander:
- Turn it off.
- Unplug it from the outlet.
For a cordless belt sander:
- Turn it off.
- Remove the battery pack if the design allows it.
Do not depend only on the trigger switch.
Accidentally starting the tool while your fingers are near the rollers can cause serious injury.
Step 2: Let the Sander Cool
If the tool has been running for a long time, give the belt and rollers time to cool.
Heavy sanding creates heat from friction.
A worn sanding belt may also be hot immediately after use.
Step 3: Place the Sander in a Stable Position
Set the sander on a workbench or other stable surface.
Position it so you can easily reach:
- Belt tension lever
- Front roller
- Rear roller
- Tracking adjustment
Avoid putting pressure on the trigger.
Step 4: Release the Belt Tension
Locate the belt-release or tension lever.
Move the lever into its released position.
One roller should move inward, reducing tension on the sanding belt.
The belt should now feel loose enough to remove.
Do not force a tight belt off the rollers. If it remains tight, confirm that the tension lever is fully released.
Step 5: Slide the Old Belt Off
Pull the sanding belt sideways over the rollers.
Inspect the old belt as you remove it.
Look for:
- Torn edges
- Cracked backing
- Worn abrasive
- Burn marks
- Damaged belt joint
- Uneven edge wear
Uneven wear can indicate a tracking problem rather than normal belt wear.
Step 6: Clean the Sander
Before installing the replacement, remove loose sanding dust from the accessible roller and belt area.
Use a brush, vacuum, or another method approved for the tool.
Pay attention to buildup around:
- Rollers
- Belt guides
- Tracking mechanism
- Dust ports
Do not soak the tool with cleaner.
Step 7: Check the Direction Arrows
Look inside the new sanding belt.
Many belts have arrows printed on the backing.
Also look for an arrow on the sander showing normal belt movement.
Install the belt so both arrows point in the same direction.
If the belt has no directional arrow, follow the sanding belt manufacturer’s instructions.
Step 8: Slide the New Belt Onto the Rollers
Fit the belt over both rollers.
Make sure it sits approximately centered rather than hanging far over one edge.
Do not fold or sharply crease the belt during installation.
Step 9: Restore Belt Tension
Return the tension lever to its operating position.
The spring-loaded roller should move outward and tighten the belt.
The belt should now sit firmly around both rollers.
Step 10: Check Belt Alignment by Hand
Before reconnecting power, inspect the belt from both sides.
It should not:
- Touch the housing
- Hang far off a roller
- Twist
- Fold at an edge
If the design permits easy manual roller movement, check that the belt can travel without binding.
Step 11: Reconnect Power
Insert the battery or plug the sander back in.
Keep the sanding surface clear of the workpiece.
Hold the tool securely.
Step 12: Test the Belt Tracking
Run the sander briefly while watching the belt.
The belt should remain centered on the rollers.
If it moves toward one side, adjust the tracking control.
Make very small adjustments.
Step 13: Confirm Tracking Before Sanding
Run the sander again for a few seconds.
The belt should stabilize and remain in position.
Once tracking is correct, the sander is ready to use.
Key Takeaway: Disconnect power, release tension, match the belt direction, restore tension, and always check tracking before placing the sander against the workpiece.
How Does the Belt Sander Tension Lever Work?
The tension lever changes the distance between the sander’s rollers.
Released Position
Moving the lever to the release position allows one roller to move inward.
This reduces belt tension so the sanding belt can be removed.
Operating Position
Returning the lever extends the roller and places tension on the belt.
That tension allows the drive roller to move the sanding belt without excessive slipping.
What If the Lever Is Hard to Move?
Do not force it aggressively.
Possible causes include:
- Dust buildup
- Damaged tension mechanism
- Belt installed incorrectly
- Mechanical wear
- Obstruction around the roller
Disconnect the tool from power before inspecting it.
Key Takeaway: The tension lever moves a roller to loosen or tighten the sanding belt, allowing belt replacement without dismantling the sander.
Which Direction Does a Belt Sander Belt Go?
Check the arrows printed inside the sanding belt.
Directional belts should be installed according to those arrows.
Find the Arrow on the Belt
Turn the new belt inside enough to see its backing.
You may find an arrow showing intended travel direction.
Find the Direction on the Sander
Some belt sanders have a matching arrow on:
- Housing
- Belt cover
- Frame
Match the two directions.
Why Direction Matters
A sanding belt is joined into a continuous loop.
Some belt joints are designed to tolerate force better in one direction.
Running such a belt backward can increase the chance of:
- Joint failure
- Belt tearing
- Rough operation
What If There Are No Arrows?
Some sanding belts are designed to run in either direction.
If the belt has no arrows, check the belt packaging or manufacturer’s instructions.
Do not assume every belt is directional.
Key Takeaway: Follow the directional arrows when they are present. A directional belt installed backward may run poorly or place extra stress on its joint.
How to Adjust Belt Sander Tracking After Changing Sandpaper
Tracking controls the side-to-side position of the belt.
It is one of the most important checks after installing a new belt.
Locate the Tracking Knob
The tracking adjustment is usually near the front roller.
It may be:
- Round knob
- Screw-style adjustment
- Small dial
Its location depends on the sander.
Start the Sander Away From the Workpiece
Hold the tool in a safe position.
Run it briefly.
Watch where the belt moves.
Adjust in Small Increments
Turn the tracking control slightly.
Observe the belt again.
Continue until it runs centered.
Avoid large adjustments because the belt can move rapidly from one side to the other.
Stop If the Belt Starts Leaving the Roller
Switch the sander off immediately if the belt moves dangerously close to coming off.
Disconnect power before inspecting the belt.
Recheck Tracking After Initial Sanding
A new belt may settle slightly after it begins running.
Check tracking again after a short test on scrap material.
Key Takeaway: Adjust tracking gradually while observing belt movement. The goal is a stable belt that remains centered without touching the housing.
Why Does My Belt Sander Belt Keep Sliding Off?
A belt that repeatedly walks off the rollers needs attention.
Tracking Is Incorrect
This is the most common reason.
Adjust the tracking knob until the belt remains centered.
Wrong Belt Size
An incorrect circumference can prevent proper tension.
A belt that is too wide may also rub against the housing.
Belt Is Damaged
A stretched, torn, or poorly joined belt may not track correctly.
Replace visibly damaged belts.
Roller Is Dirty
Dust or resin buildup on one side of a roller can change its effective diameter.
That can pull the belt sideways.
Roller Is Worn or Misaligned
A damaged bearing, roller, or frame can cause persistent tracking problems.
If every new belt moves toward the same side despite proper adjustment, the sander may need service.
Key Takeaway: Poor tracking, incorrect belt size, damaged belts, dirty rollers, and mechanical wear can all cause a sanding belt to move off-center.
Why Won’t the New Sanding Belt Fit?
Do not force it.
Tension Lever Is Still Engaged
Make sure the tension mechanism is fully released.
Belt Size Is Wrong
Compare the new belt with the old one.
Check both:
- Width
- Loop length
Even a small difference in circumference can prevent installation.
Belt Is Twisted
Make sure the abrasive side faces outward around the entire loop.
The belt should not form a twist between rollers.
Roller Mechanism Is Stuck
Heavy dust or damage can prevent the movable roller from retracting completely.
Disconnect the sander before inspection.
Why Does My Belt Sander Belt Slip?
Slipping means the drive roller is turning without moving the abrasive belt correctly.
Insufficient Tension
A faulty tension mechanism may not hold the belt tightly enough.
Wrong Belt Size
A belt with too much circumference can remain loose even when the tension lever is engaged.
Worn Drive Roller
The drive roller may lose grip after extensive use.
Dust or Contamination
Heavy contamination on the belt or roller may reduce traction.
Excessive Sanding Pressure
Pushing down too hard can overload the belt and motor.
A belt sander usually works best when its own weight and moderate guidance do most of the work.
Key Takeaway: Belt slipping usually points to low tension, an incorrect belt size, a worn or dirty drive roller, or too much pressure during sanding.
When Should You Change Belt Sander Sandpaper?
Replace the sanding belt when it stops cutting properly or becomes physically damaged.
Abrasive Is Worn Smooth
A fresh belt should cut material without excessive pressure.
If sanding becomes noticeably slower, the abrasive may be worn.
Belt Is Clogged
Wood resin, paint, finish, and dust can clog the abrasive.
A cleaning stick may restore some belts if the backing and abrasive remain in good condition.
Belt Has Burn Marks
A glazed or burned belt cuts poorly.
Burning can come from:
- Excessive pressure
- Clogged abrasive
- Staying in one spot too long
- Using too fine a grit for heavy stock removal
Belt Edges Are Frayed
Fraying can indicate poor tracking.
Replace the belt if the backing is damaged.
Correct the tracking problem before installing another belt.
Belt Joint Is Separating
Stop using the belt immediately.
A separated belt can break at high speed.
Key Takeaway: Replace a sanding belt when the abrasive is worn, clogged beyond recovery, burned, torn, badly frayed, or separating at the joint.
What Grit Sandpaper Should You Put on a Belt Sander?
The right grit depends on how much material you need to remove.
40 to 60 Grit
Use coarse belts for:
- Heavy stock removal
- Removing thick finish
- Leveling rough wood
- Aggressive shaping
These grits can leave deep scratches.
80 Grit
This is a common general-purpose grit.
It works well for:
- Removing moderate material
- Smoothing rough boards
- Preparing surfaces for finer sanding
100 to 120 Grit
Use these when you need a smoother surface with less aggressive cutting.
150 Grit and Finer
Fine belts can be used for lighter finishing, though a belt sander is often too aggressive for the final finishing stage.
An orbital or finishing sander may produce a more uniform final surface.
Key Takeaway: Coarse belts remove material rapidly, while finer belts smooth the surface. Match grit to the stage of the sanding job rather than using one belt for everything.
Can You Change a Belt Sander Belt While It Is Plugged In?
No.
Unplug a corded sander before changing or repositioning its belt.
Remove the battery from a cordless model when possible.
The belt and rollers sit close to your hands during replacement.
Accidental startup can pull fingers toward:
- Rollers
- Belt edges
- Pinch points
Disconnecting power also protects you while cleaning the tracking and tensioning areas.
Do All Belt Sanders Change Sandpaper the Same Way?
Most handheld models use the same basic process, but details can differ.
Brands commonly using tension-lever systems include:
- Makita
- DEWALT
- Bosch
- RIDGID
- Metabo HPT
- CRAFTSMAN
- Porter-Cable
- Milwaukee
Some older or specialty machines may use a different tensioning arrangement.
Stationary belt sanders can also have:
- Guards
- Tables
- Separate tension knobs
- Larger tracking systems
Check the manual if you cannot identify a release lever.
Common Mistakes When Changing Belt Sander Sandpaper
A few installation errors create most problems.
Installing a Directional Belt Backward
Check the arrows before tensioning the belt.
Forgetting to Set Tracking
A new belt may not follow the same path as the old one.
Always test tracking.
Installing the Wrong Size
Do not rely on appearance alone.
Read the belt dimensions.
Forcing the Belt Onto Tight Rollers
Release the tension lever first.
Forcing a belt can damage the backing or tension mechanism.
Touching the Trigger During Installation
Disconnect power first.
Starting the Sander on the Workpiece
A belt sander can jerk forward when started against material.
Start it clear of the surface unless the manufacturer’s instructions state otherwise.
Ignoring Frayed Belt Edges
Frayed edges often mean the belt is rubbing against something.
Correct tracking before the new belt develops the same damage.
Key Takeaway: The most common mistakes are wrong belt direction, incorrect sizing, skipped tracking adjustment, forced installation, and handling the belt while the tool is still connected to power.
How to Make Sanding Belts Last Longer
Proper use can extend belt life.
Let the Sander Do the Cutting
Avoid excessive downward force.
Heavy pressure creates heat and can wear the abrasive faster.
Keep the Tool Moving
Holding the belt sander in one spot can:
- Burn the wood
- Create grooves
- Overheat the belt
Move steadily with the grain when working on wood.
Use the Right Grit
Trying to remove heavy material with very fine sandpaper creates heat and rapid clogging.
Start coarse enough for the task.
Clean the Belt When Appropriate
A sanding-belt cleaning stick can remove some loaded wood dust and resin.
Do not try to restore belts that are torn or separating.
Use Dust Extraction
Removing dust from the sanding area can reduce clogging and improve visibility.
Connect the dust bag or compatible extractor when available.
Key Takeaway: Moderate pressure, steady movement, suitable grit, belt cleaning, and dust collection can extend sanding-belt life and improve the finish.
Conclusion
For how to change sandpaper on a belt sander, disconnect power first, release the belt-tension lever, remove the worn belt, and clean loose dust from the roller area.
Install the replacement belt in the direction shown by its arrows, center it on the rollers, and return the tension lever to its operating position. Reconnect power only after your hands and tools are clear of the belt.
Run the sander briefly and adjust tracking until the belt stays centered. Do not begin sanding if the belt moves toward the housing or starts walking off a roller.
A correctly sized belt, proper direction, and accurate tracking make belt replacement quick while reducing premature belt damage.
FAQs About Changing Belt Sander Sandpaper
How do you remove sandpaper from a belt sander?
Disconnect the power, move the belt-tension lever to its released position, and slide the loose sanding belt sideways off the rollers. Do not force the belt off while it is still under tension.
Which way does sandpaper go on a belt sander?
Check for arrows printed on the inside of the sanding belt and match them with the belt-travel direction on the sander. If the belt has no arrows, follow the belt manufacturer’s instructions.
Why won’t my sanding belt fit my belt sander?
The tension lever may not be fully released, or the belt may be the wrong size. Check both the width and loop length printed on the belt.
How tight should a belt sander belt be?
The sander’s tensioning mechanism normally sets belt tension automatically. Engage the tension lever fully rather than attempting to stretch or manually tighten the belt.
Why does my sanding belt keep moving sideways?
The tracking adjustment may be incorrect. Dirty rollers, an incorrect belt size, a damaged sanding belt, or worn roller components can also cause sideways movement.
Do you have to adjust tracking every time you change a sanding belt?
You should at least check it. Different belts can track slightly differently even when they are the same size and brand. Run the sander briefly and make small adjustments if the belt moves off-center.
Can you reuse a sanding belt after removing it?
Yes, if the belt still has usable abrasive and the backing, edges, and joint are undamaged. Store it without sharp folds or moisture exposure.
When should I replace my belt sander sandpaper?
Replace it when cutting slows noticeably, the abrasive is badly clogged or glazed, the edges become damaged, the backing tears, or the belt joint begins separating.