
How to Clean Clogged Sanding Belts and Restore Cutting Power
A clogged sanding belt can often be cleaned instead of thrown away. For wood dust, pitch, paint residue, and other nonmetallic buildup, an abrasive-belt cleaning stick is usually the simplest method. Press the rubber cleaning block lightly against the moving belt, following the sander and cleaner instructions, until the packed material releases and fresh abrasive is exposed.
Sanding belts clog when dust, resin, paint, finish, or soft material packs into the spaces between abrasive grains. Once those spaces fill, the belt stops cutting freely and begins generating more friction and heat.
A belt that looks worn may still have plenty of abrasive left beneath the buildup. Cleaning it at the right time can restore much of its cutting action and extend how long the belt remains usable.
For how to clean clogged sanding belts, the cleaning method should match both the belt and the material causing the blockage. Rubber cleaning sticks work especially well for wood and other nonmetallic residue, while heavy resin or pitch may require a different method if the abrasive manufacturer permits washing.
Do not automatically soak a sanding belt in water or solvent. Some cloth-backed belts are specifically made with washable backing, but others can suffer weakened joints, damaged adhesive, curled backing, or grain loss after getting wet.
Cleaning also has limits. A belt with rounded abrasive grains, a damaged splice, torn edges, deep glazing, or heat damage will not become new again after debris is removed. At that point, replacing the belt is usually the better move.
Why Do Sanding Belts Get Clogged?
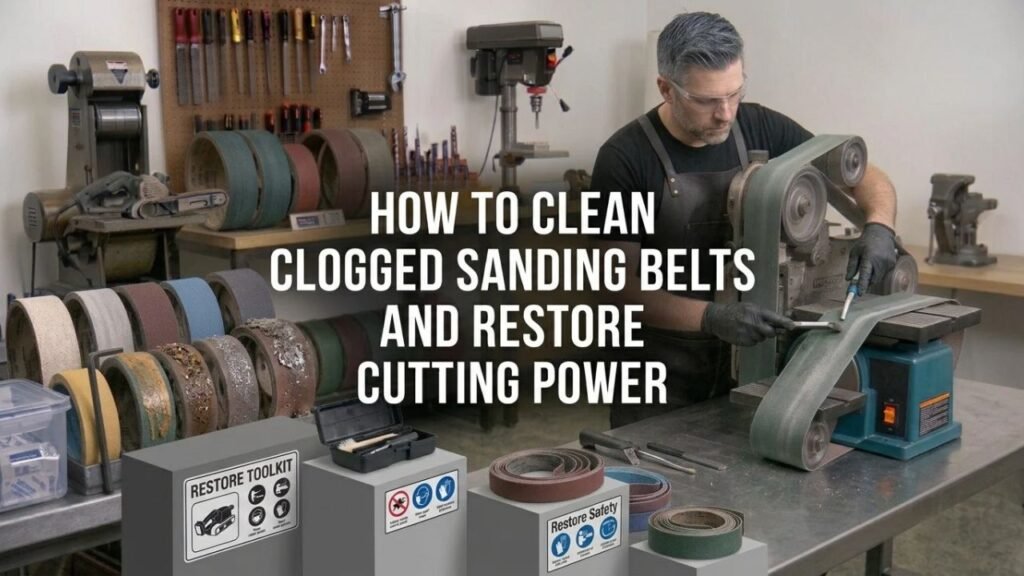
Sanding produces debris faster than many people expect. If that debris cannot leave the abrasive surface, it begins packing between the grains.
Wood Dust Packs Between the Abrasive Grains
Fine sanding dust can accumulate across the face of the belt.
This happens faster with:
- Fine-grit belts
- Heavy sanding pressure
- Poor dust extraction
- Long sanding sessions
- Soft woods
As the openings between grains become filled, fewer sharp abrasive points can reach the workpiece.
The sander may still sound normal, but material removal slows.
Softwood Pitch and Resin Stick to the Belt
Pine and other resinous woods are especially prone to belt loading.
Heat generated during sanding can soften pitch and make it sticky.
The resin then grabs:
- Sawdust
- Wood fibers
- More resin
- Finish residue
The result can look like dark, shiny patches across the sanding belt.
Open-coat sanding belts are often chosen for softwood because their abrasive grains are spaced farther apart, leaving more room for debris to escape.
Paint and Old Finish Can Smear
Paint, varnish, adhesive, and some finishes soften under sanding heat.
Rather than becoming dry dust, the coating can smear across the abrasive.
Heavy pressure makes this worse because it creates more heat.
If the belt begins leaving gummy streaks or develops smooth colored patches, the coating may be loading the abrasive.
Soft Metals Can Load Abrasives Too
Aluminum, brass, and other softer metals can pack material between abrasive grains.
Metal loading behaves differently from wood dust or resin.
A rubber cleaning block marketed for wood and nonmetallic buildup may not remove deeply embedded metal effectively.
For metal sanding, belt selection, pressure, speed, and abrasive type become especially important.
Key Takeaway: Sanding belts clog when dust or softened material fills the spaces around abrasive grains. Softwood resin, paint, adhesive, and soft metals tend to load belts faster than dry hardwood sanding.
How to Tell if a Sanding Belt Is Clogged or Worn Out
A belt that cuts poorly is not always clogged.
Cleaning works only when debris is blocking abrasive grains that are still sharp enough to cut.
Signs of a Clogged Belt
Look for:
- Packed sawdust
- Dark resin patches
- Paint buildup
- Shiny material between grains
- Reduced cutting speed
- More heat than usual
- Increased need for sanding pressure
- Material rubbing instead of cutting
If the belt still feels abrasive in clean areas, cleaning is worth trying.
Signs the Abrasive Is Worn Out
A worn belt may look relatively clean but still cut slowly.
Signs include:
- Abrasive grains feel smooth
- Belt cuts slowly after cleaning
- Entire surface looks polished
- Sanding requires heavy pressure
- Belt produces heat without much material removal
Cleaning cannot sharpen worn abrasive grains.
Signs the Belt Should Be Replaced Immediately
Do not continue using a belt with:
- Separating splice
- Torn edge
- Deep crease
- Missing abrasive patches
- Cracked backing
- Severe heat damage
- Belt that will not track properly
A damaged belt can break while running.
Key Takeaway: A dirty belt may respond well to cleaning, but a belt with worn grains, damaged backing, or a failing joint needs replacement.
How to Clean a Clogged Sanding Belt With a Cleaning Stick
An abrasive cleaning stick is commonly made from a soft rubber-like material that grabs packed debris from the belt.
It works particularly well on wood dust, pitch, and other nonmetallic material.
1. Inspect the Belt Before Cleaning
Turn the sander off and disconnect it from power.
For a cordless sander, remove the battery.
Check the sanding belt for:
- Tears
- Loose splice
- Damaged edges
- Missing abrasive
- Heavy cracking
Do not clean a structurally damaged belt while it is running.
Replace it.
2. Check That the Cleaning Stick Is Suitable
Use a product sold specifically as:
- Sanding belt cleaning stick
- Abrasive cleaning stick
- Sandpaper cleaner
- Belt cleaner
These are different from ordinary erasers.
The material is made to grab buildup without intentionally grinding away the abrasive surface.
3. Set Up the Sander Safely
A benchtop belt sander is generally straightforward because the machine remains stationary.
For a handheld belt sander, follow the manufacturer’s instructions for cleaning or stationary operation.
Do not improvise a setup that:
- Holds the trigger on unsafely
- Removes guards
- Leaves the tool unstable
- Places your fingers near the rollers
If the belt cannot be cleaned on the running machine safely, remove it and use an approved offline cleaning method instead.
4. Start the Belt
Wear eye protection.
Start the sander with the belt free of the workpiece.
Let it reach normal speed.
Keep clothing, hair, gloves, cords, and loose objects away from the moving belt.
5. Press the Cleaning Stick Lightly Against the Belt
Bring the end of the cleaning stick into contact with the abrasive surface.
Use light, controlled pressure.
The moving abrasive will wear a small amount from the cleaning stick while the rubber material pulls packed debris from the belt.
Do not push so hard that:
- Motor speed drops sharply
- Cleaning stick catches
- Belt deflects excessively
- Sander becomes unstable
6. Move Across the Belt Width
Move the cleaning stick across the working width so the entire abrasive surface gets cleaned.
You should see clogged areas become more open.
Some buildup may come away as crumbs or dust.
Avoid holding the stick in one location longer than needed.
7. Stop and Inspect
Turn the sander off and wait for the belt to stop completely.
Disconnect power again before touching the belt.
Check whether:
- Abrasive grains are visible again
- Resin patches are gone
- Belt feels more open
- Belt surface is damaged
Repeat once if necessary.
If heavy buildup remains, do not keep grinding the cleaning stick against it indefinitely. Another method or a new belt may be needed.
Key Takeaway: A rubber abrasive-cleaning stick is usually the fastest option for wood and nonmetallic loading. Use light pressure, clean across the full belt width, and inspect the belt afterward.
How to Clean a Sanding Belt Off the Sander
Removing the belt gives you more control and avoids working around a moving abrasive.
This method works well for light dry debris.
Remove the Belt
Disconnect power.
Release the belt-tension mechanism and remove the sanding belt.
Remember the running-direction arrow so it can be reinstalled correctly.
Flex the Belt Gently
A cloth-backed belt can sometimes be flexed gently to loosen dry dust packed between grains.
Do not:
- Fold the belt sharply
- Crease it
- Bend the splice backward aggressively
- Twist it tightly
Damage to the backing can cause tracking trouble or later belt failure.
Brush Loose Debris Away
A stiff nylon brush can remove loose dry dust from some abrasive belts.
Brush gently rather than scrubbing hard enough to tear abrasive grains from the backing.
Work in an area where sanding dust can be collected.
Avoid blowing dust into the air.
Vacuum the Belt
A shop vacuum can remove material loosened during brushing.
Vacuuming also avoids sending fine wood or coating dust throughout the workspace.
Use dust collection suited to the material you sanded.
Old coatings may contain hazardous substances, so treat unknown paint dust carefully.
Key Takeaway: Offline cleaning works well for loose dry buildup. Remove the belt, flex it gently, brush lightly, and vacuum away released dust without sharply bending the backing.
Can You Wash a Clogged Sanding Belt?
Only if the abrasive manufacturer identifies that specific belt as washable.
Do not assume every cloth-backed belt can handle water.
Some Cloth Belts Are Washable
Certain industrial sanding belts use washable cloth backings specifically for pitch and resin buildup.
Manufacturers of these belts may permit washing the belt after it has been removed from the machine.
The belt then needs to dry thoroughly before reuse.
This can work well on resinous softwood buildup when dry cleaning is not enough.
Remove the Belt Before Washing
Never pour water or cleaner onto a sanding belt while it is installed on an electric sander.
Water can reach:
- Motor
- Bearings
- Electrical connections
- Switches
- Internal parts
Remove the belt first.
Let It Dry Completely
A washable belt should be allowed to dry fully before going back onto the machine.
Do not reinstall a damp belt.
Moisture can affect tracking, backing stability, and the sander itself.
Hang or support the belt in a way that does not create a sharp crease.
Do Not Wash an Unknown Belt
If the packaging or technical information does not state that the belt is washable, stay with dry cleaning.
Water may weaken:
- Belt splice
- Backing
- Resin bond
- Adhesive
This can shorten belt life instead of extending it.
Key Takeaway: Some sanding belts are washable, especially certain cloth-backed products made for resinous wood, but washing should only be used when the belt manufacturer permits it.
Can You Use Solvent to Clean Sanding Belts?
Using solvent without belt-specific approval is a poor idea.
Solvents can attack adhesives, resin bonds, backings, and belt splices.
Avoid casually applying:
- Paint thinner
- Acetone
- Mineral spirits
- Gasoline
- Brake cleaner
- Carburetor cleaner
- Strong degreasers
A chemical that dissolves paint or resin may also weaken the materials holding the abrasive belt together.
Flammable solvents create another problem around electric motors and sanding sparks.
If a manufacturer supplies a chemical-cleaning method for a specific abrasive product, follow that exact procedure. Otherwise, use a cleaning stick or dry cleaning.
How to Clean Resin and Pitch From a Sanding Belt
Pitch can be harder to remove than ordinary sanding dust.
Clean the Belt Early
Do not wait until the entire belt is covered in a thick layer of hardened resin.
As soon as you notice sticky buildup, use a sanding-belt cleaning stick.
Frequent light cleaning tends to work better than trying to rescue a completely packed belt.
Reduce Sanding Heat
Pitch becomes stickier when the workpiece and belt get hot.
To reduce heat:
- Use lighter pressure
- Keep the sander moving
- Use a sharp belt
- Use suitable belt speed
- Improve dust extraction
- Allow overheated belts to cool
Pushing harder rarely solves poor cutting from a loaded belt.
Choose Open-Coat Abrasives for Resinous Wood
Open-coat belts leave more space between abrasive grains.
That extra space gives wood dust and resin somewhere to go rather than immediately packing across the belt.
Some belts also have load-resistant treatments made for softwood sanding.
Key Takeaway: Resin is easiest to manage before it forms a thick coating. Clean early, reduce sanding heat, and consider open-coat belts when working with resinous woods.
How to Clean Paint Off a Sanding Belt
Paint can create either dry powder or sticky melted buildup.
The difference often comes down to coating type and sanding temperature.
Let the Belt Cool First
If the paint has softened and smeared, stop sanding.
Continuing to run the hot belt across the coating usually packs more material into the abrasive.
Let the belt and workpiece cool.
Try a Belt Cleaning Stick
Dry or semi-dry paint residue can sometimes be pulled out with an abrasive cleaning stick.
Clean the belt before the buildup becomes thick.
Change Your Sanding Method
If paint repeatedly melts onto the belt:
- Use lighter pressure
- Move faster across the workpiece
- Try a coarser grit for initial stripping
- Improve dust extraction
- Remove thick coatings with another suitable method first
Do not aggressively sand coatings of unknown age or composition without considering dust hazards.
Older painted surfaces may contain lead. In the United States, homes built before 1978 have a higher likelihood of lead-based paint being present.
What About Metal-Clogged Sanding Belts?
Metal sanding creates swarf rather than ordinary wood dust.
A cleaning stick made for wood and nonmetallic buildup may not restore a heavily metal-loaded belt.
Soft Metals Load Belts Quickly
Aluminum is a common example.
Soft metal can smear between abrasive grains, making the belt look shiny and smooth.
Heat and excessive pressure make loading worse.
Use the Right Abrasive Belt
For metalworking, choose a belt made for the metal being sanded.
Common abrasive minerals include:
- Aluminum oxide
- Zirconia alumina
- Ceramic abrasive
- Silicon carbide for selected finishing jobs
The correct coating density and abrasive type can reduce loading substantially.
Replace Severely Loaded Metal Belts
If metal has become deeply packed across the abrasive and normal approved cleaning does not release it, replacement may be the safer and faster option.
Do not attack the belt with sharp metal tools that can cut its backing or weaken the splice.
Key Takeaway: Metal loading is harder to clean than wood dust. Belt selection, lower heat, proper pressure, and timely replacement often matter more than aggressive cleaning.
How to Prevent Sanding Belts From Clogging
Preventing buildup saves more belt life than repeatedly rescuing badly loaded abrasives.
Do Not Push Too Hard
Heavy downward pressure creates more friction and heat.
A belt sander already removes material rapidly.
Let the abrasive cut instead of forcing the machine into the surface.
Use Dust Collection
Connect the dust bag or vacuum system specified for the sander.
Good dust removal carries loose particles away before they become trapped in the abrasive.
Check that dust ports and bags are not blocked.
Start With the Right Grit
A very fine belt used for heavy stock removal can load quickly.
Typical starting points include:
- 40–60 grit for aggressive removal
- 80 grit for general sanding
- 100–120 grit for smoothing
- Finer grits for lighter finishing
Move through grit stages instead of forcing a fine belt to remove thick material.
Keep the Belt Moving Over the Workpiece
Holding a belt sander in one location creates concentrated heat.
It can:
- Load the belt
- Burn wood
- Melt coatings
- Damage the workpiece
Use smooth, controlled passes.
Clean Before the Belt Is Fully Packed
Run a cleaning stick over the belt when the first signs of buildup appear.
It takes less time and removes material more easily than waiting until the abrasive surface is nearly covered.
Store Belts Properly
Keep unused belts in a dry area away from extreme heat.
Avoid sharp folds and creases.
Poor storage can damage the splice or backing before the belt ever reaches the sander.
Key Takeaway: Light sanding pressure, proper grit, good dust extraction, controlled movement, and early cleaning greatly reduce belt loading.
When Should You Stop Cleaning and Replace the Belt?
Cleaning saves money only while the abrasive underneath still cuts.
Replace the belt if cleaning no longer improves performance.
Other replacement signs include:
- Belt remains smooth after cleaning
- Abrasive grains are worn flat
- Splice starts separating
- Edges begin tearing
- Backing becomes stiff or cracked
- Belt repeatedly loses tracking
- Large abrasive patches are missing
- Heat has damaged the joint
- Belt breaks frequently
Trying to squeeze a few more minutes from a damaged sanding belt is not worth the risk of the belt separating at operating speed.
Conclusion
For how to clean clogged sanding belts, start with a rubber abrasive-cleaning stick when the buildup comes from wood dust, resin, paint residue, or other suitable nonmetallic material. Light contact with the moving belt can remove packed debris and uncover abrasive grains that still have usable life.
For dry loose dust, you can also remove the belt, flex it gently, brush it with a suitable nylon brush, and vacuum away loosened material. Washing should be reserved for belts specifically identified by their manufacturer as washable.
Cleaning works best before loading becomes severe. Lower sanding pressure, control heat, use the correct grit, and keep dust extraction working to slow future buildup.
Replace the belt once the abrasive itself is worn, the backing is damaged, or the splice begins separating. Removing debris can restore a clogged belt, but it cannot repair a belt that has reached the end of its usable life.
FAQs About Cleaning Clogged Sanding Belts
What Is the Best Way to Clean a Clogged Sanding Belt?
For wood dust, pitch, and many nonmetallic deposits, a rubber abrasive-belt cleaning stick is usually the easiest option.
Apply light pressure according to the cleaner and sander instructions, then inspect the belt after it stops.
Can I Use an Eraser to Clean a Sanding Belt?
A purpose-made abrasive cleaning stick works like a large rubber eraser but is made for cleaning abrasives.
A normal pencil eraser is too small for practical belt cleaning and places your fingers unnecessarily close to moving abrasive.
Can I Wash Sanding Belts With Water?
Only wash a belt if its manufacturer states that the backing and bond are washable.
Remove the belt from the machine and let it dry fully before reuse. Do not soak an unknown sanding belt.
Can I Use a Wire Brush to Clean a Sanding Belt?
A metal wire brush can damage backing, loosen abrasive, or create other problems.
For offline dry cleaning, a stiff nylon brush is a safer starting point. A belt-cleaning stick is generally better for packed wood residue.
Why Does Pine Clog My Sanding Belts So Fast?
Pine can contain substantial pitch and resin.
Sanding heat softens that material, allowing it to stick between abrasive grains and trap sawdust. Lighter pressure, dust extraction, early belt cleaning, and an open-coat abrasive can reduce the problem.
Why Does My Sanding Belt Still Not Cut After Cleaning?
The belt may be worn rather than clogged.
Once abrasive grains become rounded or polished, removing surface debris cannot restore their original cutting edges. Replace the belt if cleaning produces little improvement.
How Often Should I Clean a Sanding Belt?
Clean it when you first see buildup or notice the cutting rate beginning to drop.
Frequent light cleaning is usually easier on the belt than waiting until the entire abrasive face is packed with dust or resin.
Can I Clean a Sanding Belt While It Is Running?
Purpose-made cleaning sticks are commonly designed to contact a running abrasive belt.
Use them only with a stable setup and according to the sander and cleaner instructions. Keep fingers, clothing, hair, and loose objects away from the belt and rollers.
Does Cleaning a Sanding Belt Make It Last Longer?
Yes, when the abrasive grains are still usable.
Removing packed material exposes the abrasive again and reduces the temptation to apply excessive sanding pressure. Cleaning cannot extend the life of a belt with worn grains or structural damage.