
How to Clean Sanding Belts: Safe Methods, Tools & Maintenance
red instead of thrown away. For dry sawdust, pitch, and light residue, a rubber abrasive-cleaning stick is usually the simplest method. Run the sander as directed by its manufacturer, apply the cleaning stick lightly to the moving abrasive, then stop and unplug the machine before inspecting the belt.
Sanding belts gradually fill with sawdust, resin, paint, adhesive, or metal particles. This buildup covers the abrasive grains and makes a belt feel dull even when plenty of usable grit remains underneath.
Cleaning is most useful when the belt is loaded rather than worn out. If the abrasive grains are already rounded, missing, glazed from heat, or separating from the backing, removing surface debris will not restore its original cutting ability.
For how to clean sanding belts, a purpose-made rubber cleaning stick is the best starting point for most woodworking belts. Some washable cloth-backed belts can also be cleaned off the machine, but only when the abrasive manufacturer specifically approves washing.
The material on the belt matters too. Dry wood dust is relatively easy to remove. Pine pitch, paint, glue, aluminum, and other sticky materials may require a different approach or a belt designed to resist loading in the first place.
Good cleaning habits can extend useful belt life, reduce heat, improve cutting speed, and produce a more consistent scratch pattern without forcing extra pressure onto the sander.
How to Clean Sanding Belts Safely
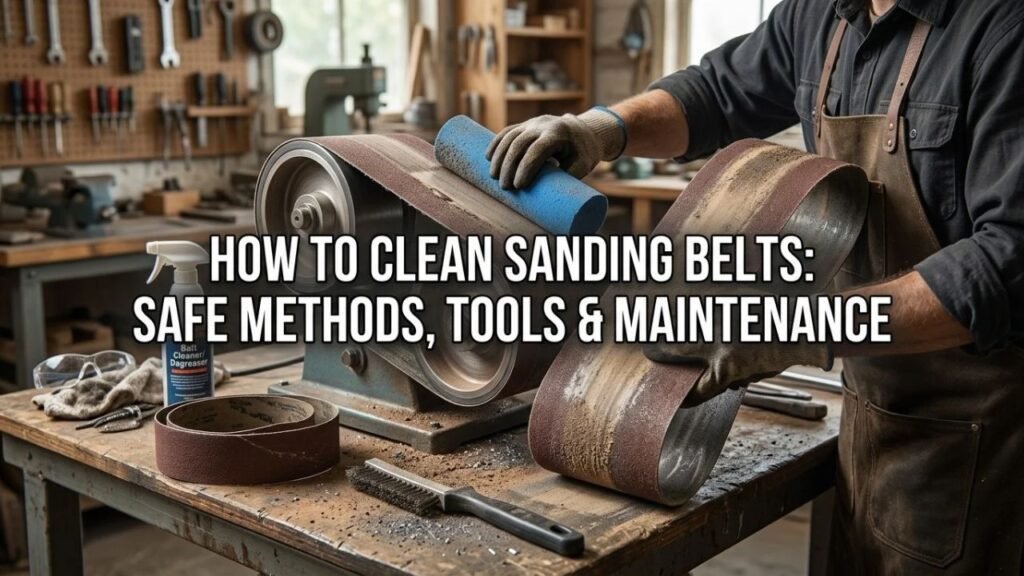
Start with the least aggressive cleaning method. The goal is to expose the abrasive grains again without damaging the backing, joint, or grit.
Step 1: Inspect the Belt Before Cleaning
Look at the abrasive surface before turning the sander on.
Check for:
- Packed sawdust
- Resin or pitch
- Paint buildup
- Glue
- Metal deposits
- Missing abrasive
- Torn edges
- Cracks
- Joint separation
- Severe glazing
A belt that is simply clogged is worth cleaning.
A belt with a damaged joint, torn backing, deep crease, or major abrasive loss should be replaced.
Do not try to save a physically damaged belt just because some grit still looks sharp.
Step 2: Use a Rubber Abrasive-Cleaning Stick
A rubber cleaning stick, sometimes called a sanding-belt cleaner or abrasive eraser, is designed to pull debris from the abrasive surface.
Follow the cleaning-stick instructions and your sander manual.
For a compatible stationary or handheld belt sander:
- Make sure the belt is correctly tracked and tensioned.
- Keep loose clothing, hair, jewelry, and hands away from the moving belt.
- Turn the sander on.
- Hold the cleaning stick securely.
- Apply the end of the stick lightly against the abrasive surface.
- Move it across the usable belt width if the machine design permits.
- Use only enough contact to remove the buildup.
- Stop the machine after a few seconds and inspect the belt.
The rubber gradually wears away while lifting packed debris from between the abrasive grains.
Heavy pressure is unnecessary and only consumes the cleaning stick faster.
Step 3: Turn Off and Unplug the Sander for Inspection
Once the cleaning pass is complete, switch the sander off.
Wait until the belt stops completely.
Unplug a corded sander or remove the battery from a cordless model before touching or closely inspecting the abrasive.
Look for open spaces between the abrasive grains.
A cleaned belt should feel rougher and look less packed than it did before cleaning.
Step 4: Repeat Only if Needed
If some dry buildup remains, another short cleaning-stick pass may remove it.
Do not keep pressing the cleaner into a belt that is already clean but still cuts poorly.
At that point, the abrasive grains may be worn rather than clogged.
Step 5: Replace the Belt if Cleaning Does Not Restore Cutting
Reinstall or continue using the belt only if it remains structurally sound.
Test it on suitable scrap material.
A successfully cleaned belt should cut with less pressure and produce material removal closer to what you expect from that grit.
If sanding remains slow, the belt is probably worn out.
Key Takeaway: Use a rubber abrasive-cleaning stick for ordinary dry loading, then stop and disconnect the sander before inspecting the belt. Cleaning removes debris; it cannot restore worn abrasive grains or repair a damaged belt.
What Is the Best Way to Clean a Clogged Sanding Belt?
The best method changes with the belt construction and the material causing the clog.
Rubber Cleaning Stick for Dry Buildup
For woodworking belts covered with dry sawdust, a rubber abrasive cleaner is usually the first method to try.
These cleaners can remove:
- Sawdust
- Fine wood particles
- Dry pitch
- Gum
- Some glue residue
- General sanding debris
They are useful on many:
- Belt sanders
- Disc sanders
- Drum sanders
- Stationary sanding machines
Check the cleaner manufacturer’s instructions because some products are not intended for every machine type.
For example, a cleaning stick that works on an exposed sanding belt may not be intended for a conveyor-feed wide-belt machine.
Offline Washing for Approved Washable Belts
Some heavy cloth-backed abrasive belts are manufactured with washable backings.
These belts may be cleaned to remove pitch buildup from resinous woods.
The important point is that washing should be done only when the manufacturer identifies that belt as washable.
Remove the belt from the machine before washing.
Afterward, hang or support it as instructed and let it dry thoroughly before reinstalling it.
Never reinstall a wet belt simply because the surface feels dry in one area.
Manufacturer-Approved Cleaner for Specialty Belts
Industrial abrasive belts used on metals may sometimes permit a specific cleaner, lubricant, or solvent.
Do not assume a chemical that is safe for one abrasive is safe for another.
A chemical may attack:
- Resin bond
- Backing
- Belt joint
- Adhesive
- Machine components
Use liquids only when the abrasive maker approves them for that exact belt and application.
Key Takeaway: A rubber cleaning stick is the first choice for common dry loading. Washing or chemical cleaning should be reserved for belts whose manufacturers specifically approve those methods.
Can You Wash Sanding Belts?
Some sanding belts can be washed, while others should stay dry.
The backing material and bonding system determine the answer.
Washable Cloth-Backed Belts
Certain industrial cloth belts are designed with washable backings.
These products may be washed off the machine to remove pitch and similar deposits.
If your belt is identified as washable:
- Remove it from the sander
- Follow the abrasive maker’s cleaning instructions
- Avoid folding or creasing the backing
- Let it dry completely
- Inspect the joint before reuse
Do not assume every cloth belt is washable merely because cloth looks water-resistant.
Paper-Backed Belts
Paper-backed abrasive products generally need more caution around water.
Moisture can affect:
- Paper strength
- Belt shape
- Joint integrity
- Abrasive bond
Unless the product is explicitly rated for wet use or washing, keep it dry.
Dry the Belt Completely Before Reuse
A washable belt needs full drying time before it returns to the machine.
Using it while damp can distort the backing or affect tracking.
Hang it in the manner recommended by the belt maker and keep it away from extreme heat.
Do not speed drying with an open flame, heat gun, or other high-temperature source.
Key Takeaway: Wash only belts specifically designed for washing or wet use. Paper belts and unidentified abrasives should normally remain dry.
How to Clean Sanding Belts With Sawdust, Resin, Paint, or Metal
Different forms of buildup behave differently on abrasive grain.
Sawdust
Dry sawdust is one of the easiest forms of loading to remove.
Use a rubber abrasive-cleaning stick while following the cleaner and sander instructions.
Regular cleaning before the belt becomes completely packed usually works better than waiting until the surface is heavily clogged.
Dust extraction also reduces how quickly sawdust returns.
Pine Pitch and Resin
Resinous woods can create sticky buildup.
Heat softens pitch and causes it to bond around abrasive grains.
Start with a rubber cleaning stick.
If your specific belt has a washable backing, an approved offline wash may remove pitch that the stick cannot.
For frequent sanding of soft, gummy, or resinous wood, an open-coat abrasive may be a better choice. Open spacing between grains gives sanding debris more room to escape instead of packing tightly into the surface.
Paint and Varnish
Paint and finish residue can soften from sanding heat and smear across the abrasive.
A cleaning stick may remove cured, dry residue.
Soft or melted coating can be harder to clear.
If the belt repeatedly loads while stripping paint:
- Use a coarser suitable grit
- Reduce excess sanding pressure
- Keep the sander moving
- Improve dust extraction
- Consider an abrasive made for coating removal
A belt packed with hardened finish may not be worth further cleaning.
Glue and Adhesive
Glue buildup can be difficult because many adhesives soften with heat.
A rubber cleaner may remove dry surface residue.
Do not scrape the belt aggressively with a metal object. That can tear the backing or damage abrasive grain.
If glue has melted deeply into the abrasive coat, replacement may be the practical choice.
Metal Particles
Metalworking belts can load with softer metals such as aluminum.
Using an abrasive designed for nonferrous metal can reduce this problem.
Some metalworking systems also use approved lubricants to limit loading.
Do not apply an unknown oil, solvent, wax, or cleaner to a belt without checking its application data first.
Key Takeaway: Dry sawdust is usually easy to clean, while resin, paint, glue, and soft metal can bond more firmly to the abrasive. Matching the belt to the material reduces repeated clogging.
Why Do Sanding Belts Get Clogged?
Loading occurs when removed material stays on the abrasive instead of leaving the sanding area.
Several conditions make it worse.
Too Much Sanding Pressure
Heavy pressure forces debris into the abrasive surface.
It also creates more heat.
That combination can turn loose dust or resin into packed buildup.
A fresh belt should cut without excessive force.
If you find yourself leaning harder on the machine, inspect the belt.
Grit Is Too Fine
Fine grit has less open space between abrasive grains.
Using a fine belt for heavy stock removal can make it clog rapidly.
Start with a grit suited to the amount of material that needs to come off.
Move to finer grits as the surface becomes smoother.
Weak Dust Extraction
Dust that stays around the sanding contact area has more opportunity to collect on the abrasive.
Check:
- Dust bag
- Vacuum connection
- Dust port
- Extraction hose
- Machine passages
Clear blocked dust paths before installing another belt.
Resinous or Soft Material
Some woods naturally contain more pitch.
Soft coatings and certain metals can also smear across abrasive grain.
An open-coat belt or application-specific abrasive may resist loading better.
Excess Belt Speed
High belt speed can increase heat.
Heat can soften resin, paint, adhesive, or nonferrous metal deposits and make them stick to the abrasive.
Use the machine speed and abrasive type suited to the workpiece.
Damp Wood
Wood with high moisture content can create poor sanding conditions and contribute to loading.
Let lumber reach an appropriate condition for the project before sanding when practical.
Key Takeaway: Excess pressure, overly fine grit, weak dust extraction, sticky material, high heat, and damp wood all contribute to belt loading. Fixing the cause reduces how often the abrasive needs cleaning.
How to Keep Sanding Belts Clean Longer
Preventing heavy loading is easier than recovering a belt that is completely packed.
Clean the Belt Before It Is Fully Clogged
You do not need to wait until the abrasive stops cutting.
A short cleaning-stick pass after visible buildup appears can keep the abrasive surface open.
This is useful when sanding resinous woods.
Use Open-Coat Abrasives for Loading-Prone Wood
Open-coat belts have more space between abrasive grains.
That spacing gives wood dust and pitch somewhere to go.
They are often a good match for:
- Pine
- Softwoods
- Resinous lumber
- Materials prone to clogging
Closed-coat belts place more abrasive grain across the backing and work well in applications where loading is less of a concern.
Maintain Dust Collection
A dust collector or shop vacuum cannot prevent all loading, but removing loose debris from the sanding area reduces the amount available to pack into the belt.
Empty collection bags and containers before airflow becomes restricted.
Avoid Excess Pressure
More force is not always more cutting.
If the abrasive is sharp, moderate pressure is normally enough.
Excess force increases heat and speeds up loading.
Keep the Workpiece Moving
Holding the sander or workpiece in one position increases localized heat.
Steady movement spreads the work across more of the abrasive and reduces burning.
Use the Right Grit Sequence
Trying to skip from a rough surface directly to a fine belt wastes abrasive.
Use a sensible progression from coarse to finer grit.
Each belt should remove the scratch pattern from the grit before it rather than perform all the stock removal itself.
Key Takeaway: Early cleaning, open-coat abrasives, strong dust extraction, moderate pressure, steady movement, and a sensible grit sequence keep belts open and cutting longer.
What Should You Not Use to Clean Sanding Belts?
Some cleaning methods can damage the abrasive or create a safety problem.
Do Not Use a Sharp Metal Scraper
Screwdrivers, knives, and metal scrapers can tear the backing or strip abrasive grain from the belt.
Use an abrasive-cleaning product designed for the task.
Do Not Spray Flammable Cleaner on a Running Belt
A moving sanding belt generates friction, heat, dust, and potentially sparks in metalworking applications.
Do not spray a flammable solvent onto a running machine.
If a specialty belt permits chemical cleaning, remove it and use the exact procedure specified by its manufacturer.
Do Not Soak an Unrated Belt in Water
Water can weaken or distort some backings and joints.
Wash only products marked or documented as washable.
Do Not Use Excessive Force With the Cleaning Stick
A cleaning stick works by contacting the abrasive surface.
You do not need to force it hard into the belt.
Excess pressure can wear the stick quickly and put unnecessary load on the machine.
Do Not Clean a Damaged Belt for Reuse
Cleaning is not a repair method.
Replace a belt with:
- Joint separation
- Torn edge
- Cracked backing
- Severe crease
- Missing sections of abrasive
- Obvious structural damage
How to Tell if a Sanding Belt Needs Cleaning or Replacement
A loaded belt and a worn belt can both feel slow.
The difference matters.
Signs the Belt May Only Need Cleaning
Cleaning is worth trying when:
- Abrasive surface is packed with dust
- Pitch is visible between grains
- Belt cut well before loading occurred
- Abrasive still feels sharp in cleaner areas
- Backing and joint are undamaged
A cleaning stick may restore much of its cutting action.
Signs the Abrasive Is Worn Out
Replace the belt when:
- It remains slow after cleaning
- Grit feels smooth
- Large abrasive patches are missing
- You need much more pressure
- Wood burns despite proper technique
- Scratch pattern becomes inconsistent
- Belt is heavily glazed
You cannot sharpen worn sanding grit with a cleaning stick.
Signs the Belt Is Unsafe to Reuse
Do not reinstall a belt with:
- Torn backing
- Damaged seam
- Cracked edges
- Severe folds
- Deep cuts
- Separation around the joint
Physical belt damage matters more than how much abrasive remains.
Key Takeaway: Cleaning restores a clogged belt, not a worn or damaged one. If the belt remains dull after debris is removed, replacement is the right next step.
How Often Should You Clean Sanding Belts?
There is no fixed schedule.
Clean them based on visible loading and cutting performance.
For clean hardwood, you may sand for a long period before buildup becomes noticeable.
With pine, paint, MDF, adhesive, or other loading-prone materials, cleaning may be needed much more often.
A good time to inspect the belt is when you notice:
- Slower material removal
- More heat
- Extra sanding pressure
- Visible debris between grains
- Change in finish quality
Cleaning before severe buildup develops is generally easier.
You do not need to clean a belt after every short sanding session if it remains open and cuts normally.
How to Store Sanding Belts After Cleaning
A cleaned belt can still be damaged by poor storage.
Make Sure Washable Belts Are Fully Dry
If you used an approved wet-cleaning process, let the belt dry thoroughly before storage.
Moisture can affect some backings and joints.
Keep Belts Flat or Properly Supported
Do not tightly fold or crush belts.
Creases can affect tracking and may weaken the backing.
Avoid Extreme Heat and Humidity
Abrasive belts perform best when stored in moderate environmental conditions.
Very damp conditions can alter some backing materials.
Very dry or hot conditions can make others brittle.
Keep Abrasives Clean
Store belts away from:
- Oil
- Grinding debris
- Metal chips
- Water
- Direct sunlight
- Strong heat sources
Original packaging is useful for unused belts.
Conclusion
How to clean sanding belts usually starts with a rubber abrasive-cleaning stick. It removes dry sawdust, pitch, gum, and similar buildup without requiring the belt to be taken apart or chemically treated. Use light pressure, follow the cleaner and sander instructions, then disconnect the machine before inspecting the abrasive.
Some cloth-backed belts are washable, but only when their manufacturer approves washing. Paper-backed or unidentified belts should not be soaked, and solvents or other chemicals should never be treated as universal sanding-belt cleaners.
I recommend cleaning a belt as soon as visible loading begins rather than waiting until it barely cuts. If cleaning does not restore material removal, or the backing, edges, or joint are damaged, replace the belt instead of trying to extend its use further.
FAQs About Cleaning Sanding Belts
What Is the Best Thing to Clean Sanding Belts With?
A purpose-made rubber abrasive-cleaning stick is a good choice for common dry sawdust, pitch, gum, and sanding debris.
It is designed to contact the abrasive without scraping the grit away. Use it according to its instructions and the safety guidance for your sander.
Can You Clean a Sanding Belt With an Eraser?
A normal pencil eraser is not the same as a purpose-made abrasive cleaning stick.
Dedicated belt-cleaning sticks are larger and made from rubber formulated for cleaning sanding abrasives. They are easier to hold at a safe distance from the moving belt.
Can You Wash a Sanding Belt With Water?
Only if the belt manufacturer states that the product is washable or designed for wet use.
Some cloth-backed industrial belts can be washed off the machine and dried thoroughly. Do not wash ordinary paper-backed or unidentified belts.
How Do You Remove Pine Pitch From a Sanding Belt?
Start with a rubber abrasive-cleaning stick.
For a belt specifically identified as washable, the manufacturer’s approved offline washing process may remove stubborn pitch. Using an open-coat abrasive can also reduce future loading when sanding resinous woods.
Can You Use a Wire Brush to Clean a Sanding Belt?
A wire brush can damage abrasive grain or backing, especially if used aggressively.
A rubber abrasive-cleaning stick is a better choice for ordinary belt loading. Replace a belt if contamination cannot be removed without harsh scraping.
Why Does My Sanding Belt Clog So Fast?
Common causes include excess sanding pressure, grit that is too fine, poor dust extraction, resinous wood, damp material, excessive heat, paint, adhesive, or a belt coating that does not suit the workpiece.
Correcting the cause will usually reduce repeated loading.
Does Cleaning a Sanding Belt Make It Last Longer?
It can extend the useful life of a belt that is clogged but still sharp.
Removing packed debris exposes abrasive grains that were covered. Cleaning does not restore grains that have already become dull or worn away.
When Should I Replace a Sanding Belt Instead of Cleaning It?
Replace the belt if it remains dull after cleaning, has major grit loss, burns the workpiece under normal sanding conditions, or shows a torn backing, cracked edge, damaged joint, or severe crease.
A cleaning method should never be used to put a structurally damaged belt back into service.