
How to Connect Two Air Compressor Tanks Safely and Correctly
The safest DIY way to add a second air tank is to use a purpose-built auxiliary receiver connected to the compressor outlet with pressure-rated hose and fittings. Keep the second tank within its maximum pressure rating, retain its safety relief valve, gauge, and drain, and test every connection for leaks before pressurizing the system fully.
Connecting another receiver increases stored-air capacity. A 20-gallon compressor connected to a 10-gallon auxiliary tank gives roughly 30 gallons of total receiver volume, but it does not increase the compressor pump’s CFM output.
The extra storage can provide longer tool run time before pressure falls, reduce rapid pressure changes during short bursts, and place extra air closer to a distant work area. ROLAIR, for example, sells an auxiliary receiver specifically for installation downstream from an existing compressor and equips it with a check-valve inlet, gauge, relief valve, and drain.
Pressure-vessel safety matters more than gaining extra storage. U.S. OSHA rules require covered air receivers to have a visible pressure gauge and spring-loaded safety valve. The relief system must prevent receiver pressure from exceeding its maximum allowable working pressure by more than 10 percent. OSHA also says a shutoff valve must not be installed between the receiver and its safety valve.
For how to connect two air compressor tanks, the simplest home-shop arrangement is usually compressor outlet → pressure-rated air hose → auxiliary tank inlet → auxiliary tank outlet → air tool or shop hose. This keeps the original compressor controls intact and avoids modifying pump discharge plumbing or drilling into either pressure vessel.
I’d use a commercially manufactured auxiliary tank with its original relief valve, gauge, drain, and rated ports rather than converting an old propane bottle, damaged compressor tank, or unknown pressure vessel. A pressure tank stores a large amount of energy, so improvised modifications can create a rupture hazard.
The sections below cover the connection layout, pressure ratings, fittings, check valves, regulated versus full-tank pressure, two powered compressors, leak testing, and mistakes to avoid.
How to Connect Two Air Compressor Tanks Step by Step
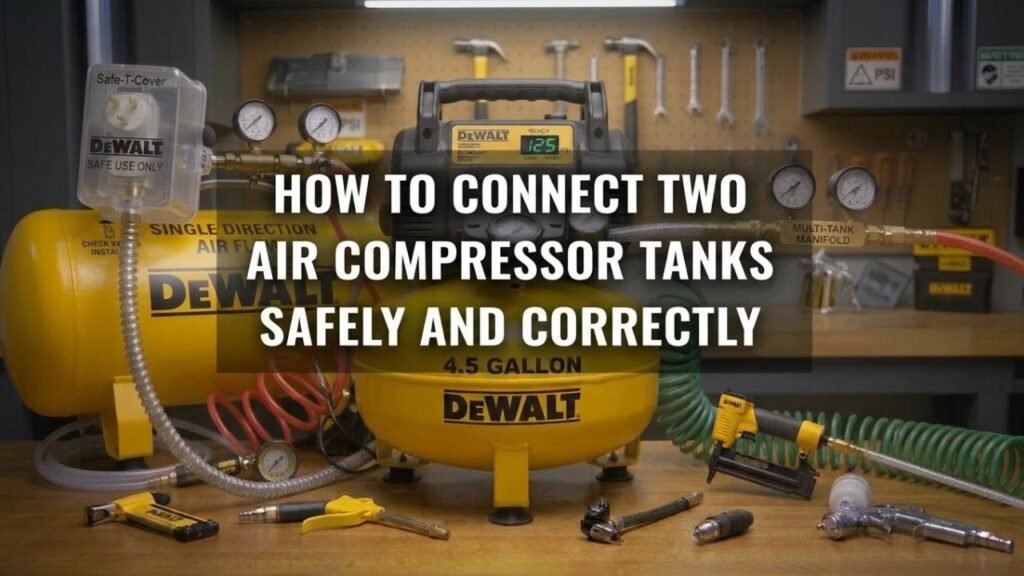
For most DIY setups, one tank is the compressor’s built-in receiver and the other is a purpose-built auxiliary air tank.
This method leaves the compressor itself unchanged.
Step 1: Check Both Tank Pressure Ratings
Find the data plate or permanent markings on both tanks.
Look for:
- Maximum working pressure
- Tank capacity
- Manufacturer information
- ASME marking when applicable
- Relief-valve rating
- Port sizes
The lowest-rated tank determines the pressure limit for the connected setup.
For example, California Air Tools currently lists several portable auxiliary tanks with a 125 PSI maximum pressure. Connecting one directly to a receiver that reaches 175 PSI would expose the auxiliary tank to pressure above its listed maximum unless an approved pressure-reducing arrangement is placed before it.
Do not assume tank size indicates pressure rating.
A 10-gallon tank may have a higher or lower rating than a much larger receiver.
Step 2: Inspect Both Tanks
Do not connect a receiver showing:
- Heavy rust
- Deep dents
- Cracks
- Damaged welds
- Severe pitting
- Leaking seams
- Missing pressure markings
- Modified ports
- Damaged relief valve
Water accumulates inside compressor receivers and can corrode steel from the inside.
DEWALT warns that accumulated water can weaken a tank and create a rupture risk, which is why regular draining is part of compressor maintenance.
An old tank can look acceptable outside while having serious internal corrosion.
Step 3: Depressurize the Entire System
Turn the compressor off and unplug it.
Release tank pressure through the approved drain or outlet until the pressure gauge reaches zero.
Do not remove plugs, fittings, gauges, regulators, or hoses from a pressurized receiver.
Wear eye protection while releasing compressed air because moisture, rust, and debris can leave the drain with considerable force.
Step 4: Choose Pressure-Rated Hose and Fittings
Every component between the tanks should be rated above the highest pressure it will experience.
This includes:
- Air hose
- Quick-connect couplers
- Plugs
- Tee fittings
- Nipples
- Manifolds
- Check valves
- Ball valves
- Regulators
Use fittings designed for compressed-air service.
Do not use ordinary above-ground PVC water pipe for the connection. OSHA has warned that PVC used for compressed air can rupture and throw sharp fragments.
For permanent shop plumbing, use a piping system specifically listed by its manufacturer for compressed air.
Step 5: Connect the Compressor Outlet to the Auxiliary Tank
For the easiest arrangement, connect a pressure-rated hose from the compressor’s air outlet to the auxiliary tank’s designated inlet.
A typical layout looks like:
Compressor receiver → regulator/outlet → air hose → auxiliary tank inlet → auxiliary tank outlet → tool
Purpose-built portable tanks often make this simple.
California Air Tools sells auxiliary receivers with male and female industrial quick-connect fittings so the tank can be connected to a compressor by hose without modifying the compressor receiver.
ROLAIR’s AIRKEG uses a check-valve inlet and is designed to sit downstream from an existing pneumatic setup.
Follow the connection instructions supplied with your exact tank.
Step 6: Set the Pressure Below the Auxiliary Tank Limit
If the second tank has a lower maximum pressure than the compressor receiver, regulate the air before it enters the second tank.
Example:
- Main compressor cut-out pressure: 175 PSI
- Auxiliary tank maximum: 125 PSI
Do not expose that auxiliary tank to 175 PSI.
Feed it only through a pressure-control arrangement approved for that use and keep the second receiver at or below its rated pressure.
A normal compressor regulator reduces pressure on its outlet side. DEWALT describes outlet pressure as pressure downstream of the regulator and states that it remains at or below tank pressure.
If the pressure-control arrangement is uncertain, use a matching auxiliary tank approved by the compressor maker or have a compressed-air technician design the setup.
Step 7: Keep Each Tank’s Safety Devices Functional
A receiver should retain its:
- Pressure gauge
- Safety relief valve
- Drain
- Rated tank openings
Do not plug a relief-valve port because another tank already has a relief valve.
OSHA requires covered receivers to have pressure indication and spring-loaded safety protection and specifically prohibits placing another valve between a receiver and its safety valve.
The safety valve is the final protection if a regulator or pressure-control part fails.
Step 8: Pressurize the System Slowly
Close both drain valves.
Set the outlet regulator low before starting.
Turn the compressor on and allow pressure to rise gradually.
Watch both tank gauges.
Stop immediately if:
- The second tank approaches its maximum rating
- A fitting moves
- A hose swells
- A joint leaks badly
- The safety valve opens unexpectedly
- A tank makes abnormal noises
Never stand directly over fittings while testing a newly assembled pressure system.
Step 9: Check Every Joint for Leaks
Brush or spray soapy water on each threaded joint and fitting.
Bubbles that continue growing indicate an air leak.
California Air Tools also recommends using soapy water around air connections when checking compressor leaks.
Depressurize the system before tightening or resealing a leaking threaded connection.
Do not tighten a fitting while it is carrying full receiver pressure.
Step 10: Connect the Tool or Main Air Line
Once both tanks reach the intended pressure and no leaks are found, connect the working air hose to the auxiliary tank outlet or approved downstream manifold.
A regulator near the point of use can then set the PSI required by the tool.
Key Takeaway: Match tank pressure ratings, depressurize before assembly, use compressed-air-rated components, retain every relief valve and drain, then fill slowly and leak-test before normal use.
Should You Connect the Tanks Before or After the Regulator?
This choice changes what the second tank does.
Connecting After the Regulator
For many DIY users, connecting an auxiliary tank through the compressor’s normal regulated outlet is the simpler arrangement.
The second tank stores air at the regulator setting.
For example, a 175 PSI compressor could feed a 125 PSI auxiliary tank through a suitable pressure-control setup set below 125 PSI.
Advantages include:
- No receiver modification
- Easier quick-connect setup
- Lower pressure in the auxiliary tank
- Original compressor controls remain untouched
The downside is that the second tank does not store air at the main receiver’s full pressure.
Connecting at Full Receiver Pressure
Connecting both receivers directly on the unregulated tank side gives more stored air mass for the same tank volume because both receivers reach the compressor’s cut-out pressure.
This setup requires more care.
Both tanks, hoses, fittings, gauges, and relief systems must be rated for the full receiver pressure, and modifications must use manufacturer-approved ports.
Do not drill, weld, braze, or add homemade threaded holes to an air receiver.
For a permanent full-pressure connection, manufacturer instructions or a qualified compressed-air installer are the better path.
Key Takeaway: A downstream regulated auxiliary tank is simpler for DIY use; a full-receiver-pressure connection demands matching ratings and approved receiver plumbing.
Do You Need a Check Valve Between Two Air Compressor Tanks?
It depends on the system design.
A check valve permits air to travel in one direction and blocks reverse flow.
Auxiliary Tank With a Check-Valve Inlet
Some auxiliary tanks include one from the factory.
ROLAIR’s 10-gallon AIRKEG, for example, has a 90-degree check-valve inlet.
The check valve can keep air in the auxiliary receiver from flowing backward toward the supply when pressure drops or the supply is disconnected.
Simple Shared Storage Setup
Some commercially produced auxiliary tanks are designed around quick-connect fittings and do not require the owner to build a custom check-valve arrangement.
Use the tank maker’s connection method.
Do not add a valve where it could isolate the tank from its safety relief device.
Two Powered Compressors
This is different from adding a passive auxiliary tank.
If two complete compressors feed a common air system, each compressor may need its own discharge check valve so one unit does not push air backward into the other.
Quincy Compressor describes multi-compressor networking with individual check valves feeding a common connection and coordinated pressure controls.
Key Takeaway: Follow the auxiliary tank design for a single-compressor setup; when two powered compressors share a system, one-way flow and coordinated pressure controls become much more important.
Can You Connect Two Complete Air Compressors Together?
Yes, but this is not the same job as linking one compressor to an auxiliary storage tank.
Each complete compressor has its own:
- Pump
- Motor
- Receiver
- Check valve
- Pressure switch
- Safety valve
- Cut-in and cut-out settings
Connecting the outlets of two compressors to a common downstream manifold can increase available CFM if the system is designed for both machines to run.
Use a Common Manifold
A basic multi-compressor system commonly routes each compressor toward a common manifold rather than connecting one pump directly into the other compressor tank.
Quincy describes using check valves on each compressor line and a common fitting or header.
All shared piping must be rated for the highest compressor pressure.
Pressure Controls Need to Work Together
If one machine has a 125 PSI cut-out and the other has a 175 PSI cut-out, they will not naturally share the workload evenly.
The lower-pressure machine may remain filled by the higher-pressure unit or behave in a way its original control system was not intended to handle.
Commercial systems use staged or coordinated controls to manage multiple compressors.
For two portable shop compressors, use manufacturer-approved procedures rather than altering pressure switches until both appear to start together.
Do Not Tie Pump Discharge Tubes Together Casually
The line from a compressor pump to its receiver can run hot and carries pulsating compressed air.
It also interacts with the receiver check valve and unloader system.
Connecting those discharge tubes together without a designed control arrangement can interfere with compressor starting and unloading.
Use the downstream air outlets or an engineered compressed-air header.
Key Takeaway: Two powered compressors can share a downstream air system, but their check valves, pressure controls, and ratings must work together; this is more involved than adding passive storage.
What Happens When You Add a Second Air Tank?
Adding receiver volume changes storage behavior but does not make the compressor pump produce more air.
Total Gallons Increase
Tank capacities add together.
Examples:
- 6-gallon compressor + 10-gallon tank = 16 gallons
- 20-gallon compressor + 20-gallon tank = 40 gallons
- 30-gallon compressor + 60-gallon tank = 90 gallons
This gives the tool a larger stored-air reserve.
CFM Does Not Increase
If the compressor pump produces 5 CFM, adding another receiver does not turn it into a 10 CFM compressor.
For tools that consume more air than the pump can produce continuously, the extra tank only delays the pressure drop.
Once the stored reserve is depleted, pump CFM becomes the limiting factor again.
Fill Time Gets Longer
More receiver volume means more air must be compressed before the whole system reaches cut-out pressure.
A small pump connected to a very large additional tank may run for a long time during initial filling.
Check the compressor duty cycle and manufacturer guidance before adding a large amount of receiver volume.
Pressure Drop Can Improve During Short Bursts
An auxiliary receiver installed near the point of use can supply a local reserve for nailers, impact tools, and other intermittent loads.
ROLAIR markets its auxiliary tank for extra reserve capacity and reduced line loss over long distances.
Key Takeaway: A second tank increases stored-air volume and run time during short demands, but pump CFM stays unchanged and system refill takes longer.
What Size Hose Should Connect Two Air Tanks?
Hose diameter should be large enough that it does not become the main airflow restriction.
For light shop use, many portable auxiliary tanks use 1/4-inch quick-connect fittings.
High-CFM tools or long hose runs may benefit from 3/8-inch or larger compressed-air hose and fittings.
The narrowest fitting in the path can limit airflow even if the hose itself is large.
For example, a 3/8-inch hose connected through restrictive 1/4-inch couplers may not deliver the airflow expected from the larger hose.
Match the hose to:
- Required CFM
- Hose length
- Working pressure
- Tool inlet size
- Tank ports
- Compressor outlet
Every hose must also have a working-pressure rating above the system pressure.
Can You Use an Old Compressor Tank as the Second Tank?
Only if its condition, pressure rating, safety equipment, and intended service can be verified.
An old receiver with unknown internal corrosion is not a good candidate.
Water is produced every time air is compressed. If the receiver has gone years without proper draining, internal corrosion may weaken the steel.
Do not reuse a tank that has:
- Unknown origin
- Missing data plate
- Severe rust
- Weld repairs
- Deep dents
- Modified shell
- Damaged threads
- A history of being stored full of water
Do not use a propane cylinder, fire extinguisher, water heater, or other unrelated container as an air receiver unless it is specifically engineered, certified, and approved for that service.
A manufactured auxiliary air tank is the safer choice.
Air Tank Connection Mistakes to Avoid
Connecting a Low-Pressure Tank to a Higher-Pressure Receiver
A 125 PSI tank should never be allowed to reach 175 PSI.
The lower receiver rating controls its permitted pressure.
Removing the Safety Relief Valve
Never plug the relief-valve opening to gain another air port.
OSHA requires safety-valve protection on covered receivers and says no valve may sit between the receiver and its safety valve.
Using PVC Pipe
Ordinary PVC water pipe can fragment when it fails under compressed-gas pressure.
OSHA specifically warns against exposed above-ground PVC for compressed air.
Welding or Drilling a Receiver
Modifying a pressure-vessel shell can weaken it and change its certification.
Use existing manufacturer-provided ports.
Ignoring Condensation
Both tanks collect moisture.
OSHA requires covered receivers to have drains and calls for accumulated oil and water to be removed often enough to prevent excessive buildup.
Drain both tanks as required by their manuals.
Assuming More Gallons Means More CFM
The second receiver stores what the compressor already produced.
It does not increase pump displacement.
Leaving Leaks Unrepaired
Small leaks waste stored air and make the compressor cycle more often.
Use soapy water to find leaks, then depressurize before repairs.
Key Takeaway: Stay within the lower tank pressure rating, keep safety devices intact, avoid PVC and pressure-vessel modifications, drain both tanks, and remember that added storage does not raise pump CFM.
Conclusion
How to connect two air compressor tanks safely starts with using receivers that have known pressure ratings and their original safety equipment. For most DIY shops, the simplest arrangement is a rated air hose from the compressor’s normal outlet to the inlet of a purpose-built auxiliary air tank.
Keep the auxiliary tank below its maximum working pressure. If the main compressor operates at a higher pressure, reduce pressure before air enters the lower-rated receiver. Both tanks should retain their gauge, relief valve, and drain.
A second tank increases storage capacity, not compressor CFM. It gives you more reserve before pressure falls but also takes longer to refill.
For a permanent full-pressure system or two powered compressors sharing one air network, use equipment designed for that arrangement or have the system set up by a compressed-air professional. Pressure vessels are not good candidates for improvised drilling, welding, or mismatched fittings.
FAQs About Connecting Two Air Compressor Tanks
Can I connect two air compressor tanks with an air hose?
Yes, if one is a purpose-built auxiliary air tank and the hose, fittings, and tank are rated for the pressure involved. A common setup uses the compressor outlet to feed the auxiliary tank inlet through a pressure-rated hose.
Will adding a second tank increase CFM?
No. CFM comes from the compressor pump. A second tank increases stored-air volume, so a high-demand tool can run longer before pressure falls. Once the stored air is used, the original compressor pump still determines how quickly the system recovers.
Can I connect a 125 PSI tank to a 175 PSI compressor?
Not directly at 175 PSI. The 125 PSI receiver must stay at or below its maximum pressure rating. Use a manufacturer-approved regulated arrangement that limits pressure before it reaches the auxiliary tank, or use a receiver rated for the compressor’s full pressure.
Do both air tanks need safety relief valves?
Each receiver should retain the safety protection supplied or required for that pressure vessel. Do not remove or block a relief valve because another receiver has one. OSHA requires covered air receivers to have spring-loaded safety valves and pressure gauges.
Do I need a regulator between two air compressor tanks?
You need pressure reduction before the second tank when the compressor can supply pressure above that tank’s rating. If both receivers are designed for the same full system pressure and are connected through an approved receiver arrangement, the plumbing may differ.
Can I connect two air compressors to one tank?
This requires a designed multi-compressor setup with correct check valves, pressure controls, unloaders, piping, and receiver capacity. Do not simply connect two pump discharge lines into one receiver unless the equipment manufacturer supports that arrangement.
Does adding a second tank make the compressor run longer?
Yes. The pump has more total receiver volume to fill, so the initial fill and recovery from a large pressure drop take longer. The extra tank can reduce short-term cycling during intermittent use, but the compressor still has the same pump output.
Can I connect two different-size air tanks?
Yes, tank gallon sizes do not need to match. Pressure ratings matter more. A 20-gallon and 10-gallon receiver can share a system when both are intended for compressed-air service and the pressure stays within the rating of every tank and component.