
How to Install Air Filter on Air Compressor: Step-by-Step Guide
To install an air-compressor intake filter, turn the compressor off, locate the intake port on the pump head, remove any shipping plug or old filter, and install the correct replacement filter without overtightening it. An inline moisture or particulate filter is installed on the pressure side instead, with its airflow arrow pointing toward the air tool.
The term “air filter” can describe two different parts on a compressor. The intake air filter cleans atmospheric air before it enters the pump. An inline compressed-air filter cleans air after compression and may remove dirt, condensed water, oil aerosols, or other contamination.
Campbell Hausfeld compressor documentation shows the intake filter being installed directly on the compressor pump before startup, while California Air Tools specifies threading its intake filter into the pump-head NPT port on applicable models.
For how to install air filter on air compressor, first identify which filter you have. A small threaded filter or silencer attached to the pump is normally an intake filter. A bowl-style filter with an inlet, outlet, drain, and sometimes a pressure regulator is normally a pressure-side line filter.
Correct filtration also matters on a much larger scale. The U.S. Department of Energy reports that compressed-air systems consume roughly 90 billion kWh of electricity each year in the United States. Dirty intake filters and pressure restrictions add unnecessary load to compressed-air systems, so filter sizing and maintenance should not be treated as minor details.
A filter installed backward, connected through undersized fittings, or placed where hot compressed air has not had time to cool can reduce airflow or collect moisture poorly. The installation steps below cover both common filter types and explain which arrangement fits a portable compressor, home garage, or shop air line.
How to Install Air Filter on Air Compressor Intake
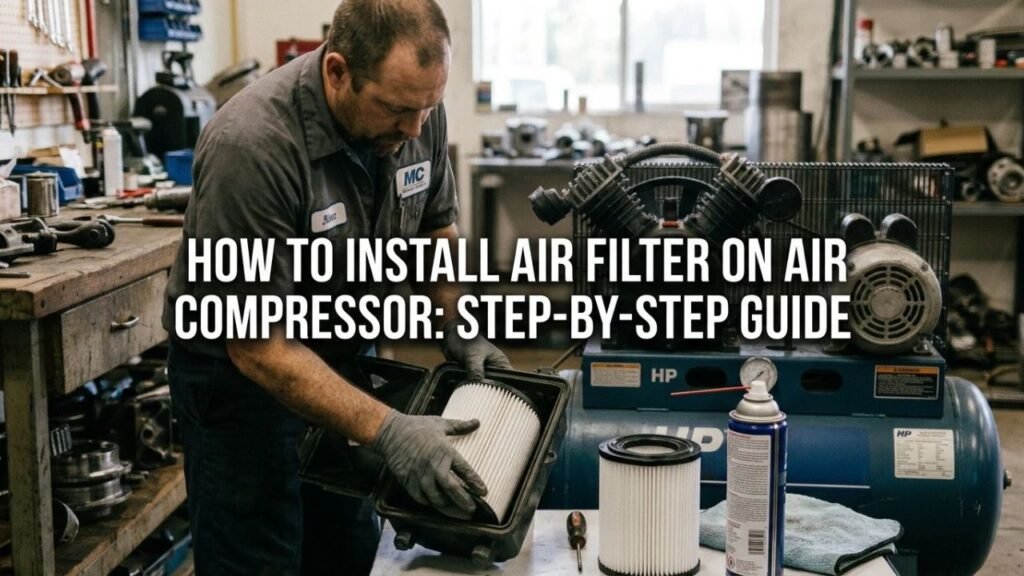
Most small piston compressors use a replaceable intake filter mounted directly to the cylinder head or intake port.
Some compressors arrive with this filter removed for shipping.
1. Turn Off the Compressor
Move the power switch to OFF and unplug an electric compressor.
For a battery compressor, remove the battery.
For a gasoline-powered unit, shut the engine down and follow the manufacturer’s service procedure.
Allow hot pump components to cool before working around the cylinder head.
If you are opening any pressure-side connection, drain system pressure first. The pump intake itself normally sits on the suction side rather than tank-pressure side, but isolating the machine from power prevents an accidental startup.
2. Find the Compressor Intake Port
Look at the compressor pump or cylinder head.
The intake filter is commonly mounted:
- On the side of the pump head
- At the end of a cylinder head
- On each head of a twin-cylinder compressor
- At the end of a short intake tube
- Inside a larger filter housing on industrial equipment
A new compressor may have a temporary plastic plug or shipping cap installed in this opening.
Rolair instructions for applicable compressors direct the owner to thread the air cleaner into the open intake port on the pump cylinder head before operation.
Do not confuse the intake opening with:
- Oil-fill opening
- Crankcase breather
- Tank fitting
- Pressure-switch port
- Discharge line
- Safety-valve connection
Check the owner’s manual if several openings look similar.
3. Remove the Shipping Plug or Old Filter
If the compressor is new, remove the temporary shipping plug from the intake opening.
If replacing an old filter, unscrew the filter housing or remove its retaining screw, clip, nut, or cover as specified for the compressor.
Briggs & Stratton instructions for one compressor design call for removing a shipping cap, installing the filter stem, then assembling the filter housing, media, cover, washer, and wing nut. Other compressors use a one-piece threaded filter instead.
Clean loose dirt from around the opening before exposing the intake.
On larger compressor systems, VMAC specifically instructs technicians to clean debris from around the housing and cover the open air inlet during filter service so contamination cannot enter the compressor.
4. Confirm Filter Size and Thread Type
The new filter must match the compressor.
Check:
- Filter part number
- Thread diameter
- Thread type
- Housing clearance
- Airflow capacity
- Number of filters required
Common small compressor intake filters may use NPT threads such as 1/4 inch, 3/8 inch, or larger, but there is no universal size.
California Air Tools specifies a 1/4-inch NPT intake connection on certain models, for example. That does not mean another compressor uses the same thread.
Do not force a metric filter into an NPT port or use adapters that leave the filter loose and unsupported.
5. Install the Filter
Start threaded filters by hand.
The filter should thread smoothly into the pump head without cross-threading.
Some compressors require the entire filter housing to be screwed into the head. Others use a fixed stem with the filter element and housing assembled around it.
Follow the exact arrangement shown in the compressor manual.
Avoid overtightening. Pump heads can be aluminum, and damaged intake threads can turn a simple filter installation into a repair.
If the manufacturer calls for thread sealant, use only the specified type and amount. Do not let PTFE tape or paste protrude into the intake opening where fragments could enter the pump.
6. Install the Filter Element Correctly
If the filter housing and element arrive separately, seat the filter element squarely.
Make sure:
- The element is centered
- Gaskets or seals are in place
- The element is not crushed
- The cover closes fully
- No edge is pinched
Some designs have a locating step or seating surface that the filter must fit over.
VMAC instructs installers to seat the filter element securely on the filter plate before replacing the cover.
7. Refit the Cover or Intake Tube
Reinstall any housing cover, retaining clip, nut, silencer tube, or intake hose.
Some small compressors use a tube between the filter and pump. California Air Tools, for instance, shows an intake filter plus a short air-filter tube on selected models.
Keep the tube free of:
- Kinks
- Sharp bends
- Cracks
- Loose connections
A restricted intake makes the pump work harder to draw air.
8. Start the Compressor and Check Operation
Reconnect power and start the compressor.
Listen for abnormal intake noises and watch tank fill time.
A newly installed filter should not cause:
- Severe suction noise
- Slow pump-up time
- Filter housing movement
- Whistling from a loose connection
- Compressor overheating
A badly undersized or clogged filter restricts incoming air and lowers compressor output.
Several compressor manuals specifically warn that a clogged intake filter reduces pump performance.
Key Takeaway: Install the correct intake filter directly at the pump’s designated intake port, keep dirt out of the open inlet, seat the element correctly, and avoid cross-threading or overtightening the housing.
Intake Filter vs Inline Air Filter
These filters serve different purposes and go in different locations.
| Filter type | Location | Main job |
| Intake filter | Before compressor pump | Stops dust and dirt entering pump |
| Particulate line filter | After compressor | Removes solid contamination |
| Water separator/filter | Pressure side | Removes bulk liquid water |
| Coalescing filter | Pressure side | Removes fine oil/water aerosols |
| Filter-regulator | Near distribution or tool | Filters air and controls pressure |
Intake Filter Protects the Pump
Atmospheric air contains dust and particles.
Without an intake filter, abrasive contamination can enter the compressor and contribute to wear inside cylinders, rotors, valves, and other components.
Never intentionally run a compressor without its specified intake filter.
Inline Filters Protect the Air System and Tool
Once air has been compressed, other contamination becomes a concern.
Compressed air can contain:
- Condensed water
- Pipe rust
- Dirt
- Oil aerosols
- Compressor wear particles
Pressure-side filtration is selected according to the final use.
A nail gun does not normally require the same air quality as precision painting, instrumentation, food processing, or breathing-air applications.
Key Takeaway: The intake filter protects the compressor itself, while inline filters clean already-compressed air before it reaches piping, tools, or process equipment.
How to Install an Inline Air Filter on an Air Compressor
An inline filter has pressure on both its inlet and outlet, so installation requires more attention to ratings and airflow direction.
1. Depressurize the Air System
Turn off the compressor.
Disconnect power.
Open the drain or safely release air until the section of line being opened reads zero pressure.
Never unscrew an inline filter, regulator, hose fitting, or filter bowl while it is pressurized.
2. Select the Right Filter
Check the filter’s:
- Maximum pressure
- Maximum airflow
- Port size
- Filtration rating
- Drain type
- Operating temperature
The filter pressure rating must exceed the pressure it can receive from the compressor.
A filter that is too small for the required airflow creates pressure drop.
Parker recommends selecting a filter with suitable flow capacity and notes that the filter port should be equal to or larger than the intended line size in its installation guidance.
3. Choose the Installation Location
For a basic shop system, a common arrangement is:
Compressor → aftercooler if fitted → receiver tank → inline filter → regulator → air line/tool
Parker recommends installing a general coalescing filter downstream from the receiver in a typical compressor installation. If air continues cooling farther down the piping, point-of-use filters may also be needed to remove condensation that forms later.
For portable compressors, a small filter/water separator can be connected near the outlet or closer to the tool.
For spray finishing, allowing the compressed air to cool before final moisture filtration is useful because more water vapor can condense into removable liquid. Binks’ spray-finishing guidance places its filter/regulator at least 25 feet from the compressed-air source in its recommended layout.
That 25-foot spacing is not a universal rule for every compressor filter. Follow the filter and application instructions.
4. Find the Airflow Arrow
Most inline compressed-air filters have an arrow on the body.
The arrow needs to point:
From compressor → toward air tool
Parker installation instructions require connecting inlet and outlet ports according to the flow markings on the filter head.
Do not assume the left port is always the inlet.
Filter-regulator assemblies can be made in different orientations.
5. Mount the Filter Upright
Bowl-style filters are normally installed vertically with the drain at the bottom.
This lets separated liquid fall into the bowl where it can be drained.
A tilted or sideways separator may not collect and drain moisture correctly.
Use the manufacturer’s wall bracket when one is supplied or recommended rather than letting a heavy filter hang from a flexible hose.
6. Connect the Inlet and Outlet
Install fittings that match the filter port and air-line size.
Use compressed-air-rated:
- Pipe
- Hose
- Nipples
- Couplers
- Valves
- Fittings
Apply suitable thread sealant to NPT threads.
Keep excess tape or compound out of the air passage.
Hold the filter body or use the designated wrench flats when tightening so you do not twist the housing or break a plastic bowl.
7. Install the Drain
Many moisture and coalescing filters use:
- Manual drain
- Float drain
- Automatic drain
- Zero-loss drain
Make sure the drain is installed and closed or configured according to its instructions before pressurizing the filter.
Parker notes that collected liquid must be removed rather than allowed to rise into the element, and it recommends automatic drains for many coalescing-filter applications.
8. Pressurize Slowly
After checking all fittings, restore air pressure gradually.
Parker’s filter instructions call for slowly opening the upstream shutoff valve before opening the downstream valve.
Watch for:
- Leaks
- Bowl movement
- Abnormal pressure drop
- Incorrect drain operation
- Filter housing damage
Do not stand directly beside a questionable bowl or fitting while bringing the system up to pressure.
9. Check Pressure Drop
Run the air tool and compare pressure upstream and downstream if gauges are available.
A large pressure loss may point to:
- Undersized filter
- Clogged element
- Small fittings
- Wrong flow direction
- Undersized regulator
- Excessive airflow demand
Atlas Copco notes that valves, bends, piping, and other restrictions all create pressure loss in a compressed-air distribution system.
Key Takeaway: Install an inline filter after depressurizing the system, follow the airflow arrow, keep the bowl upright, use full-flow fittings, and bring pressure back slowly while checking for leaks and pressure loss.
Where Should an Air Compressor Filter Be Installed?
The best location depends on the filter type.
Intake Filter Location
The intake filter belongs at the compressor’s air inlet.
It should draw air from an area that is:
- Clean
- Dry
- Cool
- Away from exhaust fumes
- Away from heavy sanding dust
- Protected from rain
Atlas Copco recommends accounting for added pressure drop when a prefilter is needed in a dusty environment and advises using adequately sized intake piping if outside air is routed to the compressor.
A remote intake tube should not be so narrow or long that it starves the pump.
Main Line Filter Location
A general shop filter commonly goes after the receiver and after an aftercooler when the system has one.
At this point, compressed air has had a chance to cool and some moisture can condense.
Point-of-Use Filter Location
For painting or another job sensitive to water and oil, a final filter close to the point of use can catch contamination or condensation that develops inside the distribution piping.
Parker recommends point-of-use filtration when long downstream piping permits more condensation or contamination to reach the work area.
Keep Filters Accessible
Do not hide the filter where maintenance requires dismantling the compressor installation.
Leave room beneath bowl filters to:
- Drain water
- Remove the bowl
- Change the element
Parker installation guidance specifically calls for leaving enough clearance for future filter-element replacement.
Key Takeaway: Put intake filtration at the compressor inlet, general pressure-side filtration after the receiver or cooling stage, and extra point-of-use filtration where cleaner or drier air is required.
Which Direction Should an Air Compressor Filter Face?
For an inline filter, follow the arrow printed or cast into the filter body.
The arrow should point downstream toward the tool or air system.
Why Direction Matters
Coalescing filters are built around a specific path through the filter element.
Parker explains that its coalescing elements use inside-to-outside flow so collected liquid reaches the outside of the media and drains into the bottom of the housing. Reversing that intended path can interfere with liquid drainage.
Other filter designs may use a different internal arrangement.
That is why the housing arrow—not a generic assumption—controls installation.
What if There Is No Arrow?
Check:
- IN and OUT markings
- Port numbers
- Manufacturer diagram
- Filter manual
Do not guess if the filter has a coalescing element or automatic drain.
Should the Air Filter Go Before or After the Regulator?
For many filter-regulator setups, filtration occurs before pressure regulation:
Compressor → filter → regulator → tool
A combined FR unit already arranges those functions internally.
Filtering first keeps dirt and liquid from entering the regulator mechanism.
Some systems use several filtration stages with regulators positioned differently for process reasons, so manufacturer diagrams still control.
If using an FRL assembly—filter, regulator, lubricator—the common direction is:
Filter → regulator → lubricator
Do not install a lubricator ahead of a paint spray gun or another application that needs oil-free downstream air.
Can an Air Filter Reduce Compressor CFM?
Yes, if it is undersized, dirty, or installed incorrectly.
Dirty Intake Filter
A blocked intake filter makes it harder for the pump to draw atmospheric air.
The result can include:
- Longer tank fill time
- Lower pump output
- Higher operating temperature
- Increased intake noise
Scheppach documentation states that a blocked intake filter can sharply reduce compressor performance.
Undersized Inline Filter
Every pressure-side filter produces some pressure drop.
A correctly sized clean filter keeps that loss low.
A filter with a tiny port installed on a high-CFM system can choke airflow to the tool.
Clogged Filter Element
As dirt accumulates, pressure drop rises.
Some industrial filters use differential-pressure indicators that show when the element needs replacement. Parker instructs users to replace elements when its differential indicator reaches the specified change zone or when excessive pressure drop appears.
Key Takeaway: A clean, correctly sized filter causes limited restriction; a dirty element, small port, or wrong filter size can reduce usable airflow and pressure at the tool.
How Often Should an Air Compressor Filter Be Changed?
There is no single interval for every compressor.
The owner’s manual gives the correct schedule.
Intake Filter
Replacement frequency depends heavily on the work environment.
A compressor used in a clean indoor garage may keep its filter much cleaner than one running around sawdust, bodywork dust, concrete dust, or construction debris.
Some compressor manuals call for intake-filter inspection or cleaning around every 300 operating hours, while other models use shorter or longer intervals.
Do not transfer one manufacturer’s interval to another machine.
Inline Filter
Change intervals vary by element type and contamination load.
Parker states that some of its compressed-air filter elements should be changed at least annually or sooner when the pressure-drop indicator reaches its replacement range.
Replace Earlier When Needed
Inspect sooner if you notice:
- Longer compressor fill time
- Lower tool pressure
- Heavy dirt on intake element
- Damaged filter media
- Water passing downstream
- Oil contamination
- Rising pressure drop
Key Takeaway: Follow the exact filter schedule for the compressor, but inspect sooner in dusty service or whenever airflow, pressure, or moisture control begins to change.
Common Air Filter Installation Mistakes
Running the Compressor Without the Intake Filter
Do not operate the pump with an open intake.
Dust can enter the compressor directly.
Installing the Filter in the Wrong Port
An intake filter belongs at the pump intake, not the crankcase breather or discharge port.
Use the diagram for your model.
Installing an Inline Filter Backward
Always check the airflow arrow.
Overtightening an Intake Filter
Small filter housings and aluminum pump heads can be damaged by excessive force.
Thread the filter straight and tighten only as specified.
Using an Undersized Inline Filter
A 1/4-inch filter may become a bottleneck in a larger high-CFM shop system.
Match flow capacity and port size to the air system.
Mounting a Water Separator Sideways
A bowl-style separator normally needs to remain vertical so liquid reaches its drain.
Installing the Filter Too Close to Hot Discharge Air
Hot air still carries a large amount of moisture as vapor.
For moisture removal, cooling the air before final filtration gives more water a chance to condense.
Forgetting the Drain
A full filter bowl can send moisture downstream.
Check manual drains routinely or maintain automatic drains according to their instructions.
Key Takeaway: Wrong ports, backward flow, overtightening, undersizing, poor bowl orientation, and ignored drains are the most common installation errors.
Conclusion
For how to install air filter on air compressor, first identify the type of filter. An intake filter belongs directly at the compressor pump’s inlet and protects the pump from airborne contamination. An inline filter belongs on the compressed-air side and removes dirt, water, oil aerosols, or other contaminants before the air reaches equipment.
For an intake filter, turn off the compressor, clean around the intake, remove the shipping plug or old filter, fit the correct element, and secure the housing without overtightening it.
For an inline filter, fully depressurize the line, mount the bowl upright, follow the airflow arrow, use pressure-rated fittings, restore pressure slowly, and check for leaks and pressure drop.
Correct filter sizing matters as much as placement. A small or clogged filter can restrict airflow even when the compressor pump itself has enough CFM for the tool.
FAQs About Installing an Air Filter on an Air Compressor
Does an air compressor need an intake filter?
Yes, compressors designed with an intake filter should be operated with the filter installed. It stops airborne dirt from entering the pump. Campbell Hausfeld and Rolair compressor instructions both call for installing the intake filter before normal operation on applicable models.
Where does the air filter go on an air compressor?
The intake filter mounts at the pump’s atmospheric air inlet. A pressure-side filter or water separator goes downstream from the compressor, commonly after the receiver or closer to the point of use. Check the manual because compressor layouts differ.
Which way should an inline air compressor filter face?
Follow the arrow on the filter housing. It should normally point from the compressor toward the tool. Parker states that correct flow direction is required for its coalescing filters to collect liquid and drain it from the media correctly.
Do I need thread tape on an air compressor filter?
Some threaded NPT connections use PTFE tape or another compatible thread sealant, but follow the filter or compressor instructions. Keep sealant away from the inside edge of the fitting so loose material cannot enter the pump or downstream equipment.
Should an air filter be installed before or after the air tank?
The compressor’s intake filter goes before the pump, so it is naturally before the tank. A compressed-air line filter is commonly installed downstream from the receiver. Parker recommends this arrangement for many general coalescing-filter installations.
Can I run an air compressor without the intake filter temporarily?
It is better not to. An open intake gives dust and debris direct access to the pump. Compressor manuals commonly instruct users to install the intake filter before operation and keep the element clean.
Why does my compressor fill slower after installing an air filter?
The filter may be clogged, undersized, incorrectly installed, or too restrictive. Check the element, thread size, intake path, inline flow direction, and pressure drop. Compressor manuals warn that a blocked intake filter can reduce pump performance.