
How to Open a Cordless Drill: Step-by-Step Disassembly Guide
A cordless drill may need to be opened when the trigger stops working, the motor develops a problem, the chuck or gearbox needs inspection, or dust and debris have collected inside the housing. Although the outer shell looks simple, a modern drill contains several parts packed closely together, including the motor, gearbox, trigger switch, wiring, battery terminals, and electronic control components.
Learning how to open a cordless drill is mostly a matter of removing the battery, finding all of the housing screws, and carefully separating the two plastic shell halves. The difficult part is usually not removing the screws. It is opening the housing without breaking plastic clips, pulling wires loose, or allowing springs and small components to move out of position.
Cordless drills also vary considerably by brand and model. Some use ordinary Torx or Phillips screws, while others use tamper-resistant fasteners. Certain models have screws hidden under labels, rubber grips, belt clips, or other accessories. Brushless drills may also contain more electronics than older brushed models, so extra care is needed when the housing is opened.
This guide explains how to open a cordless drill safely, what tools you may need, how to separate the housing, what you will find inside, common problems that make a drill difficult to open, and how to put everything back together correctly.
How to Open a Cordless Drill
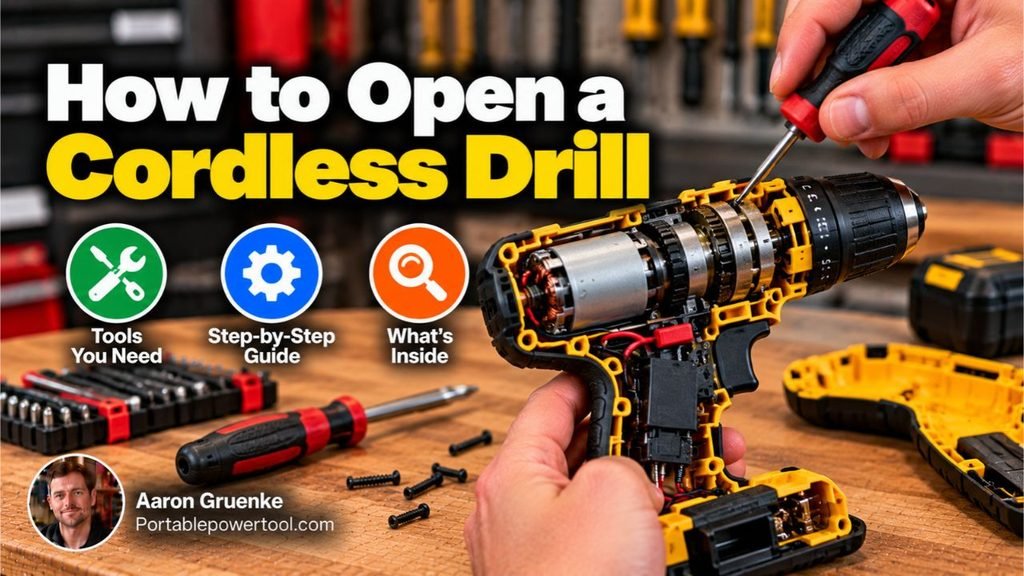
To open a cordless drill, remove the battery first, take off any accessories that block the housing screws, remove all screws holding the case together, and carefully separate the two halves of the plastic housing.
The basic process is:
- Remove the battery.
- Remove the drill bit and any external accessories.
- Identify all housing screws.
- Remove the screws with the correct screwdriver or bit.
- Lay the drill flat on one side.
- Carefully lift the upper housing half.
- Keep internal parts in their original positions.
- Photograph the internal layout before removing anything.
Never open a cordless drill while the battery is installed.
Tools You May Need to Open a Cordless Drill
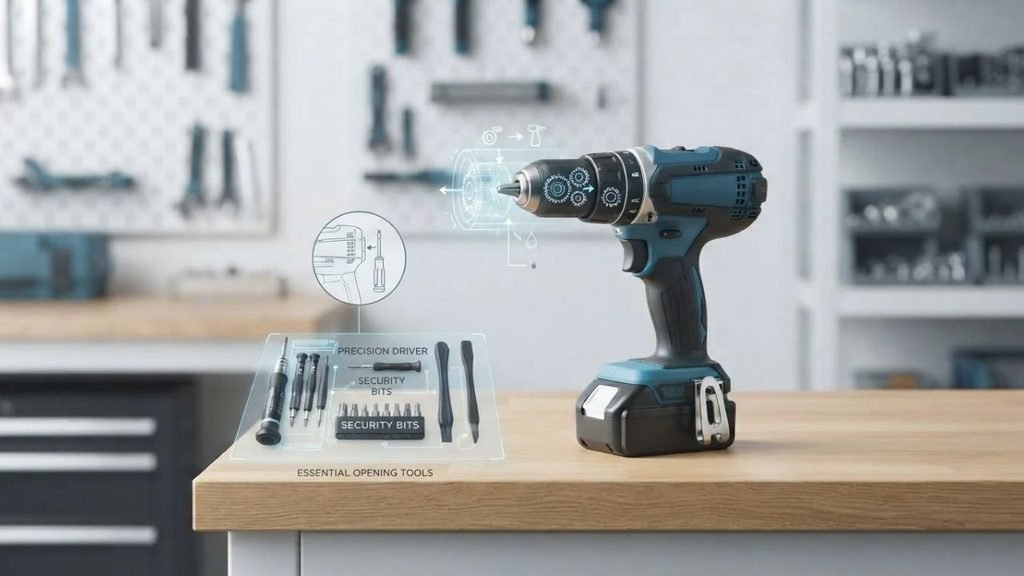
Most cordless drills require only basic hand tools to open.
Common tools include:
- Phillips screwdriver
- Torx screwdriver or bit set
- Tamper-resistant Torx bits
- Small flat plastic pry tool
- Magnetic parts tray
- Needle-nose pliers
- Small brush
- Flashlight
- Smartphone or camera
A magnetic parts tray is especially helpful because drills may use several screws of different lengths.
Keep each screw organized so it returns to its original position during reassembly.
Safety Before Opening a Cordless Drill
The first and most important step is completely disconnecting the drill from its power source.
Remove the Battery
Slide or release the battery from the drill.
Do not simply turn the drill’s direction selector to the center lock position. The battery must be physically removed.
Once the battery is out, briefly press the trigger to confirm that the drill cannot operate.
Remove the Drill Bit
Remove any drill bit, driver bit, hole saw, or other attachment from the chuck.
This makes the drill easier to handle and reduces the chance of accidentally cutting or scratching yourself.
Work on a Clean Surface
Use a clean workbench or table.
Small springs, screws, gears, or clips can easily disappear if they fall onto a cluttered floor.
A light-colored towel or mat can make small parts easier to see.
Identify the Type of Screws
Turn the drill over and inspect the housing.
Most cordless drills use either:
- Phillips screws
- Torx screws
- Tamper-resistant Torx screws
Torx screws have a star-shaped recess.
Tamper-resistant Torx screws look similar but have a small pin in the center.
Using the wrong tool can strip the screw head and make disassembly much harder.
Remove External Accessories
Some accessories may cover housing screws.
Depending on the drill, you may need to remove:
- Belt clip
- Bit holder
- Side handle
- Depth stop
- Auxiliary attachments
Belt clips are commonly attached near the battery base with one screw.
Place these parts and their screws together so they are easy to reinstall.
Find All Housing Screws
Inspect the entire perimeter of the drill.
Screws are commonly located around:
- Handle
- Trigger area
- Motor housing
- Gearbox area
- Battery connection
- Rear housing
Count the screws as you remove them.
If the drill housing does not separate after all visible screws have been removed, stop and inspect again.
Do not force the case open because a hidden screw may still be installed.
Watch for Hidden Screws
Some cordless drills have screws hidden beneath:
- Rubber covers
- Decorative caps
- Labels
- Belt clips
- Battery-area components
- Removable trim
However, do not automatically peel off labels or rubber sections.
Check whether the housing has clearly visible screw locations first.
If you have access to the drill’s service diagram, it can help identify hidden fasteners.
Lay the Drill on Its Side
After removing the screws, place the drill flat on one housing half.
Usually, it is easiest to leave the side containing most internal components facing downward.
The goal is to lift one empty shell half away while leaving the motor, trigger, gearbox, and wiring seated in the other half.
If you lift the drill upright, internal parts may fall out.
Separate the Housing Carefully
Start near the handle and gently separate the two plastic shell halves.
Use your fingers whenever possible.
If the housing is stuck, use a plastic pry tool rather than a metal screwdriver.
Work slowly around the perimeter.
Do not insert a pry tool deeply into the housing because wiring may be located close to the edge.
Do Not Force the Case
If the housing refuses to open, check for:
- A missed screw
- Hidden retaining clip
- Rubber grip holding the halves together
- Dirt around the seam
- Accessory still attached
Excessive force can crack the plastic shell.
Lift the Top Housing Half Slowly
Once the case begins separating, lift the upper shell carefully.
Watch for components that may be attached to both halves.
Some drills contain small parts such as:
- Forward/reverse selector
- Trigger lock components
- Springs
- LED light assemblies
- Battery terminal pieces
If something begins lifting with the upper housing, stop and inspect it before continuing.
Take a Photo Before Removing Anything
Once the drill is open, take several clear photographs.
Capture:
- Wire routing
- Trigger position
- Motor orientation
- Gearbox position
- Battery terminal connections
- LED wiring
- Switch arrangement
These photos can be extremely useful during reassembly.
Internal wires often fit through very specific channels in the housing. If they are routed incorrectly, the case may not close or a wire may become pinched.
What Is Inside a Cordless Drill?
The exact design varies, but most cordless drills contain several major components.
Motor
The electric motor produces rotational power.
Older or lower-cost drills may use a brushed DC motor.
Many newer drills use a brushless motor, which relies on electronic control rather than carbon brushes.
Gearbox
The gearbox sits between the motor and chuck.
It reduces motor speed while increasing torque.
Multi-speed drills usually contain planetary gears that allow the user to select different mechanical ratios.
Trigger Switch
The trigger assembly controls power delivery to the motor.
In many drills, the trigger also controls variable speed.
Modern switches may contain substantial electronics rather than acting as simple mechanical switches.
Forward/Reverse Selector
The selector located above the trigger changes the drill’s rotation direction.
It may be a separate plastic component resting on top of the trigger switch.
Be careful not to lose or misalign it when the case is opened.
Battery Terminals
The battery terminals connect the removable battery pack to the drill electronics.
These metal contacts are usually located at the bottom of the handle.
LED Work Light
Many cordless drills have an LED near the trigger or battery.
Thin wires may run from the trigger electronics to the LED.
Handle these wires carefully because they can be easier to damage than the heavier motor wires.
How to Open a Cordless Drill to Clean It
If you are opening the drill only for cleaning, extensive disassembly may not be necessary.
After removing the housing half, inspect for:
- Sawdust
- Drywall dust
- Metal particles
- Dirt
- Grease buildup
Use a soft brush to remove loose debris.
Low-pressure compressed air may also help in some cases, but avoid forcing debris deeper into bearings, switches, or electronics.
Do not spray water or household cleaner inside the drill.
How to Open a Cordless Drill to Check the Trigger
A faulty trigger may cause symptoms such as:
- Drill does not start
- Intermittent operation
- Drill runs only at certain trigger positions
- Speed control behaves incorrectly
After opening the housing, locate the trigger assembly.
Before disconnecting wires, photograph their positions.
Some drill switches use plug-style connections, while others may have soldered or permanently attached wires.
Do not assume every trigger switch can simply be unplugged.
How to Open a Cordless Drill to Check the Motor
The motor is usually located directly behind the gearbox.
In many designs, the motor and gearbox can be lifted out as one assembly once the housing is open.
However, do not separate them unnecessarily.
The gearbox may contain:
- Small gears
- Bearings
- Grease
- Springs
- Clutch components
If your repair only involves the motor connections, there may be no need to open the gearbox itself.
Brushed vs. Brushless Drill Disassembly
The internal design differs depending on motor type.
Brushed Cordless Drill
A brushed drill may contain:
- DC motor
- Carbon brushes
- Trigger switch
- Basic wiring
- Gearbox
Some brushed motors have externally accessible brushes, while others require opening the drill.
Brushless Cordless Drill
A brushless drill usually contains more electronic components.
You may see:
- Motor controller
- Circuit board
- Additional wiring
- Electronic speed-control components
- Sensors
Because brushless systems rely heavily on electronics, diagnosing them may be more complicated.
Avoid probing or bypassing electronic components unless you understand the circuit.
Why Won’t My Cordless Drill Open?
If all visible screws are removed but the housing remains stuck, several things may be responsible.
You Missed a Screw
This is the most common cause.
Inspect the handle, motor housing, battery base, and gearbox area carefully.
A Belt Clip Screw Is Holding the Housing
Some belt clips attach through both housing halves.
Remove the clip before attempting to separate the shell.
Rubber Overmolding Is Sticking
Soft rubber grips can make two shell halves feel stuck together.
Gently work around the seam rather than forcing one area.
Internal Components Are Catching
The forward/reverse selector or trigger assembly may partially connect the two housing halves.
Open the shell slowly and observe what is resisting movement.
The Housing Uses Clips
Some designs include plastic clips in addition to screws.
Use a plastic opening tool to release them carefully.
Should You Remove the Chuck Before Opening the Drill?
Usually, no.
On many cordless drills, the chuck can remain attached while the outer housing is opened.
The chuck, gearbox, and motor may form one internal assembly.
If your goal is simply to inspect the switch, motor wiring, battery contacts, or electronics, removing the chuck is usually unnecessary.
Chuck removal is a separate repair procedure and may require loosening an internal retaining screw and unscrewing the chuck from the spindle.
Common Mistakes When Opening a Cordless Drill
Taking a drill apart is straightforward, but several mistakes can make reassembly difficult.
Leaving the Battery Installed
Always remove the battery before opening the housing.
Mixing Up Screw Lengths
Some screws may be longer than others.
Installing a long screw in the wrong hole can damage internal plastic or components.
Pulling the Housing Apart Forcefully
If the case does not open easily, look for another screw.
Removing Too Many Internal Parts
Only disassemble what is necessary for the repair.
Every additional part removed increases the chance of losing its original orientation.
Forgetting Wire Routing
Wires are usually positioned in molded channels.
Incorrect routing can prevent the housing from closing or allow screws to damage wires.
Losing the Direction Selector
The forward/reverse selector is often a loose plastic piece located above the trigger.
It can fall out when the housing is lifted.
How to Reassemble a Cordless Drill
Reassembly is basically the reverse of disassembly, but careful alignment matters.
1. Check Component Positions
Make sure the:
- Motor
- Gearbox
- Trigger
- Battery terminals
- Direction selector
- LED
- Wiring
are correctly seated.
2. Route Wires Through Their Channels
Inspect the molded grooves inside the housing.
Lay wires into the same paths shown in your disassembly photos.
Keep wires away from:
- Screw posts
- Gearbox
- Motor shaft
- Moving trigger components
- Housing edges
3. Check the Forward/Reverse Selector
Make sure the selector properly engages the switch mechanism.
Move it gently between forward, reverse, and center-lock positions before closing the shell.
4. Reinstall the Housing Half
Position the second shell half over the drill.
It should settle into place with minimal pressure.
If a large gap remains, do not squeeze the case together with screws.
Something inside is probably misaligned.
5. Reinstall the Screws
Start each screw by hand before fully tightening it.
This helps prevent cross-threading in the plastic screw posts.
Tighten the screws until secure, but do not overtighten them.
Excessive force can strip the plastic threads or crack the housing.
6. Reinstall Accessories
Reattach any:
- Belt clip
- Bit holder
- Side accessories
that were removed.
7. Install the Battery and Test
After the housing is completely closed, reinstall the battery.
Test:
- Forward rotation
- Reverse rotation
- Variable speed
- Gear selector
- Clutch
- LED light
If something feels unusual, remove the battery before reopening the drill.
What If the Drill Does Not Work After Reassembly?
If the drill worked before opening but does not operate afterward, check for simple assembly problems first.
Possible causes include:
- Battery not fully installed
- Trigger wiring disconnected
- Battery contact misaligned
- Forward/reverse selector incorrectly positioned
- Pinched wire
- Motor connection pulled loose
- Electronic connector not fully seated
Remove the battery before opening the housing again.
Compare the internal layout with the photographs you took earlier.
When Should You Avoid Opening a Cordless Drill?
Opening the drill may not be worthwhile in every situation.
Consider professional repair or replacement if:
- The drill is still under warranty.
- The housing is severely damaged.
- The electronics are burned.
- The motor controller has failed.
- The drill has suffered major water damage.
- Repair parts are unavailable.
- You are uncomfortable working around electrical components.
Opening the housing may also affect warranty coverage, depending on the manufacturer and product.
Can Opening a Cordless Drill Damage It?
Yes, especially if the drill is forced apart or internal parts are disturbed unnecessarily.
Common damage includes:
- Broken housing clips
- Stripped screw posts
- Pinched wires
- Broken trigger components
- Damaged connectors
- Misaligned gearbox
- Lost springs
Working slowly and documenting the internal arrangement greatly reduces these risks.
FAQs About How to Open a Cordless Drill
Do I Need to Remove the Battery Before Opening a Cordless Drill?
Yes. Always remove the battery before removing housing screws or accessing internal components.
The drill should be completely disconnected from its power source during disassembly.
What Screwdriver Do I Need to Open a Cordless Drill?
Many cordless drills use Torx screws, although some use Phillips or tamper-resistant Torx fasteners.
Inspect the screw head carefully and use a bit that fits snugly.
Why Does My Drill Case Stay Closed After Removing the Screws?
A hidden screw, belt clip, plastic clip, rubber grip, or internal component may still be holding the housing together.
Do not force the shell apart.
Can I Open a Cordless Drill Without Removing the Chuck?
Yes. In most cases, the chuck can stay attached while the outer drill housing is opened.
Chuck removal is usually necessary only when repairing or replacing the chuck or certain gearbox components.
Will Opening a Cordless Drill Void the Warranty?
It may, depending on the manufacturer, product, and warranty terms.
If the drill is still covered, check the warranty conditions before opening the housing.
Can I Clean the Inside of a Cordless Drill?
Yes, loose dust and debris can generally be removed carefully with a soft brush.
Avoid spraying liquids onto the motor, switch, battery terminals, or electronic components.
Is It Safe to Open a Brushless Cordless Drill?
A brushless drill can be opened after the battery is removed, but its electronics are generally more complex than those in a simple brushed drill.
Avoid altering or bypassing the motor controller and electronic circuitry.
Why Should I Take Pictures Before Removing Internal Parts?
Photos provide a record of wire routing, component orientation, and switch position.
They make it much easier to put the drill back together correctly.
Conclusion
Learning how to open a cordless drill is usually straightforward: remove the battery and accessories, locate every housing screw, remove the screws with the correct tool, lay the drill flat, and carefully lift one side of the housing.
The most important part is working slowly. Do not force the plastic case apart, and avoid removing more internal components than necessary. Keep screws organized, take photographs of the internal layout, and pay particular attention to wiring, the trigger assembly, and the forward/reverse selector.
For simple cleaning, switch replacement, contact inspection, or basic troubleshooting, opening the housing may be enough to identify the problem. If the drill contains damaged electronics, a badly worn gearbox, or other complex faults, professional repair or replacement may be the more practical option.