
How Far Apart and Where to Put Plastic Cap Staples Correctly
If you are wondering how far apart and where to put plastic cap staples, there is an important detail to know first: there is no single spacing rule for every material.
For housewrap, plastic cap staples are commonly installed along studs or another solid nailing surface, and some manufacturers specify spacing between about 6 and 18 inches on center. For synthetic roofing underlayment, a common pattern is around 12 inches on center at laps and wider spacing in the field, although high-wind installations usually require closer fastening. Manufacturer instructions always take priority because fastening patterns vary by product.
The caps should sit flat against the material without cutting, crushing, or tearing it. Placement is just as important as spacing because a poorly driven cap staple can create a weak point even when the spacing is correct.
This guide explains where plastic cap staples should go, typical spacing for housewrap and roof underlayment, how close to place them around edges and openings, and the mistakes that can cause tearing or poor holding power.
How Far Apart and Where to Put Plastic Cap Staples
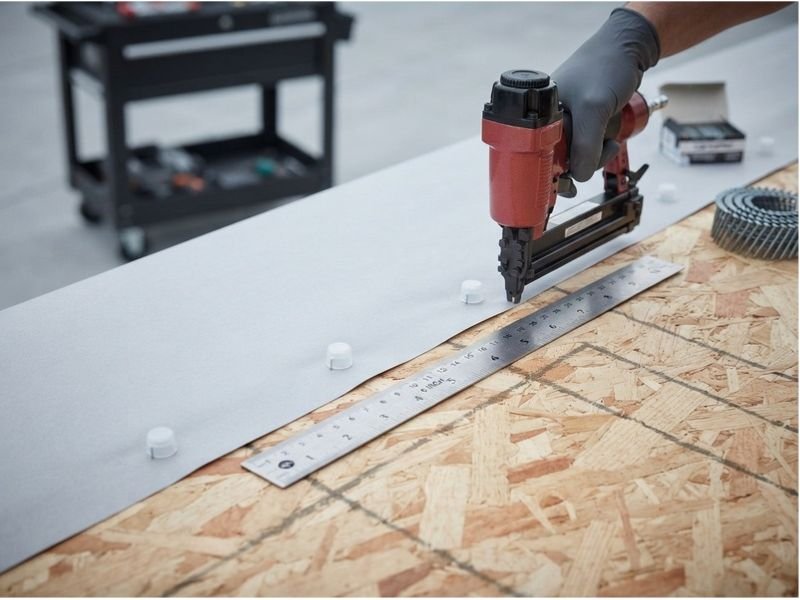
For a quick starting point, plastic cap staple spacing depends on what you are fastening.
A useful general reference is:
| Application | Typical Placement |
| Housewrap/WRB | Along studs or solid nail-base material |
| Some housewrap systems | About 6–18 inches vertically along stud lines |
| Roofing underlayment laps | Around 12 inches on center |
| Roofing underlayment field | Often wider spacing, such as staggered rows around 24 inches on center |
| High-wind roofing areas | Often closer, such as 6 inches at laps and 12 inches in the field |
These are examples rather than universal requirements. DuPont, for example, specifies recommended cap fasteners no closer than 6 inches and no farther than 18 inches along vertical stud lines for certain Tyvek WRB installations. GAF’s FeltBuster instructions call for 12-inch spacing at side and end laps and two staggered field rows at 24 inches on center under standard conditions, with closer fastening in high-wind applications.
Before starting, check the printed fastening marks and installation sheet for the exact housewrap, roofing felt, or synthetic underlayment you are using.
What Are Plastic Cap Staples?
Plastic cap staples combine a metal staple with a relatively wide plastic washer or cap.
Instead of the narrow staple crown pressing directly against housewrap or roofing underlayment, the plastic cap spreads the holding pressure over a larger area.
This provides several benefits.
The larger surface helps reduce tearing, improves holding strength, and makes the fastener less likely to pull through thin building membranes. Cap fastener manufacturers specifically market these staples for materials such as housewrap, roofing felt, and synthetic roofing underlayment.
A typical cap may be around 1 inch in diameter, although the dimensions and staple lengths differ between products.
Plastic cap staples are commonly installed using:
- Pneumatic cap staplers
- Manual cap staplers
- Cap hammers
- Specialized autofeed fastening tools
The correct staple length depends on the material underneath the membrane and the manufacturer’s penetration requirements.
Where Should Plastic Cap Staples Go on Housewrap?
When installing housewrap or a water-resistive barrier (WRB), cap staples generally need to penetrate solid material rather than simply being scattered randomly across the wall.
For wood-frame construction, that usually means fastening along:
- Wall studs
- Structural sheathing backed by framing
- Band or rim framing
- Other approved nail-base material
DuPont’s Tyvek guidance recommends fastening the WRB to studs or other nail-base material and keeping the fastening pattern along the vertical stud lines.
Follow the Stud Lines
If your wall framing is 16 inches on center, the horizontal distance between fastening lines will normally follow those studs.
You then place the cap staples vertically along each required stud line according to the manufacturer’s spacing.
This creates a pattern rather than randomly stapling the middle of the housewrap.
For example:
- First fastening line follows one stud.
- Next fastening line follows the next required stud.
- Staples continue vertically along each fastening line.
- Seams, corners, and openings receive treatment according to the WRB manufacturer’s instructions.
Some housewrap products include printed marks to make stud alignment easier.
Keep Fasteners Away From Certain Window Areas
Windows and doors require special treatment because the WRB must be integrated with flashing.
For certain Tyvek installations, DuPont instructs installers not to place fasteners within 6 inches of window sills and jambs or within 9 inches of the head of the rough opening.
That space allows the WRB and flashing system to be installed correctly.
Do not assume those dimensions apply to every brand. Follow the instructions supplied with your particular WRB and flashing system.
How Far Apart Should Plastic Cap Staples Be on Housewrap?
A commonly encountered range for cap fasteners on housewrap is approximately 6 to 18 inches on center vertically, but the exact spacing depends on the WRB.
For certain DuPont Tyvek installations, cap staples or equivalent cap fasteners should be:
No closer than 6 inches and no farther than 18 inches along vertical stud lines.
“On center” means the measurement is taken from the center of one staple to the center of the next.
For example, if your specified spacing is 16 inches on center:
- Install one staple.
- Measure approximately 16 inches along the fastening line.
- Install the next staple.
- Continue the pattern.
Do not automatically use 16 inches just because wall studs are 16 inches apart. Stud spacing describes the horizontal framing layout; fastener spacing may describe the vertical distance between fasteners on those studs.
Those are two different measurements.
Where Should Plastic Cap Staples Go on Roofing Underlayment?
Roofing underlayment uses a different fastening pattern from housewrap.
Instead of primarily following vertical studs, roofing fasteners are generally located in designated lap areas and field fastening zones.
Many synthetic underlayments have printed:
- Fastening lines
- Overlap lines
- Nail or staple targets
- Alignment grids
Use those marks whenever they are provided.
Fasten Along Side Laps
The side lap is where one horizontal course of underlayment overlaps the course below it.
Cap staples are commonly installed along this area according to the printed fastening pattern.
Fasten End Laps
An end lap occurs where the end of one roll overlaps the next section.
These areas also need fastening because wind can work underneath poorly secured overlaps.
Add Field Fasteners
The field means the main central area of the underlayment away from its edges and laps.
Field fasteners prevent the large middle portion of the sheet from lifting or moving.
They are often arranged in staggered rows rather than one straight line.
How Far Apart Should Plastic Cap Staples Be on Roofing Underlayment?
The answer depends heavily on the specific underlayment.
For one real-world example, GAF specifies the following standard fastening pattern for FeltBuster synthetic roofing underlayment:
- Side and end laps: 12 inches on center
- Field: two staggered rows at 24 inches on center
For high-wind conditions, GAF specifies closer spacing:
- Side and end laps: 6 inches on center
- Field: two staggered rows at 12 inches on center
That does not mean every synthetic underlayment uses exactly those dimensions.
Another manufacturer may print a different fastening schedule directly on the roll.
Always treat the underlayment manufacturer’s pattern as the primary instruction.
Should Plastic Cap Staples Go Through the Overlap?
For many roofing underlayments, yes, the fastening pattern specifically includes the side and end lap areas.
The cap holds the overlapping layers against the roof deck.
However, overlap width and fastener placement differ between products.
For example, GAF’s standard FeltBuster installation uses a 3-inch side lap and a minimum 6-inch end lap for certain roof slopes, with fasteners installed according to its specified schedule.
Housewrap is different.
You should not simply copy a roofing-underlayment fastening pattern onto a wall WRB. Housewrap seams, flashing, and attachment points have their own requirements.
How Deep Should Plastic Cap Staples Be Driven?
A plastic cap staple should normally be driven flush and flat against the membrane.
The cap should hold the material securely without crushing or cutting through it.
For roofing applications, GAF specifies that cap fasteners should be installed flush to the deck and at approximately a 90-degree angle to the roof deck.
You want the finished staple to look like this:
- Cap lies flat.
- Membrane remains intact.
- Staple is fully seated.
- Cap is not cracked.
- Staple is not sticking up.
- Material is not deeply crushed.
Do Not Overdrive Plastic Cap Staples
One of the most common installation mistakes is setting the tool pressure too high.
An overdriven cap staple can:
- Crush the plastic cap
- Tear the membrane
- Cut through housewrap
- Damage synthetic underlayment
- Reduce holding strength
- Create an unnecessary penetration point
A cap that is buried deeply into the membrane is not better secured.
It may actually perform worse because the membrane has been weakened around the fastener.
Test your stapler on a scrap or inconspicuous area before fastening an entire wall or roof.
If using a pneumatic cap stapler, adjust the tool or air pressure until the cap sits flat without deforming the membrane.
Do Not Underdrive the Staples Either
An underdriven staple creates a different problem.
If the cap remains raised above the surface, it may:
- Catch on siding
- Interfere with roofing
- Allow the membrane to move
- Prevent proper contact between layers
- Become loose
The staple legs must penetrate sufficiently into the approved substrate while the cap sits firmly against the membrane.
Fastener length requirements vary.
For example, GAF requires fasteners for FeltBuster to penetrate at least 3/4 inch into wood decking or pass through plywood or OSB decking as specified in its instructions.
Why Plastic Cap Staple Spacing Matters
Fastener spacing controls how well the membrane stays attached before the final siding or roofing is installed.
Spacing them too far apart can allow the material to:
- Billow in wind
- Tear around individual fasteners
- Fold or wrinkle
- Pull loose
- Shift during construction
Putting far more fasteners than required is not necessarily better either.
Every staple penetrates the membrane. Following the approved fastening pattern provides adequate holding power without creating unnecessary penetrations.
Plastic Cap Staples for Housewrap vs Roofing Underlayment
The biggest mistake beginners make is assuming one fastening pattern works everywhere.
It does not.
Housewrap
For housewrap, think in terms of stud lines and wall framing.
Fasteners commonly run vertically along the framing according to the WRB instructions.
Attention around windows, doors, corners, and flashing is especially important.
Roofing Underlayment
For roofing underlayment, think in terms of:
- Side laps
- End laps
- Field rows
- Roof edges
- Wind exposure
Roofing products commonly print the recommended staple locations directly on the material.
The pattern may also become tighter when the roof will be exposed before shingles are installed or when high winds are expected.
Should You Put Cap Staples on Every Stud?
Not necessarily for every product and every installation.
For many WRB systems, the manufacturer wants fasteners aligned with stud lines or another approved nail base.
However, the precise schedule can depend on:
- Stud spacing
- Sheathing type
- WRB type
- Temporary versus permanent attachment
- Building height
- Wind exposure
- Exterior cladding
- Manufacturer requirements
Do not assume “every stud” automatically answers the entire fastening question.
Check both the horizontal fastening lines and the required vertical spacing.
Can You Use Regular Staples Instead of Plastic Cap Staples?
Sometimes a manufacturer permits alternatives, but you should not substitute them automatically.
The advantage of the plastic cap is its much larger bearing surface.
A narrow staple concentrates force over a small area. Under wind pressure, a thin membrane can tear around the staple.
A plastic cap spreads that load over a much wider area.
Manufacturers of cap fastening systems specifically note that this larger surface improves holding power and reduces the likelihood of tearing housewrap and underlayment.
If the product instructions specify plastic cap staples or cap nails, use an approved cap fastener.
Common Plastic Cap Staple Placement Mistakes
Correct spacing will not help much if the fasteners are poorly installed.
Randomly Stapling Between Studs
For a WRB installation that requires fastening into studs, random staples in unsupported locations do not provide the intended holding strength.
Follow the framing.
Overdriving the Cap
A cap should hold the material, not cut into it.
Reduce tool pressure or adjust the depth setting if the cap is crushing the membrane.
Leaving Staples High
Raised caps can interfere with the next layer of construction.
Drive them flush.
Ignoring Printed Fastener Marks
Many synthetic underlayments make installation easier by printing fastening locations directly on the roll.
Use them.
Using Roof Spacing for Housewrap
The materials may look similar, but their installation patterns are different.
Fastening Through Flashing Areas
Avoid putting unnecessary fasteners where flashing tape or another self-adhered flashing product needs uninterrupted contact.
DuPont specifically cautions against locating its wrap cap fasteners where certain Tyvek tapes or self-adhered flashing products will be applied.
Ignoring High-Wind Requirements
A normal fastening pattern may not be enough when the membrane will experience strong winds.
Some roofing manufacturers specify much tighter spacing for high-wind exposure.
How to Lay Out Plastic Cap Staples Neatly
A consistent pattern makes installation easier to inspect and reduces missed areas.
For housewrap:
- Identify the stud locations.
- Mark them if they are not visible.
- Unroll and position the WRB correctly.
- Start fastening along an approved stud line.
- Maintain the manufacturer’s vertical spacing.
- Continue across the wall.
- Leave required clearances around openings.
- Complete seams and flashing according to the WRB instructions.
For roofing underlayment:
- Start with a clean, dry roof deck.
- Roll the underlayment parallel to the eave when specified.
- Align the printed overlap lines.
- Fasten the side-lap area.
- Secure end laps.
- Install field fasteners on the marked rows.
- Check every cap before moving to the next course.
Working systematically is better than randomly adding staples where the material looks loose.
Safety When Installing Plastic Cap Staples
Cap staplers are still fastening tools capable of causing serious injury.
Keep your hands away from the tool nose and never point a pneumatic stapler toward yourself or another person.
Wear appropriate eye protection.
Roof work adds additional hazards. Roof surfaces can become extremely slippery from dust, moisture, or loose underlayment. Manufacturer instructions also emphasize proper roofing safety equipment and safe working practices.
If you are uncomfortable working at roof height, professional installation is safer than trying to learn roofing techniques while standing on a steep roof.
FAQs About How Far Apart and Where to Put Plastic Cap Staples
How far apart should plastic cap staples be?
There is no universal distance. For certain housewrap installations, cap fasteners may be placed approximately 6–18 inches on center along stud lines. Some roofing underlayments specify 12-inch spacing at laps with wider field spacing. Follow the exact manufacturer’s fastening schedule for your material.
Where do plastic cap staples go on housewrap?
They generally go along stud lines or another approved nail-base surface rather than being randomly placed across the wall.
Fastening around windows and doors may require additional clearance for proper flashing.
How far apart should cap staples be on roofing felt?
Spacing varies by product. A synthetic roofing underlayment may use approximately 12-inch spacing along laps and wider spacing through the field, while high-wind installations may require closer fasteners.
Always check the markings and installation instructions on the roll.
Should cap staples go into studs?
For many housewrap systems, yes. Fastening into framing provides stronger attachment than relying only on thin or unsuitable sheathing.
Follow the WRB manufacturer’s approved substrate requirements.
How tight should a plastic cap staple be?
The cap should sit flat and flush against the material without crushing, cutting, or tearing it.
A raised cap is underdriven; a deeply buried or distorted cap is overdriven.
Can plastic cap staples be used for synthetic roof underlayment?
Yes, many synthetic roofing underlayments allow or require corrosion-resistant fasteners with plastic caps.
Confirm that the exact staple and cap combination is approved for your underlayment.
Can you put too many cap staples in housewrap?
Yes. More fasteners are not automatically better because every fastener penetrates the WRB.
Use the fastening schedule specified by the manufacturer rather than adding unnecessary holes.
Should plastic cap staples be closer together near roof edges?
Some underlayment systems require different fastening patterns for high-wind or exposed conditions, which can include closer spacing.
Roof edges are especially vulnerable to wind uplift, so follow the exact underlayment and local code requirements rather than using a generic pattern.
Conclusion
The answer to how far apart and where to put plastic cap staples depends mainly on whether you are installing housewrap, roofing underlayment, or another membrane.
For housewrap, cap staples are generally placed along stud lines or approved solid nail-base material, with some systems using spacing in the range of approximately 6–18 inches on center. For synthetic roofing underlayment, the pattern commonly includes staples along side and end laps plus additional staggered fasteners through the field.
More important than memorizing one number is following the fastening pattern printed on or supplied with your specific product. Keep every plastic cap flat, flush, properly supported, and correctly spaced. That provides better holding power without unnecessarily tearing or damaging the membrane.