
How to Connect Air Compressor Hose in a Tight Area Correctly
To learn how to connect air compressor hose in a tight area, shut down and depressurize the compressor, then use a compact 90-degree swivel fitting, short flexible whip hose, or remotely mounted quick coupler instead of forcing the main hose into a sharp bend. The best solution depends on whether the problem is limited hand clearance, insufficient room for the hose bend, or an inaccessible compressor outlet.
A direct hose connection may work in an open shop, but it often becomes impractical when the compressor sits beneath a workbench, inside a service vehicle, behind equipment, or close to a wall. The hose may kink, the quick-connect collar may be impossible to operate, or tightening the fitting may twist and damage the compressor’s regulator or manifold.
The connection also has to remain safe under pressure. Every elbow, coupler, adapter, and hose section must be rated above the compressor’s maximum possible pressure—not merely the pressure you usually set at the regulator. Thread type, fitting size, coupler profile, airflow capacity, and hose bend radius all matter.
In this guide, I’ll explain the best ways to connect an air compressor hose in a confined space, how to identify the correct fittings, how to install them without damaging the compressor, and how to test the finished connection for leaks.
The Best Ways to Connect an Air Compressor Hose in a Tight Area
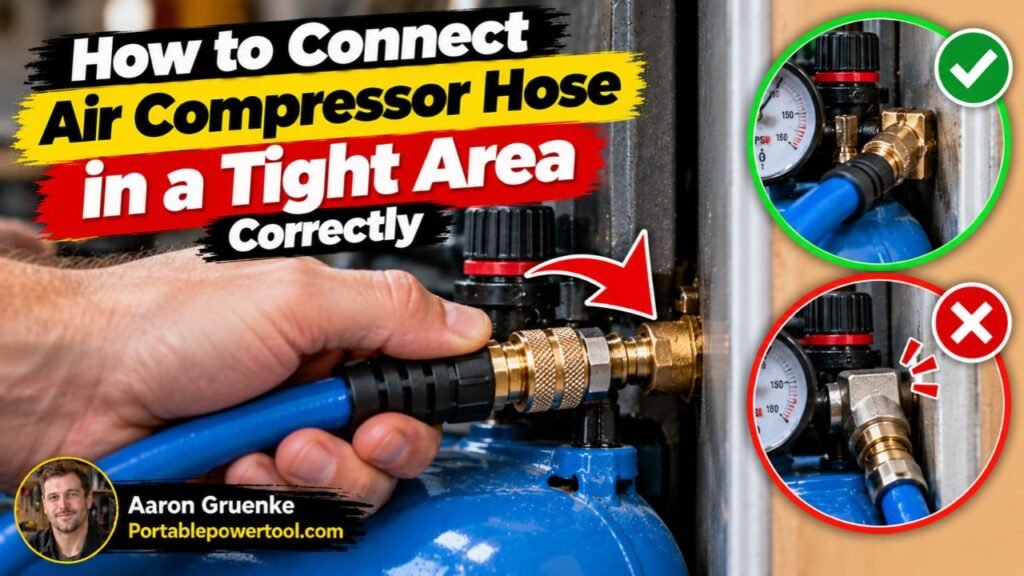
The most practical solution is usually to change the direction or location of the connection rather than trying to bend the main hose more sharply.
A flexible air hose needs room to curve naturally. When the compressor outlet faces a wall or cabinet, bending the hose immediately after the fitting can restrict airflow, damage the reinforcement, and eventually cause the hose to crack or fail.
Three solutions work especially well: a swivel elbow, a short whip hose, or a remote coupler.
Use a 90-Degree Swivel Elbow
A 90-degree swivel elbow changes the direction of the air outlet without forcing the hose to make a sharp turn.
The elbow connects to the compressor’s regulated outlet, and the quick-connect coupler attaches to the other end. The hose can then run sideways, downward, or toward the front of the compressor instead of projecting straight into the obstruction.
A swivel design is preferable to a basic fixed pipe elbow when orientation is important. A fixed NPT elbow may point in the wrong direction when it becomes tight. Continuing to turn it can crack a regulator body or strip a threaded port, while loosening it to obtain the desired angle can create a leak.
An alignment swivel lets you tighten the threaded joint correctly and then position the outlet where it is accessible. Verify whether the fitting is intended only for installation alignment or rated for continuous movement. A normal alignment swivel should not be treated as a rotary union for a hose that twists constantly during use.
A compact street elbow, which has male threads on one end and female threads on the other, can reduce the number of adapters needed. However, a swivel street elbow is easier to orient accurately than a fixed version.
Install a Short Whip Hose
A whip hose is a short section of flexible air hose placed between the compressor outlet and the main quick coupler.
Instead of trying to reach behind the compressor each time, you connect the whip hose permanently and position its free end in an accessible location. The main shop hose then plugs into the coupler at the end of the whip.
This is often the best solution when there is not enough hand clearance to pull back the quick-connect collar. It also isolates the compressor’s rigid regulator and manifold from hose movement. When the main hose is pulled, twisted, or stepped on, the flexible whip absorbs much of that stress.
Choose a whip hose with an internal diameter suitable for the tools you use. A small 1/4-inch hose may be adequate for nailers and intermittent inflation, but a higher-air-demand spray gun, impact wrench, or sander may benefit from a 3/8-inch hose and higher-flow fittings.
Keep the whip only as long as necessary. It should be long enough to place the coupler in a reachable position but short enough to avoid tangles, heat exposure, or contact with moving components.
Mount a Remote Quick Coupler
When the compressor is permanently installed under a bench, inside a cabinet, or in a service vehicle, the best arrangement may be a remote outlet.
A short rated hose connects the compressor to a coupler or manifold mounted on the front of the bench, cabinet wall, or vehicle panel. You can then connect and disconnect the main air hose without reaching the compressor at all.
Use a proper bulkhead fitting if the air line passes through a panel. Do not run a hose through a sharp unprotected hole where vibration can cut through the outer cover. A bulkhead fitting or protected grommet provides a secure, abrasion-resistant transition.
A remote manifold can also provide more than one outlet, separate regulators, or different coupler profiles. However, each added connection creates another potential leak, so keep the system as simple as the application allows.
| Tight-Space Solution | Best Use | Main Advantage | Important Consideration |
|---|---|---|---|
| 90-degree swivel elbow | Outlet faces a wall or obstruction | Changes direction with minimal added hose | Use a full-flow, pressure-rated fitting |
| Short whip hose | Coupler is hard to reach | Moves the connection and reduces stress on the regulator | Protect it from heat and abrasion |
| Remote coupler or manifold | Permanent under-bench or vehicle installation | Places the outlet where it is easy to access | Use a proper bulkhead mount and rated line |
| Compact one-hand coupler | Not enough room to pull a standard collar | Easier connection in limited hand space | Must match the plug profile |
| Straight low-profile adapter | Space is limited only by fitting length | Keeps the assembly compact | May not solve hose-bending problems |
Key Takeaways:
- Use an elbow when the hose needs to change direction immediately.
- Use a whip hose when the compressor outlet or coupler is difficult to reach.
- Use a remote bulkhead coupler for a permanent confined installation.
- Do not force an air hose into a bend tighter than its rated minimum radius.
Identify the Connection Before Buying Fittings
Air fittings that look similar are not necessarily interchangeable. Before purchasing an elbow, swivel, plug, or coupler, identify both the thread type and the quick-connect profile.
Check the Compressor Outlet
Most portable air compressors sold for general use in the United States have a regulated outlet fitted with a quick-connect coupler. Behind that coupler, the threaded port is often 1/4-inch NPT, but 3/8-inch NPT and other sizes are also used.
Do not assume the port is 1/4 inch simply because that size is common. Check the compressor manual, fitting markings, or actual thread specification.
Imported equipment may use BSP threads rather than NPT. NPT and BSP fittings can appear close in size, but their thread forms and pitches differ. Forcing one into the other can damage the port and create an unreliable seal.
Match the Quick-Connect Profile
Quick-connect plugs and couplers come in different profiles, including common industrial, automotive, ARO, and high-flow patterns.
Two fittings may both be labeled 1/4 inch but still fail to connect because that measurement can refer to the pipe thread rather than the plug profile.
The safest approach is to use the same coupler and plug series throughout the system. If you are unsure what is already installed, compare the plug shape carefully or replace the coupler and plugs as a matched set.
A mismatched plug may seem to lock into a coupler but leak, disconnect unexpectedly, or restrict airflow.
Choose the Correct Flow Capacity
Fitting size affects more than physical compatibility. Small internal passages can reduce airflow and cause pressure loss while a tool is running.
For a brad nailer, blow gun, or tire inflator, common 1/4-inch fittings are usually adequate. Continuous-use tools such as grinders, sanders, paint guns, and larger impact wrenches may perform better with 3/8-inch hose and full-flow or high-flow couplers.
Do not create a tight-space solution by stacking several tiny adapters together. Each restriction and directional change can reduce available airflow.
Confirm the Pressure Rating
Every component should be rated for at least the maximum pressure it could experience.
A fitting installed downstream of the regulator normally sees regulated pressure, but a failure or incorrect connection can expose components to more pressure than expected. Use parts specifically intended for compressed-air systems and follow the compressor manufacturer’s limits.
Do not use an unmarked plumbing fitting simply because its threads fit. Temperature, vibration, material strength, and pressure cycling all affect suitability.
Key Takeaways:
- Verify NPT, BSP, thread size, and fitting gender before buying adapters.
- Match the quick-connect plug and coupler profile exactly.
- Avoid undersized fittings when operating high-CFM tools.
- Use only components rated for compressed air and the system’s maximum pressure.
How to Connect Air Compressor Hose in a Tight Area Step by Step
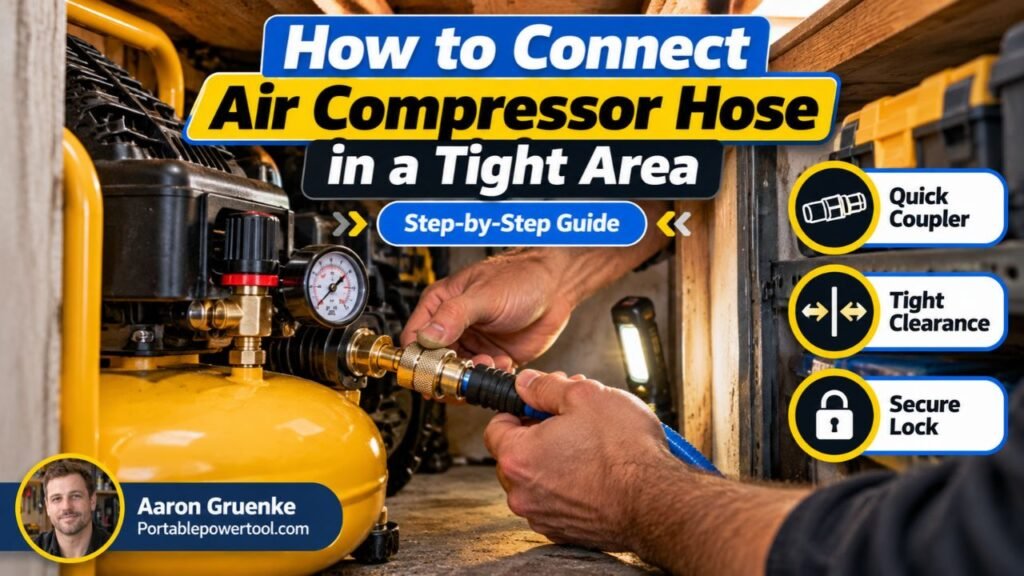
Compressed air stores considerable energy. Before removing any fitting, make sure the section you are opening contains no pressure.
Important Tip: Never remove a regulator, elbow, coupler, or hose fitting while the compressor tank or connected line is pressurized. Turning the compressor off does not automatically release stored air.
1. Shut Down the Compressor
Turn the compressor off and unplug it from the electrical outlet. For a gasoline-powered compressor, shut down the engine according to the manufacturer’s procedure.
Allow hot components to cool before reaching around the pump, discharge tube, motor, or engine.
2. Isolate or Drain the Air Supply
If the compressor has a tank outlet valve, close it and bleed pressure from the downstream line.
If you are removing a fitting that is connected directly to a tank or to a system without an isolation valve, drain the tank to zero pressure.
Watch the pressure gauge and confirm that it reaches zero. Then briefly operate the downstream coupler or drain valve to make sure no trapped pressure remains.
Do not rely solely on a gauge that may be stuck or inaccurate.
3. Determine Why the Area Is Difficult
Look closely at the available space.
If the hose can connect but bends sharply against a wall, use a 90-degree elbow.
If there is enough room for the hose but not your hand, use a whip hose or one-hand coupler.
If the compressor will remain permanently inaccessible, install a remote outlet.
Choosing the right arrangement now prevents an unnecessary stack of adapters later.
4. Plan the Hose Route
The hose should leave the connection without kinking or rubbing against sharp metal.
Keep it away from:
- Exhaust components and hot compressor tubing
- Belts, fans, pulleys, and wheels
- Hinges, drawers, and cabinet doors
- Sharp sheet-metal edges
- Areas where the hose can be stepped on or crushed
Leave enough slack for normal vibration, but do not leave a large loose loop where it can snag.
5. Remove the Existing Coupler if Necessary
Use a wrench on the fitting’s flats rather than gripping the round body with pliers.
Place a second backup wrench on the regulator, manifold, or adjacent fitting whenever possible. The backup wrench prevents the entire assembly from twisting while you loosen the coupler.
This is especially important with regulators that have cast aluminum, zinc, or composite bodies. Applying all the torque through the regulator can crack it.
6. Apply Sealant Only Where Appropriate
Tapered pipe threads such as NPT normally require an approved pneumatic thread sealant or PTFE tape.
When using PTFE tape, wrap it in the direction the fitting will tighten so it does not unravel during assembly. Keep the first thread or two reasonably clear to reduce the chance of loose tape entering the air system.
Do not apply thread tape to:
- The nose of a quick-connect plug
- Flare sealing surfaces
- Compression seats
- O-rings
- Swivel sealing surfaces that use an internal seal
Those connections seal through their designed mating surfaces, not through the threads.
7. Install the Elbow or Whip Hose
Thread the fitting in by hand first.
It should engage smoothly for several turns. If it binds immediately, stop and verify the thread type and alignment.
Tighten it with the correct wrench while supporting the adjoining component with a backup wrench. Follow the fitting or compressor manufacturer’s tightening guidance.
Do not keep turning a fixed elbow far beyond normal tightness just to make it face the correct direction. Use an orientable swivel fitting instead.
8. Install the Quick Coupler
The supply side should normally use the female quick coupler, which closes when the hose is disconnected. The mating plug is installed on the hose.
This arrangement prevents the compressor from discharging freely when no hose is attached.
Position the coupler so you have enough room to operate its collar or release mechanism. A fitting that technically fits but cannot be disconnected is not a useful installation.
9. Secure a Remote Hose or Coupler
If using a whip hose or remote manifold, support it so its weight does not hang entirely from the compressor outlet.
Use padded clamps or brackets that do not crush the hose. At a panel penetration, use a proper bulkhead fitting or abrasion protection.
Do not secure the hose so tightly that normal compressor vibration pulls on the fittings.
10. Pressurize and Test Gradually
Close the drain valve, reconnect power, and allow the compressor to build a modest amount of pressure first.
Listen for major leaks. Then apply a leak-detection solution or soapy water to each threaded connection. Growing bubbles indicate leakage.
After correcting any leaks, bring the system to normal working pressure and repeat the test.
Never search for a high-pressure air leak with your bare hand. A concentrated air jet can carry debris or injure tissue.
11. Test With the Intended Tool
Connect the main hose and operate the tool.
Watch the regulated pressure while air is flowing. A large pressure drop may indicate an undersized hose, restrictive elbow, incompatible quick coupler, or excessive number of adapters.
A connection can be leak-free yet still restrict the tool’s airflow.
Key Takeaways:
- Depressurize the exact section you are opening before loosening fittings.
- Use a backup wrench to protect the regulator or manifold.
- Apply sealant only to threads designed to seal with it.
- Leak-test first at low pressure and again at normal operating pressure.
Choosing the Best Setup for Different Tight Areas

The ideal solution depends on the physical limitation you are trying to solve.
When the Compressor Is Close to a Wall
Use a compact 90-degree swivel elbow so the coupler and hose run parallel to the wall.
Leave enough clearance for air circulation around the compressor. Moving the hose connection does not make it safe to operate a compressor in a sealed, unventilated cabinet.
When the Compressor Is Under a Workbench
A short whip hose leading to a coupler mounted near the front of the bench is usually more convenient than reaching underneath every time.
Protect the hose from drawers, stored tools, and sharp bench hardware. If the line passes through the bench, use a bulkhead fitting.
When the Compressor Is Inside a Service Vehicle
Use a pressure-rated flexible connection to isolate vibration, then mount the outlet where it can be reached from the door.
Route the line away from hot exhaust systems, electrical wiring, moving equipment, and cargo that may crush it. Secure the hose at intervals without pulling it tight.
When There Is No Room to Pull the Coupler Collar
Use a one-hand or push-to-connect coupler, or move the coupler to the end of a whip hose.
Confirm that the coupler automatically locks and that its plug profile matches the hose.
Do not grind or modify a standard coupler collar to make it fit.
When the Hose Immediately Kinks
Install an elbow or swivel at the fitting. Do not try to solve the problem by heating the hose, crushing it into place, or tying it against a sharp bend.
A kink reduces the internal passage and concentrates stress in the reinforcement layers.
When Using a High-Air-Demand Tool
Use the largest practical full-flow fitting arrangement that matches the compressor and hose.
A compact elbow with a very small internal opening may be adequate for a nailer but noticeably restrict a spray gun or pneumatic sander.
For high-CFM equipment, a 3/8-inch whip hose and high-flow couplers may be a better solution than several 1/4-inch adapters.
Common Mistakes When Making a Tight-Space Connection
One common mistake is forcing the hose against a wall until it bends sharply at the fitting. This may work temporarily, but repeated pressure cycles and vibration can damage the hose near its most highly stressed point.
Another mistake is stacking a tee, reducer, nipple, elbow, and coupler together without supporting the assembly. The long rigid stack creates leverage on the compressor’s regulator or manifold. A short flexible whip is usually safer.
Using the wrong quick-connect profile is another frequent problem. The plug may not seat fully, or the coupler may leak as soon as the hose moves.
Overtightening tapered threads can also crack a regulator body. Pipe threads become tighter as they engage, so more force is not always better.
Some users apply PTFE tape to every connection, including flare seats and quick-connect plugs. Tape on a non-thread-sealing surface does not fix a leak and may introduce fragments into the air system.
Another serious mistake is connecting to the wrong port. Do not remove or replace the pressure-relief valve, tank drain, pressure-switch line, or other safety component to create an air outlet. Use only the compressor’s designated outlet or a manufacturer-approved connection point.
How to Find and Fix Leaks After Installation
A small leak may not be loud enough to hear in a busy shop, but it can make the compressor cycle more often and waste electricity.
Apply soapy water or commercial leak-detection liquid to each connection while the system is pressurized. Look for bubbles that continue growing.
Leak at an NPT Thread
Depressurize the system, remove the fitting, clean the threads, and reapply the correct sealant.
Inspect for cracked female ports or damaged threads before reinstalling the fitting.
Do not try to stop a leak simply by tightening indefinitely.
Leak at a Quick Coupler
The coupler may contain a worn internal seal, contamination, or an incompatible plug.
Try a known matching plug. If the coupler still leaks, replace it rather than attempting an unreliable field modification.
Leak at a Swivel
Determine whether the leak comes from the threaded joint or the swivel’s internal seal.
Thread sealant can correct only the threaded connection. A leaking internal swivel seal normally requires replacement of the fitting.
Leak at a Hose End
A leaking crimp or factory hose end usually means the hose assembly needs repair or replacement.
Do not secure a high-pressure air hose with a random household clamp unless the hose and fitting manufacturer specifically approves that method. Use compressed-air-rated barbs, ferrules, clamps, or professionally crimped ends.
Pressure Drops Only While the Tool Runs
This may be a flow restriction rather than a leak.
Check hose diameter, hose length, regulator capacity, coupler profile, and the internal bore of elbows and adapters. Compare the tool’s air requirement with the compressor’s delivered CFM.
Pro Tip: When diagnosing pressure loss, compare the gauge reading with the tool stopped and while the trigger is held open. A large dynamic drop often reveals an airflow restriction that is invisible during a static leak test.
Key Takeaways:
- Growing soap bubbles reveal leaks safely.
- Thread sealant cannot repair a worn quick coupler or swivel seal.
- Pressure loss during use may come from restricted airflow rather than leakage.
- Replace damaged hose ends with properly rated components.
Safety Rules for Tight Air-Hose Installations
Use only hose, tubing, fittings, and manifolds specifically rated for compressed air.
Do not build a permanent compressed-air line from ordinary PVC water pipe. PVC can become brittle and may fragment dangerously if it fails under compressed-air pressure. Use a compressed-air-rated piping system appropriate for the installation.
Never modify the compressor’s pressure-relief valve or pressure switch to gain more room. These components are essential to safe operation.
Protect hoses from sharp edges, excessive heat, chemicals, sunlight, and moving machinery. Inspect the tight section regularly because hidden hoses are easy to forget.
When disconnecting a pressurized hose, hold the hose firmly. Trapped pressure can make the plug and hose move suddenly when the coupler releases. Bleed downstream pressure first whenever practical.
Do not exceed the hose’s working-pressure rating, and do not confuse burst pressure with allowable working pressure. The normal operating system must remain within the published working limit.
If a fitting must support repeated movement, choose a hose swivel specifically rated for that service. An installation swivel designed only to orient a fitting is not necessarily suitable for constant rotation.
FAQs About How to Connect Air Compressor Hose in a Tight Area
What is the easiest way to connect an air hose behind a compressor?
Install a 90-degree swivel elbow or short whip hose at the regulated outlet. This redirects the connection and moves the coupler into a reachable position.
Can I put a 90-degree elbow on an air compressor?
Yes, provided the elbow has the correct thread, pressure rating, and airflow capacity. A swivel elbow is easier to orient without overtightening the compressor port.
Will a 90-degree fitting reduce airflow?
It can create some restriction, especially if its internal passage is small. Use a full-flow fitting that matches the hose and tool requirements.
What is an air-compressor whip hose?
It is a short flexible hose installed between the compressor or rigid piping and the main hose connection. It improves access and reduces stress from vibration and hose movement.
Can I move the quick coupler away from the compressor?
Yes. Use a rated whip hose and mount the coupler or manifold in an accessible location. Support the remote connection so it does not pull on the compressor outlet.
What size fitting does an air compressor hose use?
A 1/4-inch NPT connection is common on portable compressors, but 3/8-inch and other sizes are also used. Verify the exact compressor and hose specifications.
Are all air-compressor quick couplers compatible?
No. Industrial, automotive, ARO, and high-flow coupler profiles are not all interchangeable. Use matching plugs and couplers.
Should the male or female quick connector be on the compressor?
The compressor supply side normally uses the female shutoff coupler, while the hose uses the male plug. This stops airflow automatically when the hose is disconnected.
Can I connect the hose while the tank is pressurized?
You can normally insert a matching plug into the compressor’s installed quick coupler while the system is pressurized. However, you must fully depressurize the system before removing, replacing, or tightening threaded fittings.
Should I use PTFE tape on air fittings?
PTFE tape can be used on compatible tapered pipe threads when applied correctly. Do not use it on quick-connect noses, flare seats, compression surfaces, or O-ring seals.
How do I tighten a fitting when there is no room for a wrench?
Use a compact wrench, crowfoot where appropriate, or assemble the fitting before placing the compressor in its final position. Do not use pliers on a regulator body or force a poorly accessible fitting.
Can I use a flexible hose instead of an elbow?
Yes. A short whip hose is often better when vibration, hose movement, or coupler access is the main problem.
How do I keep the hose from kinking in a tight space?
Use an elbow, swivel, or bend restrictor and route the hose according to its minimum bend radius. Do not force it into a sharp turn immediately behind the fitting.
How do I check the new connection for leaks?
Pressurize gradually and apply soapy water or leak-detection solution to each connection. Continuous bubble growth indicates a leak.
Can I use ordinary PVC pipe to extend the compressor outlet?
Ordinary PVC water pipe should not be used for compressed-air distribution. Use a piping material and fittings specifically rated for compressed air.
Conclusion
Knowing how to connect air compressor hose in a tight area is mainly about redirecting or relocating the connection instead of forcing the hose into an unsafe position.
When the outlet faces a wall, a compact 90-degree swivel elbow is usually the simplest solution. When the quick coupler is difficult to reach or the hose places stress on the regulator, a short whip hose is often better. For a permanently installed compressor beneath a bench, inside a cabinet, or in a vehicle, a remote bulkhead coupler or manifold provides the cleanest access.
Before changing any threaded fitting, shut the compressor down, unplug it, and remove all pressure from the section being opened. Use a backup wrench so the regulator or manifold does not twist while you loosen or tighten the connection.
Verify the thread size and type rather than assuming every compressor uses 1/4-inch NPT. Match the quick-connect coupler and plug profile, and choose fittings with enough internal flow for the tools you operate.
Apply thread sealant only to connections designed to seal at tapered threads. Keep tape and sealant away from quick-connect surfaces, flare seats, O-rings, and internal air passages.
After installation, pressurize the system gradually and test every joint with soapy water or leak-detection solution. Then operate the intended air tool and watch for pressure loss while air is flowing.
My preferred setup for most confined installations is a short, full-flow whip hose leading to an accessible female coupler. It solves both the clearance problem and the mechanical stress created when a heavy main hose pulls on the compressor’s regulator.
The practical bottom line is straightforward: depressurize the system, choose a swivel elbow or whip hose that preserves the hose’s bend radius, match all threads and couplers correctly, support the connection, and leak-test it before regular use.