
How to Attach Sand Discs to RIDGID Sander Safely and Correctly
If you are learning how to attach sand discs to RIDGID sander, disconnect the power first, choose a disc that matches the pad’s diameter and attachment system, align the dust-extraction holes, and press the disc firmly and evenly across the entire backing pad. On RIDGID random-orbit sanders with a hook-and-loop pad, the fuzzy side of the disc faces the pad. On models equipped with an optional pressure-sensitive adhesive pad, the sticky side faces the smooth backing pad.
The basic procedure is easy, but several small mistakes can cause the disc to slip, vibrate, tear, or block dust collection. The most common problems are using the wrong disc backing, installing it off-center, failing to align the holes, or attaching a new disc to a dust-packed or worn-out pad.
RIDGID sells several types of sanders, and they do not all accept round sanding discs. Current RIDGID 5-inch random-orbit models use hook-and-loop sanding media, while RIDGID quarter-sheet sanders hold rectangular paper with clamps. Identifying your exact sander type is therefore the first step.
In this guide, I’ll explain how to attach hook-and-loop and PSA sanding discs, how to align the holes correctly, how to remove an old disc, why a disc may not stick, how to recognize a worn backing pad, and how to choose the right size and grit for your project.
First Identify Which RIDGID Sander You Have

The phrase “RIDGID sander” can refer to a random-orbit sander, sheet sander, belt sander, spindle sander, or another machine. Only some of these use round sanding discs.
The current corded RIDGID R26011 random-orbit sander uses a 5-inch pad and is supplied with a hook-and-loop pad. The RIDGID R8606-series cordless random-orbit sander also uses 5-inch hook-and-loop discs. By contrast, the R25011 quarter-sheet sander uses rectangular quarter sheets held by its easy-load clamping system rather than round discs.
Look at the bottom of your sander before buying abrasives. A round pad with a rough fabric-like surface is a hook-and-loop pad. A smooth pad intended for peel-and-stick paper is a PSA pad. A rectangular base with front and rear clamps is a sheet sander.
| Sander or Pad Type | Abrasive It Uses | How It Attaches |
|---|---|---|
| 5-inch random-orbit sander | 5-inch round disc | Hook-and-loop on most RIDGID models |
| Optional PSA random-orbit pad | Round adhesive-backed disc | Peel-and-stick |
| Quarter-sheet finishing sander | Rectangular sandpaper sheet | Front and rear clamps |
| Belt sander | Continuous sanding belt | Slides over rollers and is tensioned |
| Oscillating spindle sander | Sanding sleeve | Fits over a spindle drum |
Do not try to convert a sheet sander into a disc sander or attach adhesive paper directly to a hook-and-loop surface. The abrasive and pad must be designed to work together.
Key Takeaways:
- Most RIDGID 5-inch random-orbit sanders use hook-and-loop discs.
- RIDGID quarter-sheet sanders use clamped rectangular paper, not discs.
- Identify the pad type before buying abrasives.
How to Attach Sand Discs to RIDGID Sander Step by Step
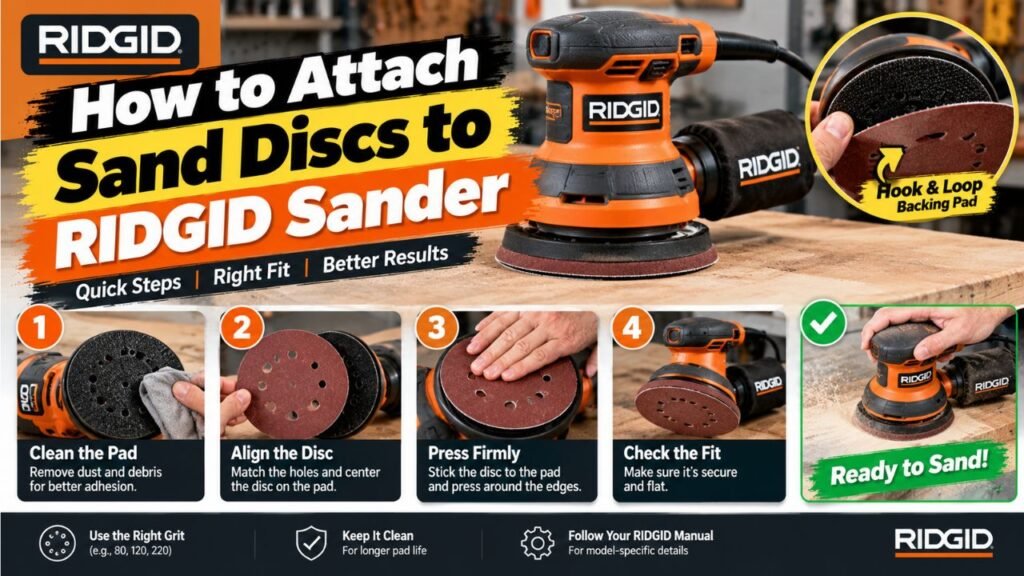
The following procedure applies to a RIDGID random-orbit sander equipped with its standard hook-and-loop backing pad.
1. Disconnect the Sander From Power
For a corded RIDGID sander, unplug it from the outlet.
For a cordless model, remove the battery pack completely.
Do not rely only on the switch being in the off position. RIDGID’s operating instructions specifically require disconnecting the corded model or removing the cordless model’s battery before attaching or changing sanding discs.
Place the sander upside down on a clean, stable work surface. Make sure it cannot roll onto the switch or fall from the bench.
2. Remove the Old Sanding Disc
Grip the old disc at one edge and peel it slowly away from the pad.
Support the sander with your other hand so you do not pull excessively on the backing pad. A hook-and-loop disc should separate without tools.
Do not scrape the pad with a screwdriver, knife, or putty knife. A sharp metal tool can cut the small hooks or damage the foam beneath the pad.
If the old disc tears, remove every piece of paper and backing before installing the replacement. Leaving fragments behind creates an uneven surface and can cause vibration.
3. Inspect the Backing Pad
The pad should be flat, firmly attached, and free from tears, melted areas, missing hook material, or loose edges.
Run your hand lightly across the pad while the sander remains disconnected. The hook surface should feel reasonably consistent across the entire diameter.
If one section is smooth while the rest still feels rough, the hooks in that area may be worn away. A new disc may attach initially but lift as soon as the sander reaches speed.
Also check whether the pad itself wobbles, sits crooked, or has separated from its foam layer. A damaged backing pad should be replaced rather than covered with a new sanding disc.
4. Clean Dust From the Pad
Use a small, clean brush to remove packed sanding dust from the hook surface and extraction holes.
A soft nylon brush works well. Brush gently rather than digging aggressively into the hooks.
RIDGID specifically recommends keeping the backing pad clean and occasionally brushing it lightly because accumulated dust can reduce adhesion.
Avoid soaking the hook-and-loop pad in solvent. Strong chemicals may damage the adhesive, foam, or hook material.
If the pad is oily, determine where the contamination came from. Sanding pads need to remain clean and dry for the disc to grip properly.
5. Confirm the Disc Is the Correct Size
The disc should match the backing-pad diameter.
A 5-inch RIDGID random-orbit sander needs a 5-inch disc. Do not use a 6-inch disc and allow it to overhang the pad. The unsupported abrasive can catch an edge, tear, and damage the workpiece.
A disc that is too small leaves the pad edge exposed. The exposed pad can contact the work surface and become damaged.
Check the package for the disc diameter and attachment type before installation.
6. Check the Disc for Damage
Do not install a disc that is torn, creased, badly curled, wet, contaminated with oil, or separated from its backing.
A damaged disc may not remain balanced at operating speed.
Inspect the abrasive face as well. If grit is missing around the edge or the backing has cracked around the dust holes, use another disc.
RIDGID’s manuals instruct users not to install a broken or defective sanding disc.
7. Align the Dust-Collection Holes
Hold the disc just above the pad without pressing it down.
Rotate it until its holes line up with the corresponding holes in the sander pad.
The cordless RIDGID R8606 manual specifies a standard 8-hole hook-and-loop disc. Other models or replacement pads may use a different pattern, so match what is actually on your tool.
Hole alignment matters for more than appearance. Sanding dust travels through the disc and pad into the dust bag or vacuum port. If the paper blocks those openings, dust collection drops and heat can build between the workpiece and abrasive.
A universal-hole disc can work when its layout provides open paths to the pad holes, but a disc matching the pad exactly is usually easier to position.
8. Center the Disc Over the Pad
Check the outer edge before pressing the disc into place.
The abrasive should be centered so the amount of material around the pad is equal on every side.
An off-center disc creates imbalance. It can make the sander vibrate, leave inconsistent scratch patterns, and cause one side of the paper to wear prematurely.
Centering is easier if you align the holes first and then compare the disc edge with the pad all the way around.
9. Press the Disc Firmly Onto the Pad
Once the holes and outer edges are aligned, press the fuzzy-backed side of the disc against the hook pad.
Start near the center and press outward with your palm and fingertips.
Apply pressure around the full circumference so there are no lifted edges.
RIDGID’s official instructions direct the user to align the holes and press the fuzzy side of the hook-and-loop disc against the pad as tightly as possible.
You do not need glue, adhesive spray, tape, screws, or clips. The hook-and-loop surfaces provide the attachment.
10. Inspect the Installation
Look around the entire disc.
It should lie flat with no folds, bubbles, loose edges, or visible pad overhang.
Gently try to lift one edge. It should resist but still peel away when deliberately removed.
If the disc falls off with almost no resistance, do not operate the sander. Clean the pad, confirm the backing type, and inspect for worn hooks.
11. Reconnect the Dust Collection
Attach the dust bag or vacuum hose before sanding.
Correct hole alignment allows the dust to move through the disc and pad. RIDGID notes that the holes must line up for the dust-collection feature to work correctly.
Make sure the dust bag is not full and the vacuum hose is not blocked.
12. Test the Sander
Reconnect the cord or reinstall the battery.
Secure your workpiece.
Place the complete disc surface flat against scrap material and start the sander. RIDGID recommends keeping the full sanding surface in contact with the workpiece, applying only the tool’s normal weight, and waiting for the disc to stop before lifting the sander away.
Listen for unusual vibration. If the tool shakes more than normal, stop it, disconnect power, and check whether the disc is centered or damaged.
Key Takeaways:
- Disconnect the cord or battery before changing discs.
- Align the extraction holes before pressing the disc onto the pad.
- Center the abrasive and press every part of it firmly.
- Test for vibration on scrap before beginning important work.
How to Attach a PSA Sanding Disc to a RIDGID Sander
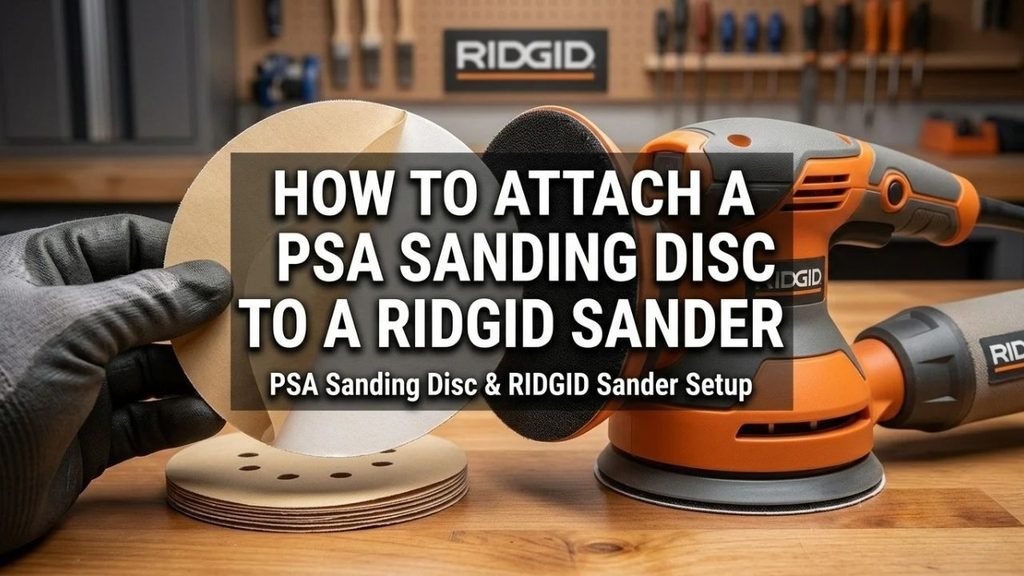
PSA means pressure-sensitive adhesive. These discs have a peel-off paper backing covering a sticky adhesive surface.
A PSA disc cannot be attached correctly to a normal hook-and-loop pad. It requires a smooth PSA backing pad.
Some RIDGID random-orbit sander manuals describe an optional PSA pad that replaces the standard hook-and-loop pad. The conversion involves removing four screws, lifting off the hook-and-loop pad, cleaning the pad-brake area, installing the approved PSA pad, and securing it with the original screws.
This is a model-specific modification. Do not buy a random smooth pad and assume it fits your sander. Use a pad specifically listed for the exact RIDGID model.
Installing the PSA Backing Pad
Disconnect the cord or remove the battery.
Remove the screws holding the existing hook-and-loop pad.
Lift the pad away without losing screws or washers.
Clean dust from the exposed pad-brake area.
Install the manufacturer-approved PSA pad exactly as directed in the model manual. The RIDGID R2601 and R8606 instructions call for a thin layer of lightweight grease on the back of the replacement pad before it is aligned and secured. This grease belongs only where the manual specifies—never on the sanding face, abrasive disc, or hook surface.
Tighten the pad screws evenly and securely, but do not overtighten them into the sander housing.
Rotate the pad by hand and make sure it sits flat without rubbing or wobbling.
Attaching the PSA Disc
Clean the smooth pad so it is free of dust and old adhesive.
Hold the new disc over the pad and plan the hole alignment before removing the release paper.
Peel off part or all of the paper backing without touching the adhesive excessively.
Align the dust holes and center the disc.
Press the sticky side against the pad, working from the center toward the edges to avoid wrinkles or trapped air.
Press firmly around the full circumference.
Do not peel and reposition the disc repeatedly. Each removal weakens the adhesive and can transfer residue to the pad.
Remove PSA Discs Before Long-Term Storage
RIDGID advises removing a PSA disc soon after sanding rather than storing the sander with it installed. Heat from operation can make the adhesive form a tighter bond, causing the disc to tear or leave difficult residue when removed later.
For most DIY users, hook-and-loop discs are easier because they can be removed, inspected, and reused without adhesive residue. I would choose PSA only when your work or preferred abrasive makes it worthwhile.
Hook-and-Loop vs. PSA: Which Is Better?
Hook-and-loop is the better general-purpose choice for most RIDGID random-orbit sander owners.
It allows fast grit changes and lets you remove a partially used disc without destroying it. It also avoids adhesive residue.
PSA discs can provide direct contact with a smooth pad and may be preferred in some production settings, but they are less convenient to reuse. Adhesive can become difficult to remove after heat exposure, and every grit change consumes a disc.
| Feature | Hook-and-Loop | PSA |
|---|---|---|
| Installation speed | Very fast | Fast once aligned |
| Reusable after removal | Usually | Often difficult |
| Residue | None under normal use | Possible adhesive residue |
| Pad required | Hook fabric | Smooth PSA pad |
| Best for frequent grit changes | Yes | Less convenient |
| Standard on common RIDGID random-orbit models | Yes | Usually optional |
Never place an adhesive-backed disc directly on a hook-and-loop pad. The adhesive can fill and damage the hooks, and the paper may not sit flat.
How to Remove a Hook-and-Loop Disc Correctly
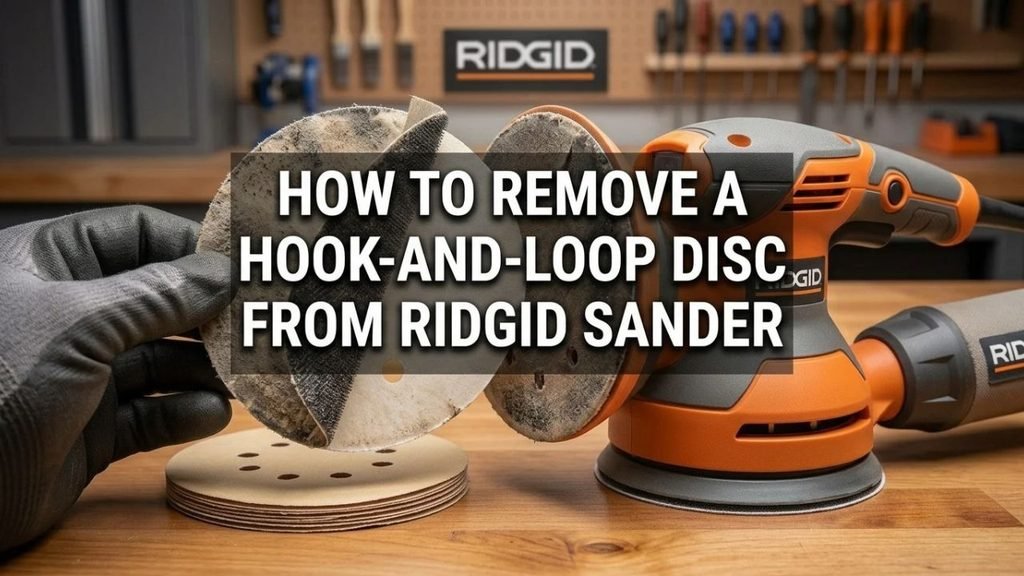
Disconnect power before removing the disc.
Support the backing pad with one hand.
Lift the abrasive at one edge and peel it back gradually at a low angle.
Avoid jerking it straight upward because repeated aggressive removal can stress the hook surface and foam pad.
If you plan to reuse the disc, store it flat with the abrasive face protected. Do not fold it or leave it under heavy tools.
Write the grit on the back if it is difficult to read after use.
Why the Sanding Disc Will Not Stick
A hook-and-loop disc should remain secure throughout normal sanding. If it repeatedly detaches, one of the following conditions is usually responsible.
The Disc Has the Wrong Backing
A PSA disc has a smooth adhesive side under release paper.
A hook-and-loop disc has a fuzzy fabric backing.
A smooth non-adhesive disc will not attach to a hook pad, and an adhesive disc should not be stuck to it.
Check the package carefully. Similar-looking abrasive faces can hide completely different backing systems.
The Pad Is Packed With Dust
Fine dust fills the spaces between the hooks and prevents them from gripping the disc fibers.
Brush the pad lightly and clean the dust holes.
Do not wait until the hooks are completely buried before cleaning. A quick brushing during grit changes helps preserve adhesion.
The Hook Surface Is Worn Out
The hooks gradually wear, especially when users press too hard, sand with part of the disc hanging over an edge, or allow the pad to contact the workpiece without paper.
A worn pad often feels smooth or polished.
You may notice that a new disc grips well in one area but lifts in another.
Once the hook material is worn away, cleaning will not restore it. Replace the pad with the correct RIDGID-compatible part.
The Disc Is Installed Off-Center
An off-center disc develops uneven centrifugal force.
The overhanging side can catch the workpiece and begin peeling away.
Remove and reinstall the disc before using it.
The Pad or Disc Is Contaminated
Oil, wax, polish, adhesive residue, and some cleaners can prevent proper attachment.
Keep both surfaces clean and dry.
Do not place new discs on a dirty shop bench where they can pick up oil or metal chips.
The Sander Is Being Pressed Too Hard
Excessive pressure creates heat, slows the sanding action, wears the paper faster, and places more stress on the attachment surface.
RIDGID advises letting the weight of the sander provide the necessary pressure rather than forcing it downward.
The Disc Has Been Removed Too Many Times
Hook-and-loop discs are reusable while their abrasive and backing remain sound, but repeated removal eventually weakens the fabric.
If an older disc no longer grips while a new one holds securely, replace the disc rather than the pad.
Key Takeaways:
- Wrong backing type is the first thing to check.
- Dust-packed or worn hooks are the most common pad-related causes.
- Excessive pressure and edge sanding can make discs detach prematurely.
Why Correct Hole Alignment Matters
Dust collection is one of the main reasons random-orbit pads and discs have perforations.
As the sander moves, dust is drawn through the abrasive and into the pad’s internal passage. From there, it reaches the dust bag or connected vacuum.
When the disc holes are blocked, several problems can appear.
Dust remains between the abrasive and wood, reducing cutting efficiency.
The disc loads more quickly.
The workpiece may develop additional swirl marks.
Heat can increase.
More dust becomes airborne.
Perfect alignment is especially important when sanding paint, filler, MDF, or fine hardwood dust because these materials can clog the abrasive quickly.
Take a few extra seconds to rotate the disc into the correct position before pressing it down.
Choosing the Right Sanding Disc
A correctly attached disc can still perform poorly if its grit or abrasive type is wrong.
For ordinary woodworking, aluminum oxide hook-and-loop discs are the most common choice.
Coarse grits remove stock quickly, while fine grits refine the scratch pattern.
| Grit Range | Typical Use |
|---|---|
| 40–60 | Heavy removal, stripping, leveling rough wood |
| 80–100 | General shaping and initial sanding |
| 120–150 | Smoothing before final preparation |
| 180–220 | Fine finishing and preparation between stages |
| 240 and finer | Very fine finishing or between finish coats when appropriate |
Do not jump directly from a very coarse grit to an extremely fine one. The fine disc may polish the surface without removing the deeper scratches.
A typical sequence might be 80, 120, and 180 grit, though the correct progression depends on the wood, existing finish, and desired result.
Choose the Correct Hole Pattern
Use a disc that matches the pad whenever possible.
The R8606 manual specifies standard 8-hole hook-and-loop discs, but replacement pads and other RIDGID models may differ.
Mesh abrasives can work on compatible hook-and-loop pads and offer broad dust extraction, but they should still match the tool diameter and manufacturer recommendations.
Do Not Use Oversized Discs
A larger abrasive is not a practical way to increase sanding area.
Unsupported paper bends around the pad edge, catches corners, and can cut into adjacent surfaces.
Use the exact nominal diameter intended for the sander.
How to Protect the RIDGID Sander Pad
The backing pad is a wear component, but good technique can extend its life.
Keep the full disc flat against the workpiece rather than tilting the sander sharply onto one edge.
Do not continue sanding after the abrasive paper has torn away.
Avoid using the bare pad as a polishing or rubbing surface.
Do not press so hard that the pad overheats.
Keep sharp screws, nails, and metal edges away from the foam.
When sanding narrow edges, control the tool carefully so the disc does not fold under the pad.
An optional interface pad can be useful for contoured surfaces, but only use one compatible with your sander and disc system. Extra layers can change tool control and dust extraction.
Safe Sanding After the Disc Is Attached
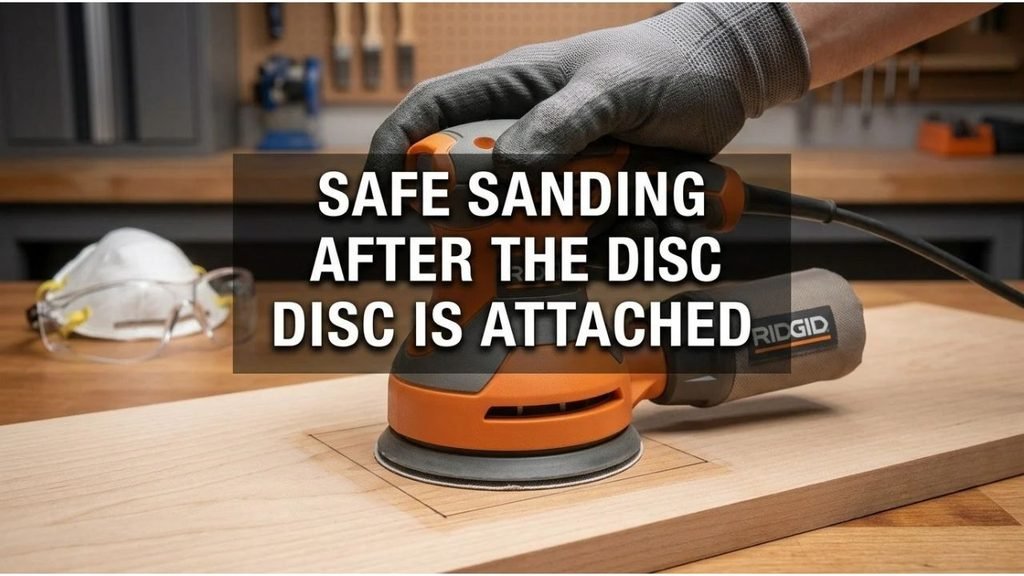
Secure small workpieces so they cannot move.
Wear eye protection and appropriate respiratory protection. Sanding wood, paint, filler, and composite materials can produce fine airborne dust.
Keep loose clothing and long hair away from the sander’s vents and moving pad.
Place the disc flat on the workpiece before starting the sander if that is the procedure specified for your model. Move the tool steadily and avoid holding it in one location long enough to create a depression.
Do not cover the cooling vents with your hand.
At the end of the pass, switch the sander off and wait until the disc stops completely before lifting it from the surface. RIDGID includes these operating steps in both its corded and cordless random-orbit manuals.
Empty the dust bag regularly and do not store the sander with combustible finishing dust accumulated inside it.
Key Takeaways:
- Keep the sander flat and let its weight provide the pressure.
- Secure the workpiece and use eye and dust protection.
- Wait for the disc to stop before lifting the tool.
- Preserve the backing pad by avoiding torn paper and aggressive edge sanding.
FAQs About How to Attach Sand Discs to RIDGID Sander
Which side of the sanding disc goes against the RIDGID sander?
On a hook-and-loop disc, the fuzzy fabric side goes against the sander pad and the abrasive grit faces outward.
On a PSA disc, the sticky side goes against the smooth PSA pad.
Do I need adhesive for RIDGID hook-and-loop sanding discs?
No.
The hook-and-loop backing holds the disc without glue, tape, or spray adhesive.
What size sanding disc does a RIDGID random-orbit sander use?
Common RIDGID handheld random-orbit sanders such as the R26011 and R8606 use 5-inch discs. Verify the model plate and pad diameter before purchasing.
How many holes should a RIDGID sanding disc have?
The R8606 uses standard 8-hole hook-and-loop discs. Other models or replacement pads may differ, so match the hole pattern on your actual pad.
Can I use a no-hole sanding disc?
It may attach physically, but it will block through-pad dust extraction.
A matching perforated disc is the better choice when using the dust bag or vacuum system.
Can I use universal-hole sanding discs?
Yes, provided the disc is the correct diameter and its openings leave the pad’s dust holes unobstructed.
Exact-match patterns are generally easier to align.
Why does my sanding disc keep flying off?
The pad may be dirty or worn, the disc may have the wrong backing, or the paper may be installed off-center.
Excessive pressure and aggressive edge sanding can also loosen it.
How do I clean a hook-and-loop sander pad?
Disconnect the power and brush the pad lightly with a small clean nylon brush.
Remove dust from the extraction holes as well.
Can I wash the RIDGID hook-and-loop pad?
I would avoid soaking it.
Water and cleaning chemicals can affect the foam, adhesive, bearings, or hook material. Dry brushing is usually sufficient.
How do I know when the sanding pad needs replacement?
Replace it when the pad is torn, warped, separated, visibly damaged, or too smooth to hold a new disc evenly.
Can I attach a PSA disc to a hook-and-loop pad?
No.
Install the correct optional PSA backing pad if your exact RIDGID model supports one.
Can I attach a hook-and-loop disc to a PSA pad?
No.
The smooth adhesive pad does not have hooks to grip the fuzzy disc backing.
Why does the sander vibrate after I install a new disc?
The disc may be off-center, folded, torn, or only partly attached.
The backing pad may also be damaged or loose.
Should the sanding disc overhang the pad?
No.
The edges should align closely. Significant overhang can catch the workpiece and tear the abrasive.
Can I reuse a hook-and-loop sanding disc?
Yes, while the abrasive and fuzzy backing remain in good condition. RIDGID notes that hook-and-loop discs can be reused during the useful life of the abrasive.
How should I store partially used sanding discs?
Store them flat, dry, and protected from oil, moisture, creasing, and heavy objects.
Mark the grit if the original printing has worn away.
Why is dust collection poor after changing the disc?
The holes may be misaligned, the disc may have the wrong pattern, or the dust bag or vacuum hose may be clogged.
Should I run the sander before pressing the disc down?
No.
Disconnect the power while attaching the disc and press it firmly by hand before reinstalling the cord or battery.
Can I trim a 6-inch disc to fit a 5-inch RIDGID sander?
I would not.
The result may be unbalanced, irregular, and incorrectly perforated. Use the correct 5-inch disc.
Can I use sanding discs from another brand?
Yes, when the diameter, hook-and-loop or PSA backing, hole pattern, speed rating, and intended material are compatible.
The disc does not need to carry the RIDGID brand merely to fit properly.
Why is the edge of my disc wearing faster than the center?
You may be tilting the sander, applying too much pressure, or spending too much time sanding narrow edges.
Keep the pad flat whenever possible.
Do I need to change the disc when changing grit?
Yes.
Remove the current abrasive and install a disc with the next required grit. Do not place one sanding disc over another.
Conclusion
Knowing how to attach sand discs to RIDGID sander is straightforward once you identify the pad system.
For the common 5-inch RIDGID random-orbit sander, remove the cord or battery, clean the hook-and-loop pad, choose a matching 5-inch disc, align every dust hole, center the paper, and press the fuzzy backing firmly against the complete pad surface.
Do not add glue or tape.
If your sander has an approved optional PSA pad, peel the release paper from the adhesive disc, align it carefully before contact, and press it onto the smooth pad. Do not stick PSA paper directly to a hook-and-loop surface.
The details that matter most are correct backing type, exact diameter, centered installation, clean pad hooks, and proper dust-hole alignment.
If a new disc will not stay attached, clean the pad first and test another new disc. When multiple discs fail to grip in the same area, the backing pad is probably worn and should be replaced.
My recommendation for most users is to stay with hook-and-loop abrasives. They install quickly, allow easy grit changes, and can often be removed and reused while the abrasive remains effective.
Once the disc is installed, keep the sander flat, use light pressure, and allow the tool to do the work. That protects both the abrasive and the RIDGID backing pad while producing a smoother, more consistent finish.