
How to Use a 3 Gallon Air Compressor Safely: Step-by-Step Guide
A 3-gallon air compressor is fairly simple to operate: place it on a stable surface, close the tank drain, connect the hose and accessory, let the tank fill, adjust the regulated outlet pressure for the tool, then work in short cycles. After use, switch it off, release pressure as instructed, and drain moisture from the tank.
Small compressors are best suited to jobs that need short bursts of compressed air. Common uses include inflating tires, firing brad or finish nailers, stapling, using an air blow gun, and other low-air-demand tasks.
Tank size alone does not tell you which tools will run properly. PSI describes pressure, while SCFM/CFM describes how much air the compressor can continuously deliver. For example, Harbor Freight’s current 3-gallon McGraw compressor is rated at 0.6 SCFM at 90 PSI and 0.9 SCFM at 40 PSI, which suits intermittent work far better than continuous high-air-demand tools.
For how to use a 3 gallon air compressor, one of the main rules is to set outlet pressure according to the tool or accessory rather than simply turning the regulator to maximum. The tank may store air at 100 PSI or more while your nailer, inflator, or blow gun uses a lower regulated pressure.
Safety matters even with a small tank. For workplace cleaning applications, OSHA requires compressed air used for cleaning to be reduced below 30 PSI under static conditions and calls for chip guarding and personal protective equipment. Compressed air should never be directed at a person’s body or clothing.
Moisture management matters too. Water naturally condenses inside compressed-air tanks. OSHA requires air receivers to have drainage provisions and calls for accumulated liquid to be drained frequently, while compressor manufacturers commonly instruct owners to drain tanks as part of routine maintenance.
The process below covers normal operation for common portable electric 3-gallon compressors. Controls and break-in procedures differ by model, so use your owner’s manual when its instructions differ from these general steps.
How to Use a 3 Gallon Air Compressor Step by Step
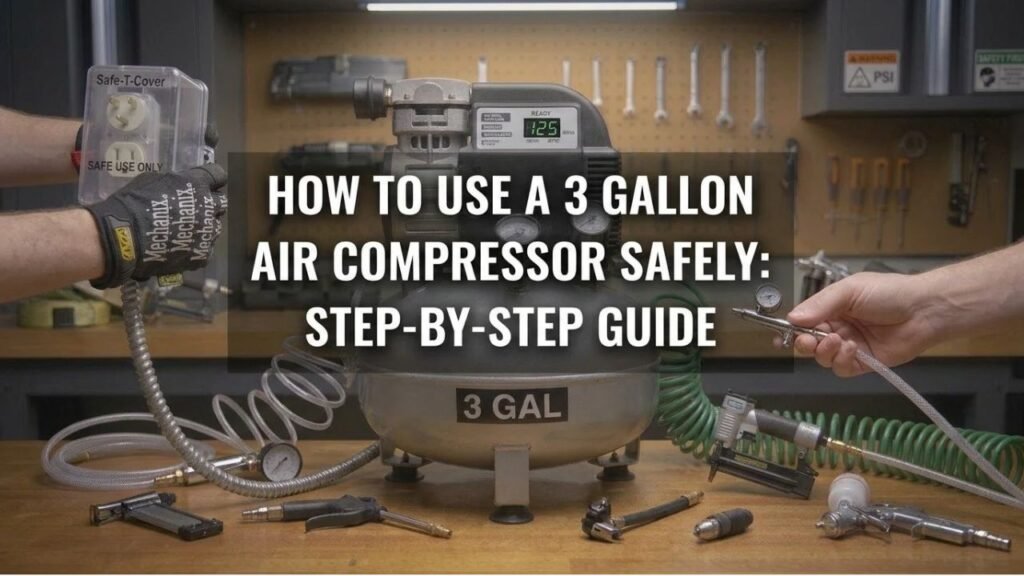
Most 3-gallon portable compressors have a power switch, tank-pressure gauge, regulated-pressure gauge, regulator knob, quick-connect outlet, safety valve, and tank drain.
Identify these parts before the first startup.
Step 1: Read the Manual and Check for a Break-In Procedure
Do not assume a brand-new compressor is ready for immediate tool use.
Some compressors require an initial break-in period with the drain valve open so the pump can run without building normal tank pressure.
One 3-gallon compressor manual, for example, specifies a 20-minute break-in period, while another 3-gallon model calls for 30 minutes. The procedure is model-specific.
Check the manual before the first use for:
- Break-in requirements
- Maximum tank pressure
- Electrical requirements
- Oil requirements
- Drain-valve operation
- Regulator controls
- Recommended maintenance
Many current small compressors are oil-free, but that is not true for every machine. If yours uses an oil-lubricated pump, check the oil level before operation.
Step 2: Put the Compressor on a Stable Surface
Place the compressor upright on a firm, level surface.
Leave open space around the motor and pump so cooling air can circulate.
Do not operate it where the intake can pull in excessive dust, paint mist, gasoline vapor, exhaust fumes, or other contaminants.
Make sure the compressor cannot slide, tip, or fall while the motor is running.
Step 3: Check and Close the Tank Drain Valve
The drain valve is usually at the lowest part of the air tank.
Before filling the tank, confirm that the valve is closed.
If it is left open, the compressor may run continuously while air escapes through the bottom.
Do not overtighten a small drain valve. Close it according to the manufacturer’s instructions.
Step 4: Turn the Regulator Down
Before attaching a tool, turn the regulated outlet pressure down.
On many compressors, turning the regulator counterclockwise lowers the outlet pressure and turning it clockwise raises it. Check the markings on your machine because control designs vary.
The tank-pressure gauge and outlet-pressure gauge do different jobs.
Do not confuse them.
Step 5: Connect the Air Hose
Insert the air hose fitting into the compressor’s quick-connect coupler.
Push it in until the coupler locks securely.
The other end of the hose connects to the tool or accessory.
Common attachments include:
- Tire chuck
- Blow gun
- Brad nailer
- Stapler
- Finish nailer
- Small airbrush setup
- Inflation nozzle
Inspect the hose and couplers for cuts, cracks, loose fittings, or other damage before pressurizing the system.
Step 6: Connect the Tool or Accessory
Check the tool’s rated operating pressure before connecting it.
Never set the compressor’s regulated outlet above the maximum pressure allowed by the hose, tool, fitting, or accessory.
For example, a nail gun may operate in a pressure range such as 70–120 PSI, but its exact requirement comes from that tool’s manual.
A tire is different. The compressor regulator supplies air to the inflator, while the tire itself should be inflated to the vehicle manufacturer’s specified cold tire pressure.
Step 7: Plug the Compressor Into the Correct Outlet
Many portable 3-gallon compressors in the U.S. operate from a grounded 120-volt outlet.
The current McGraw 3-gallon models, for example, are rated for 120V operation.
Put the compressor’s power switch in the OFF position before plugging it in.
Use a correctly grounded outlet.
Some compressor manuals recommend connecting directly to the outlet rather than using a long extension cord. If an extension cord is permitted, follow the manufacturer’s required wire gauge and maximum cord length.
Voltage drop from an undersized cord can cause poor motor starting and overheating.
Step 8: Turn the Compressor On and Let the Tank Fill
Switch the compressor ON.
The pump should begin filling the tank.
Watch the tank-pressure gauge rise.
Once the tank reaches the compressor’s preset cut-out pressure, the pressure switch automatically stops the motor.
You do not normally turn the compressor off manually each time the tank fills.
As you use air and tank pressure falls to the preset cut-in pressure, the motor starts again and refills the tank.
For comparison, Harbor Freight’s current McGraw 3-gallon compressor has a maximum working pressure of 110 PSI. Its published pump-up time from empty to 110 PSI is about 223 seconds for the pancake version.
Your model may use different cut-in and cut-out pressures.
Step 9: Set the Regulated Outlet Pressure
Once the tank is pressurized, adjust the regulator while watching the outlet-pressure gauge.
Set it to the pressure required by the connected tool.
Do not set pressure according to tank size.
A 3-gallon tank does not mean you need a certain PSI. The tool decides the working pressure.
If your nailer calls for 90 PSI, set regulated pressure to its specified operating range and test the tool. If your accessory calls for much less, reduce the regulator.
Step 10: Use the Tool and Watch Compressor Cycling
Start working normally.
A 3-gallon tank holds a limited volume of compressed air, so its pressure can fall quickly with an air-hungry tool.
The motor will restart as pressure drops.
That cycling is normal.
If the compressor runs almost continuously and the tool rapidly loses power, the tool probably requires more airflow than the compressor can supply.
Compare the tool’s SCFM requirement with the compressor’s SCFM rating at the same pressure.
Step 11: Turn the Compressor Off After Use
When the job is finished:
- Turn the compressor OFF.
- Unplug the power cord.
- Disconnect or depressurize the air tool according to its instructions.
- Reduce regulated outlet pressure.
- Bleed tank pressure as specified by the compressor manufacturer.
- Drain moisture from the tank.
Do not leave a portable compressor powered unattended.
Step 12: Drain Moisture From the Tank
Place a container beneath the drain valve if needed.
Open the valve slowly so pressure and moisture escape in a controlled way.
DEWALT warns that air tanks contain high-pressure air and recommends eye protection while draining because moisture and debris can be discharged from the drain.
Tilt the compressor only if its manual instructs you to do so.
Close the drain after the tank is emptied and store the compressor in a dry location.
Key Takeaway: Connect the hose with outlet pressure turned down, let the tank reach cut-out pressure, regulate PSI for the tool, work within the compressor’s airflow limit, then shut down and drain the tank.
Understanding the Two Pressure Gauges
Many new users mistake tank pressure for tool pressure.
They are not the same reading.
Tank Pressure Gauge
This gauge shows the pressure stored inside the 3-gallon tank.
It rises as the compressor fills.
The pressure switch controls tank pressure automatically between preset cut-in and cut-out values.
You normally do not adjust these factory pressure-switch settings.
Regulated Outlet Gauge
This gauge shows the pressure being supplied toward the hose and tool.
You adjust it with the regulator knob.
For example:
- Tank pressure may be 110 PSI.
- Outlet pressure may be set to 80 PSI.
- The connected tool receives about 80 PSI rather than the full tank pressure.
The exact pressure during airflow may drop slightly as the tool consumes air.
PSI Does Not Tell You Airflow Capacity
A compressor may reach 110 PSI and still be unable to run a high-demand tool for long.
That is because PSI is pressure, while SCFM is airflow.
The current McGraw 3-gallon compressor illustrates this distinction: it can reach 110 PSI but supplies only 0.6 SCFM at 90 PSI.
Key Takeaway: Use the tank gauge to monitor stored pressure and the regulated gauge to set tool pressure; compare SCFM ratings to judge tool compatibility.
What Can You Use a 3 Gallon Air Compressor For?
A 3-gallon compressor works best with tools that use air intermittently rather than continuously.
Common uses include:
| Task | 3-Gallon Compressor Suitability | Main Limitation |
| Car tire top-off | Good | Slower than larger units |
| Bicycle tires | Good with correct adapter | Avoid exceeding tire rating |
| Sports balls | Good | Use proper needle |
| Brad nailer | Good on many models | Watch minimum tool PSI |
| Stapler | Good | Intermittent use |
| Finish nailer | Often suitable | Compressor must recover between bursts |
| Blow gun | Good for short bursts | Tank empties quickly |
| Airbrush | Model-specific | Moisture control may be needed |
| Impact wrench | Limited | Airflow may be too low |
| Ratchet | Limited | Tank cycles frequently |
| Die grinder | Poor match | High continuous airflow |
| DA sander | Poor match | High continuous airflow |
| Full-size spray gun | Poor match | Air demand commonly exceeds supply |
Harbor Freight specifically markets its current 3-gallon McGraw compressors for nailing, stapling, inflation, and cleaning, matching the short-duration work this size handles best.
How to Set PSI on a 3 Gallon Air Compressor
Set pressure from the tool specification, not from the compressor’s maximum number.
Check the Tool Rating
Look at the label or manual for the connected tool.
It may list:
- Recommended operating PSI
- Minimum PSI
- Maximum PSI
- SCFM requirement at a stated pressure
Do not exceed its rated maximum.
Let the Tank Fill First
Allow the compressor to reach cut-out pressure before making the final outlet adjustment.
This gives you a stable stored-air supply.
Adjust the Regulator
Turn the regulator slowly while watching the outlet gauge.
Increase pressure only until the tool operates correctly within its approved range.
Running unnecessary pressure can increase air consumption and place more stress on hoses, seals, and tools.
Key Takeaway: Tool specifications set working PSI; the compressor’s maximum tank pressure is not the pressure you should automatically send to every accessory.
How to Use a 3 Gallon Compressor to Inflate Tires
A small compressor is well suited to topping off passenger-vehicle tires.
Connect a tire inflator or air chuck to the hose.
Check the recommended cold tire pressure on the vehicle’s tire-information label, commonly found on the driver’s door jamb. Do not use the maximum pressure printed on the tire sidewall as the normal inflation target unless the vehicle manufacturer specifically calls for it.
Add air in short intervals and verify pressure with an accurate tire gauge.
A 3-gallon unit may need to restart during inflation, especially when adding a large amount of air or inflating several tires.
Do not walk away while a tire is filling.
How to Use a 3 Gallon Compressor With a Nail Gun
Brad nailers, staplers, and some finish nailers are good matches for many small compressors because they consume a short pulse of air for each fastener.
Connect the hose with the compressor regulator turned down.
Check the nailer’s approved pressure range.
Increase outlet pressure gradually until the fastener is driven to the desired depth.
If nails are sitting proud, pressure may be too low, the depth adjustment may need changing, or the compressor may not be recovering fast enough.
Do not exceed the nail gun’s pressure limit to compensate.
Disconnect the air hose before clearing jams or servicing the nailer unless its manual gives another procedure.
How to Use a Blow Gun With a 3 Gallon Compressor
A blow gun can clean sawdust or loose debris from certain equipment and work areas, but compressed air can propel chips at high speed.
Wear eye protection.
Never point the nozzle toward yourself or another person.
For U.S. workplace cleaning, OSHA requires compressed air to remain below 30 PSI under the specified static conditions and requires guarding and protective equipment for flying debris.
A small 3-gallon tank is best used for short blow-off bursts. Holding the trigger continuously will drain the tank quickly.
Why Some Air Tools Do Not Work Well on a 3 Gallon Compressor
Tank capacity gives you stored air, but the pump must replace that air after it is used.
A tool that consumes 4 SCFM connected to a compressor producing only 0.6 SCFM at the same pressure is using air far faster than the pump can replace it.
The tool may work briefly while the tank is full.
Then:
- Outlet pressure falls
- Tool speed drops
- The motor runs continuously
- You must stop and wait for recovery
This is common with:
- Pneumatic sanders
- Die grinders
- Cut-off tools
- Full-size paint sprayers
- High-demand impact wrenches
- Continuous air nozzles
A larger tank may extend the initial run time, but higher pump SCFM is the main requirement for continuous tools.
3 Gallon Air Compressor Safety Rules
Compressed air stores significant energy even in a small tank.
Use the compressor as pressure equipment, not as an ordinary appliance.
Wear Eye and Hearing Protection
Air tools and tank draining can release debris and produce high noise levels.
Eye protection is especially important when blowing debris or draining the receiver.
Never Modify the Safety Valve
The safety relief valve protects the tank against excessive pressure.
Do not plug it, wire it closed, replace it with an unapproved fitting, or adjust factory pressure-switch settings.
OSHA’s air-receiver rules require pressure gauges and spring-loaded safety valves on covered receivers.
Never Aim Compressed Air at Skin
Compressed air is not safe for cleaning hands, clothing, hair, or skin.
OSHA specifically prohibits using compressed air to clean employees.
Check Hoses Before Pressurizing
Replace hoses with:
- Cuts
- Bulges
- Exposed reinforcement
- Damaged fittings
- Loose couplers
- Severe cracking
A failed hose can whip violently.
Keep the Compressor Dry
Do not expose a normal indoor-rated electric compressor to rain or standing water.
Electric motors, switches, and power cords need a dry operating environment unless the machine is explicitly rated for another setting.
Let Hot Parts Cool
The pump head, discharge tube, and nearby fittings can become hot during operation.
Do not touch them immediately after use.
Key Takeaway: Protect your eyes, stay away from moving and hot parts, never defeat safety controls, inspect hoses, and never direct compressed air at a person.
How to Maintain a 3 Gallon Air Compressor
Most small oil-free models require relatively little routine service, but the air tank still needs attention.
Drain the Tank Regularly
Moisture is produced every time atmospheric air is compressed.
Leaving water inside a steel tank can promote internal corrosion.
DEWALT warns that water left in an air receiver can corrode and weaken the tank and calls for regular draining on its compressors.
Follow your model’s drain schedule.
Clean or Replace the Intake Filter
A dirty air filter makes it harder for the pump to draw air.
Check the service interval in the manual.
Do not operate the compressor without its intended intake filter.
Check for Air Leaks
Listen around:
- Quick couplers
- Hose ends
- Regulator
- Drain valve
- Fittings
A persistent leak makes the compressor cycle more frequently.
Soapy water applied to suitable external fittings can reveal bubbles from small leaks, but keep moisture away from electrical parts.
Inspect the Power Cord
Do not operate the machine with damaged insulation, exposed conductors, loose plug blades, or a damaged grounding pin.
Store It Dry
After draining, close the valve as directed and store the compressor in a dry location.
Keep hoses loosely coiled instead of sharply kinked.
Key Takeaway: Tank draining, intake-filter service, leak checks, and basic electrical inspection account for most routine care on a small oil-free compressor.
Conclusion
For how to use a 3 gallon air compressor, start with the machine on a stable surface, close the tank drain, connect the hose and accessory, plug into the proper electrical supply, let the tank reach cut-out pressure, then adjust regulated PSI to match the tool.
The small tank works best for intermittent jobs such as tire inflation, brad nailing, stapling, and brief blow-off work. Check SCFM before connecting sanders, grinders, spray equipment, or other tools that consume air continuously.
Watch the outlet-pressure gauge during use rather than assuming a full tank means the tool is receiving the proper pressure. If pressure falls faster than the compressor can recover, stop and let the tank refill or use a compressor with greater airflow capacity.
After each work session, switch the unit off, unplug it, release pressure according to the manual, and drain accumulated moisture. Those basic habits keep operation predictable and reduce tank-corrosion risk.
FAQs About Using a 3 Gallon Air Compressor
Is a 3 Gallon Air Compressor Good for Beginners?
Yes. Its compact size, basic regulator controls, and suitability for short-duration jobs make it manageable for tire inflation, stapling, brad nailing, and other light tasks. Read the model’s manual before the first startup because break-in and maintenance instructions vary.
How Long Does a 3 Gallon Air Compressor Take to Fill?
It varies by pump output and maximum tank pressure. Harbor Freight lists about 223 seconds from empty to 110 PSI for its current 3-gallon McGraw pancake compressor and 214 seconds for the hot-dog version. Other models can be faster or slower.
What PSI Should I Set My 3 Gallon Air Compressor To?
Set regulated outlet pressure to the requirement listed for the connected tool or accessory. Do not automatically use maximum tank pressure. Nailers, inflators, blow guns, and other tools can require very different working pressures.
Can a 3 Gallon Air Compressor Inflate Car Tires?
Yes. It is a good size for topping off passenger-car tires. Connect a tire chuck or inflator, use the vehicle manufacturer’s specified cold tire pressure, and check progress with an accurate gauge.
Can a 3 Gallon Air Compressor Run an Impact Wrench?
It may run some impact wrenches for a few short bursts, but many impact tools require much more SCFM than a small compressor supplies. Compare the wrench’s SCFM requirement with the compressor rating at the specified PSI.
Can I Leave Air in a 3 Gallon Compressor Overnight?
Follow the owner’s manual for shutdown and storage. Regularly draining the tank removes condensed water that can contribute to internal corrosion. Many manufacturers call for frequent or daily tank draining after use.
Why Does My 3 Gallon Air Compressor Keep Turning On and Off?
The compressor automatically starts when tank pressure falls to its cut-in setting and stops when it reaches cut-out pressure. Frequent cycling can occur when a tool consumes substantial air, the tank is small, or the system has an air leak.
Can I Use a 3 Gallon Air Compressor for Painting?
Small detail or airbrush work may be possible with a compatible setup, but many automotive and full-size spray guns need far more continuous airflow than a typical 3-gallon compressor supplies. Compare the spray gun’s SCFM requirement with the compressor’s rated output before use.