
How to Connect Air Compressor to Air Tank: Safe Setup and Tips
To connect an air compressor to an auxiliary air tank, use a pressure-rated air hose between the compressor outlet and the tank inlet, make sure the tank is rated for at least the compressor’s possible pressure, and keep the tank’s pressure gauge, drain valve, and safety relief valve installed and working. Never use an unapproved container as an air receiver.
Adding a second tank gives the compressor more stored air. This can provide longer bursts for nailers, impact tools, blow guns, and other intermittent air demands. It does not increase the compressor pump’s CFM, so a small pump will still struggle with a tool that consumes more air than the pump produces.
The most important specification is the auxiliary tank’s maximum allowable working pressure, often marked as MAWP. A compressor capable of reaching 150 PSI should not be connected to a receiver rated below the pressure that could reach it.
OSHA requires workplace air receivers to have an indicating pressure gauge and one or more spring-loaded safety valves. OSHA also requires a drain for removing accumulated water and oil and states that no valve should be installed between the receiver and its safety relief valve.
For how to connect air compressor to air tank, there are two common layouts. The simplest portable setup connects the compressor’s regulated quick-coupler outlet to an auxiliary tank with a rated hose. A shop installation may connect the additional receiver on the tank-pressure side of the system, placing the regulator downstream so both receivers provide stored air at full receiver pressure.
The second method involves unregulated compressor pressure and should only use manufacturer-approved ports, pressure-rated components, and a properly equipped receiver. Do not drill, weld, or add homemade ports to an air tank.
Below is a practical setup method, a parts list, pressure-routing options, regulator placement, tank sizing, and the safety checks to make before pressurizing the system.
What You Need to Connect an Air Compressor to an Air Tank
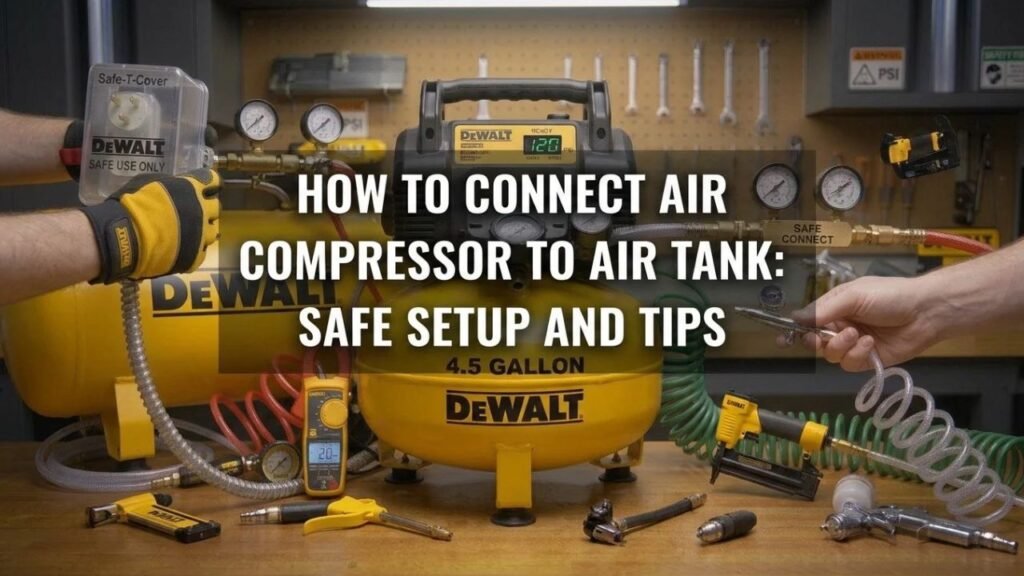
Most portable auxiliary-tank setups require only a few components, but every component exposed to tank pressure needs the correct rating.
Pressure-Rated Auxiliary Air Tank
Use a tank built specifically to hold compressed air.
The tank should have a clearly marked pressure rating that is at least as high as the greatest pressure that can reach it.
For example:
- Compressor maximum pressure: 150 PSI
- Auxiliary receiver rating: 150 PSI or higher
- Hose and fittings: rated above expected system pressure
Do not use an old propane cylinder, refrigerant cylinder, water tank, homemade welded container, or an unknown rusty tank as an air receiver.
OSHA’s air-receiver rules reference ASME pressure-vessel construction for covered workplace installations and require accessible drains, gauges, and relief valves.
Air Hose
Use compressed-air hose with a working-pressure rating above your system pressure.
Common hose sizes include:
- 1/4 inch
- 3/8 inch
- 1/2 inch
A larger inside diameter creates less airflow restriction, mainly across longer hose runs or when using higher-CFM tools.
For a small portable compressor and auxiliary tank, 3/8-inch hose is a common practical choice.
Quick-Connect Couplers and Plugs
Quick couplers make the auxiliary tank easy to connect and disconnect.
Make sure all plugs and sockets use the same profile. Industrial/M-style fittings are common in U.S. home shops, but several fitting styles exist and are not always interchangeable.
All couplers need to be pressure rated for the system.
Pressure Gauge
The auxiliary tank should have a gauge that shows actual receiver pressure.
OSHA requires covered air receivers to have a readily visible pressure gauge.
The gauge tells you:
- When the tank is empty
- How quickly it fills
- When compressor pressure has equalized
- How much stored pressure remains
- If pressure is rising beyond the intended range
Safety Relief Valve
A compressed-air receiver needs a spring-loaded relief valve sized and set for the tank.
The relief valve is a backup device if normal compressor pressure controls fail.
OSHA states that receiver relief capacity must prevent pressure from exceeding the receiver’s maximum allowable working pressure by more than 10% under its covered standard, and no valve may sit between the receiver and its safety valve.
Do not plug a relief-valve opening because you need another port.
Drain Valve
Compressed air contains moisture that can condense inside the receiver.
The tank needs a drain at or near its lowest collection point.
OSHA requires receiver drainage to prevent excessive accumulation of oil and water.
Key Takeaway: Use a purpose-built pressure vessel with a gauge, relief valve, drain, and fittings rated for the highest pressure the system can produce.
How to Connect Air Compressor to Air Tank Step by Step
The following method is suited to a portable compressor and a separate auxiliary tank fitted with normal air couplers.
1. Turn Off and Depressurize the System
Switch off the compressor and unplug it.
Release pressure from the hose before changing fittings.
You do not necessarily need to drain the compressor’s entire receiver for a simple quick-coupler connection, but the hose and any component you are opening should not be pressurized.
2. Check the Auxiliary Tank Pressure Rating
Find the label, stamped plate, or manufacturer specifications.
Confirm that the tank can safely accept the pressure you plan to send into it.
If the rating is unreadable, the tank has deep corrosion, it is badly dented, or its history is unknown, do not use it.
3. Inspect the Tank Hardware
Verify that the tank has:
- Working pressure gauge
- Safety relief valve
- Drain
- Secure inlet/outlet fittings
- No severe rust
- No damaged threads
- No obvious air leaks
Do not substitute an ordinary plug for a relief valve.
4. Install Matching Air Fittings
Fit compatible quick-connect plugs and couplers to the compressor hose and tank.
Use thread sealant made for compressed-air fittings on tapered pipe threads where required.
Keep sealant away from the first thread or two so material is less likely to enter the airflow path.
Do not use excessive force on aluminum manifolds or small brass fittings.
5. Connect the Compressor Outlet to the Tank Inlet
For the simplest portable setup, the air path is:
Compressor → regulator → quick coupler → air hose → auxiliary tank
This arrangement fills the auxiliary tank only to the regulator’s output pressure.
For example, if the compressor receiver reaches 150 PSI but its regulator is set to 120 PSI, the auxiliary tank will receive roughly 120 PSI rather than the full 150 PSI.
That provides less stored air than charging the tank to 150 PSI, but it avoids modifying the compressor’s high-pressure tank manifold.
6. Set the Compressor Regulator
Set the output pressure below the rating of every downstream component.
If the auxiliary tank is rated for 125 PSI, do not feed it from a regulator set to 140 PSI.
A suitable relief valve on the auxiliary tank remains necessary; a regulator should not be treated as the tank’s only overpressure protection.
7. Start the Compressor
Turn the compressor on and let the auxiliary tank fill.
Watch both pressure gauges.
Pressure should rise smoothly.
Stop the compressor immediately if:
- A fitting leaks badly
- The tank makes abnormal noises
- Pressure exceeds its intended range
- The relief valve repeatedly opens
- The tank or manifold shows deformation
8. Check for Leaks
Apply a soap-and-water leak-check solution around threaded fittings and couplers.
Growing bubbles indicate escaping air.
Depressurize the system before tightening or resealing the joint.
Do not work on a fitting while it is under pressure.
9. Connect the Tool
If the auxiliary tank has an outlet manifold, connect the tool hose to its outlet.
A useful portable layout is:
Compressor → hose → auxiliary tank → regulator → tool
This is especially helpful when the auxiliary tank is placed closer to the work area.
10. Drain Moisture After Use
After the tank cools, moisture can collect at the bottom.
Drain it at intervals appropriate for humidity and use.
OSHA requires receivers in covered workplaces to be drained frequently enough to prevent excessive liquid accumulation.
Key Takeaway: For a simple setup, feed a pressure-rated auxiliary receiver from the compressor’s regulated outlet, monitor both gauges, test for leaks, and drain collected moisture regularly.
Where Should the Regulator Go With an Auxiliary Air Tank?
Regulator placement determines how much pressure the second tank can store.
Regulator Before the Auxiliary Tank
Layout:
Compressor tank → regulator → auxiliary tank → tool
This is the easier portable arrangement.
If the regulator is set to 100 PSI, the auxiliary receiver can only fill to roughly 100 PSI.
Advantages include:
- No modification to compressor manifold
- Easy quick-connect installation
- Lower auxiliary tank pressure
- Simple portable setup
The tradeoff is less stored usable air.
Regulator After the Auxiliary Tank
Layout:
Compressor receiver → auxiliary receiver → regulator → tool
This lets both tanks operate at receiver pressure.
A 150-PSI compressor and a 150-PSI-rated auxiliary receiver can then equalize close to the compressor’s normal cut-out pressure.
The downstream regulator reduces that stored pressure to the tool requirement.
This arrangement provides more useful storage, but connecting an extra receiver to the unregulated side should only be done through a manufacturer-approved tank-pressure outlet or properly designed compressed-air piping.
Never remove safety hardware or drill into the compressor tank to create a port.
Why Regulator Location Changes Stored Air
Suppose the auxiliary tank is 10 gallons.
Charging it to 150 PSI stores more compressed air than charging it to 90 PSI.
The physical tank remains 10 gallons in both cases; more air mass has been compressed into that same volume at the higher pressure.
Key Takeaway: A regulator before the auxiliary tank gives a simpler lower-pressure setup; placing regulation after both receivers provides more stored air but requires a properly designed high-pressure connection.
Do You Need a Check Valve Between the Compressor and Extra Tank?
Not always.
A check valve allows air to flow in one direction and blocks reverse flow.
When a Check Valve Is Useful
A check valve may be used when a system is intentionally designed so one receiver retains pressure after the upstream supply loses pressure.
OSHA documentation for certain compressed-air systems describes an inlet-side check valve as a means of preventing loss of stored air if the compressor supply fails.
Large compressor systems may also contain check valves as part of the normal compressor-to-receiver plumbing.
When You Want Both Tanks to Equalize
If an auxiliary receiver is simply added to increase system storage, you normally want both tanks to share pressure.
A one-way check valve placed incorrectly can prevent the air from moving in the direction you expect.
Do not add one simply because it appears in another compressor diagram.
Follow the tank or compressor manufacturer’s piping layout.
Isolation Valves Need Care
A shutoff valve can make maintenance easier, but each receiver still needs its own working overpressure protection.
Never arrange a shutoff valve so closing it isolates a pressurized tank from its only safety relief valve.
OSHA explicitly prohibits placing a valve between an air receiver and its safety valve under its receiver standard.
Key Takeaway: A check valve is useful in some one-way storage systems, but an auxiliary receiver does not automatically need one; never isolate a tank from its relief valve.
Can You Connect Two Air Compressor Tanks Together?
Yes, two proper compressed-air receivers can be connected to increase total storage.
For example:
- Compressor tank: 6 gallons
- Auxiliary tank: 10 gallons
- Approximate combined physical storage: 16 gallons
Both tanks will move toward the same pressure if connected without a regulator or check valve separating their pressures.
The Pump Does Not Become Larger
Adding another receiver does not increase compressor displacement.
If the pump produces 3 SCFM at 90 PSI before adding a tank, it still produces roughly the same rated airflow afterward.
The extra tank gives you more stored air before pressure drops.
Initial Fill Takes Longer
A larger combined volume requires more air before reaching cut-out pressure.
A compressor that fills a 6-gallon receiver quickly may take much longer after another 20-gallon tank is connected.
That is normal.
More Storage Can Help Intermittent Tools
Extra receiver volume is useful for tools that consume air in bursts, such as:
- Impact wrenches
- Nailers
- Staplers
- Blow guns
- Air ratchets used briefly
The reserve can supply short peaks above the pump’s instantaneous output.
It Will Not Solve Low CFM for Continuous Tools
A sander needing 10 CFM cannot run continuously from a compressor that produces 4 CFM simply because you added a 20-gallon tank.
You may get a longer initial run, but pressure will eventually fall.
Key Takeaway: Connecting tanks increases stored air and burst runtime, but it also increases fill time and does not increase compressor CFM.
Can You Use a Portable Air Tank as an Auxiliary Tank?
Yes, if the tank is designed for compressed air and its fittings support the intended connection.
Portable air tanks are commonly filled from a compressor and then disconnected for inflation or other short tasks.
To use one while connected:
- Confirm its maximum working pressure.
- Check the relief valve.
- Inspect the gauge.
- Verify the hose and fittings.
- Connect through a rated air hose.
- Keep supply pressure within the tank rating.
Some portable tanks include a hose intended mainly for discharging air rather than acting as a high-flow receiver in a shop system.
Small valves and narrow hoses can restrict airflow to demanding tools.
What PSI Should the Auxiliary Air Tank Be Rated For?
The auxiliary receiver should be rated for at least the highest pressure that can reach it.
Do not base this only on normal tool pressure.
For example:
System A
- Compressor cut-out: 150 PSI
- Auxiliary tank connected before regulator
- Tank needs a rating suitable for at least that 150-PSI supply
System B
- Compressor cut-out: 150 PSI
- Downstream regulator fixed at 100 PSI
- Auxiliary tank fed only from regulated side
- Tank sees approximately 100 PSI during normal operation
Even in a regulated setup, the receiver needs proper overpressure protection.
A regulator can fail. Its presence does not eliminate the need for rated equipment and a relief valve.
What Size Hose Should You Use Between the Compressor and Tank?
Hose diameter matters more as flow demand and hose length increase.
1/4-Inch Hose
Good for:
- Small nailers
- Inflation
- Short low-CFM connections
- Small portable compressors
It can become restrictive for larger tools or longer runs.
3/8-Inch Hose
A common general-purpose choice for:
- Impact tools
- Medium portable compressors
- Auxiliary tanks
- Garage use
It gives lower pressure loss than 1/4-inch hose at higher airflow.
1/2-Inch Hose or Pipe
Useful in higher-flow installations and longer shop runs.
Larger fittings will not increase the compressor’s CFM rating, but they reduce unnecessary pressure drop between the tank and the tool.
Keep the smallest coupler, regulator, valve, and hose in mind. A large hose connected through a tiny restrictive fitting still limits flow.
Does an Extra Air Tank Increase CFM?
No.
The pump determines how quickly new compressed air is produced.
An extra tank increases the amount of stored air available.
For example, assume:
- Tool demand: 8 CFM
- Compressor output: 4 CFM
An auxiliary tank can supply the 4-CFM shortfall for a while.
Once the stored air falls, the compressor still cannot maintain the tool indefinitely.
This is the main reason extra tanks work well for intermittent jobs but have limited benefit for continuous sanding, grinding, or spraying.
Does an Auxiliary Tank Make the Compressor Run Less?
It can change the cycling pattern, but it does not reduce the total amount of air the compressor must produce for the same job.
A larger combined receiver may:
- Make each pump cycle longer
- Increase the time between some cycles
- Reduce very rapid cycling
- Take longer to reach cut-out pressure
For a fixed amount of tool air consumption, the compressor still has to replace the air you used.
Do not assume a large tank permits a light-duty pump to run continuously beyond its rated duty cycle.
Follow the compressor manufacturer’s duty-cycle requirements.
Common Mistakes When Connecting an Extra Air Tank
Using a Tank With an Unknown Pressure Rating
Do not pressurize a tank unless you know it was built for compressed air and know its working-pressure rating.
Removing the Safety Relief Valve
Never use the relief-valve port as a convenient hose connection.
OSHA requires a spring-loaded safety valve and prohibits placing a valve between the receiver and its relief device.
Using Low-Pressure Hose
Garden hose, fuel hose, vinyl tubing, and other non-air-service products are not substitutes for rated compressed-air hose.
Modifying the Compressor Tank
Do not drill or weld an air receiver.
Pressure vessels are engineered components, and modifications can weaken them.
Ignoring Moisture
Water accumulates inside compressed-air receivers.
OSHA requires a receiver drain and calls for draining often enough to avoid excessive liquid accumulation.
Internal corrosion can weaken a tank over time.
Assuming the Extra Tank Adds Pump Capacity
The extra receiver gives you storage, not more CFM.
If your tool continuously requires more air than the compressor produces, a higher-output compressor is the real solution.
Key Takeaway: The biggest mistakes are using an unrated tank, bypassing safety hardware, exceeding pressure ratings, using unsuitable hose, and expecting storage to replace pump airflow.
A Simple Auxiliary Air Tank Plumbing Diagram
For a portable setup, think of the system this way:
Compressor receiver → compressor regulator → quick coupler → rated hose → auxiliary air tank → tool
The auxiliary tank should retain its own:
- Pressure gauge
- Relief valve
- Drain valve
For a properly engineered shop setup using full receiver pressure:
Compressor receiver → approved receiver-pressure connection → auxiliary receiver → regulator/filter → distribution hose → tool
The second layout provides greater stored-air capacity at higher receiver pressure, but all tank-pressure components must be rated accordingly.
In either layout, keep the relief valve directly connected to its receiver and accessible.
How to Maintain an Auxiliary Air Tank After Installation
The extra receiver becomes part of the compressor system and needs the same basic inspection attention as the main tank.
Drain Condensation
Open the drain according to the manufacturer’s procedure and usage conditions.
Humid environments can create significant water inside compressed-air tanks.
Inspect for Corrosion
Look for:
- Deep rust
- Pitting
- Swelling
- Dents
- Damaged welds
- Leaking seams
Do not attempt to patch a compromised pressure vessel yourself.
Check the Relief Valve
OSHA requires safety valves on covered workplace receivers to be tested frequently and at regular intervals to verify operation.
Follow the tank manufacturer’s procedure and replacement schedule.
Check Fittings for Leaks
Air leaks make the pump run more frequently and waste stored air.
Soap solution can reveal small leaks around threaded connections.
Key Takeaway: Drain water, watch for corrosion, maintain the relief valve, and fix fitting leaks so the auxiliary receiver remains safe and useful.
Conclusion
For how to connect air compressor to air tank, the simplest setup uses a pressure-rated hose from the compressor’s regulated outlet to a purpose-built auxiliary receiver equipped with a gauge, relief valve, and drain.
Make sure every part can withstand the pressure it will receive. If the compressor can send 150 PSI into the second tank, that receiver and its pressure-side hardware need suitable ratings. Never rely on an unmarked tank or remove safety devices to gain another connection port.
An extra tank gives you more stored air, not more compressor CFM. It can extend burst runtime and change cycling behavior, but a continuously air-hungry tool still needs a pump capable of keeping up.
For full receiver-pressure plumbing, use manufacturer-approved connection points and proper compressed-air components. Avoid drilling, welding, or otherwise modifying the compressor or auxiliary pressure vessel.
FAQs About Connecting an Air Compressor to an Air Tank
Can I connect an extra air tank to a small air compressor?
Yes. A small compressor can fill a larger auxiliary receiver as long as the tank and connecting hardware are rated for the pressure. The main drawback is longer fill time. The extra tank does not increase the small compressor’s CFM.
Where should I connect an auxiliary tank to my compressor?
The easiest portable method is to connect the compressor’s regulated quick-coupler outlet to the tank using a rated air hose. A full-pressure shop installation can connect at an approved receiver-pressure outlet, but it requires properly rated plumbing and safety hardware.
Does an auxiliary air tank need a pressure relief valve?
Yes. A compressed-air receiver needs proper overpressure protection. OSHA requires spring-loaded safety valves on covered receivers and states that no valve should be installed between the receiver and its safety valve.
Can I connect a 20-gallon tank to a 6-gallon compressor?
Yes, assuming pressure ratings and connections are compatible. You would have roughly 26 gallons of combined physical receiver volume. The 6-gallon compressor’s pump will take longer to fill both tanks and will still produce the same rated CFM.
Should the regulator go before or after the extra air tank?
Putting the regulator before the auxiliary tank creates a simple lower-pressure setup. Placing regulation after both receivers lets the auxiliary tank store full receiver pressure, but that requires an approved high-pressure connection and components rated for the full system pressure.
Can I use a propane tank as an auxiliary air compressor tank?
No. Use a receiver designed and rated for compressed-air service. A pressure vessel with an unknown condition, unsuitable fittings, corrosion, or no proper compressed-air safety equipment should not be repurposed for this job.
Will adding an air tank make my compressor run air tools better?
It can improve short-burst performance by giving the tool more stored air. It will not fix inadequate pump output for a continuous-use tool. If a tool consumes more CFM than the compressor produces, tank pressure will eventually fall regardless of receiver size.