
How to Use DeWalt Air Compressor 4.5 Gallon Safely and Correctly
Using a DEWALT 4.5-gallon air compressor is straightforward: place it on a stable surface, close the tank drain, connect the correct air hose, turn the compressor on, let the tank fill, and adjust the regulator to the pressure required by your air tool. Always drain tank moisture after use and disconnect power before maintenance.
DEWALT has produced more than one 4.5-gallon compressor, so individual controls and specifications can vary. Models such as the D55146 and newer 4.5-gallon oil-free compressors share the same basic operating process, but you should still follow the manual for your exact model.
If you want to know how to use dewalt air compressor 4.5 gallon, the two pressure readings are especially important. Tank pressure shows stored air pressure, while regulated outlet pressure shows the pressure being delivered to your hose and pneumatic tool.
The compressor should not automatically be set to its highest available pressure. Nailers, inflators, impact tools, spray equipment, and other pneumatic devices have their own pressure limits. Set the regulator according to the tool manufacturer rather than the maximum pressure printed on the compressor.
Safety matters with compressed air. OSHA limits compressed air used for cleaning purposes to less than 30 PSI when appropriate guarding and personal protective equipment requirements are met. This does not mean pneumatic tools should all run at 30 PSI; it specifically applies to compressed-air cleaning.
Once the controls make sense, normal operation comes down to four stages: preparation, filling the tank, setting outlet pressure, and shutting down correctly. Regular draining and basic inspections keep the compressor ready for the next job.
Know the Controls on a DEWALT 4.5 Gallon Air Compressor
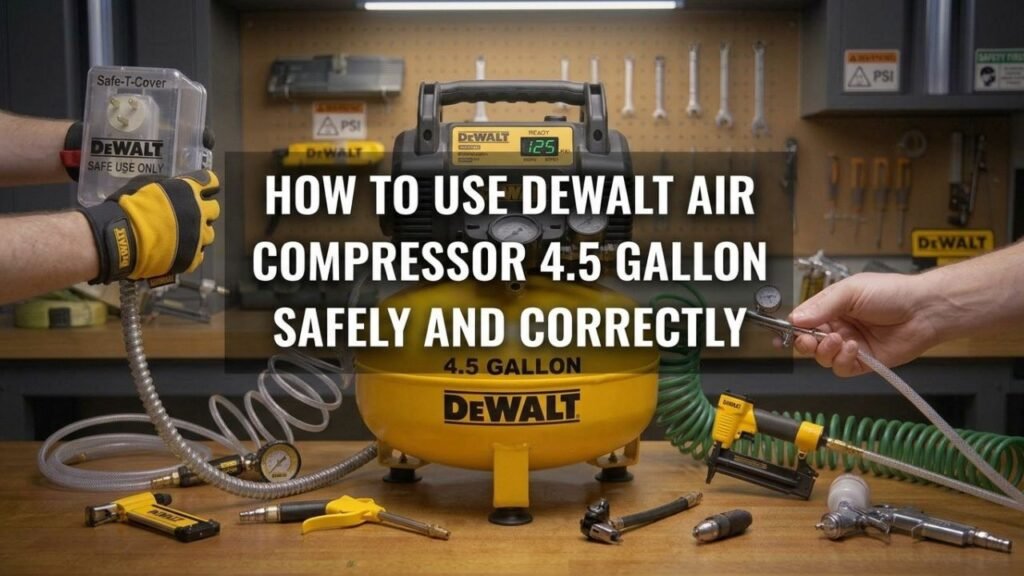
Before turning the compressor on, identify the main controls.
Exact placement varies by model.
Power or Auto/Off Switch
The power control starts and stops automatic compressor operation.
When switched to AUTO or ON, the motor fills the tank until the pressure switch reaches its cut-out setting.
The compressor then stops automatically.
When tank pressure falls during tool use, the motor automatically starts again and refills the tank.
You normally do not need to switch the compressor on and off each time the motor cycles.
Tank Pressure Gauge
The tank gauge shows how much pressure is stored inside the compressor tank.
This is not necessarily the pressure reaching your air tool.
Tank pressure rises while the motor runs and falls as compressed air is consumed.
Regulated Pressure Gauge
The regulated gauge shows outlet pressure after the regulator.
This is the gauge you normally watch when setting PSI for a pneumatic tool.
For example, if a tool calls for 90 PSI, adjust the regulator until the outlet gauge reads approximately 90 PSI while following the tool manufacturer’s instructions.
Pressure Regulator
The regulator controls outlet pressure.
On many DEWALT compressors:
- Turning clockwise increases outlet pressure.
- Turning counterclockwise decreases outlet pressure.
Some regulator knobs must be pulled outward before adjustment and pushed back in to lock the setting.
Quick-Connect Coupler
The quick coupler connects the compressor to the air hose.
Some 4.5-gallon DEWALT compressors have two couplers so more than one hose can be connected.
Connecting two tools does not double compressor airflow. Both tools share the compressor’s available CFM.
Tank Drain Valve
The drain valve is located near the bottom of the tank.
It releases:
- Compressed air
- Condensed water
The valve should be closed during normal operation and opened during tank draining.
Safety Relief Valve
The safety valve protects the tank from excessive pressure.
It is not a normal pressure-control device and should never be modified, plugged, or defeated.
Key Takeaway: Know the difference between tank pressure and regulated outlet pressure. Your air tool should be set from the regulated gauge, not from the compressor’s maximum tank PSI.
How to Set Up a DEWALT 4.5 Gallon Air Compressor
A few checks before startup prevent most beginner problems.
1. Place the Compressor on a Stable Surface
Set the compressor on:
- Firm ground
- Level flooring
- A well-ventilated area
- A location free from excessive dust
Keep the motor and air intake away from walls or objects that block cooling airflow.
Do not operate a model in a storage position if its manual states that it must run horizontally.
2. Check the Power Source
Read the compressor nameplate.
Many portable DEWALT 4.5-gallon compressors are 120V units, but never assume voltage from tank size alone.
Use:
- Correct voltage
- Properly grounded outlet
- Adequately rated branch circuit
Avoid undersized extension cords.
Voltage drop through a long or thin cord can make the motor difficult to start and may cause overheating or nuisance breaker trips.
3. Check the Tank Drain
Make sure the drain valve is closed before filling the tank.
If it is open, you may hear air escaping continuously and the compressor may struggle to build pressure.
4. Inspect the Hose
Check the air hose for:
- Cracks
- Cuts
- Abrasion
- Damaged fittings
- Loose couplers
The hose must be rated for pressure above the compressor’s operating pressure.
5. Inspect the Tool
Before connecting a pneumatic tool, check its required:
- PSI
- CFM
- Fitting size
- Lubrication requirements
Pressure and airflow are different.
The compressor might produce enough PSI for a tool but still lack enough CFM for continuous operation.
Key Takeaway: Before startup, confirm the correct power supply, close the drain, inspect the hose, and check both the PSI and CFM requirements of the tool you plan to use.
How to Use DEWALT Air Compressor 4.5 Gallon Step by Step
Once the compressor is prepared, operation is simple.
Step 1: Turn the Regulator Down
Before starting, reduce regulated outlet pressure.
Turn the regulator counterclockwise until the outlet pressure is low or reaches zero.
This prevents an unknown high-pressure setting from immediately reaching the connected tool.
Step 2: Connect the Air Hose
Insert the hose fitting into the quick-connect coupler.
Pull back the coupler sleeve if your fitting style requires it.
Push the plug completely into place and release the sleeve.
Gently pull on the hose to make sure it is locked.
Keep a firm grip on pressurized hoses during connection and disconnection because an unsecured hose can whip.
Step 3: Connect the Pneumatic Tool
Attach the other end of the hose to your tool.
Make sure:
- Trigger is released
- Tool is in a safe position
- Required accessories are installed correctly
For a nailer, keep your hands away from the nose and trigger during connection.
Step 4: Plug In the Compressor
Plug the compressor directly into an appropriate grounded receptacle when possible.
Do not use damaged outlets, cords, adapters, or improvised wiring.
Step 5: Switch the Compressor On
Move the power switch to AUTO or ON.
The motor should start.
You will see tank pressure begin rising.
Step 6: Let the Tank Fill
Allow the compressor to run until it reaches its automatic cut-out pressure.
The motor should then shut off by itself.
This does not mean the compressor has turned completely off.
It remains ready to restart when tank pressure drops.
Step 7: Set the Tool Pressure
Check the pneumatic tool’s recommended PSI.
Adjust the compressor regulator until the regulated pressure gauge shows the required setting.
For the most accurate working-pressure adjustment, check the outlet pressure while air is flowing if the tool manufacturer recommends doing so.
Step 8: Begin Using the Tool
Operate the pneumatic tool normally.
While working, you may notice:
- Tank pressure gradually falls.
- The compressor reaches its cut-in pressure.
- The motor starts automatically.
- Tank pressure rises again.
- The motor stops at cut-out pressure.
This cycling is normal.
Key Takeaway: Fill the tank first, then adjust regulated pressure to match the pneumatic tool. The compressor automatically cycles as tank pressure rises and falls.
How to Adjust Pressure on a DEWALT 4.5 Gallon Compressor
Setting pressure correctly protects both the tool and the operator.
Check the Tool’s Maximum PSI
Look on the tool label or instruction manual.
Do not exceed its rated pressure.
Higher PSI does not automatically make every pneumatic tool perform better.
Excessive pressure can:
- Increase wear
- Damage seals
- Make a nailer drive too deeply
- Damage accessories
- Create a bursting hazard
Increase Pressure Slowly
Turn the regulator clockwise gradually.
Watch the regulated pressure gauge.
Stop at the pressure required by the tool.
Reduce Pressure Properly
When lowering the setting, turn the regulator counterclockwise.
Some systems may need a small amount of air released before the gauge settles to the new setting.
Do Not Confuse PSI With CFM
PSI measures pressure.
CFM measures airflow volume.
A compressor may maintain 90 PSI but still run out of air when connected to a high-CFM tool.
That distinction matters with tools such as:
- Die grinders
- Sanders
- Air ratchets
- Spray guns
- Impact wrenches used continuously
Key Takeaway: Set outlet PSI from the pneumatic tool’s specification. Compressor tank pressure can be much higher than the pressure the tool is supposed to receive.
What Tools Can You Run With a DEWALT 4.5 Gallon Compressor?
A 4.5-gallon compressor is well suited to intermittent air-tool use.
The compressor’s CFM rating matters more than tank capacity when matching tools.
Nail Guns
A 4.5-gallon compressor is commonly suitable for:
- Brad nailers
- Finish nailers
- Framing nailers
- Roofing nailers
Nailers use short bursts of air, giving the compressor time to recover between shots.
Tire Inflation
The compressor can be used for inflating many vehicle tires when paired with an appropriate tire inflator.
Set the regulator correctly and verify final tire pressure with an accurate gauge.
Never inflate a tire beyond the vehicle or tire manufacturer’s specified pressure.
Blow Guns
A blow gun can be used for appropriate tasks, but compressed air should never be directed at:
- Skin
- Eyes
- Another person
- Clothing being worn
Compressed air can penetrate skin and propel debris at dangerous speeds.
Impact Wrenches
Many impact wrenches can operate from a 4.5-gallon compressor for short bursts if compressor CFM output matches the tool closely enough.
Long continuous use can drain the tank quickly.
Air Ratchets
Air ratchets can work, but sustained use may cause frequent compressor cycling.
Sanders and Grinders
Pneumatic sanders and grinders often consume substantial CFM continuously.
A 4.5-gallon compressor may run them only for short periods before pressure drops.
Compare the tool’s CFM requirement with the compressor’s rated output at the required PSI.
Key Takeaway: A 4.5-gallon DEWALT works especially well with intermittent tools such as nailers and inflators. Continuous high-CFM tools can outrun a small portable compressor.
How Long Should a DEWALT 4.5 Gallon Compressor Run?
The answer depends on the exact model and tool demand.
Some compressors have duty-cycle limitations.
For example, certain DEWALT portable compressor instructions call for approximately a 50% duty cycle, meaning the motor should not run continuously for the entire operating period.
Continuous operation can occur when:
- Tool requires more CFM than compressor produces
- Air hose leaks
- Fitting leaks
- Drain valve is not fully closed
- Pneumatic tool is used continuously
- Compressor has a mechanical problem
If the compressor never reaches cut-out pressure while no tool is being used, inspect for a leak or fault.
How to Shut Down a DEWALT 4.5 Gallon Air Compressor
Correct shutdown is more than flipping the switch.
1. Turn the Compressor Off
Move the switch to OFF.
The motor should stop.
A short hiss immediately after shutdown can be normal on compressors that unload pressure from the pump discharge area.
2. Unplug the Power Cord
Disconnect the compressor from its electrical source when finished.
Do not pull on the cord itself.
Grip the plug.
3. Turn the Regulator Down
Reduce regulated pressure to zero.
This removes pressure from the outlet side.
4. Disconnect the Tool and Hose
Grip the air hose firmly before disconnecting it.
Residual pressure can make a hose move suddenly.
5. Drain the Tank
Open the tank drain slowly.
Allow compressed air and collected moisture to escape.
Tilt or position the unit only as directed by its manual so water reaches the drain opening.
6. Close the Drain Afterward
Once the tank is empty and dry enough for storage, close the drain without overtightening it.
7. Store the Compressor Properly
Keep it in a:
- Dry location
- Clean area
- Non-freezing location
- Position approved by DEWALT for storage
Key Takeaway: After use, switch off, unplug, reduce regulated pressure, disconnect the hose, drain the tank, and store the compressor in a clean, dry location.
How to Drain a DEWALT 4.5 Gallon Air Compressor
Tank draining is one of the most important maintenance tasks.
Compressed air contains moisture.
As that air cools inside the tank, water condenses.
Why Tank Water Must Be Removed
Water left inside a steel tank can promote internal corrosion.
Over time, corrosion can weaken the tank.
Never drill, weld, patch, or modify a damaged air tank.
Drain After Regular Use
When finished:
- Turn the compressor off.
- Unplug it.
- Reduce tank pressure carefully.
- Place the drain over an appropriate area.
- Open the drain valve slowly.
- Allow air and moisture to escape.
- Close the valve once draining is complete.
Take care because dirty or rusty water can spray from the valve.
Never Remove the Drain Valve Under Pressure
Do not unscrew tank fittings while the receiver contains compressed air.
Confirm pressure has been relieved before maintenance.
Does a DEWALT 4.5 Gallon Compressor Need Oil?
It depends on the model.
Many DEWALT 4.5-gallon portable compressors use oil-free pumps.
An oil-free pump does not require routine compressor-pump oil changes.
Do not add oil to an oil-free pump unless the exact manual specifically instructs you to do so.
Some pneumatic tools still require their own tool oil even when the compressor itself is oil-free.
Those are separate maintenance requirements.
Do You Need a Break-In Period?
Follow the instructions for the exact model.
Do not assume every air compressor requires the traditional procedure of running for 15 or 30 minutes with the drain open.
Some modern oil-free compressors have no user-required break-in procedure.
If your manual does not instruct you to perform a break-in cycle, do not invent one.
Why Does My DEWALT Compressor Keep Turning On and Off?
Cycling is normally part of compressor operation.
Normal Cycling
The motor starts when tank pressure reaches the cut-in point.
It stops when tank pressure reaches the cut-out point.
During heavy tool use, cycles become more frequent.
Excessive Cycling
Very rapid cycling may indicate:
- Air leak
- Small tank relative to tool demand
- Loose hose fitting
- Leaking coupler
- Faulty check valve
- Pressure-switch problem
Spraying soapy water on appropriate external connections can reveal small air leaks through bubbling, provided electrical components are kept dry.
Why Won’t My DEWALT 4.5 Gallon Compressor Build Pressure?
Several faults can prevent pressure buildup.
Drain Valve Is Open
Check this first.
An open drain can release air as quickly as the pump produces it.
Hose or Fitting Is Leaking
Listen for hissing around:
- Couplers
- Hose fittings
- Regulator
- Connections
Tool Is Consuming Air Too Quickly
Disconnect the tool and allow the compressor to fill by itself.
If the tank reaches cut-out normally without the tool, the tool may require more airflow than the compressor can provide continuously.
Air Filter Is Restricted
A dirty intake filter can reduce pump airflow.
Inspect and service it according to the compressor manual.
Internal Compressor Fault
Possible causes include:
- Check-valve problem
- Reed-valve damage
- Seal wear
- Regulator fault
- Pump damage
Stop using the compressor and arrange service if basic checks do not locate the problem.
Key Takeaway: If pressure will not build, check the drain valve, air leaks, tool CFM demand, and intake filter before assuming the pump has failed.
Why Does My DEWALT Air Compressor Trip the Breaker?
A healthy compressor should operate on the electrical circuit specified by DEWALT.
Breaker trips can occur from several conditions.
Undersized Extension Cord
A long, thin extension cord causes voltage drop.
The compressor motor may draw excessive current while trying to start.
Other Loads Are on the Circuit
A compressor shares available circuit capacity with anything else operating on the same branch circuit.
High-load devices can contribute to breaker trips.
Compressor Is Restarting Against Pressure
The unloading system normally reduces pressure against the pump when it stops.
A fault can make restart difficult.
Electrical or Motor Problem
Repeated trips with the correct circuit and no extension cord may indicate an electrical or mechanical fault.
Do not solve repeated trips by installing a larger breaker without confirming that the wiring and compressor are designed for it.
How to Maintain a DEWALT 4.5 Gallon Compressor
Oil-free does not mean maintenance-free in every respect.
Drain the Tank
Drain moisture regularly.
This is one of the most important maintenance steps.
Check the Intake Filter
Keep the filter clean and replace it when needed.
Restricted airflow can reduce compressor performance.
Inspect the Hose
Replace hoses showing:
- Cracks
- Bulges
- Severe abrasion
- Damaged fittings
Check the Power Cord
Do not operate the compressor with:
- Exposed wires
- Cut insulation
- Burned plug
- Loose grounding connection
Inspect for Air Leaks
Occasional minor leakage wastes compressor capacity and makes the motor cycle more often.
Keep Cooling Areas Clean
Do not allow heavy dust or debris to block motor or pump cooling passages.
Check the Safety Valve
Follow DEWALT’s specified procedure for testing the safety relief valve.
Replace a damaged or malfunctioning safety valve rather than modifying it.
Key Takeaway: Drain tank moisture, maintain the intake filter, inspect hoses and electrical components, check for leaks, and keep the compressor cooling areas clean.
Common Mistakes When Using a 4.5 Gallon DEWALT Compressor
Avoiding a few mistakes improves performance and safety.
Setting Pressure to Maximum for Every Tool
The compressor’s maximum tank pressure is not the required tool pressure.
Always regulate the outlet.
Ignoring CFM
A tool may be rated for 90 PSI but require far more airflow than the compressor can continuously produce.
PSI alone does not determine compatibility.
Leaving Water in the Tank
Tank moisture should not remain indefinitely after use.
Using an Undersized Extension Cord
Voltage drop can cause poor motor starting and overheating.
A longer air hose is often preferable to a long electrical extension cord.
Operating With Air Leaks
A continuous leak forces the motor to cycle more frequently.
Using Compressed Air on Your Body
Never use compressed air to clean your skin or clothing while worn.
Particles can be driven into eyes or skin, and high-pressure air can cause serious injury.
Working on a Pressurized Compressor
Before maintenance:
- Switch OFF
- Unplug
- Drain pressure
- Let the compressor cool
Key Takeaway: The most common mistakes are excessive outlet pressure, ignoring CFM demand, failing to drain the tank, using poor electrical connections, and servicing the compressor while pressurized.
Conclusion
For how to use dewalt air compressor 4.5 gallon, begin with the basic setup: place the compressor securely, close the drain valve, connect a suitable hose, plug it into the correct electrical circuit, and turn it on.
Allow the tank to reach cut-out pressure before adjusting the regulator. Set regulated outlet PSI according to the air tool rather than the compressor’s maximum tank pressure. Then operate the tool while allowing the compressor to cycle automatically as needed.
When the job is finished, switch the compressor off, unplug it, turn down the regulator, disconnect the hose, and drain moisture from the tank. These shutdown steps are just as important as startup.
DEWALT has made multiple 4.5-gallon models, so use the model number on your compressor to verify pressure limits, electrical requirements, duty cycle, hose specifications, and maintenance instructions before operating it for the first time.
FAQs About Using a DEWALT 4.5 Gallon Air Compressor
How do I start a DEWALT 4.5 gallon air compressor?
Close the tank drain, turn the regulated pressure down, connect the hose, plug the compressor into the correct outlet, and move the switch to AUTO or ON. Let the tank fill until the motor automatically stops, then set outlet pressure for the tool.
What PSI should I set my DEWALT compressor to?
Set it according to the pneumatic tool’s specification. Many air tools operate around 90 PSI, but nailers, inflators, spray equipment, and other devices can require different settings. Never exceed the tool’s maximum rated pressure.
Do I have to let the compressor fill before using it?
It is generally best to let the receiver reach its normal cut-out pressure before beginning work. This gives you the maximum stored-air reserve and makes pressure adjustment easier.
Why does my DEWALT compressor automatically turn back on?
This is normal. As you use air, tank pressure drops to the compressor’s cut-in pressure. The pressure switch then starts the motor automatically and stops it again once cut-out pressure is reached.
Should I drain my DEWALT air compressor after every use?
Regular tank draining is strongly recommended because moisture condenses inside the receiver. Leaving water inside promotes corrosion. Follow the draining frequency stated in your exact DEWALT manual.
Can I run an impact wrench with a 4.5 gallon DEWALT compressor?
Often for intermittent use, provided the compressor’s CFM output at the required PSI is sufficient for the wrench. Continuous impact-wrench operation can consume air faster than a small compressor replaces it.
Is a DEWALT 4.5 gallon compressor oil free?
Many DEWALT 4.5-gallon portable models are oil-free, including current designs, but verify your exact model before assuming no pump oil is required. Pneumatic tools may still need their own lubrication.
Why does my DEWALT compressor run continuously?
Heavy air-tool demand can keep the motor running. If it also runs continuously with no tool connected, check the drain valve, hose fittings, couplers, regulator, and other areas for leaks or a compressor fault.