
How to Change Sandpaper on Makita Belt Sander: Complete Guide
Changing the abrasive belt on a Makita belt sander is usually simple: disconnect the power, pull the belt-release lever fully outward to remove tension, slide the old belt off the rollers, install the replacement in the correct direction, return the lever to its operating position, and check that the new belt tracks correctly before sanding.
What many people call “sandpaper” on a belt sander is actually a continuous abrasive sanding belt. The belt loops around the front and rear rollers and moves at high speed while the tool is running.
For how to change sandpaper on Makita belt sander, the procedure is similar across many Makita models. Makita’s instructions for belt sanders such as the 9404 and 9924DB tell users to pull the release lever completely out, place the abrasive belt over the rollers, and return the lever to its original position.
Belt direction also matters. Makita states that the directional arrow printed on the back of the sanding belt should point in the same direction as the arrow marked on the tool.
Makita belt sanders do not all use the same belt dimensions or tracking system. The 9403 uses a 4 x 24-inch belt, the 9903 uses a 3 x 21-inch belt, and the 9920 uses a 3 x 24-inch belt.
Taking a few extra seconds to verify belt size, direction, and tracking can prevent torn belts, damaged workpieces, and premature abrasive wear.
What You Need Before Changing the Sanding Belt
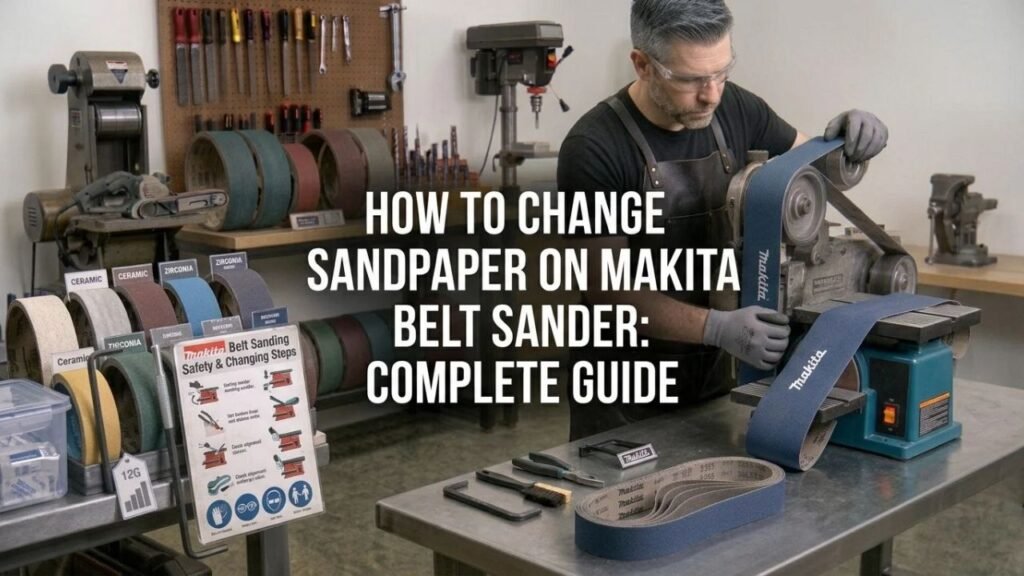
You normally need very little equipment to replace a Makita belt sander belt.
Get the Correct Belt Size
The first requirement is the correct length and width.
A sanding belt that is too short will not fit over the rollers. A belt that is too long will not tension correctly.
Some common Makita belt sander sizes include:
| Makita Model | Sanding Belt Size |
| 9403 | 4 x 24 in. |
| 9404 | 4 x 24 in. |
| 9903 | 3 x 21 in. |
| 9920 | 3 x 24 in. |
| 9924DB | 3 x 24 in. |
| GSB01 | 3 x 21 in. |
Makita currently identifies the 9403 as a 4 x 24-inch sander and the 9903 as a 3 x 21-inch model.
Always verify the model number printed on your tool before buying belts.
Choose the Right Grit
Belt size determines whether the abrasive physically fits. Grit determines how aggressively it sands.
Typical starting points include:
- 40–60 grit for aggressive material removal
- 80 grit for general sanding
- 100–120 grit for smoothing
- 150 grit or finer for lighter finishing work
The correct grit depends on the material and finish you want.
A very coarse belt can remove wood rapidly and leave deep scratches.
Check the Belt Direction Arrow
Look inside the sanding belt before installation.
Most directional belts have an arrow printed on the backing.
Makita states that the belt arrow should correspond with the directional marking on the sander.
Some abrasive belts may be designed to run in either direction. If arrows are present, follow them.
Key Takeaway: Match the replacement belt to the exact Makita model, select a suitable grit, and check the directional arrow before opening the belt-tension lever.
How to Change Sandpaper on Makita Belt Sander
The following method applies to many conventional Makita belt sanders, including popular corded models. Some details differ on cordless and specialty models, so the model manual takes priority.
Step 1: Disconnect the Power
Do not change a sanding belt while the sander is connected to power.
For a corded Makita belt sander:
- Release the trigger.
- Make sure the trigger lock is disengaged.
- Unplug the power cord.
For a cordless Makita sander:
- Turn the tool off.
- Remove the battery pack.
Makita’s corded belt-sander instructions state that the tool should be switched off and unplugged before assembly or adjustment work.
Place the sander on a clean, stable surface.
Step 2: Locate the Belt-Release Lever
Look along the side of the sander near the belt rollers.
Most conventional Makita belt sanders use a lever that controls roller tension.
When the lever is in its normal position, the rollers keep the sanding belt tight.
Pulling the lever outward releases that tension.
Step 3: Pull the Lever Fully Out
Pull the lever all the way to its released position.
The front roller or tensioning mechanism should move enough to loosen the sanding belt.
Makita’s 9404 instructions specifically say to pull the lever completely out before installing or removing the abrasive belt.
The cordless GSB01 uses the same basic procedure: pull the lever fully outward and remove the belt from the rollers.
Do not force the lever beyond its normal travel.
Step 4: Slide the Old Sanding Belt Off
With tension released, slide the old abrasive belt sideways off the rollers.
Inspect the old belt while it is off the machine.
Look for:
- Torn seam
- Cracked backing
- Missing abrasive
- Uneven wear
- Burned areas
- One edge more worn than the other
- Heavy loading with wood, paint, or finish
Uneven edge wear can point toward a tracking problem rather than normal abrasive wear.
Step 5: Inspect the Rollers and Platen
Before installing the new belt, look at the exposed sander components.
Check the rollers for:
- Heavy dust buildup
- Adhesive residue
- Damage
- Material wrapped around the roller
- Unusual looseness
Also inspect the platen, which is the flat support beneath the sanding belt.
A damaged or heavily worn platen can affect sanding quality.
Clean loose dust using the method recommended for the tool. Avoid introducing liquids into the motor or bearing areas.
Step 6: Check the Arrow on the New Belt
Look on the inside surface of the replacement belt.
Find the directional arrow.
Find the matching direction marking on the Makita sander.
Orient the belt so both arrows point the same way.
Makita repeatedly specifies this requirement in its belt-sander manuals and FAQ information.
Installing a directional belt backward can put stress on its joint and may shorten belt life.
Step 7: Slide the New Belt Over Both Rollers
Place the replacement belt around the front and rear rollers.
Make sure:
- The abrasive faces outward
- The belt is not twisted
- The belt is approximately centered
- The belt is seated over both rollers
- The direction is correct
Do not try to stretch a belt that is obviously too short.
That usually means you have the wrong belt size.
Step 8: Return the Tension Lever
Once the belt is correctly positioned, return the lever to its original operating position.
This tensions the sanding belt around the rollers.
Makita’s instructions describe returning the lever to its original position after the abrasive belt has been installed.
Keep your fingers away from pinch points between the belt and rollers while doing this.
Step 9: Check Belt Alignment by Hand
Before reconnecting power, look at the belt position.
It should sit reasonably straight along the sander.
On models where the belt can be rotated safely by hand with power disconnected, gently move it through a short distance and make sure it is not obviously trying to walk off one side.
Do not put fingers into the roller area.
Step 10: Reconnect Power and Test Tracking
Hold the sander securely with the sanding belt clear of the workpiece.
Turn it on briefly.
Watch where the belt runs.
It should remain centered or within the tracking position specified for the model.
Makita’s 9404 manual states that tracking should be adjusted if the belt runs past the edge of the base or moves more than 6 mm, or 1/4 inch, inward from the base edge.
Switch the sander off if the belt immediately moves toward one edge.
Do not continue running a badly misaligned belt.
Key Takeaway: Disconnect power, release belt tension, remove the old belt, match the arrows on the replacement, place it over both rollers, restore tension, and test tracking before touching the workpiece.
How to Adjust Belt Tracking on a Makita Belt Sander
Tracking refers to the position of the sanding belt as it rotates around the rollers.
A correctly tracked belt stays in its intended path rather than moving sideways.
Use the Tracking Knob on Manual-Adjustment Models
Many Makita models have a tracking adjustment knob or screw.
Run the tool while holding it securely and keeping it away from the workpiece.
Turn the adjustment gradually.
Small changes can move the belt noticeably.
The 9404 instructions direct users to adjust the tracking knob when the belt extends beyond the base or moves excessively inward.
Do not make large adjustments rapidly.
Some Makita Models Have Auto-Tracking
Makita markets models such as the 9903 and 9920 with an auto-tracking belt system.
The newer cordless GSB01 is also listed with auto belt tracking.
You should still inspect belt position after installing a new abrasive belt.
The GSB01 manual even provides a tracking-adjustment procedure and describes setting an approximately 0–3 mm gap at the side of the belt when adjustment is needed.
Why a Belt Keeps Moving Sideways
Tracking trouble can result from:
- Incorrect adjustment
- Damaged sanding belt
- Poorly made belt seam
- Debris on a roller
- Worn roller
- Belt installed incorrectly
- Damaged tension mechanism
If the belt cannot be centered with normal adjustment, stop using the sander and inspect these areas.
Key Takeaway: After every belt change, confirm tracking. Use the adjustment control where required, even on models that normally provide automatic belt tracking.
Which Direction Does a Makita Sanding Belt Go?
Direction is one of the easiest details to miss during belt replacement.
Match the Arrows
The belt backing may have arrows showing its intended travel direction.
Makita tools also have a directional reference.
Match them.
Makita’s own FAQ states that Makita belts have directional arrow markings and should be installed according to the procedure in the tool manual.
Why Direction Matters
Many abrasive belts are joined at a seam.
The manufacturer designs that joint to run in a particular direction.
Running a directional belt backward can increase stress on the joint as it passes around the rollers.
Possible results include:
- Premature seam failure
- Belt tearing
- Rough operation
- Reduced belt life
What if the Belt Has No Arrow?
Check the abrasive manufacturer’s packaging.
Some belts use a bidirectional splice and can be installed either way.
Do not invent a direction based only on the visible seam.
Follow the belt manufacturer’s instructions.
Common Makita Belt Sander Belt Sizes
Knowing your tool’s belt dimensions makes replacement much easier.
Makita 9403
The Makita 9403 uses a 4 x 24-inch sanding belt.
Makita lists it as an 11-amp belt sander with a belt speed of 1,640 feet per minute.
Its wide belt suits aggressive stock removal on larger surfaces.
Makita 9903
The Makita 9903 uses a 3 x 21-inch belt.
Makita lists variable belt speed from 690 to 1,440 feet per minute and an auto-tracking system.
Makita 9920
The Makita 9920 uses a 3 x 24-inch sanding belt.
It also has variable speed and Makita’s auto-tracking belt system.
Makita GSB01
The cordless 40V max XGT GSB01 uses a 3 x 21-inch sanding belt.
Makita lists belt speeds from 390 to 1,540 feet per minute and an auto-tracking system.
Key Takeaway: Makita belt sizes vary by model, so use the model number rather than measuring an old stretched or damaged belt whenever possible.
When Should You Change a Belt Sander Belt?
A sanding belt does not need to break before it should be replaced.
Performance often declines gradually.
The Belt Stops Cutting Efficiently
If the sander needs more time or pressure to remove the same material, the abrasive may be worn.
Pressing harder is usually not the answer.
Makita’s sanding instructions warn against excessive pressure and state that the weight of the tool provides adequate pressure during normal operation.
Abrasive Is Missing
Replace a belt with large areas where abrasive grains have broken away.
The belt can no longer sand uniformly.
The Belt Is Torn or Cracked
Do not continue using a belt with:
- Tears
- Cracked backing
- Damaged seam
- Frayed edges
High belt speed can cause a weakened belt to fail suddenly.
The Belt Is Heavily Loaded
Wood resin, paint, finish, and soft materials can clog abrasive grains.
Some belts can be cleaned with an abrasive cleaning stick, but heavily loaded or damaged belts are better replaced.
Sanding Quality Becomes Uneven
A worn belt may leave:
- Deep random scratches
- Uneven cutting
- Burn marks
- Lines across the workpiece
Check both the abrasive and belt tracking.
Key Takeaway: Replace a sanding belt when cutting slows, the abrasive is worn or loaded, the backing is damaged, the seam is failing, or sanding quality becomes inconsistent.
Common Mistakes When Changing a Makita Sanding Belt
Most replacement problems come from a small number of installation errors.
Changing the Belt With Power Connected
Always unplug a corded sander or remove the battery before touching the belt.
The trigger can be activated unexpectedly.
Installing the Belt Backward
Check the directional arrows before restoring tension.
Do not wait until the belt is already running.
Buying the Wrong Belt Size
A belt that is even slightly wrong in length or width may not work correctly.
Use the Makita model number to select the replacement.
Forgetting to Restore the Lever
The release lever must be returned fully to its normal operating position.
Otherwise, the belt may remain loose.
Ignoring Belt Tracking
A new belt should not be assumed to track perfectly.
Check alignment before sanding.
Testing the New Belt Against the Workpiece
Makita instructs users to keep the tool away from the workpiece while switching it on or off.
Start the sander in free air, allow the belt to reach speed, verify its position, and then bring it gently onto the material.
Touching the Fine Edges of a Moving Belt
Never try to guide a running sanding belt by hand.
Make tracking changes only through the tool’s adjustment mechanism.
Sanding Metal With Wood Dust in the Bag
If the model uses a dust bag and you move from wood to metal, empty combustible dust first.
Makita’s GSB01 instructions specifically warn users to empty wood or other material dust before sanding steel because sparks can create a fire hazard.
Key Takeaway: Disconnect power, use the correct belt, match the direction arrows, restore full tension, check tracking, and never touch or manually guide a moving belt.
Why Does My New Makita Sanding Belt Keep Coming Off?
A correctly installed belt should stay on the rollers during normal operation.
Repeated derailment means something needs attention.
Tracking Is Incorrect
This is the first thing to check.
Use the tracking control according to the model manual.
The Belt Size Is Wrong
An incorrect belt length may not hold proper tension.
Check both width and circumference.
The New Belt Is Damaged
A badly joined or distorted belt can track poorly from the first use.
Try another high-quality belt of the correct size if adjustment cannot stabilize it.
The Roller Is Dirty
Buildup on one side of a roller changes its effective diameter and can push the belt sideways.
Inspect the rollers with the tool disconnected from power.
A Roller or Bearing Is Worn
Excessive play can prevent consistent tracking.
If the roller visibly wobbles, service may be needed.
Tension Mechanism Is Not Locking
The belt-release lever should return fully and hold tension.
A damaged spring or tensioning mechanism can allow the belt to run loose.
Can You Use Any Brand of Sanding Belt on a Makita Belt Sander?
The abrasive does not necessarily have to carry the Makita name.
The important requirements are compatibility and quality.
A replacement belt should have:
- Correct width
- Correct length
- Suitable backing
- Suitable grit
- Properly made seam
- Correct direction where applicable
- Rating appropriate for belt-sander use
For example, a 3 x 21-inch abrasive belt made for powered belt sanders can fit an appropriate Makita 3 x 21-inch model if its construction is compatible.
Do not substitute sanding paper intended for hand sanding.
Conclusion
For how to change sandpaper on Makita belt sander, disconnect the power first, pull the belt-release lever completely outward, slide the old abrasive belt off, and inspect the rollers and platen.
Install the correct-size replacement belt over both rollers with the directional arrow matching the arrow on the sander. Return the release lever to its normal position so the belt is properly tensioned.
Before sanding, run the tool with the belt clear of the workpiece and check tracking. Use the tracking knob if the belt starts moving toward either edge. Some Makita models offer automatic belt tracking, but belt position should still be checked after replacement.
The entire job normally takes only a few minutes. Correct belt size, direction, tension, and tracking are the four details that matter most.
FAQs About Changing Sandpaper on a Makita Belt Sander
How Do You Remove Sandpaper From a Makita Belt Sander?
Switch the tool off, unplug it or remove its battery, and pull the belt-release lever fully outward.
The sanding belt will loosen so you can slide it off the front and rear rollers. Makita specifies this lever method on several belt-sander models.
Which Way Does the Belt Go on a Makita Belt Sander?
Look for an arrow printed on the inside of the sanding belt.
Install the belt so its arrow travels in the same direction as the arrow marked on the Makita sander.
How Do You Tighten the Belt on a Makita Belt Sander?
The belt-release lever provides normal belt tension.
After placing the belt around both rollers, return the lever fully to its original operating position.
Do not attempt to stretch the abrasive belt manually.
How Do You Center the Belt on a Makita Belt Sander?
Run the sander clear of the workpiece and watch belt tracking.
If your model has a tracking knob or screw, make small adjustments until the belt runs in its specified position. Makita’s 9404 manual provides an adjusting knob for this purpose.
What Size Sandpaper Does a Makita 9403 Use?
The Makita 9403 uses a 4 x 24-inch abrasive sanding belt. Makita lists the model with an 11-amp motor and 1,640 ft./min. belt speed.
What Size Sanding Belt Does a Makita 9903 Use?
The Makita 9903 uses a 3 x 21-inch sanding belt.
It has variable belt speed and an auto-tracking belt system.
Why Is My Makita Belt Sander Belt Moving Sideways?
The tracking may need adjustment, or the belt, roller, tension mechanism, or belt seam may be damaged.
Stop the tool if the belt begins running off the rollers and inspect the system before continuing.
Can I Change the Belt While the Makita Sander Is Plugged In?
No.
Makita instructs users to switch the tool off and unplug corded models before assembly work. On cordless models, remove the battery before changing the sanding belt.