
How to Attach a Sanding Disc to a Drill Safely and Correctly
A power drill can do much more than make holes. With the right attachment, it can also handle small sanding jobs such as smoothing wood edges, removing rust from metal, cleaning up rough surfaces, preparing material for paint, and reaching areas that are awkward for a larger sander. The key is using the correct sanding attachment and installing it properly.
If you are learning how to attach a sanding disc to a drill, the most important thing to understand is that the sanding disc normally does not go directly into the drill chuck. Instead, the drill holds a mandrel, arbor, or backing-pad shank, and the sanding disc attaches to that backing pad. Depending on the system, the disc may attach with a hook-and-loop surface, pressure-sensitive adhesive, a center screw, or another fastening method.
The setup is usually simple and takes only a minute, but matching the disc to the backing pad matters. A poorly centered disc can wobble, vibrate, sand unevenly, or come loose at speed. You also need to make sure the attachment is securely tightened in the chuck and rated for the speed you plan to use.
This guide explains how to install the common types of drill sanding discs, how to check the setup before starting, which drill settings work best, and what mistakes beginners should avoid.
How to Attach a Sanding Disc to a Drill Correctly
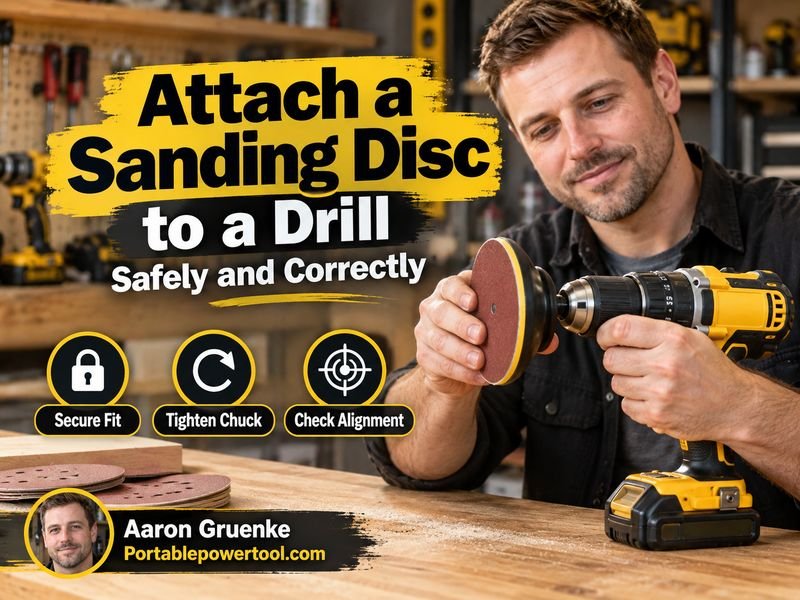
To attach a sanding disc to a drill, first secure a compatible sanding backing pad or mandrel in the drill chuck. Then attach the sanding disc to the pad using its hook-and-loop surface, adhesive backing, center screw, or other fastening system.
The basic process is:
- Disconnect the drill from power or remove the battery.
- Select a backing pad or sanding mandrel with a shank that fits your drill chuck.
- Insert the shank into the chuck.
- Tighten the chuck securely.
- Attach the sanding disc to the backing pad.
- Center the disc carefully.
- Reconnect the drill’s power.
- Run the drill briefly at low speed to check for wobbling.
Never try to clamp an ordinary flat sanding disc directly into a drill chuck. The drill needs a compatible holder or backing pad to support and rotate the disc safely.
Read More: how to sand metal with a drill
What You Need to Put a Sanding Disc on a Drill
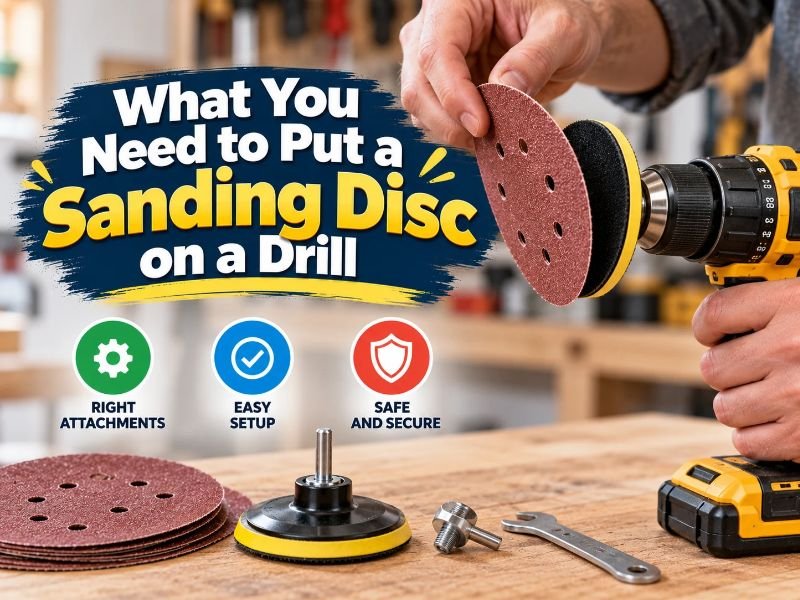
The exact parts depend on the sanding system you have, but most setups require three basic components.
Power Drill
A corded or cordless drill can usually operate small sanding attachments.
A variable-speed drill is especially useful because sanding often works better at controlled speeds than at maximum drill speed.
Sanding Backing Pad or Mandrel
The backing pad supports the abrasive disc and transfers the drill’s rotation to it.
The pad normally has a metal shank that fits into the drill chuck.
Depending on the design, the front of the pad may use:
- Hook-and-loop material
- Pressure-sensitive adhesive
- A threaded center
- A screw or retaining fastener
The backing pad and sanding disc must be designed to work together.
Sanding Disc
The sanding disc contains the abrasive surface that actually removes material.
Different grit sizes are available. Lower grit numbers are generally more aggressive, while higher grit numbers create a smoother finish.
For example, coarse abrasive is useful for removing material quickly, while finer abrasive is better for surface preparation and finishing.
Read More: how to sand wood with a drill
How the Sanding Disc Connects to the Drill
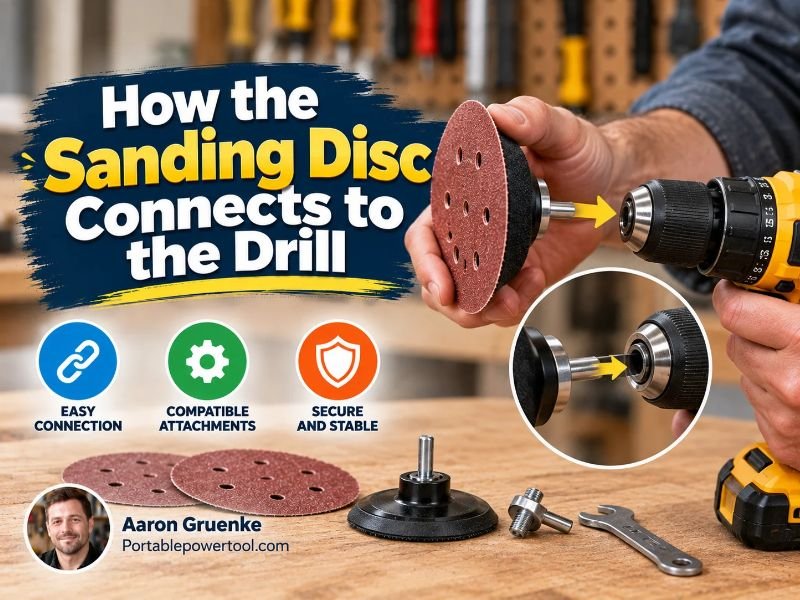
Several attachment systems are commonly used with drill sanding accessories.
Understanding which system you have makes installation much easier.
Hook-and-Loop Sanding Discs
A hook-and-loop system works much like reusable fabric fasteners.
The backing pad has one side of the hook-and-loop system, while the sanding disc has the matching surface.
To install one:
- Place the disc over the backing pad.
- Align the centers.
- Press the disc firmly against the pad.
- Run your fingers around the surface to make sure the disc is fully attached.
This style is convenient because discs can be removed and replaced quickly.
Adhesive-Backed Sanding Discs
Some sanding discs use pressure-sensitive adhesive, often called PSA.
To install one:
- Make sure the backing pad is clean and dry.
- Peel the protective liner from the sanding disc.
- Carefully center the disc over the pad.
- Press it firmly into place.
- Check that the edges are fully attached.
Try to position adhesive discs correctly the first time because repositioning them may weaken the adhesive.
Screw-On Sanding Discs
Some drill sanding systems use a central screw, threaded fastener, or quick-change attachment.
Place the disc on the holder and tighten the retaining fastener according to the accessory manufacturer’s instructions.
Do not overtighten the fastener unless the design specifically requires it. Excessive tightening can damage the disc or backing pad.
Step-by-Step: Installing a Sanding Disc on a Drill
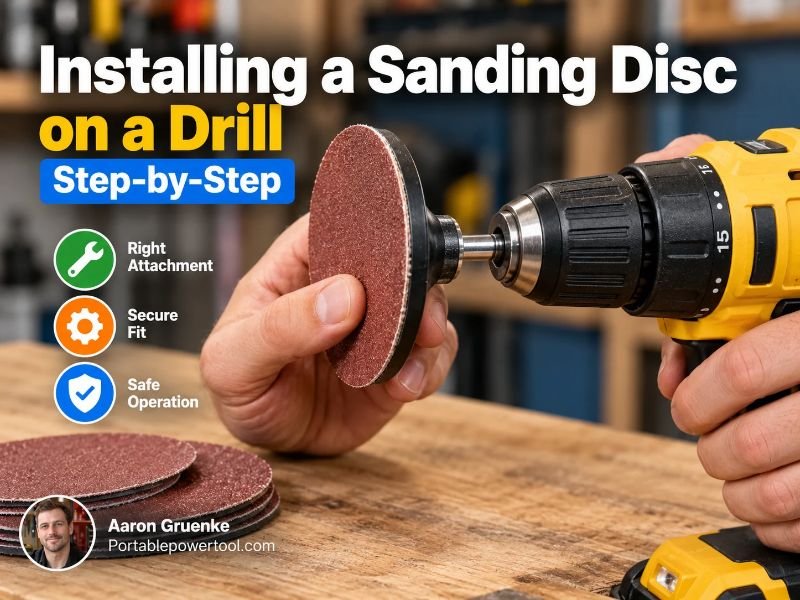
The following process works for many common backing-pad systems.
1. Disconnect the Drill From Power
For a cordless drill, remove the battery.
For a corded drill, unplug it.
This prevents the drill from accidentally starting while your fingers are near the chuck or sanding attachment.
2. Inspect the Sanding Attachment
Check the backing pad, shank, and disc before installation.
Do not use an attachment if you notice:
- Cracks
- A bent shank
- Missing fasteners
- Torn abrasive material
- Damaged hook-and-loop material
- A severely worn backing pad
A damaged attachment may rotate unevenly.
3. Open the Drill Chuck
Rotate the chuck to widen its jaws enough to accept the backing-pad shank.
Insert the shank straight into the center of the chuck.
You do not normally need to push the shank completely to the bottom of the chuck. What matters is that enough of the shank is held securely by the jaws.
4. Tighten the Chuck
Tighten a keyless chuck firmly by hand.
If your drill uses a keyed chuck, tighten it with the correct chuck key according to the drill manufacturer’s instructions.
Check that all chuck jaws are gripping the shank evenly.
5. Attach the Sanding Disc
Install the disc using the method required by your backing pad.
With a hook-and-loop disc, press the disc firmly onto the pad.
With an adhesive disc, remove the liner and stick it to the pad.
With a screw-mounted system, install and secure the required fastener.
6. Center the Sanding Disc
Centering is one of the most important parts of learning how to attach a sanding disc to a drill.
The edge of the disc should extend evenly around the backing pad.
If one side extends farther than the other, the attachment may feel unbalanced when the drill starts spinning.
7. Rotate the Attachment by Hand
Before restoring power, turn the sanding attachment manually.
Make sure nothing looks loose or badly misaligned.
8. Test at Low Speed
Reconnect the battery or power cord.
Hold the drill securely away from the workpiece and briefly operate it at low speed.
The disc should rotate smoothly.
Stop immediately if you notice excessive:
- Wobbling
- Vibration
- Rubbing
- Unusual noise
Disconnect the drill and inspect the setup before continuing.
What Drill Setting Should You Use for a Sanding Disc?
Use a controlled speed rather than immediately running the drill at maximum RPM.
High speed can generate excessive heat, wear abrasive discs quickly, and make the drill harder to control.
Start slowly and increase speed only as needed.
Most importantly, never exceed the maximum operating speed specified by the sanding disc or backing pad manufacturer. The lowest-rated component determines the safe maximum speed for the complete setup.
Use Drill Mode Rather Than Hammer Mode
If you are using a hammer drill, turn off hammer action before sanding.
Use normal rotational drilling mode.
Hammer action is intended for masonry drilling and is inappropriate for a sanding disc.
Choose the Correct Direction
Most ordinary sanding-pad setups are intended to rotate in the drill’s normal forward direction.
Some threaded or specialty attachments may have specific rotation requirements, so check the manufacturer’s instructions.
How to Choose the Right Sandpaper Grit
Sandpaper grit describes the size of the abrasive particles.
A smaller grit number generally removes material faster and leaves deeper scratches. A larger number removes less material and creates a smoother finish.
A simple guide is:
| Grit Range | Typical Use |
| Coarse | Heavy material removal, rough surfaces, rust or old finish removal |
| Medium | General smoothing and surface preparation |
| Fine | Preparing surfaces for finishing or smoothing previous sanding marks |
| Very fine | Light finishing work |
The exact grit you need depends on the material and desired finish.
For many projects, begin with the least aggressive grit that can reasonably accomplish the job. This reduces unnecessary scratches and material removal.
How to Use a Drill With a Sanding Disc
Once the attachment is installed correctly, sanding technique matters.
Hold the Drill With Both Hands When Possible
A spinning sanding disc can pull or grab when it contacts an edge.
Maintaining a secure grip gives you better control.
Start the Drill Before Heavy Contact
Bring the rotating abrasive into contact with the workpiece gradually.
Do not push the disc hard against the material before starting the drill.
Use Light Pressure
Let the abrasive do the cutting.
Excessive pressure can:
- Slow the drill
- Overheat the surface
- Wear the disc faster
- Create uneven sanding marks
- Damage the backing pad
Keep the Disc Moving
Avoid holding the sanding disc in one location for too long.
Constant movement helps prevent dips, scratches, and heat buildup.
Avoid Excessive Angling
A flexible sanding pad can tolerate some angle, but using only the outer edge of the disc puts additional stress on the abrasive and backing pad.
Keep as much of the usable sanding surface against the workpiece as the job allows.
Can You Sand Wood With a Drill?
Yes. A drill-mounted sanding disc can work well for small wood projects.
It may be useful for:
- Smoothing rough edges
- Shaping small pieces
- Cleaning up cuts
- Sanding curves
- Removing small amounts of finish
- Working in areas a larger sander cannot reach
However, a drill is generally less suitable than a random orbital sander or finishing sander for creating a consistently flat finish across a large surface.
A drill-mounted disc is best viewed as a convenient option for smaller or more localized sanding tasks.
Can You Sand Metal With a Drill?
Yes, provided the abrasive disc and backing pad are rated for the material and operating speed.
Drill-mounted sanding discs can help with:
- Removing light rust
- Cleaning metal surfaces
- Smoothing rough edges
- Removing paint
- Preparing metal for refinishing
Metal can become hot during sanding. Use light pressure and allow the workpiece and abrasive to cool if necessary.
Secure small workpieces with a vise or clamp rather than trying to hold the material in one hand while operating the drill with the other.
Can You Use a Sanding Disc on Plastic?
Some plastics can be sanded with a drill-mounted abrasive, but caution is needed.
Friction generates heat quickly. Too much speed or pressure can soften, melt, or distort plastic.
Use:
- Low to moderate speed
- Light pressure
- Appropriate abrasive
- Short sanding intervals
Test an inconspicuous area first when the finished appearance matters.
Sanding Disc vs. Flap Wheel on a Drill
A sanding disc and a flap wheel both use abrasive material, but they behave differently.
A sanding disc presents a relatively flat abrasive surface. It is useful for smoothing surfaces and removing material from accessible areas.
A flap wheel has overlapping pieces of abrasive material arranged around a rotating hub. It can conform more easily to curves, contours, and irregular surfaces.
For flat or nearly flat areas, a sanding disc is often more practical.
For curved surfaces and inside shapes, a flap wheel may provide better access.
Common Mistakes When Attaching a Sanding Disc to a Drill
Trying to Put the Disc Directly Into the Chuck
A flat sanding disc cannot normally be secured safely by itself.
Use the proper backing pad, mandrel, or arbor.
Using an Incompatible Disc and Backing Pad
A hook-and-loop disc needs a compatible hook-and-loop pad.
An adhesive disc requires a suitable smooth backing surface.
Always match the attachment system.
Failing to Center the Disc
An off-center disc can create vibration and uneven sanding.
Take a few seconds to align it properly before starting the drill.
Leaving the Chuck Loose
A loose mandrel can slip or wobble.
Make sure the chuck grips the shank securely.
Running the Drill Too Fast
Maximum drill speed is not automatically the correct sanding speed.
Follow the speed limits of the accessory and use only as much speed as the job requires.
Applying Too Much Pressure
Heavy pressure rarely makes sanding significantly better.
It usually creates additional heat and reduces control.
Safety Tips for Drill Sanding
Rotating abrasives can remove skin and throw particles from the workpiece, so basic protection matters.
Wear safety glasses or appropriate eye protection while sanding.
Depending on the material, consider suitable respiratory protection for airborne dust.
Also:
- Tie back long hair.
- Avoid loose clothing and jewelry around rotating tools.
- Keep fingers away from the spinning disc.
- Clamp small workpieces securely.
- Do not use torn or damaged sanding discs.
- Disconnect power before changing attachments.
- Check the accessory’s maximum RPM rating.
- Keep bystanders away from the immediate work area.
If you are sanding painted surfaces in an older home, determine whether the coating may contain hazardous material such as lead before creating dust.
When a Drill Is Not the Best Tool for Sanding
A drill with a sanding disc is convenient, but it is not a replacement for every type of sander.
Consider using a dedicated sander if you need to work on:
- A large tabletop
- Hardwood flooring
- Large cabinet panels
- Wide painted surfaces
- Large areas requiring a uniform finish
A random orbital sander spreads the sanding action across a broader area and generally makes maintaining a flat, consistent finish easier.
A drill attachment is more useful for quick repairs, small surfaces, edges, curves, and occasional sanding.
How to Remove a Sanding Disc From a Drill
Disconnect the drill from power first.
For a hook-and-loop disc, peel the abrasive away from the backing pad gradually rather than pulling aggressively from one point.
For an adhesive disc, carefully peel it from the pad. Remove leftover adhesive if necessary using a cleaning method approved for the backing pad.
For screw-mounted discs, remove the retaining fastener and then remove the abrasive.
If you also want to remove the backing pad, loosen the drill chuck and pull out the shank.
How to Make Sanding Discs Last Longer
Correct use can extend abrasive life considerably.
Avoid excessive pressure, which can wear abrasive particles prematurely.
Periodically remove accumulated sanding dust if the abrasive design permits it.
Replace a disc when:
- Abrasive particles are badly worn
- The surface is clogged beyond cleaning
- The disc is torn
- The backing is damaged
- The disc no longer stays attached securely
Trying to continue using a badly worn disc often increases sanding time without producing a better finish.
FAQs About How to Attach a Sanding Disc to a Drill
Do I need an adapter to put a sanding disc on a drill?
Usually, yes.
Most sanding discs require a backing pad, mandrel, or arbor with a shank that fits into the drill chuck. The sanding disc then attaches to that holder.
Can I put regular sandpaper directly into a drill?
Not safely in the same way as a sanding disc.
Regular sheet sandpaper is not designed to be clamped directly into a drill chuck. Use an attachment specifically designed to hold abrasive material.
Why does my sanding disc wobble?
The most common causes are an off-center sanding disc, a backing pad that is not seated correctly, a loosely tightened chuck, or a bent attachment shank.
Turn off and disconnect the drill before inspecting the setup.
How tight should the sanding pad be in the drill?
The mandrel or backing-pad shank should be firmly secured so it cannot slip inside the chuck.
The chuck should grip the shank evenly. Follow the drill manufacturer’s instructions for proper chuck tightening.
Can I use a sanding disc with a cordless drill?
Yes. A cordless drill can operate compatible sanding attachments.
Variable-speed control is helpful because it allows you to start slowly and adjust speed to the material.
Can I use any sanding disc with any backing pad?
No.
The diameter, attachment system, speed rating, and intended use should be compatible.
For example, a hook-and-loop sanding disc needs a backing pad designed for hook-and-loop attachment.
Should I use maximum drill speed when sanding?
Usually not.
Begin at a lower speed and increase only as necessary. Never exceed the rated maximum speed of the sanding disc, backing pad, or other attachment.
Is a drill sanding disc as good as an orbital sander?
It depends on the job.
A drill-mounted sanding disc is useful for small areas, edges, shaping, rust removal, and occasional sanding. A random orbital sander is generally better for larger flat surfaces where a smooth, consistent finish is important.
Conclusion
Knowing how to attach a sanding disc to a drill mainly comes down to using the correct backing pad or mandrel. Secure the backing-pad shank firmly in the drill chuck, attach the abrasive disc using its intended fastening system, center it carefully, and test the assembly at low speed before sanding.
Use light pressure, keep the sanding disc moving, and stay within the accessory manufacturer’s speed rating. A properly installed sanding disc can turn an ordinary drill into a useful tool for small wood, metal, plastic, and surface-preparation jobs without requiring a dedicated sander.