
How to Attach a Grinding Wheel to a Drill Safely and Correctly
A power drill can do more than make holes. With the right attachment, it can also handle light grinding, deburring, rust removal, edge cleanup, and similar small jobs.
The important part is that a standard grinding wheel cannot usually be clamped directly into a drill chuck. You need a compatible arbor or mandrel that connects the wheel to the drill securely.
If you are learning how to attach a grinding wheel to a drill, the biggest considerations are compatibility, wheel size, arbor diameter, and maximum operating speed. A wheel that does not fit the arbor correctly, is cracked, or is rated below the drill’s operating speed can be dangerous.
Drills also behave differently from dedicated angle grinders or bench grinders. They generally have less side support, their bearings are primarily designed for drilling loads, and many grinding wheels are made for specific machines rather than handheld drills. That means a drill-mounted grinding wheel is best suited to small, controlled grinding tasks, not heavy stock removal.
This guide explains what parts you need, how to install the grinding wheel step by step, how to check that the setup is secure, which wheels can be used with a drill, and when a dedicated grinder is the safer and more practical choice.
How to Attach a Grinding Wheel to a Drill
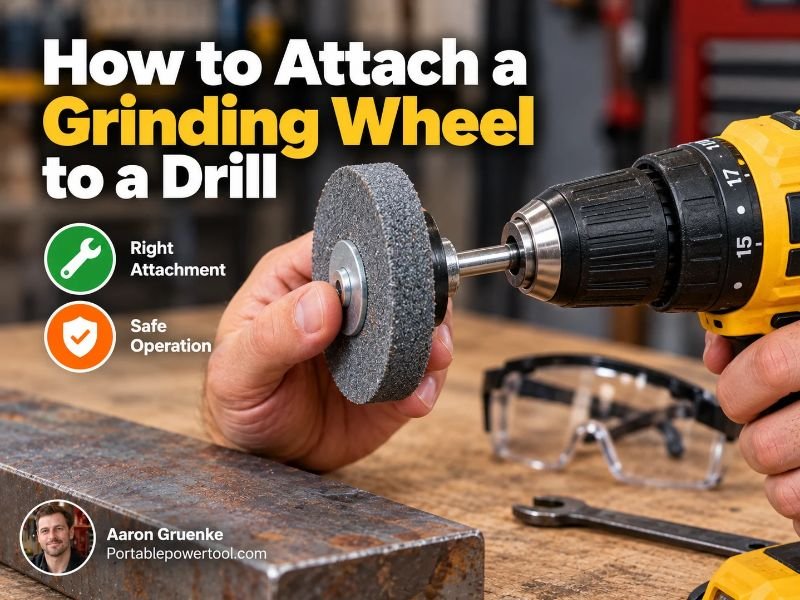
To attach a grinding wheel to a drill, use a grinding wheel arbor or mandrel with a shank that fits your drill chuck. Mount the wheel between the arbor’s washers or flanges, tighten the retaining nut securely without overtightening it, and then clamp the arbor shank firmly in the drill chuck.
Before turning on the drill, confirm that the wheel is undamaged, centered, securely mounted, and rated for the speed at which you intend to use it.
The basic setup consists of three parts:
- The drill
- A compatible grinding wheel
- A suitable arbor or mandrel
Never try to force a grinding wheel directly into the chuck unless the wheel was specifically manufactured with an integrated drill shank.
What Is a Grinding Wheel Arbor?
A grinding wheel arbor is the adapter that connects a grinding wheel to a drill.
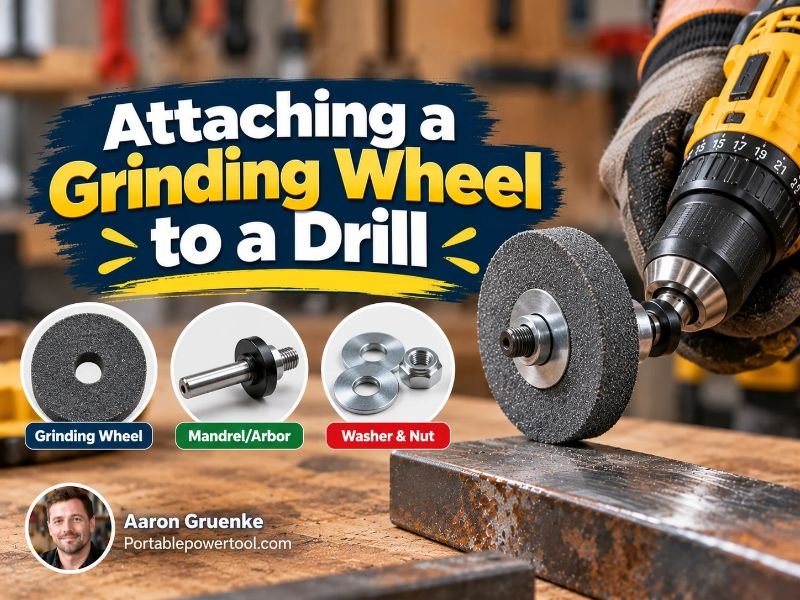
One end normally has a round or hex-shaped shank that fits inside the drill chuck. The other end has hardware that holds the grinding wheel in place.
Depending on the design, the arbor may include:
- A threaded shaft
- Two washers or flanges
- A retaining nut
- A drill-compatible shank
The grinding wheel slides onto the threaded section and is held between the washers.
The arbor must match both the center hole of the wheel and the capacity of your drill chuck.
For example, a wheel with a 1/2-inch center hole requires an arbor designed for that hole size unless an approved bushing or adapter specified for the wheel is used.
Check Whether the Grinding Wheel Is Suitable for a Drill
Not every grinding wheel should be mounted on a drill.
Before installation, check the wheel’s label, packaging, or manufacturer’s specifications.
Look for:
- Maximum RPM
- Wheel diameter
- Arbor-hole diameter
- Intended tool or machine type
- Material compatibility
- Direction-of-rotation instructions, if applicable
The wheel’s maximum RPM rating must never be lower than the speed at which the drill will operate.
For example, if a wheel is rated for a maximum of 3,000 RPM, you should not operate it at 3,500 RPM.
Running an abrasive wheel faster than its rated speed increases the risk of the wheel breaking apart.
Some grinding wheels are designed only for bench grinders, angle grinders, die grinders, or specialized machines. Do not assume that an arbor automatically makes every wheel suitable for a drill.
What You Need
For a basic drill-mounted grinding setup, you may need:
- Corded or cordless drill
- Compatible grinding wheel
- Grinding wheel arbor or mandrel
- Chuck key if your drill uses a keyed chuck
- Wrench for the arbor nut
- Safety glasses or face protection
- Hearing protection when appropriate
- Work gloves when handling rough material
- A vise or clamps for securing the workpiece
Avoid holding a small metal workpiece in one hand while grinding it with the drill in the other. Secure the workpiece whenever practical.
Step-by-Step: Attaching a Grinding Wheel to a Drill
1. Disconnect Power From the Drill
Before installing anything, prevent the drill from starting accidentally.
For a cordless drill, remove the battery.
For a corded drill, unplug it from the outlet.
Do not change grinding attachments while the drill is powered.
2. Inspect the Grinding Wheel
Examine the wheel carefully before mounting it.
Do not use a wheel that has:
- Visible cracks
- Chips
- Missing pieces
- Severe wear
- A damaged center hole
- Signs that it has been dropped or abused
A damaged abrasive wheel can break while rotating.
If the condition of the wheel is questionable, replace it rather than taking the risk.
3. Select the Correct Arbor
Choose an arbor that matches the grinding wheel’s center opening.
The arbor’s shank must also fit your drill chuck.
Many drill accessories use common shank sizes such as 1/4 inch, although the exact size depends on the accessory and drill.
Do not modify the wheel’s center hole to make an incorrect arbor fit.
4. Remove the Arbor Nut and Outer Washer
Most simple grinding wheel arbors have a threaded shaft with a nut and washers.
Remove the retaining nut and outer washer.
Keep track of how the washers are positioned so you can reinstall them correctly.
5. Slide the Grinding Wheel Onto the Arbor
Place the grinding wheel onto the arbor shaft.
The wheel should fit properly over the arbor without excessive looseness.
Do not hammer, force, or press a wheel onto an oversized arbor.
The wheel should sit centered between the mounting surfaces.
6. Install the Outer Washer and Nut
Replace the outer washer or flange, followed by the retaining nut.
Tighten the nut enough to hold the wheel securely.
Do not overtighten it.
Excessive tightening force can damage some abrasive wheels, particularly brittle bonded wheels.
The wheel should remain centered and should not wobble on the arbor.
7. Insert the Arbor Into the Drill Chuck
Open the drill chuck wide enough to accept the arbor shank.
Insert the shank deeply enough for the chuck jaws to grip it securely.
Avoid clamping onto threaded portions of the arbor unless the arbor was specifically designed that way.
8. Tighten the Drill Chuck
For a keyless chuck, hold the chuck and tighten it firmly according to the drill manufacturer’s instructions.
For a keyed chuck, tighten the chuck with the proper key.
Make sure all chuck jaws grip the arbor evenly.
The arbor should not move when you pull on it lightly by hand.
9. Rotate the Wheel by Hand
Before reconnecting power, slowly turn the wheel by hand.
Look for:
- Wobbling
- Misalignment
- Contact with the arbor hardware
- Loose mounting parts
If the wheel does not rotate smoothly and concentrically, remove it and correct the problem before using the drill.
10. Test the Wheel at Low Speed
Reconnect the battery or power supply.
Hold the drill securely and point the wheel away from yourself and other people.
Start at a low speed if your drill allows it.
Let the wheel run freely for a short period before touching the workpiece.
If you notice excessive vibration, wobbling, unusual noise, or movement of the wheel, stop immediately and inspect the mounting setup.
How Tight Should the Grinding Wheel Be?
The grinding wheel should be secure enough that it cannot slip on the arbor, but you should not crush it between the mounting washers.
The mounting hardware needs to hold the wheel evenly.
Overtightening can place unnecessary stress on bonded abrasive wheels.
Undertightening can allow the wheel to spin independently of the arbor or become unstable.
Follow the instructions supplied with the arbor and grinding wheel whenever they are available.
What Type of Grinding Wheels Can Be Used With a Drill?
Small drill-compatible grinding accessories come in several forms.
Mounted Grinding Stones
Mounted grinding stones already have a metal shank built into them.
These are among the easiest grinding accessories to use with a drill because no separate arbor is normally required.
Simply install the shank in the chuck.
They are useful for jobs such as:
- Removing small burrs
- Smoothing metal edges
- Cleaning weld areas
- Enlarging or shaping small openings
- Removing minor corrosion
Small Grinding Wheels With Arbors
Some small abrasive wheels are designed to be installed onto a separate mandrel or arbor.
These can work well for controlled grinding if the wheel and arbor are explicitly compatible.
Flap Wheels
A flap wheel uses overlapping pieces of abrasive material rather than a solid bonded grinding wheel.
Drill-mounted flap wheels are useful for:
- Surface cleanup
- Rust removal
- Light sanding
- Smoothing curved surfaces
- Blending scratches
They are generally intended for lighter finishing work rather than aggressive grinding.
Wire Wheels
A wire wheel is not technically a grinding wheel, but it is commonly used in drills for cleaning metal.
Wire wheels can remove:
- Rust
- Loose paint
- Scale
- Surface corrosion
Use only wire wheels rated for the drill’s speed, and wear eye protection because individual wire strands can break free during use.
Drill vs. Angle Grinder for Grinding
A drill can perform light grinding, but it does not replace an angle grinder.
| Feature | Drill With Grinding Attachment | Angle Grinder |
| Light deburring | Good | Good |
| Small-detail work | Good | Moderate |
| Heavy metal removal | Poor | Excellent |
| Large surface grinding | Limited | Excellent |
| Cutting discs | Generally inappropriate unless specifically approved | Designed for compatible cutting discs |
| Side-load capability | Limited | Designed for grinding loads |
| Speed | Usually lower | Usually much higher |
A drill is most useful for occasional, light grinding where access or precision matters.
For significant metal removal, weld grinding, concrete grinding, or frequent abrasive work, use a tool designed for the task.
Why Side Pressure Matters
A drill is primarily designed to apply force along the length of the drill bit.
Grinding often produces side loading, meaning force is applied sideways against the tool’s shaft and bearings.
Light side pressure may be acceptable with drill accessories specifically designed for that use, but excessive side loading can:
- Wear the drill bearings
- Bend an arbor
- Create wheel wobble
- Reduce control
- Damage the drill
Use gentle pressure and allow the abrasive to do the work.
If you need to push hard against the wheel to remove material, a drill is probably not the best tool for that job.
Set the Drill Speed Correctly
Speed is one of the most important parts of safe grinding.
Always stay below the accessory’s maximum RPM rating.
Variable-speed drills make this easier because you can start slowly and increase speed only when appropriate.
Avoid assuming that maximum drill speed will produce better grinding results.
Excessive speed can cause:
- Heat buildup
- Faster wheel wear
- Poor control
- Damage to the material
- Failure of an incorrectly rated wheel
Check both the drill’s maximum RPM and the wheel’s speed rating before use.
Secure the Workpiece
Grinding requires more sideways force than normal drilling.
The workpiece should therefore be firmly supported.
Whenever practical, use:
- A bench vise
- Clamps
- A stable workbench
Do not grind a small metal part while holding it loosely in your fingers.
The grinding wheel can grab an edge and pull the material unexpectedly.
Wear Proper Eye and Face Protection
Grinding can throw abrasive particles, sparks, rust, and small pieces of metal.
At minimum, wear ANSI-rated safety glasses or equivalent protective eyewear appropriate for the task.
For operations that produce substantial flying debris, a face shield worn with safety glasses provides additional protection.
Also keep loose clothing, jewelry, long hair, and gloves away from rotating parts.
Gloves can protect against sharp material when handling the workpiece, but they should never be allowed near exposed rotating equipment where they could become caught.
Be Careful Around Sparks
Grinding steel can produce sparks.
Keep the grinding area away from:
- Gasoline
- Solvents
- Sawdust
- Paper
- Aerosol cans
- Flammable liquids
- Other combustible materials
Remember that hot metal particles can travel farther than expected.
Inspect the surrounding area before beginning work.
Common Mistakes to Avoid
Mounting a Wheel Directly in the Chuck
A grinding wheel without an integrated shank normally requires an arbor.
Do not clamp the edge or center hole of a conventional wheel directly with the drill chuck.
Using the Wrong Arbor Size
A loose-fitting arbor can make the wheel run off-center.
Use mounting hardware designed for the wheel.
Ignoring the RPM Rating
Never operate an abrasive accessory faster than its stated maximum speed.
Overtightening the Arbor Nut
More tightening force does not necessarily make the wheel safer.
Excessive force may damage a brittle abrasive wheel.
Using a Cracked Wheel
Do not attempt to repair or reuse a damaged grinding wheel.
Replace it.
Applying Heavy Side Pressure
Heavy pressure can overload the arbor, wheel, and drill bearings.
Use light, steady pressure.
Using Large Grinder Wheels on a Drill
Large wheels designed for angle grinders or bench grinders should not automatically be adapted to a handheld drill.
The mounting system, speed, guarding, and load characteristics may be completely different.
Can You Put an Angle Grinder Disc on a Drill?
In most cases, you should not simply adapt an angle grinder disc to a standard drill.
Angle grinder discs are designed to operate with equipment that provides the correct spindle, flanges, guard, speed range, and handling characteristics.
Even if you find an adapter that physically connects the disc to a drill, physical fit does not prove that the combination is safe or approved.
For grinding jobs that require an angle-grinder disc, use an angle grinder with the correct guard and mounting hardware.
When a Drill-Mounted Grinding Wheel Makes Sense
A drill attachment can be practical for small jobs such as:
- Removing a burr from a metal edge
- Cleaning a small rusted area
- Lightly shaping metal
- Smoothing a rough bolt end
- Cleaning small weld imperfections
- Reaching into confined areas with a mounted stone
- Light sharpening when the accessory is designed for it
The key word is light.
Once a job involves prolonged grinding or removing significant amounts of material, a dedicated grinding tool becomes more efficient and easier to control.
FAQs About How to Attach a Grinding Wheel to a Drill
Do you need an adapter to put a grinding wheel on a drill?
Usually, yes. A conventional small grinding wheel generally requires a mandrel or arbor that fits through the wheel’s center hole and provides a shank for the drill chuck.
Mounted grinding stones already have their own shanks and usually do not need a separate adapter.
Can you put any grinding wheel on a drill?
No. The wheel must be suitable for the mounting method, size, operating speed, and type of work.
A wheel designed exclusively for another machine should not be adapted to a drill unless the manufacturer specifically permits that use.
Can I use a drill as a grinder?
Yes, for light-duty work with compatible grinding attachments.
A drill can handle small grinding, deburring, rust removal, and finishing jobs, but it is not a direct substitute for an angle grinder or bench grinder.
What size arbor do I need for a grinding wheel?
The arbor must match the center-hole diameter of the grinding wheel and have a shank that fits your drill chuck.
Check the wheel and arbor specifications rather than estimating the size.
Why does my grinding wheel wobble on the drill?
Wobbling can result from a poorly centered wheel, incorrect arbor size, uneven mounting washers, bent arbor, loose chuck, or damaged wheel.
Stop the drill immediately and correct the problem before continuing.
How fast should I run a grinding wheel on a drill?
Operate the wheel within the speed range recommended by its manufacturer and never exceed its stated maximum RPM.
Starting at a lower drill speed also gives you better control when checking a newly installed attachment.
Can I use a cutting wheel on a drill?
A standard drill is generally not the appropriate substitute for an angle grinder simply because an adapter can hold a cutting wheel.
Cutting discs should be used only with equipment and mounting systems specifically approved for them.
Can I sharpen tools with a grinding wheel attached to a drill?
Some drill-mounted grinding accessories can be used for light sharpening, but control can be difficult compared with a bench grinder or purpose-built sharpening system.
Use only accessories intended for the job and secure both the drill and workpiece appropriately.
Conclusion
Knowing how to attach a grinding wheel to a drill starts with choosing a compatible wheel and a proper arbor or mandrel. Mount the wheel securely between the correct washers or flanges, clamp the arbor firmly in the drill chuck, and check for wobble before applying it to a workpiece.
Always stay within the wheel’s RPM rating, inspect abrasive wheels for damage, secure the material you are grinding, and use proper eye protection. A drill-mounted grinding wheel can be very useful for small deburring, shaping, rust-removal, and finishing jobs, but heavier grinding is better handled with a dedicated angle grinder, die grinder, or bench grinder designed for those loads.