
How to Put Drill in Hammer Mode: Step-by-Step Guide
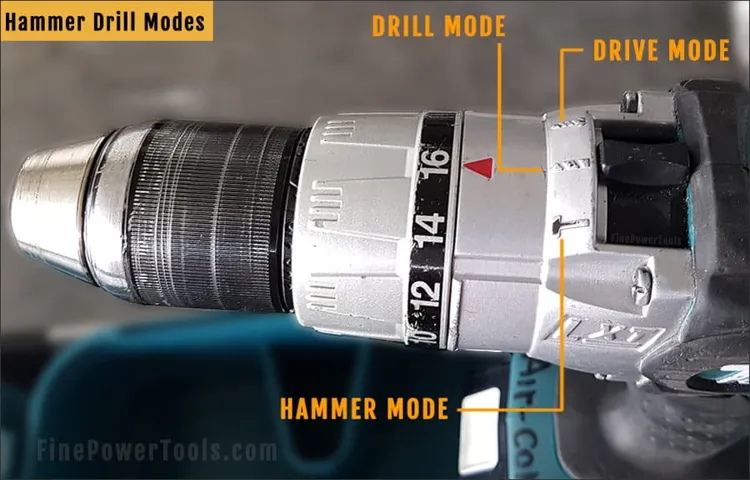
If you are wondering how to put drill in hammer mode, the process is usually simple. Most modern cordless and corded hammer drills have a mode selector ring or switch marked with symbols. Turning that selector to the hammer icon activates the hammer function.
Over the years, I have used hammer drills for home renovations, mounting fixtures on concrete walls, and installing anchors in brick. The biggest lesson I learned is that knowing how to put drill in hammer mode correctly saves time, reduces bit wear, and makes drilling much easier.

What Is Hammer Mode on a Drill?
Before learning how to put drill in hammer mode, it helps to understand what the setting does. Hammer mode combines the drill’s spinning action with a rapid forward-and-backward hammering motion.
This impact action helps the bit break through hard materials. It is especially useful when drilling into concrete, brick, cinder block, and stone.
Standard drill mode is designed for wood, plastic, and metal. Hammer mode adds extra force that improves drilling performance in masonry surfaces.
- ✦ Rotational Motion
The drill bit spins like a regular drill.
- ✦ Hammering Motion
The drill produces small impacts that help break masonry material.
- ✦ Best Use
Concrete, brick, mortar, stone, and masonry blocks.
How Hammer Mode Differs from Standard Drilling
A standard drill only rotates the bit. Hammer mode adds impact force. This combination helps the bit move through tough materials faster and with less effort.
- ✦ Regular Drill Mode
Suitable for wood, plastic, and metal.
- ✦ Hammer Mode
Designed for masonry and concrete drilling.
How to Put Drill in Hammer Mode Step by Step
The exact process varies slightly by manufacturer, but the basic steps remain the same. If you need to know how to put drill in hammer mode, follow these instructions carefully.
Always disconnect power or remove your finger from the trigger before adjusting drill settings. This helps prevent accidental operation.

- ✦ Step 1
Locate the drill mode selector ring or switch.
- ✦ Step 2
Find the hammer icon on the selector.
- ✦ Step 3
Rotate the selector until it aligns with the hammer symbol.
- ✦ Step 4
Install a masonry drill bit.
- ✦ Step 5
Test the drill on the work surface.
Finding the Hammer Symbol
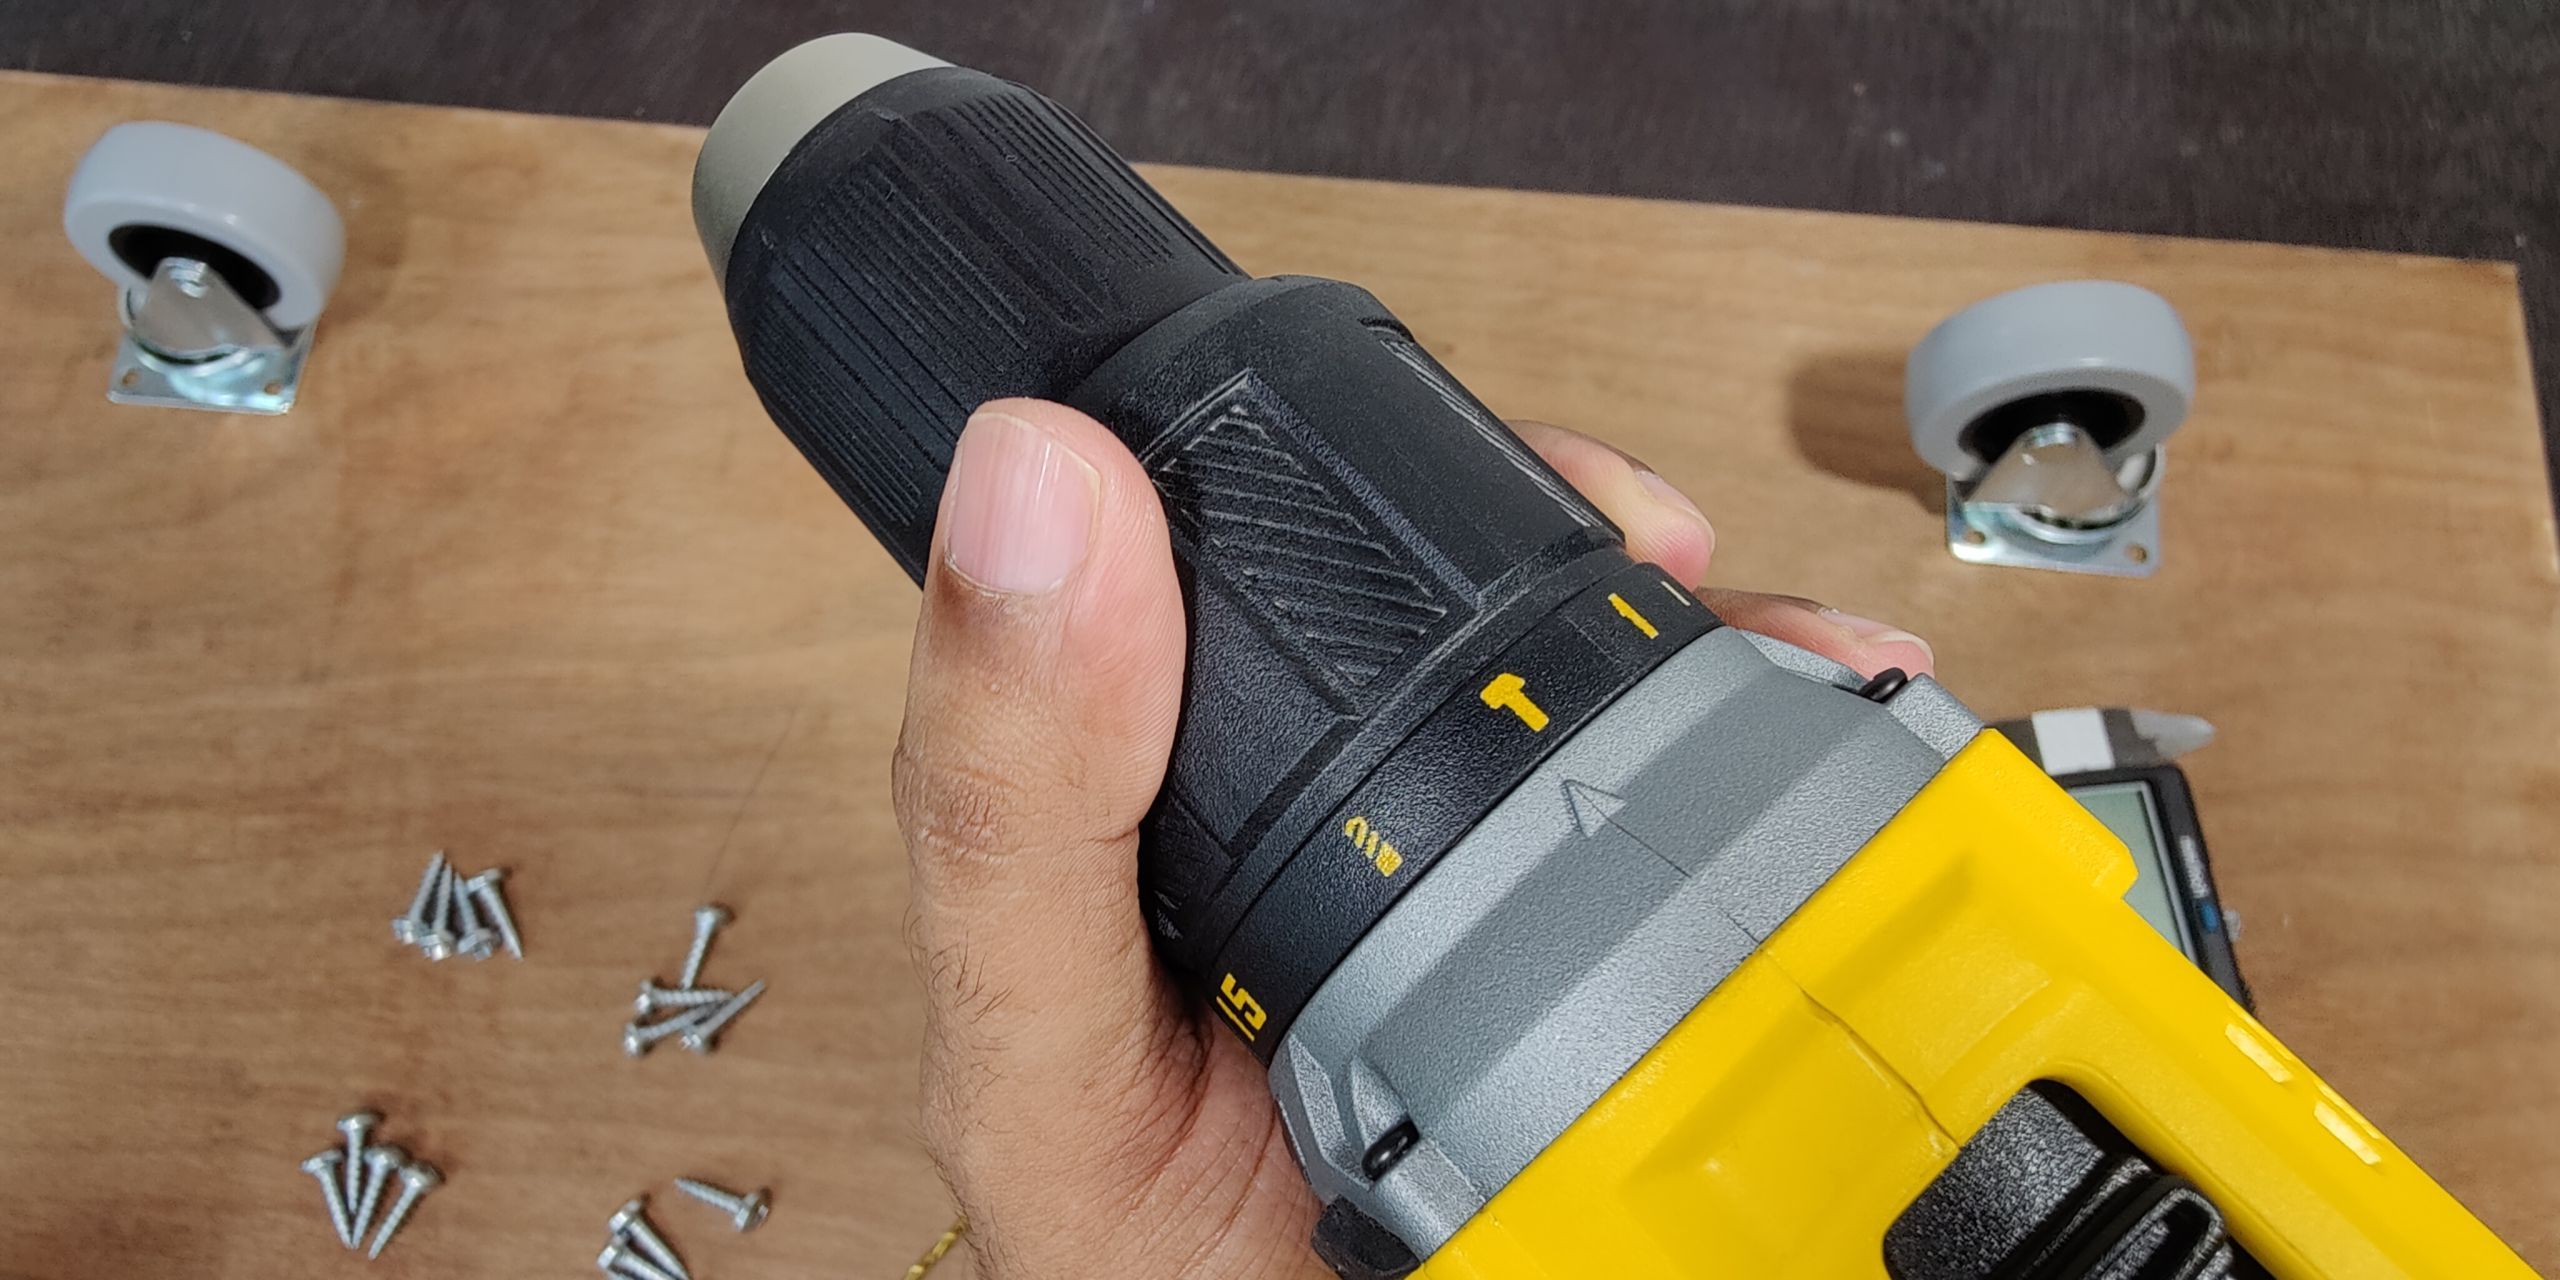
Most drills use a small hammer icon to indicate hammer mode. It may appear on the top housing, selector collar, or mode switch.
- ✦ Look for Symbols
The hammer icon is usually separate from drill and clutch settings.
Check the Manual
If the markings are unclear, consult the owner’s manual. Manufacturers often place controls in slightly different locations.
- ✦ Model Specific
Some drills use electronic selectors instead of rotating rings.
When Should You Use Hammer Mode?
Knowing how to put drill in hammer mode is only part of the job. You also need to know when hammer mode is appropriate.
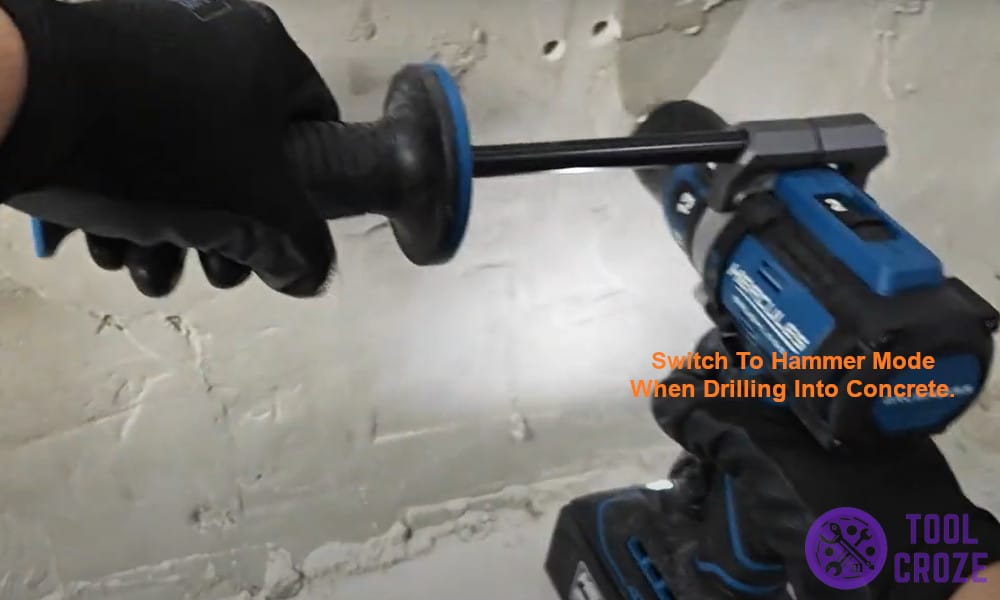
Hammer mode should only be used on hard masonry materials. Using it on soft materials may damage the workpiece or reduce drilling accuracy.
- ✦ Concrete
Ideal for anchors, fasteners, and mounting hardware.
- ✦ Brick
Makes drilling cleaner and faster.
- ✦ Stone
Provides extra impact energy for hard surfaces.
Materials That Do Not Need Hammer Mode
Avoid hammer mode when drilling wood, sheet metal, plastic, and delicate materials. Standard drill mode provides better control and cleaner holes.
- ✦ Wood
Use normal drilling mode.
- ✦ Metal
Use regular drilling with proper cutting speed.
Choosing the Right Drill Bit for Hammer Mode
Even if you know how to put drill in hammer mode, you still need the correct bit. A standard twist bit will not perform well in concrete or masonry.
Masonry bits have hardened carbide tips that can handle repeated impact forces. They improve drilling speed and help prevent damage.

- ✦ Masonry Bit
Recommended for brick, concrete, and stone.
- ✦ Carbide Tip
Provides durability during impact drilling.
- ✦ Correct Size
Match the bit size to the anchor or fastener.
Signs You Need a New Bit
If drilling becomes slow or requires excessive pressure, inspect the bit. A worn bit can make even a powerful hammer drill struggle.
- ✦ Excessive Heat
May indicate a dull cutting edge.
- ✦ Slow Progress
Often caused by worn carbide tips.
Common Mistakes When Using Hammer Mode
Many users learn how to put drill in hammer mode but still encounter problems because of avoidable mistakes. A few simple habits can improve results significantly.
The most common issue is using too much force. Let the drill do the work. Excess pressure can reduce efficiency and wear out the bit.
- ✦ Changing Modes While Running
Can damage internal components.
- ✦ Using Wrong Bits
Reduces drilling speed and increases wear.
- ✦ Too Much Pressure
Makes drilling less efficient.
Ignoring Safety Equipment
Concrete dust and flying debris can create hazards. Wear safety glasses and hearing protection whenever you use hammer mode.
- ✦ Eye Protection
Protects against dust and chips.
- ✦ Dust Control
Helps maintain a cleaner workspace.
Safety Tips for Using Hammer Mode
Safety should always come first when learning how to put drill in hammer mode. Hammer drills create more vibration and noise than standard drills.
Inspect your drill before use. Make sure the chuck is tight and the bit is secure. A loose bit can create unsafe conditions.

- ✦ Wear Safety Glasses
Protect your eyes from debris.
- ✦ Use Hearing Protection
Hammer drills can be loud.
- ✦ Maintain Firm Grip
Control kickback and vibration.
Work Area Preparation
Check for hidden electrical wiring, plumbing, and other utilities before drilling. This is especially important in homes and commercial buildings.
- ✦ Utility Check
Avoid drilling into pipes or wiring.
Troubleshooting Hammer Mode Problems
Sometimes users think they know how to put drill in hammer mode, but the drill still does not work correctly. Several issues may be responsible.
Start by checking the mode selector. Ensure it is fully engaged on the hammer setting. Partial engagement can prevent proper operation.

- ✦ Check Selector
Make sure the hammer icon is fully selected.
- ✦ Inspect Bit
Replace damaged or worn bits.
- ✦ Review Material
Confirm the surface is suitable for hammer drilling.
When to Seek Professional Repair
If the hammer mechanism stops working or produces unusual sounds, the tool may need service. Continuing to use a damaged drill can cause further problems.
- ✦ Unusual Noise
May indicate internal wear.