
How to Change Air Compressor Attachments: Step-by-Step Guide
Changing an air compressor attachment usually takes only a few steps: shut off or isolate the air supply, release pressure from the hose, pull back the quick-connect coupler sleeve, remove the old tool or accessory, insert the new plug until it locks, then restore air and set the regulator to the required pressure.
Most portable and shop compressors use quick-connect fittings so you can swap an inflator, blow gun, nailer, impact wrench, spray gun, or other pneumatic accessory without unscrewing the air hose each time.
The connection seems simple, but fittings must match. Industrial, automotive, and high-flow couplers can look similar while using different plug profiles. A mismatched plug may not lock, may leak, or may severely restrict airflow.
For how to change air compressor attachments, first identify where the attachment connects. Changing a tool at the hose coupler is different from replacing a threaded regulator, hose fitting, coupler, filter, or fitting attached directly to the compressor.
The second keyword, how to put an attachment on an air compressor, usually refers to connecting an accessory through the compressor hose. In that setup, the compressor outlet connects to the hose, and a quick coupler at the end of the hose accepts the attachment’s matching male plug.
After making the connection, set outlet pressure for the accessory rather than using full tank pressure automatically. A tank may hold 150 PSI while the connected tool is rated to operate at 90 PSI or much lower.
Before You Change an Air Compressor Attachment
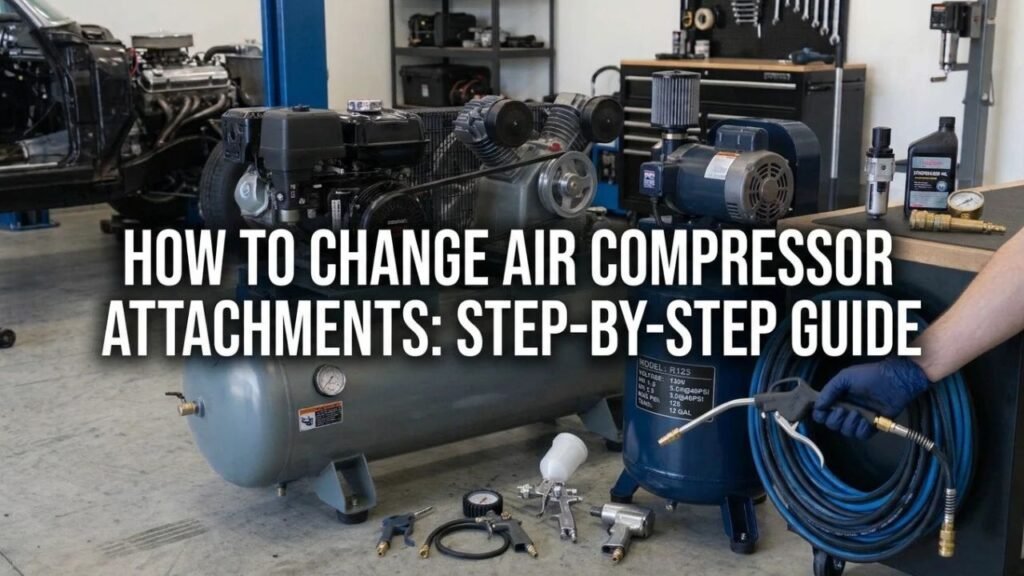
A quick inspection before disconnecting anything prevents most connection problems.
Identify the Connection Point
Most air compressor setups have an air path similar to:
Compressor tank → regulator → outlet coupler → air hose → hose coupler → tool plug → air tool
The attachment may connect at either the compressor outlet or the end of the hose.
For normal tool changes, you usually disconnect the tool from the hose coupler.
Parts screwed into the compressor manifold, regulator, or tank need a different procedure because they may be exposed to stored tank pressure.
Check the Fitting Style
Common U.S. quick-connect profiles include:
- Industrial or Milton M-style
- Automotive or Tru-Flate style
- ARO style
- High-flow styles
The names can vary among manufacturers.
Do not assume plugs are compatible because their threads or outside diameter look similar.
A coupler and plug need matching profiles.
Check Fitting Size
A common home-shop fitting uses 1/4-inch NPT threads, but that thread size does not tell you the quick-connect profile.
You may have:
- 1/4-inch NPT with industrial plug
- 1/4-inch NPT with automotive plug
- 1/4-inch NPT with high-flow plug
Larger tools and shop air systems may use 3/8-inch or larger fittings to reduce airflow restriction.
Know the Tool’s Pressure Rating
Check the accessory manual or label for its required operating pressure.
Common pneumatic tools are often designed around 90 PSI, but some nailers, spray equipment, inflators, and specialty tools use different pressures.
Do not assume every attachment needs the same regulator setting.
Key Takeaway: Before changing anything, identify the connection point, fitting profile, thread size, and attachment pressure rating.
How to Change Air Compressor Attachments Step by Step
A quick-connect tool change is simple once the hose is safely depressurized.
1. Stop Airflow to the Hose
Turn the compressor off if you are finished using it.
If your setup has a tank outlet valve, close it before disconnecting the tool.
You normally do not need to empty the entire receiver just to change a tool at a properly isolated quick-connect hose.
The hose itself may still contain compressed air.
2. Release Hose Pressure
Use the connected tool briefly to release trapped line pressure after the supply has been isolated.
Another approved method may be listed in the compressor or hose system instructions.
A pressurized hose can move suddenly when disconnected, and some couplers release air sharply as the plug comes out.
Keep the hose under control.
3. Hold the Coupler Securely
Grip the female quick-connect coupler with one hand.
Hold the tool or plug with the other.
Do not pull on the hose itself to remove the attachment.
4. Pull Back the Coupler Sleeve
Most manual quick couplers have a sliding outer sleeve.
Pull the sleeve backward toward the hose.
This releases the locking balls or internal mechanism holding the plug.
Some couplers use a push-to-connect or safety-release design, so check the coupler instructions if the sleeve does not move as expected.
5. Remove the Old Attachment
With the sleeve released, pull the tool’s male plug straight out.
Keep the plug clean.
Dirt, sawdust, metal particles, or grit on a pneumatic fitting can enter the tool or damage coupler seals.
6. Inspect the New Attachment
Check the replacement accessory for:
- Matching plug profile
- Damaged plug
- Rust
- Dirt
- Cracked fitting
- Loose threaded connection
Make sure the male plug is firmly installed in the tool.
7. Insert the New Plug
Pull the coupler sleeve back if required.
Push the new male plug fully into the female coupler.
Release the sleeve.
On many couplers you will feel or hear the locking mechanism engage.
8. Tug the Connection Gently
Pull lightly on the tool body or plug to confirm that the connection is locked.
Do not yank the hose.
The plug should remain seated inside the coupler.
9. Restore the Air Supply
Open the tank outlet slowly if you closed it.
Start the compressor if needed.
Listen around the connection for leaking air.
A quiet connection with no continuous hiss is what you want.
10. Set the Regulator
Adjust outlet pressure to the requirement of the connected attachment.
Check pressure while air is flowing when the tool manufacturer calls for a dynamic pressure setting.
Pressure can drop through a long hose, small coupler, restrictive fitting, or undersized regulator while the tool is operating.
Key Takeaway: Isolate and bleed the hose, release the coupler sleeve, swap the plug, confirm the lock, restore air slowly, and set the regulator for the new attachment.
How to Put an Attachment on an Air Compressor
If you are setting up an attachment for the first time, you may need both a hose and the correct fittings.
Connect the Hose to the Compressor
A portable compressor commonly has a female quick coupler at its regulated outlet.
Insert the hose’s matching male plug into that coupler.
Pull back the sleeve first if the coupler design requires it.
Release the sleeve once the plug is fully inserted.
Connect the Attachment to the Hose
The other end of the hose normally has a female coupler.
The air tool should have a compatible male plug installed in its inlet.
Push the plug into the hose coupler until it locks.
A common setup looks like:
Compressor coupler → hose plug → hose → hose coupler → tool plug → attachment
Set Tool Pressure
Turn the regulator down before supplying a new accessory if you are unsure of the previous setting.
Then raise outlet pressure to the tool manufacturer’s specified operating value.
Do not use tank pressure as the tool-pressure setting.
A receiver may contain far more pressure than the accessory is designed to receive.
Key Takeaway: Most attachments connect through an air hose using a male plug on the tool and a female quick coupler on the hose.
How Quick-Connect Air Fittings Work
Quick-connect fittings make attachment changes possible without repeatedly unscrewing threaded joints.
Female Coupler
The female coupler contains the locking mechanism.
Inside are parts such as:
- Seal
- Locking balls or retaining components
- Valve
- Spring
When a matching plug is inserted, the coupler locks onto it and opens the internal air passage.
Male Plug
The male plug is usually screwed into the pneumatic tool.
Its groove and nose profile must match the coupler design.
Two plugs with 1/4-inch threaded ends can still have different quick-connect shapes.
Automatic Couplers
Some modern couplers allow the plug to be pushed straight in without pulling the sleeve first.
Removal may use a sleeve or button.
Safety couplers may vent trapped hose pressure before releasing the plug completely, reducing hose whip.
Key Takeaway: Quick couplers lock onto a matching plug profile. Thread size alone does not determine compatibility.
How to Change Threaded Air Compressor Attachments
Replacing a quick-connect tool is different from replacing a threaded compressor fitting.
Threaded work may require the receiver to be completely depressurized.
Turn the Compressor Off
Disconnect electrical power or remove the battery on a cordless machine.
For gas-powered equipment, follow its shutdown procedure.
Drain Stored Pressure
If you are removing a fitting connected to the receiver, manifold, pressure switch, regulator, or another tank-pressure component, release tank pressure according to the compressor manual.
Confirm pressure on the tank gauge.
Never unscrew a receiver fitting while the tank remains pressurized.
Remove the Old Fitting
Use the correct wrench on the fitting flats.
If the fitting is attached to another component, support the second component with another wrench where the design permits it.
Avoid twisting a regulator, manifold, valve block, or thin tubing.
Check the Thread Type
Do not force together different pipe-thread standards.
Common types include:
- NPT
- BSPT
- BSPP
They are not automatically interchangeable.
An incorrect fitting can damage threads or leak under pressure.
Apply the Correct Thread Sealant
Tapered pipe threads commonly need a compressed-air-compatible thread sealant or PTFE tape when allowed by the component manufacturer.
Keep sealant away from the first thread or two so loose material is less likely to enter the air system.
Do not wrap PTFE tape around a quick-connect plug’s smooth sealing surface. Sealant is for the threaded joint, not the coupler nose.
Install and Test
Install the new fitting without over-tightening it.
Restore pressure gradually.
Apply an approved leak-detection solution around the threaded joint.
Growing bubbles indicate leakage.
Depressurize the system again before correcting the fitting.
Key Takeaway: Fully depressurize tank-side components before unscrewing them, verify the thread standard, use approved sealant where required, and leak-test the new joint.
Changing Common Air Compressor Attachments
The basic quick-connect process works for many accessories, but pressure and airflow requirements vary.
Tire Inflator
A tire inflator usually connects to the hose with a standard air plug.
After connecting it:
- Set a safe regulated pressure.
- Attach the chuck to the tire valve.
- Monitor tire pressure with a reliable gauge.
- Inflate to the vehicle manufacturer’s specified cold tire pressure.
Do not inflate a passenger tire to the compressor tank’s maximum PSI.
Blow Gun
A blow gun connects the same way.
For workplace cleaning in the United States, OSHA places restrictions on compressed-air cleaning, including pressure requirements under specified conditions and requirements for guarding and personal protection.
Never direct compressed air at your body or another person.
Nail Gun
Connect the nailer through the hose and set the regulator to the nailer’s specified range.
Start at the lower end of the permitted pressure range and test the fastener depth on scrap material.
Increase pressure only as needed within the tool rating.
Impact Wrench
An impact wrench needs both pressure and airflow.
A small restrictive plug or hose can reduce performance even when the regulator reads the correct PSI.
Large high-demand tools may perform better with:
- Larger hose
- High-flow couplers
- Larger fittings
Check the tool’s airflow requirement before changing the entire fitting system.
Spray Gun
Spray equipment is sensitive to pressure, airflow, and moisture.
Connect the spray gun through clean, dry air and set pressure according to the gun’s instructions.
A separator, regulator near the gun, or dryer may be needed for paint work.
Key Takeaway: Most accessories use the same physical quick-connect process, but pressure, airflow, moisture control, and hose size should match the tool.
Why Won’t My Air Compressor Attachment Connect?
A fitting that refuses to connect is usually mismatched, pressurized, dirty, or damaged.
The Plug and Coupler Are Different Styles
This is one of the most common causes.
An automotive-profile plug may not fit correctly into an industrial-profile coupler.
Compare both parts with known fitting profiles or packaging.
Replacing one side with a matching fitting solves the issue.
Pressure Is Making Connection Difficult
Some couplers are harder to connect when the hose or outlet is highly pressurized.
Isolate and bleed the line first if the coupler manufacturer calls for depressurized connection.
Do not hammer or force the plug into place.
Coupler Sleeve Is Not Fully Retracted
Pull the sleeve completely backward before inserting the plug on couplers that require manual sleeve operation.
Release it only after the plug is fully seated.
Dirt Is Inside the Coupler
Sawdust, rust, grit, or dried sealant can prevent the internal valve or locking balls from moving.
Depressurize the system before cleaning or replacing the coupler.
The Plug Is Damaged
A plug with:
- Dents
- Corrosion
- Heavy scratches
- Deformed locking groove
may not seal or lock properly.
Replacement is usually inexpensive.
The Coupler Is Worn
Internal seals and locking components wear with repeated use.
Symptoms include:
- Plug falls out
- Constant hissing
- Sleeve sticks
- Connection feels loose
- Air leaks when the tool moves
Replace a worn coupler with one rated for the system pressure and airflow.
Key Takeaway: A fitting that will not connect usually has a profile mismatch, trapped pressure, dirt, plug damage, or a worn coupler.
Why Does the New Attachment Leak Air?
A small leak wastes compressor capacity and can make the pump cycle more often.
Leak Between Plug and Coupler
If air leaks around the quick connection, possible causes include:
- Wrong plug profile
- Worn coupler seal
- Damaged plug
- Dirt inside coupler
- Poor-quality fitting
A matching new plug and coupler often corrects an old loose connection.
Leak at the Threaded Joint
If air leaks where the plug screws into the tool, inspect the threaded connection.
The joint may need:
- Reinstallation
- Approved thread sealant
- Replacement fitting
- Repair of damaged threads
Never tighten a fitting aggressively while the tool is still pressurized.
Test With Leak-Detection Solution
An approved soap-type leak solution makes small leaks easier to locate.
Apply it around the suspected joint.
Bubbles that continue growing point to escaping air.
Key Takeaway: Find out if the leak comes from the quick coupler or threaded joint, then depressurize the system before repairing that exact connection.
Do You Need to Drain the Air Compressor Before Changing Attachments?
For a normal tool change at the end of a quick-connect hose, you usually need to isolate and depressurize the hose rather than empty the entire receiver.
Tank-side work is different.
Fully release receiver pressure before removing components such as:
- Tank drain fitting
- Regulator
- Manifold fitting
- Tank-mounted coupler
- Check valve
- Pressure-switch plumbing
Use the shutdown and depressurization procedure in the compressor manual.
Stored compressed air contains substantial energy. Never loosen a tank-mounted fitting simply because the motor is switched off.
Safety Tips for Changing Air Compressor Attachments
Compressed-air connections are simple, but careless disconnection can create sudden hose movement.
Keep these habits in mind:
- Shut off or isolate the air supply before major changes.
- Bleed hose pressure before disconnecting when practical.
- Keep control of the hose during release.
- Never unscrew tank-side parts under pressure.
- Use fittings rated for the compressor’s maximum pressure.
- Match plug and coupler profiles.
- Keep fittings clean.
- Set regulator pressure for each tool.
- Replace damaged hoses, plugs, and couplers.
- Wear eye protection when working with compressed-air connections.
- Never point an air tool or blow gun toward your body during reconnection.
Do not modify the compressor safety valve or pressure switch to make an attachment work.
An accessory that needs a pressure or flow the compressor cannot safely supply needs a different air source rather than higher-than-approved settings.
Conclusion
For how to change air compressor attachments, most tool swaps involve isolating the air supply, releasing pressure from the hose, pulling back the quick-coupler sleeve, removing the old plug, inserting the replacement attachment, and confirming that the coupler locks.
The plug and coupler must use the same fitting profile. Industrial, automotive, ARO, and high-flow systems can use similar thread sizes while having different mating shapes.
After attaching the new tool, restore pressure gradually and adjust the regulator to the tool’s operating specification. Check for leaks before starting normal work.
Threaded fittings attached directly to the compressor need more care. Fully depressurize the receiver before removing tank-side components, use the correct thread standard and sealant, and test the repaired joint for leakage before returning the compressor to service.
FAQs About Changing Air Compressor Attachments
How Do You Remove an Attachment From an Air Compressor Hose?
Isolate the air supply and release trapped hose pressure.
Hold the female coupler securely, pull its sleeve backward, and remove the tool’s male plug. Some couplers use a different release mechanism, so follow the fitting instructions if there is no sliding sleeve.
How Do You Attach an Air Tool to a Compressor?
Connect an air hose to the compressor outlet, then insert the air tool’s male plug into the female coupler at the other end of the hose.
Once locked, restore the air supply and adjust regulated pressure to the tool specification.
Do All Air Compressor Attachments Use the Same Fitting?
No.
Industrial, automotive, ARO, high-flow, and other quick-connect profiles exist. They may use the same 1/4-inch pipe thread while still having incompatible plug shapes.
What Is the Most Common Air Compressor Fitting Size?
A 1/4-inch NPT threaded fitting is common on home and light-shop pneumatic equipment in the United States.
The quick-connect profile attached to that thread can vary, so thread size alone does not identify the coupler system.
Why Can’t I Push the Air Tool Into the Coupler?
The plug may be the wrong profile, the coupler sleeve may not be fully released, trapped pressure may resist insertion, or the fitting may be dirty or damaged.
Do not force it. Depressurize the line and inspect both sides.
Should I Use Teflon Tape on Air Compressor Fittings?
PTFE thread-seal tape is used on some tapered threaded air fittings when permitted by the component manufacturer.
Apply it only to the threads and keep loose tape out of the air passage. Do not put tape on the smooth quick-connect plug surface.
Can I Change an Air Tool While the Compressor Tank Is Full?
You can usually swap a tool at an isolated quick-connect hose without draining the entire tank.
Close the outlet and bleed hose pressure first. Any work involving fittings directly exposed to receiver pressure requires the tank to be safely depressurized.
Why Does My Air Tool Leak After I Connect It?
The coupler seal may be worn, the plug profile may be wrong, the plug may be damaged, or the threaded fitting on the tool may leak.
Use leak-detection solution to find the exact leak before replacing parts.
Can I Mix Different Quick-Connect Fitting Brands?
Brand does not always determine compatibility; fitting profile does.
Two brands using the same standardized profile may connect correctly, while fittings from the same brand can belong to different series. Match the profile, pressure rating, and size.
Should I Change to High-Flow Air Fittings?
High-flow fittings can reduce restriction for air-hungry tools such as large impact wrenches, grinders, and sanders.
Changing fittings only makes sense if the hose, regulator, compressor CFM, and other parts of the air system can also provide the required airflow.