
How to Stop Drill Kickback: Practical Safety Tips for Beginners
Drill kickback happens when a spinning drill bit suddenly binds, catches, or stops while the drill motor keeps producing torque. Instead of the bit turning, the drill body can twist sharply in your hands. With a powerful drill, hole saw, auger bit, or large spade bit, that reaction can happen surprisingly fast.
Learning how to stop drill kickback is mostly about preventing the bit from binding and controlling the drill correctly if it does. The right bit, proper speed, a stable stance, a firm two-handed grip, and a side handle can make a major difference.
This guide explains why kickback happens, how to reduce the risk, what to do when a bit starts binding, and which drilling mistakes beginners should avoid.
How to Stop Drill Kickback Before It Happens
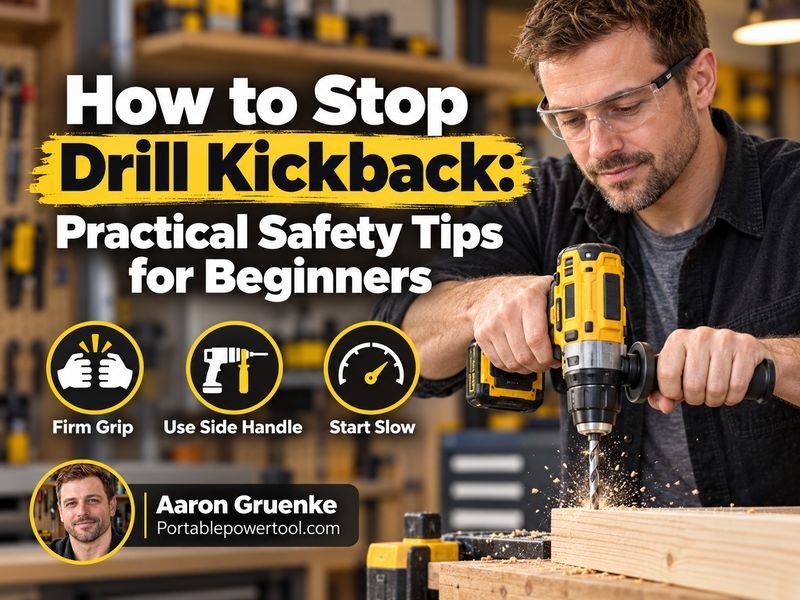
The best way to stop drill kickback is to keep the bit cutting freely while maintaining enough control over the drill to resist sudden torque.
Before drilling, make sure the workpiece is secure, the bit is appropriate for the material, and the drill is set to a suitable speed. For high-torque jobs, use both hands and install the drill’s auxiliary side handle if one is available.
During drilling, apply steady pressure without forcing the bit. If the drill begins to slow, chatter, or bind, release the trigger immediately rather than trying to overpower the obstruction.
Kickback becomes more likely when:
- A drill bit gets pinched inside the hole.
- A bit catches on an edge or hidden obstruction.
- A large hole saw suddenly grabs the material.
- Too much pressure is applied.
- The drill is running at an unsuitable speed.
- The workpiece moves during drilling.
- The bit becomes clogged with chips or debris.
- A high-torque drill is used without adequate support.
Understanding these causes makes kickback much easier to prevent.
What Is Drill Kickback?
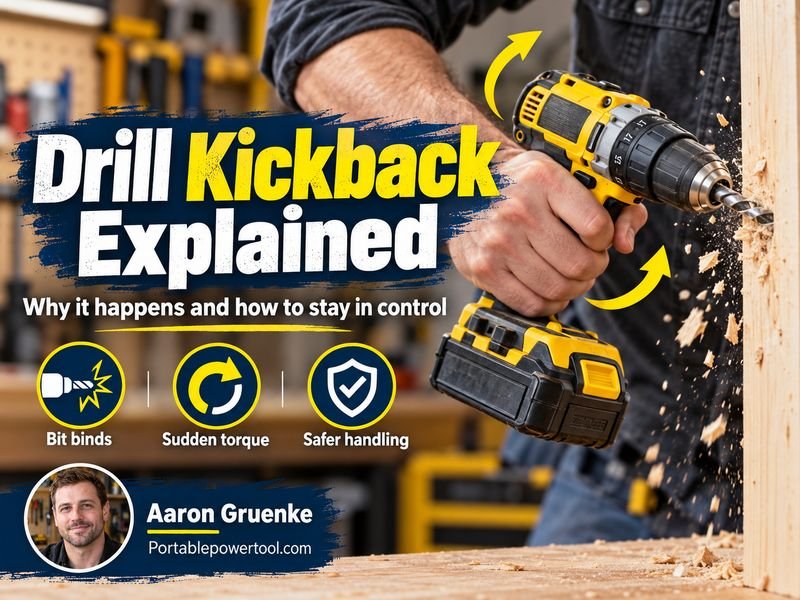
Drill kickback is the sudden rotational movement of a drill when the bit stops or slows abruptly while the motor is still applying torque.
Imagine drilling a large hole through a piece of wood. The bit normally rotates clockwise. If the bit suddenly jams, that rotational force has to go somewhere. Because the bit can no longer turn freely, the drill itself may try to rotate in the opposite direction.
The reaction can range from a small twist to a powerful jerk.
The amount of kickback depends on several factors, including:
- Drill torque
- Bit diameter
- Drilling speed
- Material being drilled
- How firmly the bit becomes stuck
- Drill design
- Your grip and body position
Large-diameter bits generally create more leverage than small drill bits, which is why high-torque drilling deserves extra care.
Why Does a Drill Kick Back?
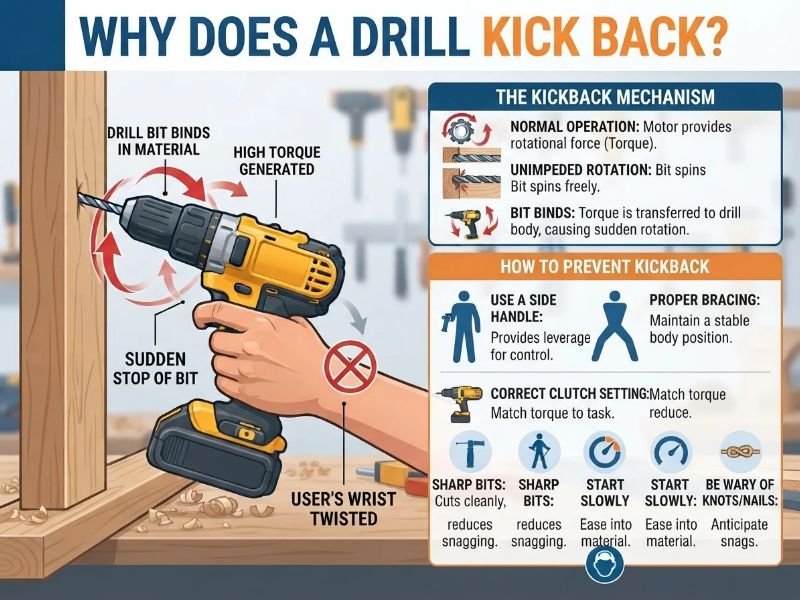
Kickback usually means something has interrupted the normal rotation of the drill bit.
The Bit Becomes Pinched
A bit may become trapped when the material closes around it or when the drill is held at an angle inside the hole.
This is especially common when drilling deep holes.
Keeping the drill aligned with the hole reduces side loading on the bit and helps prevent binding.
The Cutting Edge Catches
Aggressive cutting tools such as auger bits, spade bits, and hole saws can suddenly grab the material.
Self-feeding bits can produce particularly high torque because their screw-shaped tips actively pull the cutter into the wood.
Chips Build Up in the Hole
Wood chips, metal shavings, masonry dust, and other debris can pack around a bit.
That increases friction and may cause the bit to seize.
For deep holes, periodically withdrawing the bit while it is still rotating slowly can help clear debris.
The Bit Breaks Through the Material
Kickback can occur just before a drill bit exits the opposite side of a workpiece.
As the bit breaks through, the remaining material becomes thin and may grab the cutting edges.
Reducing pressure near the end of the hole can make breakthrough smoother.
The Workpiece Moves
If the material is not secured, the workpiece can shift, twist, or rotate with the bit.
A moving workpiece can pinch the bit unexpectedly.
Whenever practical, clamp the workpiece securely rather than holding it with one hand while drilling with the other.
Use a Two-Handed Grip
Using two hands gives you more control over drill torque.
For light drilling with a small bit, one-handed operation may sometimes be practical. For larger holes or high-torque drilling, however, two-handed control is much safer.
Place your dominant hand on the main grip and your other hand on the side handle or another manufacturer-approved gripping area.
Avoid wrapping your second hand around the rotating chuck.
Your grip should be firm enough to control the tool without becoming rigid. A locked, awkward posture can make it harder to react naturally if the drill moves.
Use the Side Handle for High-Torque Drilling
Many heavy-duty drills and hammer drills include an auxiliary handle, also called a side handle.
Use it.
The handle increases leverage and makes it easier to resist rotational force if the bit binds.
Make sure the handle is:
- Properly installed
- Tightened securely
- Positioned where you can control the drill comfortably
A side handle is especially useful when working with:
- Large hole saws
- Auger bits
- Large spade bits
- Masonry bits
- High-torque corded drills
- Powerful cordless drills
If the manufacturer provides a side handle for a particular drilling application, follow the tool’s operating instructions.
Choose the Correct Drill Speed
Using the wrong speed can increase the chance of grabbing, overheating, or poor cutting.
As a general rule, larger drill bits require lower rotational speeds than smaller bits.
Many cordless drills have a mechanical gearbox with settings such as:
- High speed / lower torque
- Low speed / higher torque
Large hole saws, auger bits, and similar accessories commonly work better in the drill’s lower-speed range.
However, low gear can also produce substantial torque. That makes a secure grip and side handle even more important.
Always check the bit manufacturer’s recommendations when available.
Do Not Force the Drill
More pressure does not always make a hole faster.
Excessive pressure can cause the bit to:
- Bind
- Overheat
- Dull faster
- Wander off line
- Grab the workpiece
- Overload the drill
Allow the cutting edges to do the work.
Use enough forward pressure to keep the bit cutting steadily, but avoid leaning your entire body weight into the drill.
If drilling slows dramatically, find out why instead of simply pressing harder.
Keep the Drill Straight
A drill bit is designed to rotate along its own axis.
Tilting the drill while the bit is deep inside a hole can press the bit against the side of the hole, increasing friction and the chance of binding.
Try to maintain a straight line between:
- Drill
- Chuck
- Bit
- Hole
This is particularly important when using long bits.
If you need an angled hole, establish the angle from the beginning rather than changing direction halfway through the hole.
Secure the Workpiece
Loose material can turn a minor snag into a serious problem.
Use clamps, a vise, or another suitable holding method whenever possible.
Do not try to stop a workpiece from spinning by pressing it against your leg or holding it loosely with your free hand.
Secure support also improves hole accuracy.
Before drilling, check that the bit will not hit the clamp or support underneath the workpiece.
Clear Chips During Deep Drilling
Deep holes create more debris than shallow holes.
As chips accumulate around the bit, friction increases.
For deeper drilling, periodically back the bit out to clear material from the flutes or cutting edges.
The exact technique depends on the material and bit type.
Wood
Withdraw the bit occasionally to remove packed wood chips.
Metal
Metal drilling may produce long or sharp chips. Use the correct bit, suitable speed, and cutting fluid when appropriate for the material and application.
Never clear sharp metal chips with your bare fingers while the tool is running.
Masonry
Masonry dust can build up inside deeper holes. Periodically withdrawing the masonry bit can help clear the hole.
Be Extra Careful With Hole Saws
Hole saws can create significant kickback because their large diameter gives them substantial leverage.
The teeth may catch suddenly, especially when:
- Starting the hole
- Breaking through the back side
- Drilling at an angle
- Cutting uneven material
Keep the drill square to the workpiece and maintain control with both hands.
As the hole saw gets close to breaking through, reduce pressure.
If possible, drilling partway from one side and finishing from the opposite side can produce a cleaner hole in some materials while reducing severe breakthrough grabbing.
Be Careful With Spade and Auger Bits
Spade bits and auger bits remove wood quickly, but they can also produce strong torque reactions.
Spade Bits
A spade bit can catch as it breaks through the backside of wood.
Use moderate pressure and slow down as breakthrough approaches.
Auger Bits
Auger bits often have a threaded lead screw that pulls the bit into the wood.
This self-feeding action can make them cut quickly, but it can also make a powerful drill react strongly if the cutter jams.
Use a side handle when appropriate and keep a stable body position.
Adjust the Clutch When Appropriate
Many drill/drivers include an adjustable torque clutch.
The clutch is mainly designed for driving screws. When the selected torque is reached, the clutch slips instead of continuing to transmit full power.
For certain light drilling or driving situations, a lower torque setting can reduce the force transferred to your wrist.
However, many drills require the clutch to be placed in the dedicated drill mode for normal drilling.
Do not rely on the clutch as your primary kickback protection. Use the correct setup and follow your drill manufacturer’s instructions.
Use Anti-Kickback Technology If Your Drill Has It
Some modern professional drills include electronic systems designed to detect sudden tool rotation or binding.
Depending on the manufacturer, this feature may be called:
- Anti-kickback control
- Kickback control
- Anti-rotation technology
- Electronic safety control
When the drill senses an abnormal rotational movement, the electronics may reduce or stop motor power.
This can add useful protection, but it does not replace proper handling.
You still need to use the right bit, correct speed, firm grip, side handle, and safe body position.
Maintain a Stable Body Position
Your stance matters almost as much as your grip.
Stand with your feet positioned so that a sudden drill movement will not immediately throw you off balance.
Avoid drilling while:
- Overreaching
- Standing awkwardly
- Leaning far to one side
- Balancing on an unstable surface
Consider where the drill could move if the bit locks.
Keep your face and body away from the most likely path of sudden tool rotation.
Avoid High-Torque Drilling From an Unstable Ladder Position
A drill that twists unexpectedly while you are on a ladder can create a greater hazard than the kickback itself.
Whenever possible, arrange your work so that you can maintain:
- Stable footing
- Good leverage
- A two-handed grip
- Comfortable drill alignment
If the job requires substantial force, a large hole saw, or a powerful drill, consider using a more stable working platform appropriate for the task.
What Should You Do If the Drill Bit Binds?
If the bit catches while you are drilling, release the trigger immediately.
Do not continue squeezing the trigger while attempting to twist the drill free.
After the drill stops:
- Disconnect power or remove the battery when appropriate before handling a seriously stuck bit.
- Determine why the bit is trapped.
- Support the workpiece securely.
- Remove the bit without forcing or bending it.
- Inspect the bit for damage.
- Clear debris from the hole.
- Correct your drilling angle or setup before continuing.
If the bit repeatedly binds, stop and identify the underlying problem rather than repeatedly restarting the drill.
Never Try to Catch a Spinning Drill Bit or Chuck
If a drill starts twisting unexpectedly, your instinct may be to grab the chuck.
Do not do this.
The chuck, bit, and accessories can be rotating rapidly.
Keep your hands on the designated gripping surfaces and release the trigger.
Wait until all movement has stopped before adjusting the bit or chuck.
Check the Bit Before Drilling
A damaged or poorly installed bit can make drilling less predictable.
Before starting, check that the bit is:
- Straight
- Sharp enough for the job
- Suitable for the material
- Properly seated in the chuck
- Tightened securely
A bent bit can wobble.
A dull bit may require excessive pressure.
A loose bit can slip inside the chuck.
Replacing a worn or damaged bit is usually safer than trying to force it through another job.
Match the Bit to the Material
The correct accessory reduces effort and helps the drill cut smoothly.
Common examples include:
- Twist bits for general metal and wood drilling
- Brad-point bits for clean holes in wood
- Masonry bits for brick and concrete
- Spade bits for larger wood holes
- Auger bits for deep wood drilling
- Hole saws for large-diameter holes
Using an unsuitable bit may create excess heat, poor cutting, or unexpected grabbing.
Common Mistakes That Increase Drill Kickback
Several simple mistakes make kickback more likely.
Using One Hand With a Powerful Drill
A large drill can produce more torque than one wrist can comfortably control.
Use two hands when the task demands it.
Starting at Full Speed
Immediately pulling the trigger to maximum speed can make some bits wander or catch.
Start under control and increase speed as appropriate.
Pushing Too Hard
Forcing a dull or clogged bit usually increases the chance of binding.
Drilling a Loose Workpiece
Secure the material before drilling.
Ignoring a Struggling Motor
If the drill speed drops sharply, the bit may be approaching a stall.
Reduce pressure or stop drilling instead of forcing it.
Using Damaged Bits
Bent, dull, chipped, or incorrectly sharpened bits can cut unpredictably.
Removing the Side Handle
The handle may seem inconvenient in a tight location, but it can provide valuable control during high-torque work.
Drill Kickback Safety Gear
Personal protective equipment cannot prevent kickback, but it can reduce injury from chips and debris.
For most drilling jobs, appropriate protection may include:
- Safety glasses
- Hearing protection when noise levels require it
- Suitable footwear
- Dust protection when drilling materials that create hazardous dust
Avoid loose clothing, dangling jewelry, or anything that could become caught in a rotating chuck or bit.
Glove use around rotating machinery requires particular care because loose gloves can become entangled. Follow the tool, workplace, and task-specific safety guidance.
When Should You Stop and Get Professional Help?
Many household drilling jobs are straightforward, but some situations deserve extra caution.
Consider hiring a qualified professional if you may be drilling near:
- Electrical wiring
- Plumbing
- Gas lines
- Structural components you do not understand
Professional help can also be appropriate when a job requires unusually large drilling equipment or high-torque tools that you are not comfortable controlling.
The goal is not simply to finish the hole. It is to complete the work without damaging the building, the tool, or yourself.
FAQs About How to Stop Drill Kickback
Can drill kickback break your wrist?
A powerful drill can apply substantial rotational force if a large bit suddenly binds. Severe kickback can injure the wrist, hand, or arm.
Using a side handle, two-handed grip, correct speed, and stable stance helps reduce this risk.
Why does my drill keep twisting out of my hand?
The bit may be binding, the cutting accessory may be too aggressive for the setup, or you may be applying too much pressure.
Stop drilling and inspect the bit, hole, material, speed setting, and your grip before continuing.
Is low speed better for preventing drill kickback?
Lower speed is often appropriate for larger-diameter drill bits and hole saws, but speed alone does not eliminate kickback.
Low gear can produce high torque, so you still need a strong two-handed grip and a side handle when appropriate.
Does a drill clutch prevent kickback?
Not completely.
A torque clutch can limit transmitted torque in certain operating modes, particularly when driving screws, but it should not be treated as a complete kickback protection system.
Follow the manufacturer’s recommendations for drilling mode and torque settings.
Why does a drill kick when the bit exits the wood?
The remaining wood becomes thin as the bit approaches the back surface. The cutting edges can grab the last fibers instead of cutting smoothly.
Reduce forward pressure as the bit begins to break through.
Are hole saws more likely to cause kickback?
They can be.
A hole saw has a much larger diameter than a normal drill bit, giving it more leverage if the teeth suddenly catch.
Use both hands, the side handle if available, suitable speed, and steady pressure.
What should I do if a drill bit becomes stuck?
Release the trigger immediately and allow the drill to stop.
Do not keep applying power. Secure the workpiece, disconnect the tool when appropriate, determine why the bit is trapped, and remove it carefully.
Do cordless drills have anti-kickback protection?
Some do, but not all.
Certain modern drills use electronic sensors that detect sudden rotation and shut down or reduce power. Check your specific drill’s manual or specifications to determine whether it includes this feature.
Conclusion
Learning how to stop drill kickback starts with preventing the bit from binding and making sure you can control the drill if it does. Use the correct bit and speed, secure the workpiece, keep the drill straight, clear debris from deep holes, and avoid forcing the tool.
For larger bits and high-torque drilling, use two hands and the auxiliary side handle whenever appropriate. If the bit starts to bind, release the trigger instead of trying to overpower it.
A few seconds spent improving your setup can make drilling smoother, more accurate, and significantly easier to control.