
How to Maintain an Oil Free Air Compressor Properly
An oil-free air compressor requires less routine maintenance than an oil-lubricated model, but it is not maintenance-free. You do not need to check or replace compressor pump oil, yet moisture, dust, loose fittings, clogged filters, overheating, worn hoses, and corrosion can still reduce performance and shorten the compressor’s useful life.
Knowing how to maintain an oil free air compressor mainly means keeping the air system clean and dry, protecting the pump from excessive heat, inspecting important components regularly, and using the compressor within its rated duty cycle. One of the most important jobs is draining condensation from the receiver tank. Water naturally forms as compressed air cools, even though the compressor itself does not use oil.
Maintenance requirements also vary by compressor design. A small pancake compressor used occasionally for a brad nailer needs different attention from a larger shop compressor that runs frequently. The owner’s manual for your exact model should always take priority when it specifies inspection intervals, replacement parts, operating temperatures, or service procedures.
This guide explains the complete maintenance process, including tank draining, intake-filter care, hose and fitting inspection, cooling, storage, moisture control, common mistakes, and the warning signs that an oil-free compressor may need professional service.
How to Maintain an Oil Free Air Compressor
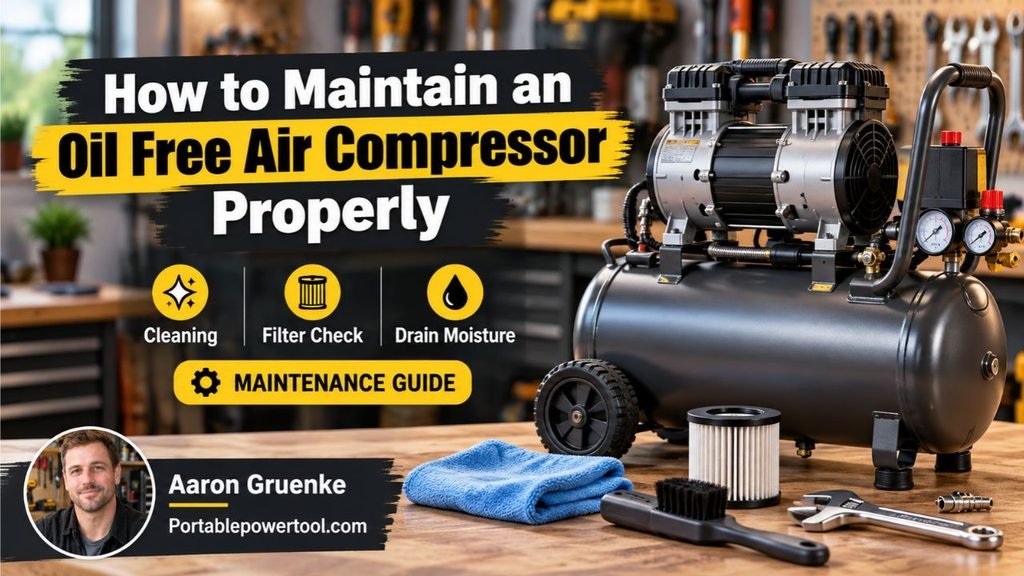
To maintain an oil free air compressor, regularly drain moisture from the tank, keep the air intake filter clean, inspect hoses and fittings for leaks, clean cooling surfaces, protect the compressor from dust and water, and avoid operating it beyond its rated duty cycle.
A practical maintenance routine includes:
- Drain condensation from the receiver tank.
- Check and clean the air intake filter.
- Inspect hoses, fittings, and couplers.
- Listen for unusual noises or vibration.
- Keep cooling vents and fins clean.
- Check the electrical cord and plug.
- Inspect the tank for rust or damage.
- Test the safety valve as directed by the manufacturer.
- Use the correct operating pressure.
- Store the compressor in a clean, dry environment.
The exact frequency depends on how often the compressor is used and the operating environment.
Why Does an Oil-Free Compressor Still Need Maintenance?
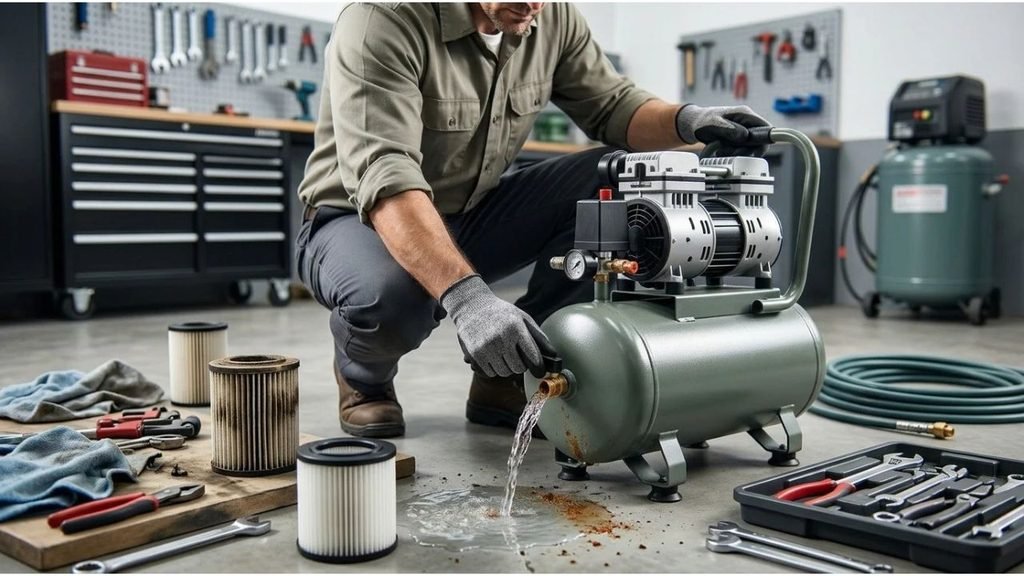
The term oil-free refers mainly to the compression mechanism.
An oil-free compressor is designed so you do not have to add or change lubricating oil in the pump’s compression chamber.
That does not eliminate other forms of wear or contamination.
During normal operation, the compressor still deals with:
- Heat
- Moisture
- Dust
- Vibration
- Electrical load
- Air leaks
- Pressure cycling
- Mechanical wear
Some oil-free compressors also contain permanently lubricated bearings or sealed components that cannot be serviced with ordinary compressor oil.
Adding oil to a compressor that was designed to run oil-free can actually damage it.
Drain Water From the Air Tank Regularly
Draining the receiver tank is one of the most important maintenance tasks.
Atmospheric air always contains water vapor.
When the compressor pressurizes air and that air cools inside the tank, some of the moisture condenses into liquid water.
If this water remains inside the tank, it can contribute to internal corrosion.
How to Drain the Tank
A general procedure is:
- Turn the compressor off.
- Disconnect electrical power if required by the manufacturer.
- Reduce tank pressure to the recommended level for draining.
- Place the compressor where water can drain safely.
- Open the drain valve slowly.
- Allow water and moisture to escape.
- Tilt the compressor only if the manufacturer permits it.
- Close the drain valve securely after the tank is empty.
Do not completely remove pressurized fittings from the tank.
Follow the manufacturer’s specific draining procedure.
How Often Should You Drain an Oil-Free Compressor?
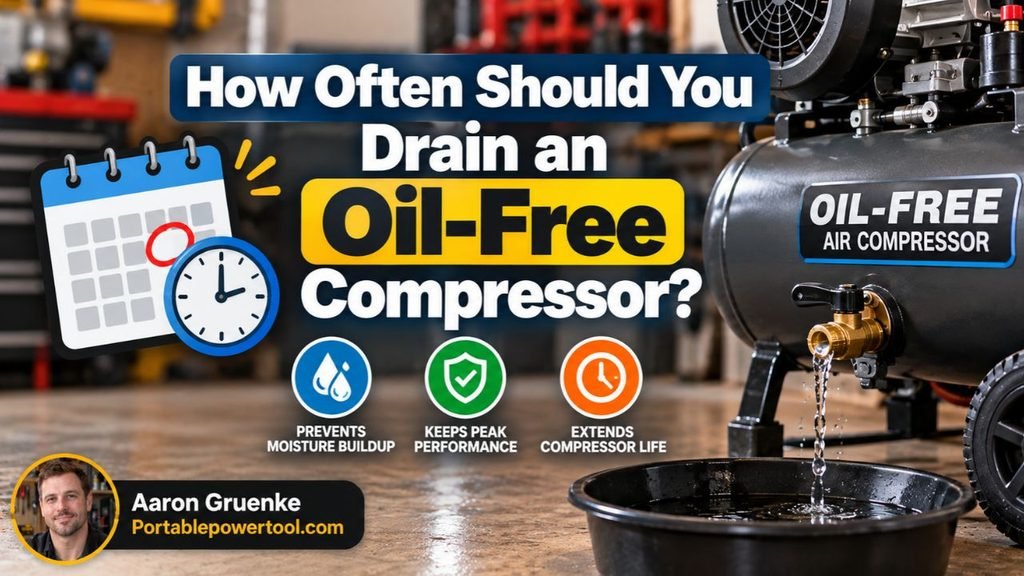
For compressors used regularly, draining after each day of use is a good general habit unless the manufacturer recommends another interval.
You may need to drain more frequently in:
- Humid weather
- Hot summer conditions
- Long operating sessions
- High-air-demand applications
A compressor used only occasionally should still be drained before long-term storage.
The amount of condensation can vary dramatically. A oil free air compressor may produce only a small amount one day and significantly more under humid conditions.
Oil-Free Does Not Mean Water-Free
This is an important distinction.
An oil-free compressor prevents compressor lubricant from being introduced into the compression chamber, but it does not remove atmospheric moisture.
You may still find water in:
- Receiver tank
- Air hose
- Filter
- Pneumatic tools
- Spray equipment
If your application requires dry air, you may need additional equipment.
Possible options include:
- Water separator
- Moisture trap
- Refrigerated air dryer
- Desiccant dryer
- Point-of-use filter
The correct solution depends on how dry the air needs to be.
Check the Air Intake Filter
The compressor’s air intake filter prevents dust and debris from entering the pump.
A clogged filter restricts airflow.
This can make the compressor:
- Work harder
- Run hotter
- Fill the tank more slowly
- Lose efficiency
- Experience increased wear
Inspect the filter according to the maintenance schedule in the owner’s manual.
If you operate the compressor in a dusty garage or workshop, check it more frequently.
How to Clean the Intake Filter
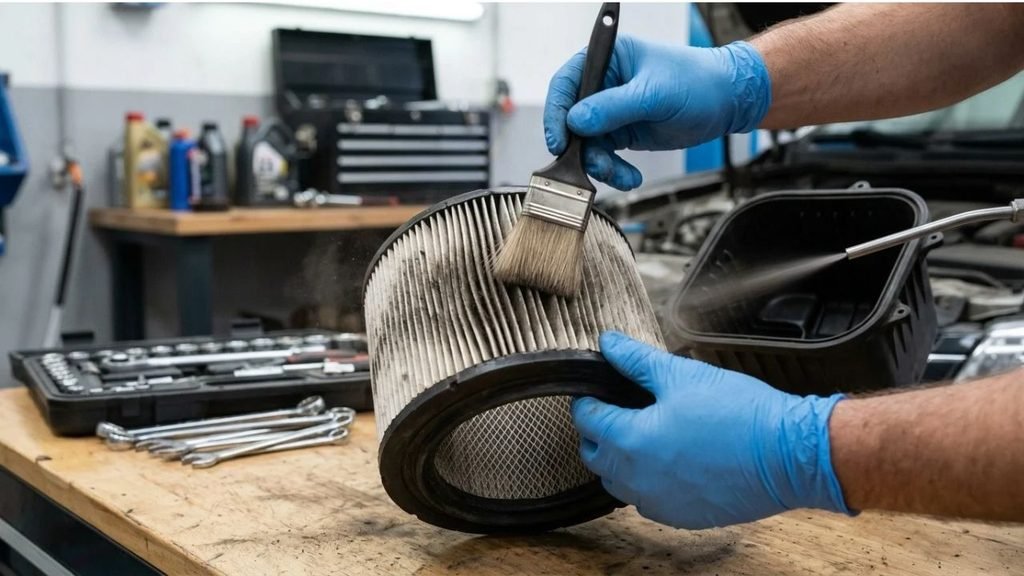
Some intake filters are reusable.
Others are disposable.
For a reusable filter:
- Turn off and unplug the compressor.
- Remove the filter cover.
- Remove the filter element carefully.
- Clean it using the manufacturer’s recommended method.
- Allow it to dry completely if washing is permitted.
- Reinstall it securely.
Never reinstall a wet filter unless the manufacturer specifically allows it.
If the filter is damaged, heavily clogged, or deteriorated, replace it.
Never Run the Compressor Without an Intake Filter
Removing a dirty filter and continuing to operate the compressor without one is not a good solution.
Dust can enter the pump and accelerate wear of internal components.
Fine particles may also contribute to:
- Valve problems
- Reduced sealing
- Increased operating temperature
- Premature compressor failure
If the filter is too dirty to clean properly, replace it before regular use.
Keep Cooling Vents and Fins Clean
Oil-free compressors rely heavily on effective cooling because they do not use an oil bath to help manage heat in the same way many lubricated compressors do.
Keep:
- Cooling fins
- Motor vents
- Fan openings
- Compressor housing vents
clear of dust and debris.
A layer of sawdust or workshop dust can reduce airflow and trap heat around the pump and motor.
Use a dry brush, vacuum, or another manufacturer-approved method to clean these areas.
Disconnect power first.
Give the Compressor Enough Ventilation
Do not operate an air compressor inside a tightly enclosed cabinet unless the space was designed with adequate cooling ventilation.
Leave sufficient clearance around the unit so cooling air can circulate.
Heat buildup can cause:
- Thermal shutdown
- Reduced performance
- Electrical stress
- Faster wear
- Shortened component life
If the compressor repeatedly trips its thermal protector, do not simply keep restarting it.
Find out why it is overheating.
Follow the Compressor’s Duty Cycle
The duty cycle tells you how much of a given period the compressor is designed to run.
Some small portable oil-free compressors are intended primarily for intermittent operation.
If air demand is higher than the compressor’s output, the pump may run almost continuously trying to maintain tank pressure.
That can cause excessive heat.
High-demand tools such as:
- Air sanders
- Die grinders
- Cutoff tools
- Spray guns
can overwhelm a small compressor.
Choose a compressor with enough CFM for the tools you intend to use rather than forcing an undersized machine to run continuously.
Allow an Overheated Compressor to Cool
If the compressor becomes unusually hot or shuts itself off through thermal protection:
- Stop using it.
- Disconnect the tool consuming air.
- Allow the compressor to cool naturally.
- Check ventilation.
- Inspect the intake filter.
- Confirm the duty cycle.
- Make sure supply voltage is adequate.
Do not pour water over a hot compressor.
If overheating repeatedly occurs under normal use, the compressor may need inspection or repair.
Check Hoses for Damage
Compressed-air hoses experience repeated pressure cycles and physical wear.
Inspect them for:
- Cracks
- Cuts
- Bulges
- Abrasion
- Damaged fittings
- Air leaks
A severely damaged hose can fail under pressure.
Replace a questionable hose rather than attempting an unsafe temporary repair.
Make sure replacement hoses are rated for the compressor’s working pressure.
Inspect Quick-Connect Fittings and Couplers
Leaks often occur at fittings rather than inside the compressor.
Check:
- Quick-connect couplers
- Threaded fittings
- Regulators
- Manifolds
- Hose connections
Listen for hissing when the system is pressurized.
A small leak may not seem serious, but it can cause the compressor to cycle more frequently.
Frequent cycling creates unnecessary:
- Heat
- Electrical use
- Mechanical wear
Repair leaking connections using the correct parts and sealing method for the application.
How to Check for Air Leaks
A simple leak test can be performed with a suitable soap-and-water solution on accessible external fittings.
With the system pressurized:
- Apply the solution to the suspected connection.
- Watch for bubbles that continue forming.
- Depressurize the system before tightening or repairing the connection.
Never disassemble a pressurized fitting.
If the tank itself appears to be leaking because of corrosion or structural damage, stop using the compressor and follow the manufacturer’s replacement or service guidance.
Do not attempt to weld or patch a pressure vessel casually.
Inspect the Pressure Regulator
The pressure regulator controls the pressure delivered to your air tool.
Make sure the regulator:
- Adjusts smoothly
- Holds the selected pressure
- Does not leak
- Displays reasonable pressure readings
A damaged regulator can make tool operation inconsistent.
Always set outlet pressure according to the pneumatic tool manufacturer’s requirements.
More pressure does not automatically make a tool work better and can damage equipment rated for lower pressure.
Check Pressure Gauges
Many portable compressors have two gauges:
- Tank pressure
- Regulated outlet pressure
Inspect them for obvious damage.
If a gauge remains at a pressure reading after the system is fully depressurized, it may be inaccurate or damaged.
Do not rely on a gauge that clearly does not function correctly.
Inspect the Safety Relief Valve
Air compressors use a safety relief valve to protect against excessive pressure.
The valve is an important safety component.
Some manufacturers recommend periodic testing by pulling its ring or using another specified procedure.
Follow the compressor manual exactly.
Do not:
- Plug the valve
- Wire it closed
- Adjust it arbitrarily
- Replace it with an improperly rated part
If the safety valve leaks continuously or fails to operate correctly, service or replacement may be necessary.
Inspect the Tank for Rust and Damage
The air receiver tank stores compressed air under significant pressure.
Inspect the visible exterior regularly.
Watch for:
- Heavy corrosion
- Deep rust
- Dents
- Cracks
- Weld damage
- Persistent leaks
Internal corrosion can be harder to detect, which is another reason regular draining is important.
Do not drill, grind, weld, or modify an air compressor tank without appropriate engineering and professional procedures.
A severely corroded pressure vessel should be taken out of service.
Check the Drain Valve
The tank drain valve itself can wear or become clogged.
Problems may include:
- Valve will not open
- Valve continuously leaks
- Rust or debris blocks the opening
- Valve becomes difficult to turn
If the valve needs replacement, completely depressurize the tank and follow the manufacturer-approved procedure.
Use a replacement rated for the compressor’s pressure.
Inspect the Power Cord
Oil-free electric compressors also require electrical maintenance.
Check the power cord for:
- Cuts
- Cracked insulation
- Exposed conductors
- Damaged plug
- Burn marks
- Loose connections
Do not operate a compressor with a damaged power cord.
If repair requires opening electrical components, qualified service may be appropriate.
Be Careful With Extension Cords
An undersized or excessively long extension cord can create voltage drop.
That may cause the compressor motor to:
- Start poorly
- Draw excessive current
- Run hotter
- Trip breakers
Whenever practical, use a longer air hose instead of an unnecessarily long extension cord.
If an extension cord is necessary, follow the compressor manufacturer’s requirements for:
- Wire gauge
- Maximum length
- Grounding
- Current rating
Check Mounting Feet and Fasteners
Vibration can gradually loosen hardware.
Inspect:
- Rubber feet
- Handle fasteners
- Wheel hardware
- Pump mounting bolts
- Covers
- Guards
Do not operate the compressor with important guards removed.
Loose mounting hardware can increase:
- Vibration
- Noise
- Component stress
Tighten fasteners according to the manufacturer’s instructions.
Listen for Changes in Compressor Noise
You become familiar with the normal sound of your compressor over time.
Pay attention if it suddenly develops:
- Knocking
- Grinding
- Rattling
- Squealing
- Excessive vibration
- A louder-than-normal pump sound
A noise change may indicate:
- Loose hardware
- Worn bearings
- Valve damage
- Fan interference
- Internal pump wear
Stop and investigate unusual mechanical sounds rather than continuing to operate the compressor until it fails.
Monitor How Long It Takes to Fill the Tank
Tank fill time provides useful information about compressor condition.
If the compressor suddenly takes much longer than usual to reach cut-out pressure, possible causes include:
- Dirty intake filter
- Air leak
- Worn piston seal
- Valve problem
- Damaged check valve
- Low electrical voltage
- Pump wear
A small gradual change may occur with normal aging, but a major change deserves inspection.
Watch for Excessive Cycling
A compressor normally starts when tank pressure falls to its cut-in pressure and stops when it reaches cut-out pressure.
If it starts every few minutes even when no tool is being used, an air leak may be present.
Potential leak points include:
- Drain valve
- Hose
- Regulator
- Couplers
- Check valve
- Pressure switch plumbing
Constant cycling increases wear and energy consumption.
Check the Tank Check Valve if Necessary
The check valve allows compressed air to enter the receiver tank while preventing it from flowing back toward the pump after shutdown.
A faulty check valve may cause symptoms such as:
- Air leaking back toward the pump
- Difficult motor restarting
- Pressure loss
- Unusual hissing after shutdown
Check-valve service can involve pressurized components, so fully depressurize and disconnect the compressor before attempting repair.
If you are unsure of the procedure, use professional service.
Keep the Compressor Clean
Wipe down the compressor periodically.
Dust and debris can accumulate around:
- Cooling vents
- Controls
- Motor housing
- Regulator
- Fittings
A clean compressor is easier to inspect because leaks, cracks, and other problems are easier to see.
Do not spray large amounts of water or cleaning liquid directly into electrical or mechanical components.
Keep Water Away From the Compressor
Oil-free does not mean waterproof.
Protect the compressor from:
- Rain
- Standing water
- Wet floors
- Outdoor storage
- Excessive humidity
Electrical compressors can present shock hazards if improperly used around water.
Follow the manufacturer’s environmental and electrical safety requirements.
Store the Compressor Properly
If the compressor will not be used for an extended period:
- Turn it off.
- Disconnect power.
- Drain tank condensation.
- Release pressure according to manufacturer recommendations.
- Clean the intake area.
- Inspect the hose and fittings.
- Store the compressor in a clean, dry location.
Avoid storing it where temperatures exceed the manufacturer’s limits.
A climate-controlled environment is preferable to a location with extreme heat, freezing temperatures, or high humidity.
Can You Store an Oil-Free Compressor on Its Side?
Many portable oil-free compressors are easier to transport than oiled models because they do not have a crankcase full of liquid compressor oil.
However, that does not mean every model can be stored in any orientation.
The design may include:
- Tank drain
- Check valves
- Regulators
- Other components
that have orientation requirements.
Follow your compressor’s transport and storage instructions.
Do You Need to Lubricate an Oil-Free Compressor?
Normally, no.
Do not pour compressor oil into the pump of a machine designed to operate oil-free.
The internal compression components are engineered to work without user-added lubricant.
Adding oil may:
- Contaminate the compressed-air system
- Damage internal materials
- Void warranty coverage
- Cause deposits
There may be separate maintenance requirements for other mechanical components on certain industrial machines, but those will be specified by the manufacturer.
Can You Oil an Oil-Free Compressor When It Gets Noisy?
No.
Increasing noise does not mean the pump suddenly needs oil.
If an oil-free compressor becomes louder, the problem may be:
- Loose fasteners
- Worn bearings
- Worn piston rings
- Damaged valve plate
- Cooling fan damage
- Internal pump wear
Adding oil where none was intended is not a proper repair.
How Long Does an Oil-Free Air Compressor Last?
There is no universal lifespan.
Oil-free compressor life depends heavily on:
- Build quality
- Pump design
- Duty cycle
- Operating temperature
- Maintenance
- Dust exposure
- Workload
- Storage conditions
A small inexpensive compressor designed for occasional DIY use may not tolerate the same workload as a professional or industrial oil-free compressor.
Using the machine within its intended capacity is one of the best ways to extend its life.
How to Make an Oil-Free Compressor Last Longer
Several habits can significantly improve reliability:
- Drain moisture regularly.
- Keep filters clean.
- Maintain cooling airflow.
- Avoid excessive duty cycle.
- Repair leaks promptly.
- Use proper electrical supply.
- Keep the compressor dry.
- Do not exceed pressure ratings.
- Keep the unit clean.
- Store it properly.
- Replace worn parts before they cause secondary damage.
Most premature failures are easier to prevent than repair.
Common Oil-Free Air Compressor Maintenance Mistakes
Assuming It Needs No Maintenance
Oil-free only eliminates routine compressor-oil service.
Never Draining the Tank
This encourages internal corrosion.
Running Continuously
An undersized compressor can overheat if air demand exceeds its intended duty cycle.
Operating With a Dirty Filter
Restricted intake airflow makes the pump work harder.
Using a Poor Extension Cord
Voltage drop can stress the motor.
Ignoring Small Air Leaks
Leaks cause unnecessary cycling.
Adding Oil to the Pump
Do not lubricate an oil-free pump unless the manufacturer specifically instructs you to service a particular component.
Blocking Cooling Vents
Cooling airflow is essential.
Ignoring Unusual Noise
A change in sound may be an early warning of mechanical wear.
Oil-Free Air Compressor Maintenance Schedule
Exact intervals should come from the owner’s manual, but a general maintenance plan can look like this:
| Maintenance Task | Typical Check Frequency |
| Drain tank moisture | After regular use or as needed |
| Inspect hoses and fittings | Before or periodically during use |
| Check air intake filter | Frequently, especially in dusty areas |
| Inspect cooling vents | Regularly |
| Check for air leaks | Periodically |
| Inspect electrical cord | Before use |
| Inspect safety valve | Per manufacturer schedule |
| Check tank for corrosion | Periodically |
| Clean exterior | As needed |
| Professional internal service | According to manufacturer or when symptoms develop |
Treat this as a general checklist, not a replacement for the maintenance schedule supplied with your specific compressor.
Signs an Oil-Free Compressor Needs Repair
Normal maintenance cannot correct every problem.
Professional service or component replacement may be necessary if you notice:
- Compressor will not start
- Motor repeatedly trips a breaker
- Compressor continually overheats
- Tank takes much longer to fill
- Maximum pressure cannot be reached
- Loud knocking or grinding
- Excessive vibration
- Air leaking from internal components
- Safety valve repeatedly opens
- Burned electrical smell
- Visible tank damage
Stop using the compressor if continued operation could create an electrical or pressure-related hazard.
Is an Oil-Free Compressor Cheaper to Maintain?
For many homeowners, yes.
There is no compressor crankcase oil to:
- Buy
- Check
- Change
- Dispose of
That reduces routine maintenance cost and complexity.
However, a low-maintenance compressor is not automatically cheaper over its entire life.
Total ownership cost also depends on:
- Component durability
- Repairability
- Electricity use
- Replacement cost
- Workload
For occasional home use, oil-free compressors are often very economical.
Does an Oil-Free Compressor Need a Dryer?
Not necessarily for every application, but a dryer may be important if moisture causes problems.
Usually No Dedicated Dryer Needed For:
- Basic tire inflation
- Occasional blow-gun use
- Many nail-gun applications
Moisture Control Becomes More Important For:
- Spray painting
- Sensitive pneumatic controls
- Certain manufacturing processes
- Instrumentation
- Applications requiring very dry air
Choose moisture treatment based on the application rather than whether the compressor is oil-free.
Does an Oil-Free Compressor Need an Inline Filter?
An inline filter can still be useful.
Depending on filter type, it can remove:
- Dust
- Rust particles
- Condensed water
- Other contaminants
The required filtration level depends on the tool or process.
A simple home air tool usually needs much less air treatment than industrial instrumentation or a paint spray system.
FAQs About How to Maintain an Oil Free Air Compressor
Does an oil-free air compressor need maintenance?
Yes.
It does not require routine pump oil changes, but you still need to drain tank moisture, inspect filters, check hoses and fittings, maintain cooling airflow, and inspect safety components.
How often should I drain my oil-free air compressor?
For regular use, draining after each work session or day of operation is a good general practice unless your manufacturer specifies another interval.
High humidity may require more frequent draining.
Do I need to put oil in an oil-free compressor?
Normally no.
An oil-free pump is specifically designed to operate without user-added compressor oil. Adding oil can damage the compressor or contaminate its air system.
How often should I clean the air filter?
Check the filter frequently and follow the manufacturer’s service interval.
Dusty environments require more frequent cleaning or replacement.
Why is my oil-free compressor getting very hot?
Compressors naturally generate heat, but excessive heat can result from a clogged filter, inadequate ventilation, excessive duty cycle, low voltage, or mechanical problems.
Allow the unit to cool and identify the cause if overheating is unusual or repeated.
Why does my oil-free compressor keep turning on when I’m not using air?
The system probably has an air leak or another pressure-loss problem.
Check the drain valve, hoses, fittings, regulator, couplers, and other accessible connections.
Can an oil-free compressor rust inside?
Yes.
Water condensation collects in the receiver tank regardless of whether the pump uses oil.
Regular draining is essential to reduce internal corrosion.
How can I make my oil-free compressor last longer?
Keep it clean and dry, drain moisture regularly, maintain the intake filter, avoid overheating, repair leaks, use proper electrical power, and never exceed its rated pressure or duty cycle.
Conclusion
Knowing how to maintain an oil free air compressor is mainly about controlling moisture, heat, contamination, and unnecessary operating stress rather than changing lubricant. The biggest maintenance advantage of an oil-free design is that there is no compressor-pump oil level to monitor or oil to replace, but that does not eliminate the need for regular preventive care.
For most owners, the most important routine is simple: drain condensation from the receiver tank regularly, keep the intake filter and cooling vents clean, inspect hoses and fittings for leaks, and avoid running the compressor beyond its rated duty cycle. These steps protect the tank from corrosion, help the motor and pump stay cooler, and reduce unnecessary cycling and wear.
Pay attention to changes in fill time, operating temperature, noise, vibration, and pressure behavior because they can reveal developing problems before the compressor completely fails. Safety components such as the pressure relief valve, receiver tank, electrical cord, and pressure controls also deserve regular inspection.
The overall verdict is that an oil-free compressor is genuinely easier to maintain than a conventional oil-lubricated model, especially for home and portable use, but oil-free does not mean maintenance-free. A few consistent maintenance habits can make a major difference in reliability, safety, and service life while helping the compressor deliver the airflow and pressure it was designed to provide.