How to Use a Cordless Screwdriver as a Drill for Small Holes
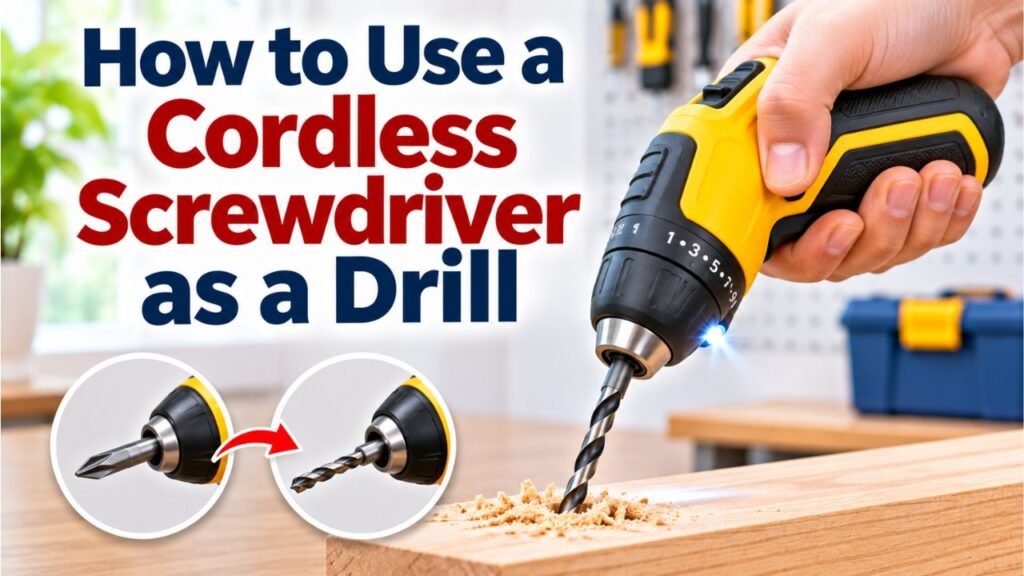
You can use some cordless screwdrivers as a drill by installing a compatible drill bit, choosing an approved operating setting, and drilling slowly into a suitable material. This works best for small pilot holes in softwood and certain plastics. However, not every cordless screwdriver is designed to drill, so check your model’s instructions before trying it.
A cordless screwdriver is built mainly to tighten and loosen screws. Its compact body, simple controls, and light weight make it convenient for assembling furniture and handling small household repairs. Those same features can make it useful for light drilling, provided the tool supports that task.
The biggest challenge is choosing the right accessory and knowing the tool’s limits. A screwdriver may have a 1/4-inch hex bit holder instead of a standard drill chuck. It may also lack the speed, torque, or bit support needed for drilling.
This guide explains which cordless screwdrivers can make holes, how to choose compatible bits, the steps for safe drilling, and when to switch to a regular drill.
Can You Really Use a Cordless Screwdriver as a Drill?
Yes, certain cordless screwdrivers can drill small holes when the manufacturer approves drilling and the tool accepts a suitable cutting bit. The most practical jobs involve small pilot holes in softwood or other approved materials. Low-powered screwdrivers designed only for fastening shouldn’t be forced into drilling work.
A cordless screwdriver and a cordless drill both use electric motors to rotate accessories. The major difference lies in their intended jobs, power delivery, bit holders, and controls.
Some screwdrivers provide little more than forward and reverse rotation. Others offer variable speed, adjustable torque, and a stronger motor.
For example, a compact screwdriver designed for furniture assembly may be fine for tightening cabinet screws but unsuitable for drilling a starter hole in hardwood.
The manufacturer’s guidance on choosing cordless screwdrivers and drills describes basic cordless screwdrivers as fastening tools rather than general-purpose drills.
More capable designs exist. Some professional hex-drive screwdrivers offer multiple speed ranges and enough power for certain drilling tasks.
The main rule is simple: A rotating bit holder doesn’t automatically mean the tool is approved for drilling.
What Do You Need to Turn a Cordless Screwdriver Into a Drill?
You need a cordless screwdriver rated for drilling, a compatible cutting bit, and a securely supported workpiece. Many screwdrivers use a 1/4-inch hex bit holder, so ordinary round-shank drill bits won’t fit directly. Check the tool’s accessory requirements before choosing a hex-shank drill bit or approved adapter.
Choose a Compatible Drill Bit
Most compact electric screwdrivers use a hexagonal holder designed for screwdriver bits.
A 1/4-inch hex-shank drill bit has a six-sided mounting end that can fit certain quick-change bit holders. Its cutting end works like a conventional drill bit.
Don’t confuse shank size with hole diameter. A bit can have a 1/4-inch hex shank while cutting a hole much smaller than 1/4 inch.
For a light-duty task, a small wood-rated hex-shank bit may be suitable if the tool manufacturer approves it.
| Accessory | Compatibility | Typical purpose |
|---|---|---|
| 1/4-inch hex-shank wood bit | Many compatible hex holders | Small holes in wood |
| Round-shank twist bit | Usually doesn’t fit a hex-only holder directly | General drilling with a drill chuck |
| Brad-point hex-shank bit | Depends on holder design | Accurate holes in wood |
| Approved chuck adapter | Only when manufacturer permits | Holding certain other bit styles |
| Standard screwdriver bit | Usually compatible with matching holders | Driving and removing screws |
| Large spade bit | Generally unsuitable for small screwdrivers | Larger wood holes with an appropriate drill |
A hex holder may also require a particular retention groove or locking design. Matching the outside shape isn’t always enough.
For example, published specifications for a professional hex-drive screwdriver identify its bit holder, speed ranges, and clutch features. Your tool may have very different limits.
Check the Screwdriver’s Power and Controls
Inspect the tool before installing anything.
Look for:
- The exact model number and operating instructions.
- Manufacturer-approved drilling applications.
- A compatible and secure bit holder.
- Variable speed or a suitable drilling speed.
- Enough power for the intended bit and material.
- A working forward/reverse switch.
Some small rechargeable screwdrivers operate at a single low speed. That can work well for fastening but may be unsuitable for cutting materials.
Heads Up: Don’t attach a large drill chuck or heavy cutting accessory just because an adapter physically fits. An unsupported accessory can damage the tool or create a safety hazard.
How to Use a Cordless Screwdriver as a Drill Step by Step
To use a drilling-capable cordless screwdriver, secure a compatible bit, mark the hole, and clamp the workpiece before starting. Select forward rotation and an approved setting, then apply light, steady pressure at a suitable speed. Stop if the tool stalls, overheats, or struggles to cut.
The following steps are intended for small holes in softwood using a model specifically approved for this work.
Step 1: Check the Battery and Tool Condition
Begin by checking that the battery has enough charge.
Some compact screwdrivers have built-in rechargeable batteries, while larger models use removable battery packs.
Inspect the tool for damage. Don’t use it if the housing is cracked, the switch behaves unpredictably, or the battery appears swollen.
Make sure the bit holder works properly before starting.
Step 2: Select the Right Drill Bit
Choose a sharp bit rated for the material.
A small wood-rated bit, such as a 1/8-inch bit, can be a reasonable practice size if it falls within the screwdriver’s approved capacity.
Avoid large-diameter bits that demand substantial turning force.
For example, making a small pilot hole for a furniture screw is much more realistic than boring a large opening through a thick wooden board.
Step 3: Install the Bit Securely
Switch off the screwdriver and activate its trigger lock if available.
For removable-battery models, disconnect the battery as directed by the manufacturer.
Insert the approved hex-shank drill bit fully into the holder.
If the tool uses a quick-release sleeve, follow the manufacturer’s locking procedure.
Gently check that the bit is secure.
Never hold the bit with your fingers while pressing the trigger to tighten or test it.
Step 4: Mark and Clamp the Workpiece
Use a pencil to mark the hole location.
Place the board on a stable work surface and secure it with clamps. If you’re drilling through the material, use a suitable backing board to protect the surface underneath.
Never hold a small board in your hand while drilling. A catching bit can rotate the workpiece unexpectedly.
Step 5: Select Forward Rotation
Most cordless screwdrivers have a forward/reverse switch.
For standard right-hand cutting bits, select forward rotation, which normally turns clockwise when viewed from behind the tool.
If your screwdriver has adjustable speed, select an appropriate low or controlled starting speed.
Some models have no separate drilling mode. Don’t assume a numbered clutch setting provides the same function as a drill mode.
Step 6: Start Drilling Slowly
Position the bit directly on the marked spot.
Hold the screwdriver firmly, keeping your wrist aligned with your forearm.
For a straight hole, aim the bit at a 90-degree angle to the surface.
Press the trigger gently.
Allow the bit to begin cutting before increasing pressure. If the tool has only one speed, use the manufacturer’s approved technique.
Step 7: Apply Light, Steady Pressure
Let the cutting edges remove material.
A cordless screwdriver generally has less drilling capacity than a dedicated drill. Pushing harder won’t compensate for insufficient power.
If the tool slows sharply, stalls, or becomes unusually hot, release the trigger.
Stop and reassess the bit, material, and tool capacity rather than forcing the cut.
Step 8: Finish and Inspect the Hole
As you approach the intended depth, reduce pressure.
Release the trigger and allow the bit to stop completely.
Withdraw the bit carefully according to the manufacturer’s instructions.
Check that the hole is straight and suitable for the fastener.
For a pilot hole, test the screw gently. If the hole is too small or the screwdriver struggles to drive the screw, don’t force the fastener into the material.
Which Materials Can You Drill With a Cordless Screwdriver?
A drilling-capable cordless screwdriver is best suited to small holes in soft, thin materials. Softwood and certain plastics are the most practical choices when the manufacturer permits them. Dense hardwood, metal, masonry, and large holes commonly require a dedicated drill with suitable speed and torque.
| Material | Suitable for a cordless screwdriver? | Recommendation |
|---|---|---|
| Softwood | Sometimes | Small approved pilot holes |
| Thin plywood | Sometimes | Use a sharp bit and backing board |
| Soft plastic | Sometimes | Control heat and prevent cracking |
| Hardwood | Model-dependent, often difficult | Prefer a cordless drill |
| Sheet metal | Only with explicit approval | Usually better with a drill |
| Brick | Generally no | Use suitable masonry equipment |
| Concrete | No for typical electric screwdrivers | Use an appropriate hammer drill or rotary hammer |
| Ceramic tile | Generally no | Use a suitable drill and tile-rated bit |
Drilling Small Holes in Softwood
Softwood is usually the most forgiving material for this technique.
A small bit needs less turning force than a large one. Still, the screwdriver must be rated for drilling.
Suppose you’re assembling a small pine storage box. A pilot hole can help guide a screw near the board’s edge and reduce the chance of splitting.
Clamp the wood, choose a bit matched to the screw and material, and drill carefully.
Drilling Into Plastic
Some plastics are suitable for light drilling, but others crack or soften from heat.
Use a compatible sharp bit and support the material properly.
Avoid forcing the tool through the surface. Excessive rubbing can heat the plastic and create a messy hole.
Test on scrap material when possible.
Why Metal and Concrete Are Different
Metal often requires cutting speeds, bit designs, and steady power that a small electric screwdriver can’t provide.
Concrete presents an even greater challenge because it’s abrasive and hard.
A standard screwdriver doesn’t provide the rotary hammer action used by many masonry drilling tools.
For these materials, using the correct drill is the safer and more practical choice.
How Do You Control Speed and Torque While Drilling?
Speed controls how quickly a bit rotates, while torque describes the twisting force available to turn it. Some cordless screwdrivers offer adjustable settings, but basic models may have only one speed and no clutch control. Use the settings approved for drilling and stop if the motor struggles.
What Speed Should You Use?
A screwdriver’s rotational speed is measured in revolutions per minute (RPM).
Low-powered models may turn much more slowly than conventional drills, which limits their cutting ability.
Start at a controlled speed if the tool supports variable-speed operation.
A small bit in softwood may cut acceptably with a suitable compact screwdriver. A larger bit can demand more speed or torque than the tool can deliver.
Don’t assume that maximum speed is always the best setting.
What Do Torque Settings Mean?
Torque is the twisting force used to rotate a bit or drive a screw.
Some screwdrivers have a numbered clutch that slips after reaching a selected resistance.
That’s useful for screwdriving, but it may interrupt drilling.
If your manufacturer approves drilling with that model, follow its instructions for the clutch and gear settings.
For larger drill/drivers with adjustable clutches, the article on how to use drill torque settings explains the numbered ring and how it affects different tasks.
Why Does the Clutch Keep Clicking?
Clicking may mean the clutch has reached its selected torque limit.
That doesn’t automatically mean the tool is defective.
If the bit isn’t cutting, check the operating mode and manufacturer’s instructions. Don’t keep increasing the clutch setting to overcome a task that exceeds the tool’s capacity.
Sometimes switching tools is the better fix.
When Should You Use a Regular Cordless Drill Instead?
Use a regular cordless drill when the hole is large, the material is hard, or the job requires greater speed, power, and bit support. A proper drill/driver also offers a conventional chuck on many models, making it easier to work with different drilling accessories.
Cordless Screwdriver vs. Cordless Drill
| Feature | Cordless screwdriver | Cordless drill |
|---|---|---|
| Primary job | Driving screws | Drilling and driving |
| Bit holder | Often 1/4-inch hex | Usually adjustable chuck |
| Drilling ability | Limited or unsupported | Designed for drilling |
| Speed options | Fixed or adjustable | Commonly variable with gear ranges |
| Large holes | Usually unsuitable | Possible within tool and bit ratings |
| Tight spaces | Often very convenient | Depends on drill size |
| Best everyday use | Furniture and light fastening | General household repairs |
A cordless screwdriver is handy when you need to tighten several small screws in a cabinet.
A cordless drill becomes the better choice when you need to make pilot holes for shelving, drill through thick lumber, or use several bit diameters.
If you’re moving to a dedicated drill, the guide on how to use a cordless drill explains bit installation, gear selection, and drilling technique.
For the wider process, including choosing bits for different materials, read how to use a drill properly.
Rule of thumb: If the screwdriver struggles with an approved small hole, don’t treat additional pressure as the solution. Move to a tool designed for the job.
Can You Drill a Pilot Hole and Then Drive the Screw?
Yes, if your cordless screwdriver is approved for drilling, you can make a suitable pilot hole and then switch to a driver bit to install the screw. This can be convenient for small furniture projects where the same tool handles both tasks without much setup.
Choose the Correct Pilot Hole
A pilot hole creates a path for the screw.
The correct diameter depends on the screw’s solid core, thread design, wood species, and fastener instructions.
A hole that’s too small can make driving difficult. A hole that’s too large may prevent the screw from gripping properly.
Test the size on scrap wood before working on a finished piece.
Switch From Drilling to Screwdriving
After drilling:
- Stop the screwdriver and disconnect power as instructed.
- Remove the drill bit after it has stopped and cooled.
- Install a driver bit that matches the screw head.
- Select forward rotation.
- Choose the recommended screwdriving setting.
- Drive the screw slowly until it seats correctly.
For example, a small wooden organizer may require several pilot holes followed by short screws. A suitable combination screwdriver can make that job convenient.
If you use a regular drill/driver for this task, the guide to using a cordless drill as a screwdriver explains clutch control and bit alignment.
What If the Screw Goes in Crooked?
Stop before the screw damages the wood.
Switch the screwdriver to reverse, remove the screw carefully, and inspect the pilot hole.
Don’t repeatedly force the fastener into the same crooked path.
For damaged heads and stubborn fasteners, the guide on how to unscrew with a power drill covers safer removal methods.
What Common Mistakes Should You Avoid?
The most common mistake is assuming every cordless screwdriver can drill simply because its bit holder rotates. Other problems include using incompatible bits, forcing the tool through hard material, and leaving workpieces unsecured. Avoiding these errors protects the tool and improves the quality of small holes.
Common Mistakes Checklist
- Using an unsupported tool: Check the manufacturer’s drilling instructions first.
- Installing the wrong bit: Match the shank and locking mechanism to the holder.
- Choosing a large cutting bit: Small screwdrivers often lack the required capacity.
- Drilling without clamps: A loose workpiece can twist or shift.
- Applying too much pressure: Extra force can stall or damage the motor.
- Ignoring heat: Excessive friction can damage bits and materials.
- Using reverse rotation: Most standard drilling bits require forward rotation.
- Forcing a stalled tool: Stop before the bit binds harder or the motor overheats.
Why Does the Bit Keep Slipping?
A slipping bit may not fit the holder properly.
Some screwdrivers use magnetic retention, while others use a positive locking mechanism.
A magnetic holder designed for screw bits may not securely support drilling forces. Follow the tool’s accessory requirements instead of improvising a connection.
Why Does the Screwdriver Stop While Drilling?
The bit may be binding, the clutch may be slipping, or the battery protection system may have activated.
A dull bit or unsuitable material can also place too much load on the motor.
Release the trigger immediately, disconnect power when appropriate, and inspect the work.
If the task exceeds the tool’s limits, use a proper drill.
What Safety Precautions Matter Most?
Safe drilling with a cordless screwdriver requires a manufacturer-approved setup, protective eyewear, secure workpieces, and controlled handling. A small tool can still cause injury if its bit breaks or catches. Never trade proper accessories and safe technique for the convenience of using a screwdriver as a drill.
Follow these safety practices:
- Wear safety glasses. Wood chips and broken bit fragments can injure your eyes.
- Secure the workpiece. Use clamps or a vise instead of holding loose material by hand.
- Disconnect power when changing accessories. Follow the manufacturer’s procedure.
- Keep hands away from rotating parts. Don’t touch the bit or holder during operation.
- Avoid loose clothing and jewelry. Rotating parts can catch fabric or hair.
- Check for hidden hazards. Don’t drill into walls without checking for electrical wiring, plumbing, and other concealed services.
- Stop when the tool binds. Never try to overpower a stuck bit.
- Inspect batteries and electrical parts. Don’t use damaged or overheating equipment.
Published safety guidance for handheld drilling tools explains why securing the workpiece and controlling rotating accessories matter.
Safety Note: Don’t wear loose-fitting gloves near rotating drill bits. Fabric can become caught and pull your hand toward the tool.
If drilling feels difficult, play it safe and switch to equipment designed for that material.
Frequently Asked Questions
Cordless screwdrivers can sometimes handle light drilling, but their limits vary considerably by model. The most common questions involve drill-bit compatibility, hole size, speed, and material choice. These answers help you decide when a compact screwdriver is suitable and when a proper drill makes more sense.
Can You Put a Drill Bit in an Electric Screwdriver?
Yes, some electric screwdrivers accept compatible drill bits, often with 1/4-inch hex shanks. The holder must secure the bit properly, and the manufacturer must approve drilling. A bit fitting into the holder doesn’t guarantee safe operation. Always check the specific model’s instructions before starting.
Can a 4V Cordless Screwdriver Drill Holes?
Some 4V screwdrivers may handle very small holes in soft materials if their manufacturer approves drilling. Many are designed strictly for light fastening. Voltage alone doesn’t determine drilling ability. Check the tool’s rated applications, speed, torque, and accessory requirements before attaching a cutting bit.
Can You Use a Cordless Screwdriver to Drill Wood?
Certain cordless screwdrivers can make small pilot holes in softwood with compatible bits. Dense hardwood and larger holes often require more power and speed. Secure the board, start carefully, and stop if the bit stalls. A regular cordless drill is the more practical choice for repeated woodworking.
Can You Drill Into a Wall With a Cordless Screwdriver?
A typical cordless screwdriver isn’t the right choice for general wall drilling. Drywall, plaster, brick, and concrete require different tools and fastening methods. Hidden wiring and plumbing also create risks. Use an appropriate drill and confirm the location is safe before making holes in an installed wall.
Do You Need a Chuck Adapter for a Cordless Screwdriver?
Not always. Some screwdrivers accept approved hex-shank drill bits directly. Others have holders intended only for screwdriving accessories. A chuck adapter may work on certain models if the manufacturer permits it, but it doesn’t increase the tool’s power or drilling capacity. Never use an unsupported adapter.
Can a Cordless Screwdriver Replace a Regular Drill?
A cordless screwdriver can replace a drill for a few small tasks only if it’s rated for drilling. It generally can’t replace a proper drill for large holes, dense wood, metal, or masonry. A cordless drill/driver is the better all-purpose tool for homeowners who regularly make holes and install screws.
Use the Right Tool for the Hole You Need
A cordless screwdriver can be useful for small drilling jobs, but only when the manufacturer approves that use. Start by checking the tool’s specifications and selecting a compatible bit. Secure the material, choose an appropriate setting, and work with light, steady pressure.
Softwood pilot holes are among the most practical applications for a drilling-capable compact screwdriver. Harder materials and larger holes demand different equipment. Forcing a small motor through a difficult cut can damage both the tool and your project.
Don’t overlook the bit holder. A secure, compatible connection matters just as much as available power.
If you regularly drill holes or work with several materials, a standard cordless drill/driver is a better long-term choice.
Your next step: check your screwdriver’s model number and manual for approved drilling applications. If drilling is permitted, practice a small hole in securely clamped scrap wood before attempting a finished project.