
How to Use a Cordless Drill Driver: 8 Steps and Safe Settings
To use a cordless drill driver, attach a charged battery, insert the correct bit, and select the proper speed, direction, and clutch setting. Choose drill mode for making holes or a numbered clutch setting for driving screws. Hold the tool straight, squeeze the trigger gently, and apply steady pressure without forcing it.
A cordless drill driver is one of the handiest tools for household repairs and DIY projects. You can use it to assemble furniture, install cabinet hardware, hang shelves, and drill holes in wood or other suitable materials. One tool handles both drilling and screwdriving, which saves time and effort.
The tricky part is knowing which setting to choose. The numbered clutch ring, two-speed gearbox, and forward/reverse switch can confuse beginners. One wrong adjustment can strip a screw head, split a wooden board, or cause the drill to twist unexpectedly.
Fortunately, getting the hang of these controls doesn’t take much practice. This guide walks through every basic part, eight operating steps, the right settings for different tasks, and common problems. You’ll also learn how to work safely and protect your drill’s battery.
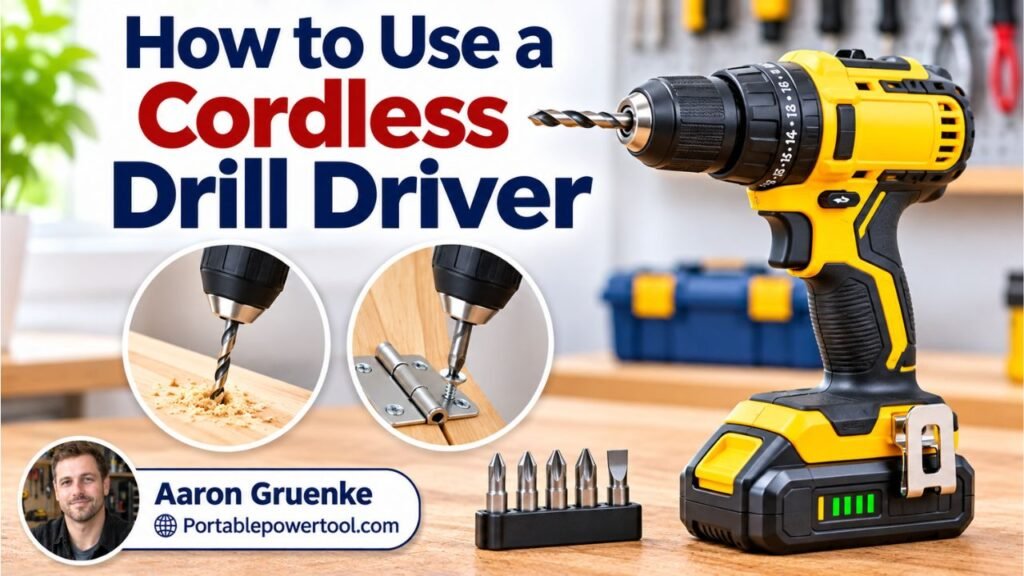
What Is a Cordless Drill Driver and How Does It Work?
A cordless drill driver is a battery-powered tool designed to drill holes and turn screws. Its electric motor rotates a chuck that holds different bits. Adjustable speed and torque controls let you match the tool’s turning force to the material, making it useful for both drilling and fastening.
Unlike a basic electric screwdriver, a drill driver can usually perform a broader selection of drilling tasks.
For example, you can drill a pilot hole into a wooden shelf and then change to a screwdriver bit to install its mounting screw.
Main Parts of a Cordless Drill Driver
| Part | Function |
|---|---|
| Chuck | Holds the drill or screwdriver bit |
| Trigger | Starts rotation and usually controls speed |
| Forward/reverse switch | Changes rotation direction |
| Clutch ring | Limits turning force when driving screws |
| Gear selector | Changes speed and torque range |
| Battery | Supplies power to the motor |
| Motor | Rotates the chuck |
| LED work light | Illuminates the work area on equipped models |
Most modern cordless drill drivers have a keyless chuck, which you tighten by hand without a separate chuck key.
The battery generally slides into the base of the handle, although some compact designs place it inside the handle.
If you want a closer look at the tool’s basic operation, the guide on how to use a cordless drill covers the controls and common applications.
How to Use a Cordless Drill Driver in 8 Steps
Using a cordless drill driver involves preparing the workspace, installing the correct bit, and adjusting the tool before starting. For drilling, select forward rotation and drill mode. For driving screws, choose a suitable clutch setting and low speed. These eight steps work for most standard cordless drill drivers.
Step 1: Prepare Your Workspace
Start with a stable, well-lit work area.
Clear away loose objects that could interfere with the drill. Wear safety glasses and remove loose jewelry.
If you’re drilling into a small wooden board, secure it with clamps.
Don’t hold the board in one hand while operating the drill with the other. The bit can catch and rotate the material unexpectedly.
The handheld drill safety recommendations explain why securing workpieces helps prevent injuries.
Step 2: Charge and Install the Battery
Charge the battery using the charger approved for your specific battery system.
Allow charging to finish according to the manufacturer’s instructions.
Once ready, slide the battery into the drill until it locks securely.
Give it a gentle pull to confirm it’s attached.
Don’t use a cracked, swollen, leaking, or unusually hot battery.
Step 3: Choose the Correct Bit
Select a bit based on the task.
For drilling holes, choose a bit suitable for the material. For driving screws, match the driver bit to the screw head.
| Task | Recommended Bit |
|---|---|
| Drilling wood | Brad-point or wood-rated twist bit |
| Drilling metal | Suitable high-speed steel (HSS) bit |
| Drilling plastic | Material-compatible sharp drill bit |
| Driving Phillips screws | Correctly sized Phillips bit |
| Driving Torx screws | Matching Torx bit |
| Driving square screws | Matching square driver bit |
For example, a #2 Phillips bit fits many common household screws, but not every cross-shaped screw.
A snug fit matters more than convenience.
Step 4: Insert the Bit Into the Chuck
Remove the battery or engage the trigger lock according to the manufacturer’s instructions.
Turn the keyless chuck to open its jaws.
Insert the bit straight into the center, then tighten the chuck securely by hand.
Don’t hold the chuck while pressing the trigger to tighten it.
Check that the bit is centered and doesn’t wobble.
A loose bit can slip during drilling or fall out.
Step 5: Select Forward or Reverse
Most drill drivers have a direction switch above the trigger.
- Forward: Clockwise rotation for ordinary drilling and tightening screws.
- Reverse: Counterclockwise rotation for removing ordinary screws.
- Center position: Locks the trigger on many models.
For most drilling and screwdriving tasks, choose forward.
Use reverse when backing out standard screws or withdrawing a drill bit when the instructions call for it.
Change direction only after the motor stops.
Step 6: Adjust the Speed and Clutch
If your drill has two gears, select the lower-speed gear for screwdriving and demanding drilling tasks.
Use the higher-speed gear for suitable smaller holes when the bit and material allow it.
For screws, start with a low clutch setting and increase it as needed.
For holes, select the drill symbol rather than a numbered clutch position.
Step 7: Position the Drill and Start Slowly
Hold the drill firmly with your wrist straight.
Place the bit at the marked drilling point or fully inside the screw head.
Keep the tool aligned with the intended hole or screw.
Squeeze the trigger gently.
Let the bit begin rotating before gradually increasing speed.
Don’t force the drill forward. Steady pressure usually works better than excessive force.
Step 8: Finish and Check Your Work
Release the trigger when the hole reaches the desired depth or the screw sits correctly.
Allow the chuck to stop completely before moving the tool.
Check the result.
If the screw isn’t fully seated, adjust the clutch and finish carefully.
For a drilled hole, remove loose chips and check the size before installing hardware.
Which Cordless Drill Driver Settings Should You Use?
Cordless drill driver settings control rotational speed, turning force, and operating direction. Use low gear and an adjustable clutch for most screwdriving jobs. Select drill mode for making holes, then choose the gear that suits the bit size and material. Start slowly whenever precise control matters.
Understanding the Two-Speed Gearbox
The gearbox changes the relationship between speed and turning force.
Many cordless drill drivers have two mechanical gear settings.
| Setting | Typical Use | Main Benefit |
|---|---|---|
| Gear 1 | Driving screws and larger drilling tasks | Lower speed, higher torque |
| Gear 2 | Smaller holes in suitable materials | Higher rotational speed |
| Low clutch number | Small screws and soft materials | Limits tightening force |
| High clutch number | Larger screws or greater resistance | Allows more turning force |
| Drill symbol | Drilling holes | Bypasses the adjustable screwdriving clutch |
Torque means twisting force. Think of turning a tight jar lid. The harder you twist, the more torque you apply.
For screwdriving, the clutch helps prevent excessive twisting force.
Start low, drive a test screw, and raise the setting until the screw seats correctly.
The detailed guide to using drill torque settings explains how to adjust the clutch without damaging screw heads.
The manufacturer’s explanation of drill controls also describes how the chuck, clutch, and speed settings work.
Pro Tip: Clutch numbers aren’t standardized across drill brands. Setting 10 on one model may deliver a different amount of torque from setting 10 on another.
How to Drill a Straight Hole With a Cordless Drill Driver
Drilling a straight hole requires a suitable bit, a stable workpiece, and proper alignment. Mark the drilling point, select drill mode, and hold the drill along the intended hole path. Begin at a controlled speed and maintain steady pressure while allowing the bit to cut naturally.
For a beginner, practicing on scrap wood is a good starting point.
Mark the Drilling Location
Use a pencil to mark the center of the hole.
For many wood-drilling jobs, a small indentation made with an appropriate marking tool helps keep the bit from wandering.
Place the board on a stable surface and clamp it securely.
Select the Correct Drill Bit
Use a wood-rated bit for ordinary lumber.
Choose the diameter based on the hole you need.
For a pilot hole before driving a wood screw, select a bit appropriate for the screw’s root diameter and the wood type.
A pilot hole helps reduce splitting and makes driving the screw easier.
Hold the Drill Straight
Position the bit perpendicular to the surface when you need a 90-degree hole.
Begin slowly until the bit establishes its position.
Increase speed as appropriate for the bit and material.
When drilling through wood, place a scrap backing board underneath if practical. This helps support the material as the bit exits.
Control the Hole Depth
For a simple wood project, you can mark the desired depth on the drill bit with tape.
Stop before the tape reaches the surface.
This is only a visual guide, not a mechanical depth stop.
For more accurate work, use a suitable drill stop collar or other approved depth-control accessory.
For additional techniques involving different materials, read the guide on how to use a drill properly.
How to Drive and Remove Screws With a Cordless Drill Driver
A cordless drill driver installs and removes screws by rotating a properly fitted screwdriver bit. For tightening standard screws, select forward rotation, low gear, and a suitable clutch setting. For removal, switch to reverse and apply controlled trigger pressure while keeping the bit firmly seated.
Driving Screws Without Stripping Them
Start with a screwdriver bit that matches the screw head exactly.
For example, when installing cabinet hinges, a poorly fitted bit can slip and damage the screw recess.
Follow these steps:
- Place the screw at the desired location.
- Position the bit straight inside its head.
- Select forward rotation and a low clutch setting.
- Squeeze the trigger gently while applying steady pressure.
- Stop when the screw seats correctly.
If the clutch clicks before the screw reaches the desired depth, increase the setting gradually.
Avoid burying the screw head too far into soft wood.
Removing Screws Safely
Switch the drill to reverse after the motor stops.
Insert the bit fully into the screw head and start slowly.
Maintain steady pressure to prevent slipping.
Once the screw becomes loose, reduce speed or finish the last turns by hand.
Common Mistake: Using maximum speed from the start makes it harder to maintain control, particularly with small or worn screw heads.
Cordless Drill Driver vs. Impact Driver: What’s the Difference?
A cordless drill driver is designed for drilling holes and controlled screwdriving, while an impact driver specializes in fastening with repeated rotational impacts. A drill driver offers adjustable clutch control and accepts many conventional drill bits. An impact driver is often better suited to long screws and demanding fastening work.
| Feature | Cordless Drill Driver | Impact Driver |
|---|---|---|
| Main purpose | Drilling and screwdriving | Driving fasteners |
| Chuck | Usually adjustable keyless chuck | Commonly 1/4-inch hex quick-release holder |
| Clutch | Usually adjustable | Often lacks a conventional numbered clutch |
| Drilling holes | Well suited | Requires compatible accessories |
| Small screws | Good control | Greater risk of overtightening |
| Long structural screws | Depends on drill and fastener | Often better suited |
| Operating noise | Usually quieter | Louder during impacts |
For example, assembling a small bookshelf is generally easier with a drill driver because you can limit the tightening force.
Driving long construction screws into dense lumber may favor an impact driver.
For the second tool’s operating technique, the guide to using an impact driver drill covers bit selection, handling, and fastening.
A regular drill driver is still the more flexible choice for many household projects.
Common Cordless Drill Driver Problems and Easy Fixes
Most cordless drill driver problems involve incorrect settings, a loose bit, battery issues, or excessive resistance. A clicking clutch doesn’t always indicate a damaged tool, and a stalled motor doesn’t always mean the drill has failed. Start by checking the simplest causes before replacing parts.
| Problem | Possible Cause | What to Do |
|---|---|---|
| Drill won’t start | Battery discharged or trigger locked | Check battery and direction switch |
| Chuck spins but bit slips | Loose chuck | Reinstall and tighten bit |
| Drill clicks while driving | Clutch setting too low | Increase setting gradually |
| Screw head strips | Wrong bit or excessive speed | Change bit and reduce speed |
| Bit wanders on wood | Poor starting position | Mark hole and start slowly |
| Drill stalls | Excessive load or bit binding | Release trigger and inspect |
| Battery drains quickly | Heavy workload or aging battery | Charge and check battery condition |
Why Does the Drill Stop Under Heavy Load?
A drill can stall when the bit encounters more resistance than the motor can overcome.
Large holes, dull bits, and binding can all contribute.
Release the trigger immediately if the bit jams.
Don’t continue squeezing the trigger against a stalled motor.
Check the bit, material, and operating settings before trying again.
Why Does the Clutch Keep Clicking?
The clutch clicks when the resistance exceeds its selected torque limit on many mechanical-clutch models.
This is normal behavior.
If the screw hasn’t reached its desired depth, increase the clutch setting slightly.
If it keeps slipping at high settings, check whether the bit is damaged or the screw is binding.
How to Use a Cordless Drill Driver Safely
Safe cordless drill operation starts with proper workpiece support, suitable bits, and controlled trigger pressure. Keep hands away from rotating parts, maintain stable footing, and disconnect the power source before changing accessories when required. Pay special attention to hidden wiring and sudden drill movement caused by binding.
The following habits help reduce common risks:
- Wear safety glasses when drilling or driving fasteners.
- Clamp loose materials instead of holding them by hand.
- Keep long hair, jewelry, and loose clothing away from the chuck.
- Use the auxiliary handle when the drill and task require it.
- Check walls for hidden electrical wiring, plumbing, and other services before drilling.
- Never operate a damaged battery or charger.
- Stop immediately if the bit binds or the drill twists unexpectedly.
The power-tool handling guidance identifies bit binding and sudden drill rotation as hazards that require proper control.
Protect the Battery and Charger
Lithium-ion batteries require appropriate charging and storage.
Use only batteries and chargers approved for the drill.
Keep battery terminals away from loose metal objects such as keys and screws that could short the contacts.
Avoid leaving the battery in extreme heat or exposing equipment to moisture beyond its rated protection.
If a battery becomes swollen, leaks, or shows signs of damage, stop using it and follow manufacturer guidance for safe handling and disposal.
Frequently Asked Questions
Cordless drill drivers are straightforward once you learn the basic controls, but beginners often have questions about speed, clutch settings, and how the tool differs from an electric screwdriver. These answers address common situations that arise during furniture assembly, home maintenance, and small woodworking projects.
Can You Use a Cordless Drill Driver as a Screwdriver?
Yes. A cordless drill driver works as a powered screwdriver when fitted with the correct driver bit. Select low gear, forward rotation, and a suitable clutch setting. Start slowly and stop when the screw reaches the desired depth to reduce the risk of overtightening.
What Does 1 and 2 Mean on a Cordless Drill Driver?
On most two-speed drills, 1 indicates a lower-speed gear that delivers greater turning force, while 2 indicates a higher-speed gear. Use gear 1 for screwdriving and demanding drilling tasks. Gear 2 often works well for smaller holes when the bit and material permit faster rotation.
Should You Use Drill Mode for Screws?
Generally, no. Drill mode often bypasses the adjustable clutch, allowing greater turning force than a screw needs. For ordinary screwdriving, choose a numbered clutch setting and increase it as needed. Drill mode is better suited to making holes with appropriate drill bits.
Can a Cordless Drill Driver Drill Into Concrete?
An ordinary drill driver may handle some limited masonry drilling with a suitable bit, but concrete often requires a hammer drill or another tool rated for the task. Never assume a standard drill driver can handle demanding concrete work. Check the tool’s approved capabilities first.
How Do You Change a Bit on a Cordless Drill Driver?
Turn the drill off and remove the battery or engage the lock according to the manual. Open the keyless chuck by hand, remove the old bit, and insert the replacement. Tighten the chuck securely and check that the bit is centered before operating the drill.
Why Does My Cordless Drill Driver Keep Slipping?
A loose chuck, incorrect driver bit, worn screw head, or low clutch setting can cause slipping. First determine whether the bit is moving inside the chuck or slipping out of the screw head. Tighten the chuck, match the bit correctly, and adjust the clutch only as needed.
Build Confidence With a Simple Cordless Drill Project
Using a cordless drill driver becomes much easier once you know how its controls work.
The chuck holds your bit, the trigger controls rotation, and the direction switch determines whether you’re tightening or loosening ordinary screws. The gearbox controls the speed range, while the clutch helps limit turning force during screwdriving.
For drilling holes, select a suitable bit and drill mode. For driving screws, use a properly fitting driver bit and start with a low clutch setting.
Don’t rush the setup. A few moments spent checking the tool can prevent damaged materials and frustrating mistakes.
A good next step is to practice on a piece of scrap wood.
Mark a hole, clamp the board, drill a pilot hole, and drive a screw until its head sits flush. Then switch to reverse and remove it.
Repeat the process until changing settings feels natural. That short exercise prepares you for shelves, furniture, cabinets, and many everyday home repairs.